
Tips
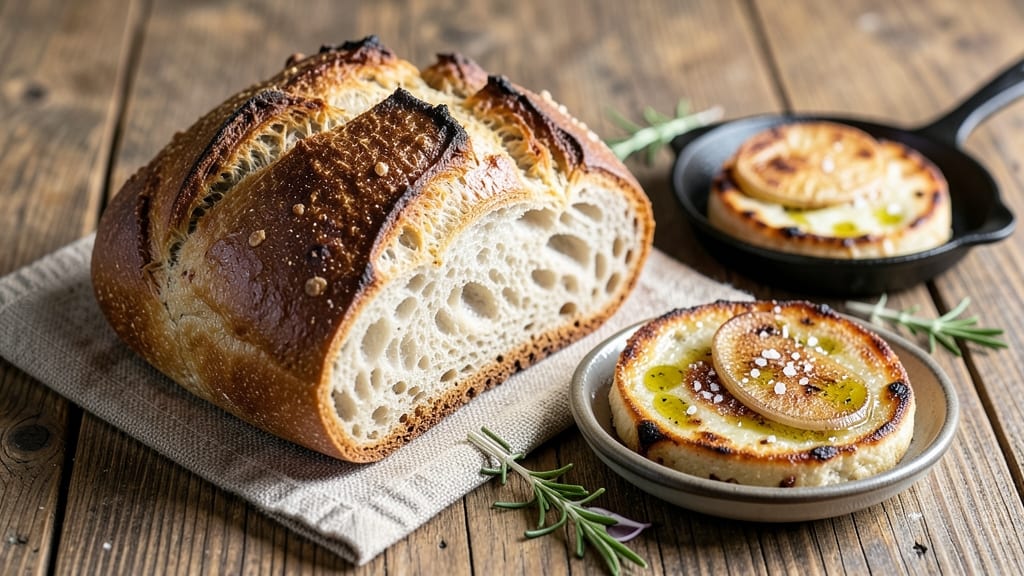
Adding sourdough to bread recipes transforms ordinary loaves into restaurant-quality creations with open crumb, crisp crust, and deep flavor. ✨ The key lies in understanding fermentation—how wild yeast and lactic acid bacteria work together to develop complexity over time.
I’ve baked hundreds of loaves, and this method consistently delivers results that rival artisanal bakeries.
The process begins with a sourdough starter, whether you’re feeding an existing culture or creating one from scratch. Hydration levels (typically 65-75%) and fermentation times (8-12 hours at room temperature) determine texture and rise.
Kneading is minimal—just enough to develop gluten—before shaping and proofing, where the dough’s magic truly unfolds.
What you’ll achieve is a loaf with tender, airy layers and a crust that crackles with every bite. The flavor? A perfect balance of tangy, slightly sweet notes that evolve over days. This isn’t just bread—it’s a culinary experience that elevates any meal, from breakfast toast to dinner rolls.
For variations, try whole wheat flour for nuttiness or add seeds for texture. The same principles apply—adjust hydration slightly and extend fermentation. Ready to bake bread that impresses? Let’s begin with the starter.
📚 In This Guide
- What you need
- Instructions
- Tips and common mistakes
- Wrapping up and next steps
What you need
- ● Active sourdough starter: 1 cup (240g) – must be bubbly, doubled in size, and 100% hydrated (peak activity, typically 4-12 hours after feeding).
- ● All-purpose or bread flour: 3–4 cups (360–480g) – for structure and texture.
- ● Water: 1.5–2 cups (360–480ml) – room temperature (70–75°F/21–24°C).
- ● Salt: 1–1.5 tsp (5–7g) – fine sea salt or kosher salt.
- ○ Optional flavor boosters: 1 tbsp honey or sugar (for a subtle sweetness).
- ● 1 tsp olive oil (for richness).
- ● Herbs, seeds, or spices (e.g., rosemary, flaxseeds, or cinnamon).
- ● Mixing bowls: 2 large bowls (stainless steel or glass preferred).
- ● Dough scraper: 1 plastic or silicone scraper (for easy cleanup).
- ● Kitchen scale: Digital, for precise measurements (grams > cups!).
- ● Dutch oven or baking stone: 1 (with lid) – or a preheated oven with a baking tray.
- ● Proofing basket or bowl: Lined with a floured linen towel or parchment.
- ● Pastry brush: For dusting flour or scoring.
- ○ Thermometer (optional): Instant-read for water/oven temp checks.
- ● A healthy, active sourdough starter (test it by doing a float test—drop a spoonful in water; if it floats, it’s ready!).
- ● At least 8–12 hours for bulk fermentation (plan ahead!).
- ● A warm, draft-free space (75–80°F/24–27°C) for proofing.
- ● Patience! Sourdough baking is a marathon, not a sprint—embrace the process. 🌟
Step-by-Step instructions for incorporating sourdough into bread
Here's how to blend active sourdough starter with your dough—transforming ordinary loaves into airy, flavorful masterpieces.
👨🍳 Step 1: Prepare Your Sourdough Starter
First, ensure your sourdough starter is at peak activity. It should float in water when dropped in—a sure sign it's ready. If it sinks, feed it with equal parts flour and water (like 50g each) and wait 4-6 hours until it doubles in size and passes the float test.
I like to use about 25% sourdough starter by weight of total flour in my recipes. For a standard loaf using 3 cups flour, that means ¾ cup active starter. Measure it accurately—too little won't give enough lift, but too much can make the dough overly sour.
🍳 Step 2: Mix the Dough with Precision
In a large bowl, combine 2 cups all-purpose flour, 1 cup bread flour, and 1 tablespoon salt. Make a well in the center and add ¾ cup active sourdough starter, 1 tablespoon honey, and 1 cup warm water (about 85°F).
Mix vigorously with a wooden spoon or dough whisk until a shaggy dough forms. The sourdough's tanginess will be subtle at first but will develop as it ferments. Let the dough rest for 20 minutes—this helps the flour absorb the liquid before kneading.
🥘 Step 3: Develop the Gluten for Structure
Turn the dough onto a lightly floured surface and knead for 8-10 minutes until smooth and elastic. The sourdough adds natural acidity, which relaxes the gluten slightly, so you won’t need to knead as vigorously as with commercial yeast. You’ll know it’s ready when it springs back slowly when poked.
For extra flavor, I sometimes add 1 tablespoon olive oil during the last minute of kneading. This creates a softer crumb and enhances the sourdough’s depth. Place the dough in a lightly oiled bowl, cover with a damp towel, and let it rise at room temperature for 4-6 hours or until doubled.
⏰ Step 4: Shape and Proof for Maximum Rise
Gently deflate the dough and divide it into 4 equal portions (about 1 cup each). Shape each into a round boule or batard. The sourdough’s slower fermentation means you’ll need to proof longer—2-4 hours at room temperature or overnight in the fridge for deeper flavor.
For a taller loaf, place shaped dough in a greased pullman pan or boules in a floured banneton. Cover and let rise until the dough has visibly expanded and feels light when pressed. The sourdough’s acidity helps create that signature open crumb structure—just don’t overproof, or the loaves will collapse.
🔥 Step 5: Bake with Confidence
Preheat your oven to 450°F with a Dutch oven inside for 30 minutes. Transfer the dough (still in the pan) into the hot oven. Bake covered for 20 minutes, then uncover and bake another 15-20 minutes until deep golden brown.
Tap the bottom—the sound should be hollow. Let the bread cool on a wire rack for at least 1 hour before slicing. The sourdough’s acidity mellows as it cools, revealing a complex, nutty flavor. Store leftovers wrapped in a cloth to keep them fresh longer.
Tips & tricks for perfect sourdough-enhanced bread
These game-changing techniques will help you harness the magic of sourdough fermentation for bread that's lighter, more flavorful, and packed with character.
Starter Activity Test: The float test in Step 1 is non-negotiable—if your starter sinks, it's not ready. I've ruined batches by using underactive starter, so feed it until it passes this test twice in a row. Pro tip: A starter that floats should double in size within 4-6 hours at 75°F. If your kitchen is cooler, extend the feeding time by 1-2 hours.
Precision in Step 2: That 20-minute rest after mixing in Step 2 is where the magic happens. The gluten needs time to hydrate properly, especially with the sourdough's natural acidity relaxing the proteins. I like to cover the bowl with plastic wrap during this time to prevent surface drying. This rest also helps prevent over-kneading later—trust me, your dough will thank you.
Olive Oil Secret: The optional 1 tablespoon olive oil in Step 3 isn't just for flavor—it creates a softer crumb and helps retain moisture during the long fermentation. For even more richness, I sometimes replace half the water with whole milk in Step 2. The fat content from both the oil and milk creates a more tender final product that holds up beautifully to toast.
Proofing Visual Cues: The 2-4 hour proof in Step 4 can be tricky—overproofing is the #1 mistake I see. Look for the dough to expand to about 50-75% of the bowl's height and feel about 25% lighter when lifted. A good test: press your finger gently into the dough. If it springs back slowly (like Jell-O), it's ready. If it springs back immediately, it needs more time. For overnight fridge proofing, I aim for 8-12 hours total.
Pro Tips for Adding Sourdough To Bread Recipe
- These game-changing techniques will help you harness the magic of sourdough fermentation for bread that's lighter, more flavorful, and packed with character.
- Starter Activity Test: The float test in Step 1 is non-negotiable—if your starter sinks, it's not ready.
- Precision in Step 2: That 20-minute rest after mixing in Step 2 is where the magic happens.
Frequently asked questions
Got questions about adding sourdough to your bread? You’re not alone! Here are answers to the most common queries—whether you're a beginner or a seasoned baker looking to level up your loaves.
1. How much sourdough starter should I use in a bread recipe?
Start with 10-20% of your total flour weight (e.g., 50-100g for 500g flour). For example, if your recipe calls for 1 lb (450g) of flour, use 45-90g of active starter. Adjust based on fermentation strength—weaker starter may need a longer proof or extra time.
2. How do I know when my sourdough starter is ready to use?
Your starter is ready when it’s doubled in size, bubbly, and floats in water. Test it by dropping a spoonful into a glass of water—if it floats, it’s active! For best results, use starter that’s 4-12 hours into its peak (not overripe or sluggish).
3. Can I replace all the yeast in a recipe with sourdough?
Yes, but adjust ratios carefully. Sourdough acts as both a leavening agent and flavor enhancer. For every 1 tsp of yeast, use 1-2 tbsp of active starter (depending on strength). Expect a longer fermentation (8-12 hours) and more flavor development than yeasted bread.
4. Why did my sourdough bread turn out dense or flat?
Dense or flat bread often means underproofed dough or weak starter. Check these fixes:
- Ferment longer (try 12-24 hours in the fridge for better rise).
- Ensure your starter is peaked and bubbly (not flat or hoochy).
- Use enough hydration (sourdough needs ~65-75% water for gluten development).
- Avoid over-kneading—stretch and fold instead for gentle gluten formation.
5. What’s a good sourdough alternative if I don’t have starter?
If you’re in a pinch, try these substitutes (though results won’t be identical):
- Commercial sourdough discs (found in baking aisles—use 1-2 tbsp per recipe).
- 1 tsp instant yeast + 1 tbsp buttermilk (mimics slight tang but lacks depth).
- Store-bought sourdough bread crumbs (soaked in water for a quick "starter" effect).
For long-term baking, start your own starter—it’s easier than you think! Mix 50g flour + 50g water, feed daily, and you’ll have a robust starter in 5-7 days.
Wrapping up and next steps
Adding sourdough to your bread recipe is a game-changer—it brings depth, flavor, and a restaurant-quality texture to every loaf! Whether you’re a beginner or a seasoned baker, this simple tweak can transform your homemade bread into something truly special. 🌟
Ready to take your baking to the next level? Grab your starter, experiment with the ratios, and don’t forget to let the dough rest—patience is key! Start with a small batch, refine your technique, and soon you’ll be crafting loaves that rival (or even surpass) your favorite bakery finds.
Happy baking—your kitchen (and taste buds) will thank you! 🍞✨