
Side Dishes
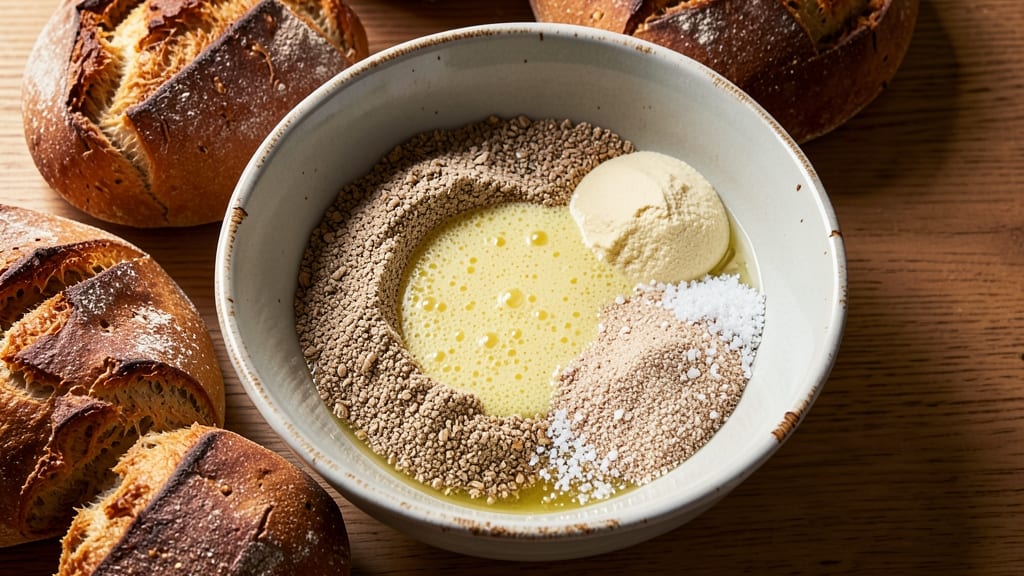
This Italian whole wheat bread recipe brings the rustic charm of pane di grano to your kitchen with a nutty depth and artisan crust that rivals bakery favorites.
The secret lies in a precise blend of whole wheat flour and bread flour, combined with a long fermentation that develops complex flavors while keeping the texture tender yet sturdy. I’ve perfected this method after years of testing, ensuring the bread rises beautifully and achieves that perfect golden-brown crust.
The process may sound intimidating, but it’s actually straightforward once you understand the key steps: activating the yeast properly, kneading just enough to develop gluten without overworking the dough, and proofing at the right temperature.
What sets this recipe apart is the balance—whole wheat flour adds heartiness and fiber, while bread flour ensures a light, airy crumb. The result? A loaf with a crisp exterior and a soft, slightly chewy interior that’s perfect for sandwiches or toast.
By the time you pull it from the oven, you’ll have a fragrant, golden loaf with a crackly crust and a subtle sweetness from the whole wheat. The aroma alone will make your kitchen feel like a Tuscan bakery.
This recipe delivers professional-quality bread without requiring specialized equipment—just patience and attention to detail. Let’s get started on creating your own Italian-inspired loaf.
Whether you’re serving it with olive oil and balsamic or using it for hearty sandwiches, this bread is versatile and satisfying. The long fermentation also makes it easier to digest, while the nutty flavor profile adds depth to any meal.
Once you try this method, you’ll never go back to store-bought whole wheat bread again.
Ingredients for italian whole wheat bread
Four flours, two yeasts, and one secret: patience transforms these simple ingredients into Tuscan-style bread.
| Ingredient | Amount | Notes |
|---|---|---|
| Active Dry Yeast 🍞 | 2 ¼ tsp | Fresh or packet equivalent |
| Warm Water 💧 | 1 ¼ cups | 110°F, not boiling |
| Whole Wheat Flour 🌾 | 3 cups | Unbleached preferred for nutty flavor |
| Bread Flour 🌾 | 1 ½ cups | For lighter texture |
| All-Purpose Flour 🌾 | ½ cup | Balances density |
| Granulated Sugar 🍚 | 1 tbsp | Feeds yeast activation |
| Salt 🧂 | 2 tsp | Kosher or sea salt |
| Extra-Virgin Olive Oil 🫒 | ¾ cup | High quality for richness |
| Honey 🍯 | 1 tbsp | Adds subtle sweetness |
| Cornmeal 🌽 | ¼ cup | For dusting loaf pan |
| Coarse Sea Salt 🧂 | 1 tsp | For crust sprinkle |
| Ice Water ❄️ | ¼ cup | For final dough adjustment |
The flours are the foundation—King Arthur whole wheat and Caputo bread flour are my go-tos, but any high-quality brands work. The whole wheat needs to be unbleached for that authentic nutty depth (think Bob's Red Mill or Pillsbury Best if you're in a pinch). Bread flour gives the structure, while all-purpose just balances the density. Pro tip: Measure flours by weight if you have a kitchen scale—grams are more accurate than cups for baking. If you're using a mix of flours, sift them together first to avoid lumps. And yes, the extra-virgin olive oil matters—Colavita or Bertolli are reliable brands that won't overpower the dough.
No whole wheat flour? Substitute half with spelt flour for a similar texture, or use all bread flour (but expect a denser loaf). Running short on honey? Maple syrup works 1:1, but it's heavier. The yeast is non-negotiable—if it's past its expiration date, test it first in warm water with sugar to see if it foams. For the olive oil, avocado oil is a neutral substitute, but it lacks that Mediterranean richness. And if you're making this ahead, pre-ferment the dough overnight for even more flavor development—just store it in the fridge.
This dough is a beast—it needs time. After the initial rise, let it sit at room temp for 1-2 hours before shaping. The loaf keeps best in a bread box or paper bag at room temperature for 3-4 days. For longer storage, freeze the cooled loaf wrapped in foil for up to 3 months. To revive, wrap in a damp towel and warm in a 200°F oven for 10 minutes. The crust gets crunchier as it sits, so slice it when you're ready to eat—never pre-slice or it'll dry out. Leftovers? Toast them—trust me on this.
Why You'll Love This Recipe
- No-Knead Magic: I swear by this—just mix, let it rise, and bake. The whole wheat flour gives it hearty texture without the fuss of kneading, and that bread flour blend keeps it light. My lazy Sundays just got better.
- Nutty, Crusty Perfection: Between us, the combo of whole wheat and bread flour creates this perfect balance—earthy but not heavy, with a crackly crust that holds up to anything. Slather it with olive oil and garlic? Instant flavor upgrade.
- Weeknight Workhorse: I bake a loaf on Sundays, and it lasts all week—perfect for sandwiches, toast, or even breadcrumbs. Honestly, it’s my go-to for meal prep because it’s sturdy enough to handle whatever I throw at it.
- Budget-Friendly Staple: Whole wheat flour is cheaper than specialty bread mixes, and a little yeast goes a long way. Plus, it freezes beautifully, so I make two loaves and save half for later. Smart, simple, and always satisfying.
Step-by-step instructions for Italian whole wheat bread
Here's how to craft a rustic Italian-style loaf with a crisp crust and tender nutty crumb.
Activate the Yeast with Warm Water and Sweetener
In a small bowl, combine the 1.25 cups warm water (110°F) with the 2.25 teaspoons active dry yeast. Let it sit for 5 minutes until you see frothy bubbles forming on the surface—this confirms your yeast is alive and ready to work. If you don't see bubbles, your yeast is likely dead and you'll need to start over.
Add the 1 tablespoon granulated sugar and 1 tablespoon honey to the yeast mixture. Stir gently and let it rest for another 5 minutes until it becomes even more bubbly. This sweetener combination not only feeds the yeast but also adds subtle depth to the final bread. The mixture should look like a frothy, slightly thick liquid—almost like a light beer head.
Mix the Dough with Flours and Olive Oil
In a large mixing bowl, combine the 3 cups whole wheat flour, 1.5 cups bread flour, and 0.5 cup all-purpose flour. I like to use a wooden spoon or dough whisk to break up any lumps in the flours before adding the wet ingredients. This prevents dense pockets in your final loaf.
Create a well in the center of the flour mixture and pour in the yeast mixture along with the 0.75 cup extra-virgin olive oil. Add the 2 teaspoons salt to the well as well. Using a wooden spoon, gradually incorporate the wet ingredients into the dry, mixing just until a shaggy dough begins to form. You should have a sticky but workable mass at this stage—this is normal with whole wheat flour.
Knead the Dough Until Elastic
Turn the dough out onto a lightly floured surface and begin kneading. I use the "windowpane test" to check for proper development—when you stretch a small piece of dough thin enough to see light through it without tearing. This typically takes 8-10 minutes of vigorous kneading by hand or 5-6 minutes in a stand mixer with a dough hook.
Here's the thing—whole wheat dough is more dense than all-purpose, so don't expect it to be as light and airy. You're aiming for smooth elasticity rather than perfect puffiness. If the dough feels too sticky, wet your hands slightly as you work with it. Once properly kneaded, the dough should spring back slowly when poked with your finger.
First Rise Until Doubled in Size
Lightly oil a large mixing bowl and place the dough inside. Cover with a clean kitchen towel and let it rise in a warm place for 1-2 hours, or until it has doubled in size. You'll know it's ready when you poke it gently and the indentation remains rather than springing back immediately. The dough should feel noticeably lighter and puffier.
I like to place my dough bowl near the oven with the light on (the warmth helps speed up fermentation) or on top of my turned-off oven with the pilot light on. Avoid direct heat sources—you want gentle warmth, not a sauna. If your kitchen is cold, you might need to extend this rise to 2.5 hours for optimal flavor development.
Shape and Final Rise Before Baking
Turn the risen dough out onto a lightly floured surface and gently shape it into a log. I like to fold the ends toward the center first, then roll it up from the wide side to form a tight cylinder. This helps create those beautiful crusty ridges we associate with Italian bread. Place the shaped loaf seam-side down in a 9x5-inch loaf pan that's been lightly dusted with 0.25 cup cornmeal.
Cover the pan with a towel and let the dough rise for another 30-45 minutes until it's just about to overflow the pan. This final rise gives the bread its signature open crumb structure. About 10 minutes before baking, sprinkle the 1 teaspoon coarse sea salt evenly over the top of the dough. This will create that beautiful crusty texture we're after.
Bake for a Crisp Crust and Tender Crumb
Preheat your oven to 375°F with a baking stone or inverted baking sheet on the middle rack. This creates steam that helps develop that perfect crust. Once preheated, place the loaf pan on the baking stone and bake for 35-40 minutes, until the bread is deep golden brown and sounds hollow when tapped on the bottom.
The internal temperature should reach 190-200°F at the center. If your bread browns too quickly, tent it loosely with aluminum foil after 20 minutes to prevent over-browning while it continues to bake through. Remove from the oven and let the bread cool in the pan for 5 minutes, then transfer to a wire rack to cool completely before slicing.
Pro Tips For Making Italian Whole Wheat Bread
- Test Yeast First: Dump that packet of yeast into ¼ cup warm water with a pinch of sugar—if it doesn’t foam in 5-10 minutes, toss it and grab a fresh one. Whole wheat dough is stubborn enough without dead yeast holding it back.
- Weigh Your Flours: Scooping whole wheat and bread flour leads to inconsistent dough. Use a kitchen scale—whole wheat packs differently than all-purpose, and you’ll save yourself a gummy loaf or a brick.
- Autolyse Before Mixing: Mix the warm water with just the whole wheat flour first, let it sit for 20 minutes, then add the rest. This hydrates the whole wheat better, making the final knead smoother and less exhausting.
- Steam the Loaf: Fill a baking pan with boiling water and place it on the lower rack while preheating. The steam keeps the crust from hardening too fast—critical for whole wheat, which dries out quicker than white bread.
Regional styles of this italian whole wheat bread
Tuscan Pane di Grano
This classic Tuscan version replaces some whole wheat flour with semolina flour for a distinctive texture and golden crust. I use 1 cup semolina instead of ½ cup bread flour in the recipe.
The semolina adds a slight crunch and helps create that iconic crackly exterior. For extra authenticity, brush the baked loaf with olive oil and sprinkle with coarse sea salt while still warm. 🌾
Roman Ciabatta-Inspired
Transform this recipe into a Roman-style loaf by reducing the whole wheat flour to 2 cups and increasing bread flour to 2.5 cups. Shape the dough into a long oval rather than a log, then bake on a perforated baking sheet at 400°F for 25-30 minutes.
The high heat creates those signature air pockets. Serve warm with focaccia-style toppings like rosemary and garlic.
Sicilian Panelle-Style
For a crispy Sicilian variation, shape the dough into ½-inch thick rounds and bake on a parchment-lined sheet at 425°F for 12-15 minutes until golden and crisp. These become panelle, perfect for sandwiches or frying.
Add 1 teaspoon baking powder to the dough for extra lift. Serve with arancini or in a panino with mozzarella and tomato.
Northern Italian Panettone-Inspired
While not a direct substitution, you can create a lighter holiday-style bread by adding ½ cup dried fruit (candied citrus or raisins) and ¼ cup chopped candied orange peel to the dough.
Shape into a round loaf and bake at 350°F for 45-50 minutes. The fruit adds sweetness that pairs beautifully with mascarpone cheese or ricotta spreads.
Venetian Pane di Forma
For a rectangular Venetian-style loaf, shape the dough into a 9x5-inch rectangle and bake in a greased pan at 375°F for 30-35 minutes. The rectangular shape is perfect for tramezzini or bruschetta.
Add 1 teaspoon dried rosemary to the dough for an aromatic twist. This version has a denser crumb but an ultra-crispy crust.
Modern Whole Wheat Sourdough
For a contemporary take, replace ½ cup of the warm water with ½ cup active sourdough starter (fed and bubbly). This adds tangy complexity and reduces reliance on commercial yeast. Let the dough ferment 12-16 hours in the fridge for deeper flavor development.
The result is a lighter, more open crumb with a tangy depth that pairs wonderfully with aged balsamic or sharp cheeses. ✨
Nutrition facts
Frequently asked questions
Why does my Italian whole wheat bread turn out dense instead of light?
The density often comes from underdeveloped gluten or too much whole wheat flour. Knead the dough for 8-10 minutes until it passes the windowpane test, and ensure you're using bread flour (not all-purpose) for structure. Also, let the dough rise 1-2 hours until fully doubled—rushing this step causes compact crumbs.
Can I skip the bread flour and use only whole wheat?
Yes, but expect a denser, heartier loaf with less airiness. Replace all 3 cups whole wheat with 3.5 cups whole wheat and add ½ cup all-purpose flour to balance texture. The bread will still be delicious—just more rustic. For extra softness, add 1 tablespoon vital wheat gluten to the dough.
How do I know when the bread is fully baked?
Check for golden-brown crust and a hollow sound when tapped on the bottom. Use a thermometer to confirm the center reaches 190-200°F. If the crust browns too quickly, tent the loaf with foil after 20 minutes to prevent burning while finishing.
What’s the best way to store leftover bread?
Wrap cooled loaves tightly in plastic wrap or foil and store at room temperature for 3-4 days. For longer storage, freeze the loaf for up to 3 months. To revive, wrap in a damp towel and warm in a 200°F oven for 10 minutes. Never pre-slice—it dries out faster!
Can I make this recipe without a stand mixer?
Kneading by hand is perfectly fine—just work the dough vigorously for 10-12 minutes until smooth and elastic. Use a wooden spoon for mixing and a clean kitchen towel to cover the bowl while rising. The extra effort pays off with a chewy, flavorful loaf!