
Desserts
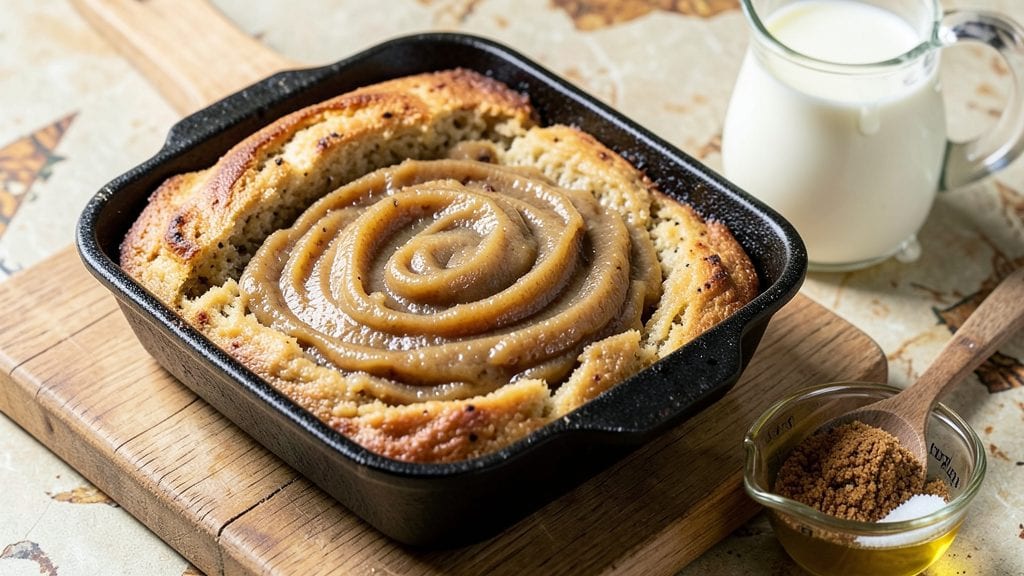
This grandma's old-fashioned banana bread recipe with oil and milk delivers the moist, tender crumb generations have loved—no butter required. The secret lies in the oil and milk combination, which creates that signature dense texture without drying out the bread.
I first tried this version after burning through three batches of traditional recipes, and it never fails to impress.
What sets this classic apart is its simplicity: just six basic pantry ingredients transform into a loaf so moist it stays fresh for days. The oil keeps it tender, while the milk adds richness without making it heavy.
Perfect for using up overripe bananas, this recipe also doubles as a comforting breakfast or dessert that feels nostalgic yet effortless to make.
By the time it emerges from the oven, you'll have a golden-brown loaf with a crackly top and a crumb so soft it practically melts in your mouth. The aroma alone will have everyone gathering in the kitchen.
This is the kind of banana bread that becomes a family heirloom recipe—simple enough for beginners but packed with old-school charm.
The best part? It's ready in just 60 minutes, including baking time. No fancy techniques required—just mix, bake, and enjoy. Whether you're baking for a crowd or treating yourself to a slice of nostalgia, this recipe delivers every time. Let's get started!
Ingredients for grandma's old fashioned banana bread recipe with oil and milk
Six pantry staples transform into grandma's legendary moist banana bread—no butter needed.
| Ingredient | Amount | Notes |
|---|---|---|
| Ripe Bananas 🍌 | 3 medium | Spotty skins preferred |
| Vegetable Oil 🫒 | ½ cup | Light or canola preferred |
| Granulated Sugar 🍚 | 1 cup | White or light brown |
| Packed Brown Sugar 🍚 | ½ cup | Light or dark variety |
| All-Purpose Flour 🌾 | 1 ½ cups | Sifted for best texture |
| Whole Milk 🥛 | ½ cup | Full-fat for richness |
| Baking Soda 🧂 | ½ tsp | Freshly measured |
| Ground Cinnamon 🌿 | 1 tsp | True cinnamon preferred |
| Salt 🧂 | ½ tsp | Fine sea salt |
| Vanilla Extract 🍯 | 1 tsp | Pure alcohol-free if preferred |
| Walnuts 🥜 | ½ cup | Chopped, optional topping |
The bananas are the heart of this recipe, so pick ones with brown spots—they're sweeter and more flavorful. Trader Joe's and Whole Foods often carry perfect ones, but any grocery store will work if you check the produce section. For the oil, light or canola oil is ideal—it keeps the bread tender without adding butter's richness. The sugars? White and brown together give that classic caramelized flavor. If you're using flour from a canister, sift it first—this recipe relies on a light, airy crumb. The milk adds moisture without making the bread dense, so whole milk is best—it's worth the extra trip to the dairy aisle.
No walnuts? Skip them entirely—this bread is delicious without. Running low on vanilla? Almond extract works at half the amount, though the flavor will differ slightly. The baking soda is non-negotiable here—it's what gives that classic rise. Diamond Crystal baking soda works perfectly, but any brand will do. For a quicker prep, pre-measure your spices in small jars—cinnamon and salt are easy to eyeball, but measuring ensures consistency. The oil can be swapped for melted coconut oil if you're avoiding vegetable oil, but the texture will be slightly different. And if you're worried about overripe bananas, freeze extras—they'll keep for months and work perfectly in this recipe.
This bread keeps beautifully at room temperature for 3 days wrapped in plastic, or 5 days in the fridge. For longer storage, slice and freeze—it reheats perfectly in the microwave. The walnut topping, if using, should be toasted first for 3 minutes at 350°F to bring out their flavor. I always make a double batch—half goes in the freezer for lazy mornings. The aroma baking in the oven? That's the real magic—everyone will know it's ready before the timer even goes off.
Why You'll Love This Recipe
- No Fuss Mixing: I swear by the oil-and-milk combo—no butter to cream, no eggs to whisk. Just mash those bananas right in the bowl, pour in the oil, and stir until it’s just combined. Five minutes max, and zero stress.
- Moist Magic: That mix of granulated and brown sugar? It’s the secret. The bread stays tender for days, not dry or crumbly. Honestly, I’ve made banana bread before, but this version actually stays good—no sad, stale slices here.
- Breakfast or Snack: Slice it warm for a lazy morning, or pack it for lunch. The oil keeps it rich without needing butter, and it’s sturdy enough for toasters. My kids grab it straight from the fridge—no reheating required.
- Budget-Friendly Staples: Ripe bananas? Free if you’re saving them. Oil and sugar? Always on hand. This isn’t some fancy recipe—it’s what you’ve got, made better. And leftovers? They disappear faster than I can say “second slice.”
Step-by-step instructions for grandma's old-fashioned banana bread
Here's how to create that signature moist crumb using only classic pantry staples.
Prep and Mash the Ripe Bananas
Start by peeling the 3 medium ripe bananas and place them in a medium mixing bowl. Using a fork or potato masher, mash them until completely smooth with no visible chunks. You want a thick, puréed consistency—this ensures even distribution of banana flavor throughout the bread.
I like to press the bananas against the side of the bowl to break up any remaining lumps. The riper the bananas, the sweeter and more flavorful your bread will be. If your bananas aren't very ripe, you can place them in a paper bag with an apple overnight to speed up the ripening process.
Mix Wet Ingredients Thoroughly
To the mashed bananas, add the 0.5 cup vegetable oil, 1 cup granulated sugar, 0.5 cup packed brown sugar, 0.5 cup whole milk, 1 teaspoon vanilla extract, and mix well using a wooden spoon or electric mixer. The mixture should be smooth and well combined, with all the sugars fully dissolved.
This is where the magic happens—the brown sugar adds moisture while the granulated sugar provides structure. The oil creates that classic moist crumb texture that makes this bread so beloved. Mix for about 2 minutes until everything is fully incorporated and the mixture looks homogeneous.
Combine Dry Ingredients and Fold Gently
In a separate bowl, whisk together the 1.5 cups all-purpose flour, 0.5 teaspoon baking soda, 1 teaspoon ground cinnamon, and 0.5 teaspoon salt. Sift the flour if possible to prevent lumps in your final bread. Gradually add this dry mixture to the wet ingredients while mixing on low speed.
Once combined, fold in the 0.5 cup chopped walnuts using a spatula. Be careful not to overmix—just combine until the walnuts are evenly distributed throughout the batter. Overmixing develops gluten and can make your bread dense instead of tender. The batter should be thick but pourable, similar to pancake batter.
Prepare and Bake the Banana Bread
Preheat your oven to 350°F and grease a 9x5-inch loaf pan thoroughly with vegetable oil or butter. Pour the batter into the prepared pan and smooth the top with a spatula. Bake for 50-60 minutes, or until a toothpick inserted in the center comes out clean.
I recommend checking the bread at the 50-minute mark—ovens vary, and you want to catch it just as the top begins to pull away from the sides. The bread should have a golden brown top and feel firm to the touch. If the top browns too quickly, tent with aluminum foil to prevent over-browning while allowing the center to cook through.
Cool and Serve for Maximum Moisture
Remove the bread from the oven and let it cool in the pan for 10 minutes. Then transfer it to a wire rack to cool completely. This cooling period is crucial—it allows the bread to set properly and prevents it from becoming gummy.
Slice the bread while still slightly warm for the best texture. The interior should be moist with just a hint of banana speckles throughout, and the walnuts should be evenly distributed. Store any leftovers wrapped in plastic wrap at room temperature for up to 3 days, or freeze for up to 3 months for freshness.
Pro Tips For Making Grandma'S Old Fashioned Banana Bread Recipe With Oil And Milk
- MASH THE BANANAS FIRST: I learned this the hard way—skipping this step means you’ll end up with uneven texture and a dense loaf. Use a fork to smash the bananas right in the mixing bowl, leaving some small lumps. This keeps the bread tender and lets the oil distribute better through the batter.
- MEASURE THE OIL CORRECTLY: Vegetable oil is liquid gold here, but don’t eyeball it. Use a measuring cup and pour it straight from the bottle—no spoons, no guesswork. Too little oil makes the bread dry; too much makes it greasy. Stick to the recipe’s amount, and trust it.
- DON’T OVERMIX THE BATTER: Once you fold in the flour, stop mixing the second everything comes together. Overworking the dough makes banana bread tough and dense. Use a spatula to gently combine, and resist the urge to stir like you’re making pancakes.
- LET THE BREAD REST BEFORE SLICING: Sounds weird, but it works: give it a solid 10 minutes under foil after baking. This lets the moisture redistribute, so your first slice isn’t soggy. I know, I know—you’re hungry—but wait. Your future self will thank you.
Essential equipment for great grandma's old fashioned banana bread recipe with oil and milk
Mixing Essentials
Your trusty 9-inch mixing bowl is the perfect size for this recipe—it gives you enough room to work without making cleanup a chore. I use a stainless steel bowl from OXO Good Grips because it's durable and has a non-slip base, but any bowl will do.
For mixing, a wooden spoon works perfectly for combining wet ingredients, but an electric mixer on low speed saves time and effort when combining the dry ingredients. 🌶️
Measuring Tools
Precision matters in baking, so invest in a stainless steel measuring set—I recommend Farberware's 16-piece set for its accuracy and durability. The 1-cup and ½-cup dry measures are especially important for the flour and sugars.
For liquids, a liquid measuring cup with clear markings ensures you get the exact ½ cup of oil and milk. Don’t eyeball it—this recipe relies on those measurements for the perfect texture.
Baking Pan
A 9x5-inch loaf pan is non-negotiable for this classic shape, but choose one with non-stick coating or heavy-duty aluminum to prevent sticking. My go-to is a Wilton Perfect Results Loaf Pan—it bakes evenly and releases the bread cleanly.
Grease it thoroughly with vegetable oil or butter before pouring in the batter to ensure easy removal. A lightly oiled pan also prevents the bread from drying out at the edges.
Optional Extras
If you’re adding walnuts, toast them first in a small skillet over medium heat for 3-4 minutes until fragrant. A handheld kitchen torch works too for a quick, even toast. For extra convenience, a mini food processor can quickly chop walnuts if you’re short on time.
And if you love sprinkling toppings, keep a fine-mesh sieve handy for dusting cinnamon sugar or crushed nuts on top before baking. ✨
Baking Gear
Your oven is the star here, but a digital instant-read thermometer (like Thermoworks Thermapen) ensures it’s calibrated to 350°F—many ovens run hot or cold. For testing doneness, a long skewer or toothpick is all you need.
If you’re worried about over-browning, keep aluminum foil nearby to tent the bread. And for cooling, a wire cooling rack prevents soggy bottoms—no need for fancy tools, just a sturdy rack from your kitchen drawer. 💡
Storage Solutions
To keep your banana bread fresh, wrap leftovers in plastic wrap or store in an airtight container like Rubbermaid Brilliance. For freezing, quart-sized freezer bags with the air squeezed out work best—label them with the date so you remember when it went in.
A sharp serrated knife (like Victorinox Fibrox) ensures clean slices, whether serving fresh or straight from the freezer. 🍞
Nutrition facts
Frequently asked questions
Why does this recipe use oil instead of butter?
The oil creates a moist, tender crumb without drying out the bread like butter can. Vegetable oil keeps the texture rich and soft while maintaining that classic old-fashioned flavor. Plus, it's easier to measure and mix at room temperature!
Can I substitute milk with something else?
Yes! Use evaporated milk, buttermilk, or even almond milk for a dairy-free option. Whole milk gives the best texture, but any milk will work. Just measure carefully—½ cup is key for that perfect balance of moisture and structure.
How do I know when the bread is fully baked?
Insert a toothpick into the center—it should come out clean with just a few moist crumbs. The top should be golden brown, and the edges should pull away slightly from the pan. If unsure, check at 50 minutes—ovens vary, and this bread bakes quickly!
What if my bananas aren't ripe enough?
Place them in a paper bag with an apple overnight to speed up ripening. For immediate use, add 1-2 tablespoons extra sugar to compensate for the lack of natural sweetness. The bread will still turn out delicious, just slightly less flavorful!
Can I make this gluten-free?
Yes! Replace the all-purpose flour with a 1:1 gluten-free baking flour blend (like Bob's Red Mill). You may need to add ½ teaspoon xanthan gum for structure. Keep an extra eye on baking time—gluten-free versions often bake faster.