Beverages
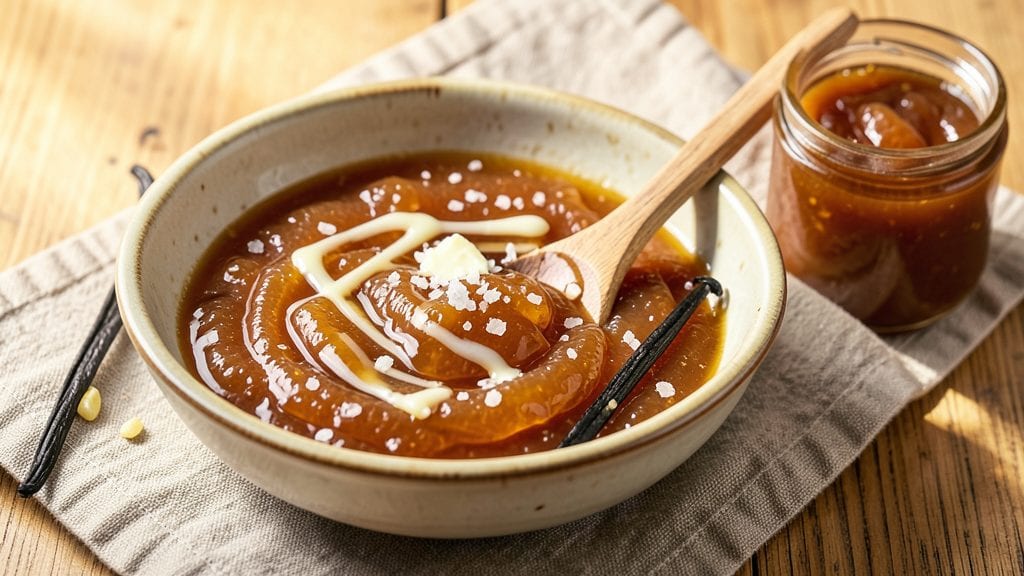
This milk jam recipe transforms simple pantry staples into a velvety, golden spread that tastes like childhood nostalgia in every bite.
What makes it extraordinary is how just three ingredients—milk, sugar, and a touch of vanilla or lemon—create something so rich and luxurious it feels like a dessert all on its own.
I first discovered this recipe while searching for a way to use up extra milk, and the result was so unexpectedly delicious that it became an instant family favorite.
The process is surprisingly straightforward: you simmer milk and sugar until it thickens into a glossy, caramel-like consistency, then finish with a flavor enhancer like vanilla or citrus zest. The key lies in patience—letting it reduce slowly on low heat ensures that silky, spreadable texture without burning.
Unlike traditional fruit jams, this version delivers a smooth, custard-like quality that pairs beautifully with scones, pancakes, or even straight from the spoon.
What you'll end up with is a silky sweet spread that's rich enough to satisfy a dessert craving but light enough to use as a breakfast topping. The flavor profile is delicate yet complex, with just the right balance of sweetness and subtle vanilla or citrus notes.
It keeps beautifully in the refrigerator for up to two weeks, making it perfect for meal prep or gifting.
This milk jam isn't just a condiment—it's a versatile treat that elevates everything from toast to ice cream. Whether you're looking for a unique homemade spread or a simple way to use up extra milk, this recipe delivers restaurant-quality results with minimal effort.
Let's get started on creating something truly special.
Ingredients for milk jam
Three ingredients. One pot. A spread that tastes like dessert and breakfast all in one.
| Ingredient | Amount | Notes |
|---|---|---|
| Whole Milk 🥛 | 2 cups | Full-fat for best texture |
| Granulated Sugar 🍚 | 1 ½ cups | White or light brown |
| Pure Vanilla Extract 🌿 | 1 tbsp | Or lemon zest for citrus twist |
| Unsalted Butter 🧈 | 2 tbsp | Cold, cut into small pieces |
The milk is the star here—whole milk gives that rich, velvety texture, but 2% works in a pinch. If you're using milk from the fridge, let it sit out for 10 minutes first so it warms up a bit. Sugar is non-negotiable for caramelization, but light brown adds subtle molasses notes. I always grab the Domino brand from the store—it's reliable and dissolves smoothly. The vanilla? Pure extract (not imitation) makes all the difference—if you're doing lemon instead, zest about 1 whole lemon and add the juice too.
No vanilla extract? Vanilla bean paste works just as well, or swap for 1 tsp lemon juice plus zest. Short on butter? Coconut oil gives a similar finish, though it won't be quite as rich. The sugar can be adjusted—1.25 cups for less sweetness, 1.75 cups for more caramel depth. If you burn it once (we've all been there), just start lower next time—low and slow is key. The butter at the end keeps it spreadable, so don't skip it unless you're okay with a firmer jam.
This keeps for 2 weeks in the fridge, sealed tight in a jar. For gifting, use small mason jars with ribbon—it's always a hit. Reheat gently in the microwave (30-second bursts) if it thickens too much. I make a double batch every time—one for breakfast, one for dessert. The flavor actually improves after a day or two as the ingredients meld. Freezes beautifully too if you want to prep ahead.
Why You'll Love This Recipe
- No Pot Stirring Needed: I swear by this—just dump the milk, sugar, and butter into a saucepan, let it bubble once, then simmer. No whisking, no watching the clock, no stress. The vanilla ties everything together while you’re free to sip coffee or scroll through your phone.
- Rich Without Effort: That first spoonful? Caramelized sugar and creamy milk hit like a hug—sweet but never cloying, with butter adding a velvety depth. It’s the kind of flavor that makes you pause mid-bite, even though you’ve got a million things to do.
- Breakfast or Dessert Fix: Slather it on buttery toast for a lazy morning or drizzle it over vanilla ice cream when company drops by. I’ve even used it to glaze cinnamon rolls—trust me, the contrast with warm dough is chef’s kiss. One jar does double (or triple) duty.
- Budget Luxury: Whole milk and sugar are pantry staples, and a stick of butter lasts forever. You’re basically turning grocery basics into something that tastes like a bakery treat. Plus, it keeps for weeks in the fridge, so you’re not scrambling to use it up.
Step-by-step instructions for milk jam recipe
This silky sweet spread comes together faster than you'd think—just four simple steps.
Warm the Milk and Sugar Together
In a heavy-bottomed saucepan, combine the 2 cups whole milk and 1.5 cups granulated sugar. Place over medium heat and stir gently until the sugar dissolves completely—this should take about 3-4 minutes. You'll see the mixture transform from grainy to completely smooth, with no sugar crystals remaining at the bottom.
Here's the thing—don't walk away. Stir occasionally to prevent the milk from scorching at the edges. You're looking for the mixture to reach a gentle simmer, where small bubbles form around the edges but don't boil over. Once it reaches this point, reduce the heat to low to maintain a gentle simmer.
Cook Until Thickened
Continue simmering for about 1 hour, stirring every 10-15 minutes. I know it seems like a long time, but this slow cooking process is what creates that signature jam-like consistency. You'll notice the mixture gradually thicken as moisture evaporates—it'll go from a thin liquid to a syrupy texture that coats the back of a spoon.
Real talk: Your stove might run hotter or cooler, so start checking after 50 minutes. The jam is ready when it reaches a pudding-like consistency that holds its shape when you lift the spoon. If it's still too thin, keep cooking for another 10 minutes. If it thickens too quickly, add 1-2 tablespoons of warm water to adjust the texture.
Add Vanilla and Butter
Once the mixture reaches the right consistency, remove it from heat and let it cool slightly for 2-3 minutes—just enough to handle comfortably. Stir in the 1 tablespoon pure vanilla extract and 2 tablespoons cold unsalted butter cut into small pieces. The butter should melt into the warm mixture, creating a velvety texture.
I like to press the butter pieces against the side of the pan with a spoon first—they'll melt faster and distribute more evenly. Give it a good stir until the butter is completely incorporated and the mixture is perfectly smooth with no lumps. This is where the magic happens—the butter adds richness while the vanilla brings out the milk's natural sweetness.
Cool and Set
Transfer the milk jam to a clean, dry jar or container. Let it cool at room temperature for about 30 minutes, then refrigerate for at least 2 hours. This cooling process is crucial—it allows the jam to set properly and develop its signature silky texture. Don't rush this step; patience here makes all the difference.
Once chilled, you'll notice the jam thicken even more, becoming spreadable yet still soft. It should have a glossy sheen and hold its shape when scooped. The final product should be sweet but not cloying, with a smooth texture that melts on your tongue. Store in the fridge for up to 2 weeks, or freeze for longer storage.
Pro Tips For Making Milk Jam
- STIR CONSTANTLY AT FIRST: The first 10 minutes are where scalding happens fastest—if you walk away even for a second, you’ll end up with grainy sugar crystals instead of smooth jam. I used to think "stirring" meant occasional glances; now I treat it like whisking eggs—no breaks, no excuses.
- USE COLD BUTTER: Cut that butter into tiny cubes and toss it in while the mixture is still warm, not boiling. Cold butter melts slower, creating those perfect ribbons of fat that make the jam taste richer. (Yes, it’ll look weird at first—trust me, it dissolves.)
- SIEVE THE MILK: Whole milk has a way of leaving little curdled bits that turn your jam into a textured mess. Strain it through a fine-mesh sieve before you even start—it’s 2 minutes of work that saves you from scraping gunk off your spoon later.
- END ON LOW HEAT: Once the sugar’s dissolved and the mixture’s thickened, drop the heat to the lowest setting and let it cook uncovered for 15–20 minutes. This evaporates extra moisture without burning the edges—skipping this step gives you a sticky, uneven jam that clumps in the jar.
Essential equipment for this dish
Heavy-Bottomed Saucepan
Your heavy-bottomed saucepan is the MVP of this recipe—it prevents scorching and ensures even heat distribution. I recommend a 3-quart stainless steel saucepan like the All-Clad Stainless or Cuisinart MultiClad for professional results. These pans handle high heat without warping, which is crucial since milk jam requires consistent, low-and-slow cooking.
If you're on a budget, a Lodge enameled cast iron works beautifully too—just avoid aluminum, as it can react with dairy and create off-flavors. 🔥
Thermometer for Precision
A candy or instant-read thermometer helps you nail the perfect consistency. I use a Thermoworks Thermapen ONE to monitor the mixture's temperature—aim for 230-235°F when it reaches the pudding-like stage. Without a thermometer, rely on the "sheet test": dip a spoon in the jam, then run your finger through it.
If it leaves a clean, slow-moving line, it's ready. No thermometer? No problem—just watch for the 1-hour mark and adjust from there.
Whisk for Smoothness
A balloon whisk is your best friend for dissolving sugar and preventing lumps. The flexible wires cut through the milk-sugar mixture more effectively than a spoon, ensuring a silky finish.
I keep mine handy for stirring during the 3-4 minute sugar-dissolving phase—this is when lumps can form if you're not careful. For extra smoothness, strain the finished jam through a fine-mesh sieve before transferring to jars.
A OXO Good Grips whisk is my go-to for its ergonomic handle and durable wires.
Glass Jars for Storage
Store your milk jam in glass mason jars with airtight lids to preserve freshness. I use Ball or Le Parfait jars because they're microwave-safe and stack neatly in the fridge. For gifting, opt for smaller 4-ounce jars—they're perfect for single servings.
Avoid plastic containers, as they can absorb odors and affect the jam's flavor over time. Label your jars with the date and flavor variation (vanilla or lemon) to keep track of what you've made. ❄️
Small Mixing Bowl
A small mixing bowl (about 1-quart capacity) comes in handy for cooling the jam slightly before adding butter. Place the hot mixture in the bowl to let it sit for 2-3 minutes while you prep the butter.
This prevents temperature shock when you stir in cold butter pieces. I use a Corelle stoneware bowl—it's heat-resistant and easy to clean. If you're short on space, a heatproof glass bowl works just as well.
Silicone Spatula
A silicone spatula is essential for scraping every last bit of jam from the saucepan and ensuring no sugar crystals remain.
The flexible edge gets into corners where wooden or metal utensils can't. I keep a OXO Good Grips silicone spatula in my kitchen specifically for this recipe—it's heat-resistant and won't scratch your pan. Use it during the 1-hour simmering phase to stir gently and prevent sticking.
For extra shine, give the finished jam a final swipe with the spatula before transferring to jars. 💫
Nutrition facts
Frequently asked questions
Can I make milk jam without butter?
The butter adds richness and helps create that signature spreadable texture, but you can substitute it with 2 tablespoons coconut oil or 1 tablespoon heavy cream for a similar effect. The jam will be slightly less rich but still delicious. Just make sure to add it at the end when the mixture is off heat.
How do I know when the milk jam is ready?
Look for a pudding-like consistency that coats the back of a spoon but still holds its shape when lifted. The mixture should reach 230-235°F on a candy thermometer, or you can do the "sheet test": dip a spoon in the jam, then run your finger through it. If it leaves a clean, slow-moving line, it's perfect.
Can I use powdered milk instead of fresh milk?
No, powdered milk won't work because it lacks the moisture and fat content needed to create the silky texture. Fresh milk (preferably whole milk) is essential for achieving that creamy, spreadable consistency. If you're short on time, let your milk sit out for 10 minutes before using to warm it slightly.
What are the best ways to use milk jam?
This versatile spread is perfect for topping warm scones, pancakes, or toast, filling crepes or waffles, or even drizzling over vanilla ice cream. It also makes a unique filling for thumbs-up cookies or cinnamon rolls. The possibilities are endless—get creative!
Why did my milk jam turn grainy?
Graininess usually happens if the sugar didn't dissolve completely at the start or if the mixture boiled too vigorously. Next time, stir constantly during the initial 3-4 minutes of heating and keep the heat at a gentle simmer. If it happens, you can strain the finished jam through a fine-mesh sieve to remove any sugar crystals.