
Side Dishes
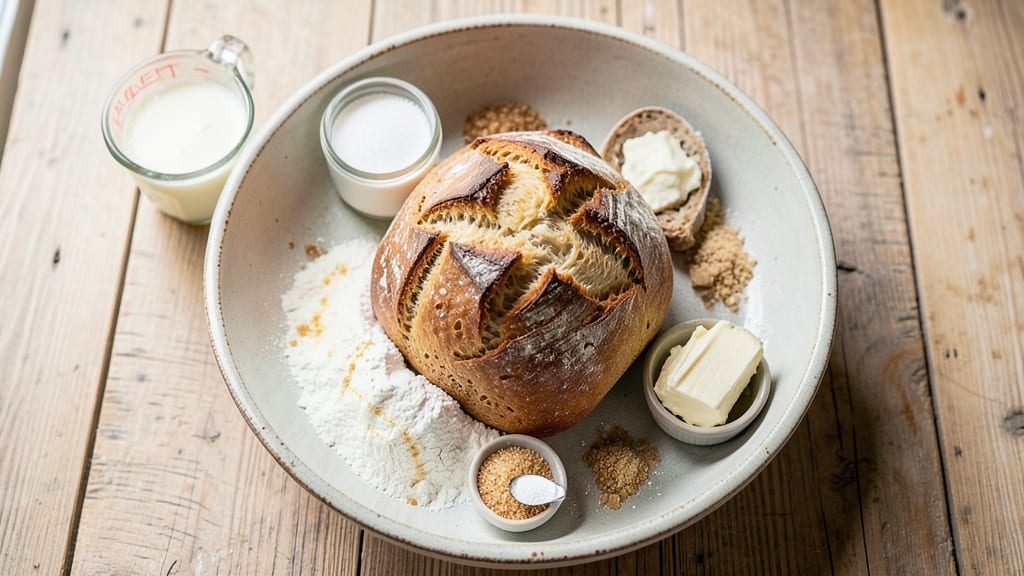
This country buttermilk bread recipe delivers the perfect balance of tender crumb and tangy crust, proving that homemade bread doesn’t require advanced skills—just patience and precise technique. The buttermilk creates a signature lightness while the slow fermentation develops deep flavor, making every slice worth the wait.
I’ve baked this loaf dozens of times, and it consistently yields a golden crust with an airy interior that melts in your mouth.
The secret lies in the fermentation process, where the dough rests overnight for maximum flavor development. This slow rise not only enhances taste but also makes the bread easier to handle when shaping. No special equipment is needed—just a mixing bowl, a warm spot, and about 12 hours of patience.
The result? A loaf with a crisp exterior and a soft, pillowy crumb that’s ideal for sandwiches or serving warm with butter.
What sets this recipe apart is its foolproof method for achieving both texture and flavor without shortcuts. The tangy crust comes from a simple water spray during baking, while the buttermilk ensures a tender crumb that stays fresh for days.
Whether you’re a beginner or an experienced baker, this recipe delivers professional-quality results with minimal effort.
Serve this bread fresh from the oven with honey, jam, or as the base for classic sandwiches. The versatility makes it perfect for breakfast, lunch, or dinner—proof that a simple loaf can elevate any meal. Let’s get started on creating your perfect country-style buttermilk bread.
Ingredients for country buttermilk bread
Pantry staples plus two key ingredients—yeast and buttermilk—that transform simple flour into golden, tangy perfection.
| Ingredient | Amount | Notes |
|---|---|---|
| All-Purpose Flour 🌾 | 5 cups | Unbleached, spooned and leveled |
| Buttermilk 🥛 | 1 ½ cups | Full-fat, room temperature |
| Granulated Sugar 🍚 | ½ cup | Light brown preferred |
| Active Dry Yeast 🍞 | 2 ¼ tsp | Fresh yeast if available |
| Salt 🧂 | 1 ½ tsp | Fine sea salt preferred |
| Unsalted Butter 🧈 | ½ cup | Cold, cubed for mixing |
| Large Egg 🥚 | 1 whole | Room temperature |
| Whole Milk 🥛 | ¼ cup | Warmed slightly |
| Cornmeal 🌽 | ¼ cup | For dusting bread pan |
| Water 💧 | ½ cup | For spraying crust |
The yeast is your flavor multiplier here. Fresh yeast from the refrigerated section at Whole Foods or Trader Joe's works best—it’s more potent than those tiny packets. If you’re using active dry, make sure it’s not expired (yeast loses power fast). The buttermilk? Full-fat is non-negotiable—it’s what gives this bread that signature tang. I always grab Land O’Lakes from the dairy case; it’s reliable and keeps well. For the flour, King Arthur or Gold Medal are my go-tos—they’re high-protein enough to hold that tender crumb without being too dense.
No buttermilk? Mix 1.5 tablespoons lemon juice or vinegar with enough milk to make 1.5 cups total—it’s the same science. Short on yeast? Double the amount if you’ve got it, but don’t overdo it or you’ll end up with a bitter loaf. The butter should be cold—cut it into small cubes so it distributes evenly in the dough. If you’re in a pinch, vegetable shortening works, but you’ll lose that rich flavor. The egg? Room temperature is key—it mixes better and helps create that tender crumb. And if you’re out of whole milk, any milk will do, but whole gives the best texture.
This dough needs time—at least 12 hours in the fridge for the magic to happen. Shape it into a loaf, cover it with plastic wrap, and let it rise in a warm spot. The longer it ferments, the more flavorful it gets. Once baked, let it cool completely on a wire rack—cutting it too soon makes it gummy. Store wrapped at room temperature for 3 days or freeze for up to 3 months. I like to slice it thin for sandwiches or toast it with butter for breakfast—either way, it’s pure comfort.
Why You'll Love This Recipe
- Pantry Staples Only: I swear by this recipe because it uses things I always have: flour, buttermilk, a pinch of sugar, and yeast. No fancy ingredients, no last-minute grocery runs—just open the cabinet and go.
- Tangy, Soft Magic: That buttermilk? It’s the star—creamy, slightly tangy, and so tender it melts in your mouth. The yeast does its thing overnight, so by morning, you’ve got bread that’s fluffy without being heavy.
- Weeknight Hero: Toss a loaf in the oven while you’re making dinner, and it’s ready by the time you’re done. Slice it warm with butter, or save it for sandwiches—it’s my go-to when I’m too tired to fuss.
- Budget-Friendly Feast: A single batch stretches for days—perfect for toast, French toast, or even croutons. Honestly, I bake two loaves at once because it’s cheaper than buying bread, and it lasts longer too.
Step-by-step instructions for country buttermilk bread
Here's how to create that perfect rustic loaf with a tender crumb and golden crust.
Activate the Yeast and Mix the Dough
In a large mixing bowl, combine the 1.5 cups buttermilk, 0.5 cup granulated sugar, and 2.25 teaspoons active dry yeast. Stir gently and let sit for 5-10 minutes until the mixture becomes foamy and bubbly. This is your signal that the yeast is active and ready to work its magic.
Once bubbly, add the 5 cups all-purpose flour and 1.5 teaspoons salt to the bowl. Mix with a wooden spoon until a shaggy dough forms. Then, cut in the 0.5 cup cold unsalted butter using a pastry cutter or your fingers, working until the butter is evenly distributed throughout the dough. Real talk: this step is where the bread gets its signature richness.
Knead the Dough Until Smooth
Turn the dough out onto a lightly floured surface and knead for 8-10 minutes until smooth and elastic. You'll know it's ready when it springs back slowly when poked. I like to use my knuckles for this test—if the dough doesn't immediately fill back in, it's ready.
Here's the thing—don't over-knead or you'll develop too much gluten, which can make the bread tough. Instead, focus on creating a dough that's just firm enough to hold its shape when rolled into a ball. Once smooth, place the dough back in the bowl, cover with a damp towel, and let it rise in a warm spot for 1-1.5 hours, or until doubled in size.
Shape and Proof the Dough
Punch down the risen dough to release the air, then divide it into 4 equal pieces (about 12 ounces each). Roll each piece into a smooth ball, cover with the damp towel again, and let them rest for 15 minutes. This short rest prevents the dough from springing back when shaping.
After resting, shape each ball into a loaf by gently stretching and folding the dough. Place each loaf seam-side down in a 9x5-inch loaf pan that's been lightly dusted with 0.25 cup cornmeal. Cover loosely with the towel and let them proof for another 45-60 minutes, until they've risen about 1 inch above the pan. The edges should look slightly puffy and rounded.
Bake to Golden Perfection
Preheat your oven to 375°F and place a small bowl of 0.5 cup water on the lower rack to create steam. Brush the tops of the loaves with a little 0.25 cup whole milk and sprinkle with a pinch of salt for extra flavor. Bake for 30-35 minutes, until the tops are deep golden brown and the internal temperature reaches 190°F.
Your kitchen will smell absolutely amazing at this point—like warm buttermilk and fresh bread. For that classic country bread look, immediately invert the loaves onto a wire rack. Let them cool for 10 minutes before slicing. The crust will be crisp and tangy, while the inside stays soft and fluffy. This is the moment that matters: serving warm with butter or jam.
Pro Tips For Making Country Buttermilk Bread
- Measure Buttermilk Precisely: Use a liquid measuring cup, not a dry one—this stuff’s thick and clings to the sides like a stubborn guest at a dinner party. A splash too much or too little throws off the dough’s balance, and you’ll end up with either a gummy mess or something that collapses faster than my willpower on a Monday.
- Bloom Yeast in Warm Water: Toss that yeast into the warm water first, then let it sit for 5 minutes until it’s frothy like a freshly whipped latte. Cold water kills it, and skipping this step means your bread might rise slower than my motivation to fold laundry. Aim for water that’s about 110°F—lukewarm to the touch, not scalding.
- Knead Just Until Smooth: Overworking the dough makes gluten tougher than my ex’s excuses. Stop when it’s elastic but still slightly tacky—about 8-10 minutes by hand or 5-6 minutes with a mixer on medium. Press your finger into it; if it springs back slowly, you’re golden. If it bounces like a trampoline, you’ve gone too far.
- Shape Loaves Tightly: Pack those dough balls like you’re stuffing a pillow—folds should meet snugly, not gap like a poorly sewn quilt. A tight shape means even rising and a crust that’s crisp, not lopsided. Roll them seam-side up in the pan so they don’t flop over during baking (yes, I’ve seen it happen).
Essential equipment for this dish
Mixing Bowl Essentials
Start with a large stainless steel mixing bowl (I use my 12-quart Cambro—it’s durable and holds heat well during fermentation). The stainless steel won’t absorb odors like plastic, and its weight keeps the dough stable during the initial rise.
For smaller batches, a 5-quart bowl works fine, but avoid glass—it’s heavier and can crack if you’re aggressive with dough handling.
Your wooden spoon is non-negotiable here—it helps distribute the butter evenly without over-developing gluten early. I keep a 12-inch oak-handled spoon from Williams Sonoma for this exact purpose.
If you’re short on time, a dough whisk (like the OXO Good Grips) works too, but it won’t handle the butter as well.
Kneading Tools
For kneading, your hands are your best tool—no fancy equipment needed. If you prefer mechanical help, a stand mixer with a dough hook (like the KitchenAid 5-quart) saves time and effort.
Set it to speed 2 for 8 minutes max—overmixing leads to tough bread. For a mid-range option, the Hamilton Beach 6-quart does the job for about half the price of KitchenAid.
A lightly floured surface is critical—use King Arthur Unbleached Flour for dusting. I keep a large marble slab (from Sur La Table) for shaping, but a clean wooden cutting board works just as well. Avoid glass or metal trays—they can dry out the dough faster.
Proofing Gear
Proofing requires warmth and patience. I use a proofing box (like the Breville Proofing Box) set to 80°F for consistent results, but a turned-off oven with a bowl of hot water works in a pinch.
Cover your dough with a damp kitchen towel or plastic wrap—never aluminum foil, as it can trap too much moisture and weaken the crust.
For shaping, a 9x5-inch loaf pan (I swear by Nordic Ware) is ideal, but cornmeal (not flour) is key for dusting—it prevents sticking and adds a subtle crunch.
If you’re making free-form loaves, a banneton basket (like the West Bend) helps with structure, but it’s optional for this recipe.
Baking Must-Haves
Your oven thermometer is non-negotiable—I use the Thermoworks Oven Thermometer to ensure 375°F accuracy. A wire cooling rack (like the OXO Good Grips) is essential for even cooling—never place bread directly on a counter or cutting board, or it’ll steam and turn gummy.
For that tangy crust, keep a spray bottle (I use a glass spray bottle from Amazon) filled with water nearby. A pastry brush (like the Silpat silicone brush) helps apply the whole milk wash evenly before baking.
And finally, a digital meat thermometer (like the Thermoworks Smoke) ensures your bread reaches 190°F internal temp—the secret to a perfectly baked loaf.
Nutrition facts
Frequently asked questions
Why does buttermilk make this bread so tender?
The acidity in buttermilk breaks down gluten strands during mixing, creating a softer crumb. The fat content also tenderizes the dough while adding that signature tangy flavor. For extra tenderness, don't skip the overnight cold proof—it enhances texture and flavor simultaneously.
Can I make this bread without a stand mixer?
This recipe works perfectly with just your hands. Knead the dough on a lightly floured surface for 8-10 minutes until smooth and elastic. For best results, work in a well-floured area to prevent sticking, and take breaks if needed—dough gets warmer as you knead.
What's the best way to store leftover buttermilk bread?
Wrap cooled loaves tightly in plastic wrap or aluminum foil to preserve freshness. Store at room temperature for 3 days or freeze for up to 3 months. For reheating, wrap slices in foil and warm in a 350°F oven for 5-7 minutes to restore that fresh-baked texture.
My bread turned out dense—what went wrong?
Dense bread usually means over-kneading or insufficient proofing time. Knead just until the dough is smooth (about 8-10 minutes by hand), and ensure your dough doubles in size during proofing. Also check your yeast—if it's old or expired, it won't activate properly. For extra insurance, try a 12-hour cold proof next time.
How can I make this bread more flavorful?
For deeper flavor, try adding 1 teaspoon honey or molasses to the dough, or sprinkle everything seasoning on top before baking. Another trick is to use whole wheat flour (replace 1 cup of all-purpose) for a nuttier taste. The longer fermentation (up to 18 hours) also develops more complex flavors.