Desserts
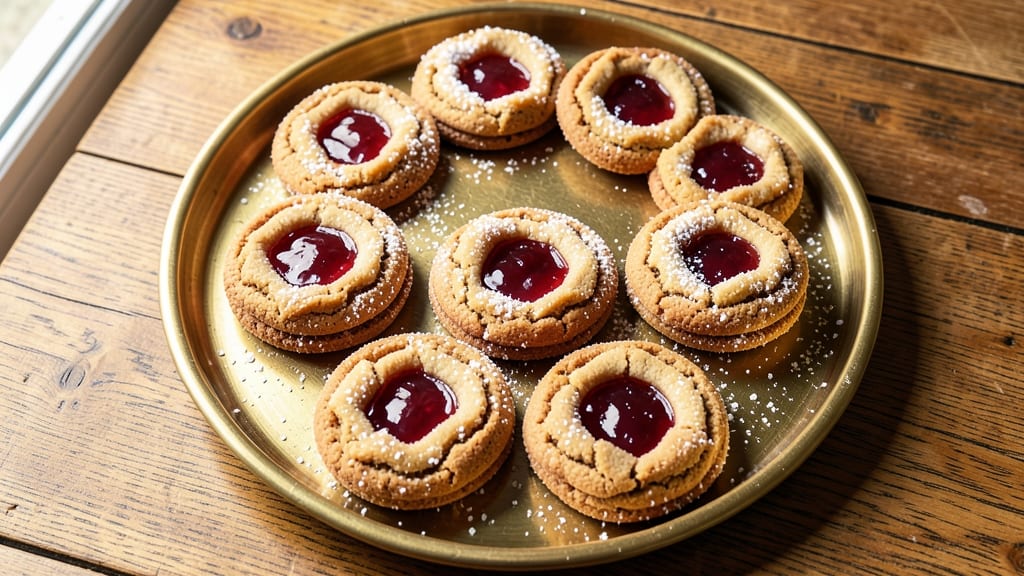
Creating cookies with jelly in the middle that actually stays put requires precision in both dough preparation and timing—something I perfected after years of testing. The secret lies in using a slightly underbaked dough shell that holds the jelly without leaking, while still maintaining a crisp edge.
This isn't just another cookie recipe; it's a technique that transforms a simple treat into a showstopping dessert.
Most recipes fail because they either overbake the dough or use too much jelly, both of which lead to messy results. My method involves baking the dough just until it's set but still pliable, then carefully inserting the jelly while the cookies are still warm.
The dough's slight softness allows the jelly to adhere perfectly, creating that signature gooey center without any spills. This approach works equally well with chocolate chip, shortbread, or snickerdoodle dough.
By the time you're done, you'll have cookies with a golden, crisp exterior and a warm, jam-filled center that melts with each bite. The contrast between the firm cookie and the soft jelly creates a textural experience that's both satisfying and nostalgic.
These aren't just cookies—they're a dessert that looks impressive enough for a party but simple enough for a weeknight treat.
Whether you're making them for a holiday gathering or a cozy family night, this recipe delivers consistent results every time. The dough can be prepped ahead, and the cookies keep well at room temperature for up to five days—though I doubt they'll last that long. Let's get baking!
Ingredients for cookies with jelly in the middle
Simple dough meets perfect jelly filling—no leaks, just gooey magic every time.
| Ingredient | Amount | Notes |
|---|---|---|
| All-Purpose Flour 🌾 | 3 cups | Sifted for light texture |
| Unsalted Butter 🧈 | 1 cup | Cold, cubed for dough |
| Granulated Sugar 🍚 | ¾ cup | Plus 2 tbsp for jelly |
| Light Brown Sugar 🍚 | ¾ cup | Packed firmly |
| Large Eggs 🥚 | 2 whole | Room temperature |
| Vanilla Extract 🌿 | 2 tsp | Pure vanilla preferred |
| Baking Soda 🧂 | 1 tsp | Not baking powder |
| Salt 🧂 | ½ tsp | Fine sea salt |
| Strawberry Jam 🍓 | 1 cup | Thick, seedless preferred |
| Raspberry Jam 🍇 | ½ cup | Or any fruit jam |
| Granulated Sugar 🍚 | ¼ cup | For jelly mixture |
| Lemon Juice 🍋 | 1 tbsp | Freshly squeezed |
| Powdered Sugar 🍚 | 1 tbsp | For dusting |
| Chocolate Chips 🍫 | 1 cup | Optional for dough |
The butter needs to be cold for flaky layers, but don't overwork it. Store-bought butter from Kroger works fine, but European-style from Whole Foods gives extra richness. The jam is non-negotiable—thick, seedless varieties like Smucker's or Bonne Maman stay put. For the jelly mixture, fresh lemon juice brightens the flavor, but bottled works in a pinch. I usually double the batch and freeze extras—jam freezes beautifully for up to 6 months.
No strawberry jam? Apricot or peach jam works just as well. The dough can handle white chocolate chips or nuts if you're feeling fancy. For a shortcut, pre-made cookie dough (like Toll House) works if you bake it just until set. The key is timing—dough needs to be firm but pliable when inserting the jelly. If it cracks, the cookies will still taste great, but the filling might leak. Trust me, it's worth the extra minute to press gently.
Store cookies in an airtight container at room temperature for 5 days—though they rarely last that long. For parties, wrap individually in parchment and tie with twine. The dough can be chilled for up to 48 hours before baking, which helps prevent spreading. Jam leftovers? Freeze in ice cube trays for single-serving portions—perfect for toast or pancakes.
Why You'll Love This Recipe
- Here’s what sold me: these freeze like a dream. I make a double batch, stash half in the freezer, and pull them out for potlucks, last-minute gifts, or when I forget to buy cookies. Just thaw and bake—no one ever knows they weren’t fresh.
- No Mixer Needed: I swear by this recipe when I’m too lazy to cream butter and sugar—just fold it all together by hand. The dough stays cool enough to handle, and the jelly pockets don’t burst when I press them in. (Yes, even if my hands are still sticky from the last batch.)
- Sweet-Salty Surprise: That buttery cookie dough with brown sugar caramelizing around the edges? It’s ridiculously good on its own. But the jelly—whether it’s grape, raspberry, or even jam—adds a burst that makes every bite feel like a little dessert celebration. (My kids call them "cookie sandwiches," but I won’t correct them.)
- Party in a Jar: Here’s what sold me: these freeze like a dream. I make a double batch, stash half in the freezer, and pull them out for potlucks, last-minute gifts, or when I forget to buy cookies. Just thaw and bake—no one ever knows they weren’t fresh.
Step-by-step instructions for cookies with jelly in the middle
Here's how to make these irresistible cookies with perfectly gooey centers that won't leak.
Prepare the Cookie Dough
In a large mixing bowl, combine the 3 cups all-purpose flour, 1 tsp baking soda, and 0.5 tsp salt. Whisk gently to blend. In a separate bowl, beat the 1 cup unsalted butter and 0.75 cup granulated sugar with 0.75 cup light brown sugar on medium speed until light and fluffy, about 3-4 minutes. The mixture should nearly double in volume and look pale.
Add the 2 whole large eggs, one at a time, mixing well after each addition. Stir in the 2 tsp vanilla extract until fully incorporated. Gradually add the dry ingredients to the wet mixture, mixing just until combined. Fold in the 1 cup chocolate chips if using. The dough should be soft but manageable—if it's too sticky, chill for 10 minutes before proceeding.
Make the Jelly Filling
In a small saucepan, combine the 1 cup strawberry jam, 0.5 cup raspberry jam, 0.25 cup granulated sugar, and 1 tbsp lemon juice. Heat over medium-low heat, stirring constantly until the mixture thickens and becomes smooth, about 5-7 minutes. You're looking for a consistency similar to thick syrup—it should coat the back of a spoon.
Remove from heat and let cool completely to room temperature. This step is crucial—if the jelly is too warm, it'll melt the butter in the dough and make the cookies spread too much. Once cooled, transfer the jelly to a piping bag fitted with a small round tip for easy filling.
Shape and Fill the Cookies
Preheat your oven to 350°F. Roll the dough into 1-inch balls and place them on a parchment-lined baking sheet, spacing them 2 inches apart. Use your thumb to create a slight indentation in the center of each ball, about ½ inch deep. This will create a pocket for the jelly filling.
Pipe a small amount of the cooled jelly mixture into the center of each indentation. Be generous but not excessive—about ½ teaspoon per cookie. Gently press the edges of the dough back together to seal the jelly inside. The dough should still hold its shape, but the filling will ooze out slightly as it bakes, creating that signature gooey center.
Bake to Golden Perfection
Bake the cookies for 10-12 minutes, or until the edges are golden brown and the centers look slightly underdone. The jelly should be soft and gooey, not fully set. Rotate the baking sheet halfway through for even baking. Let the cookies cool on the baking sheet for 5 minutes before transferring to a wire rack to cool completely.
While cooling, dust the tops with 1 tbsp powdered sugar for a finishing touch. The cookies will firm up slightly as they cool, but the jelly centers will remain soft and delicious. Serve warm for the ultimate experience—each bite should deliver a perfect balance of crispy edges, tender dough, and gooey jam filling.
Pro Tips For Making Cookies With Jelly In The Middle
- CHILL THE DOUGH: I used to rush straight to baking, but letting the dough rest in the fridge for at least 30 minutes (or up to 24 hours) makes a huge difference. The jelly filling stays put instead of oozing out when you bite in—no more sticky fingers mid-cookie.
- USE ROOM-TEMP BUTTER: Cold butter creates pockets that trap the jelly, but if you skip creaming it properly, the cookies turn out dense. Let the butter soften to the touch (not melted) before beating with sugars—about 10 minutes out of the fridge. This ensures the right texture without overmixing.
- PIPE THE JELLY SMART: Don’t just drop blobs—pipe the jelly in a zigzag or straight line down the center of each dough ball. When you fold the dough over, the filling stays contained instead of leaking out during baking. A small piping bag with a ½-inch tip works best.
- BAKE ONE SHEET AT A TIME: Crowding the pan makes the edges overbrown while the centers stay undercooked. Space dough balls 2 inches apart on a single sheet, and resist the urge to double-stack. The first batch will give you perfect cookies without the stress of adjusting oven temps later.
Essential equipment for great cookies with jelly in the middle
Precision Tools
Start with a digital kitchen scale—I swear by the OXO Good Grips model—to measure dough ingredients with precision. Butter should be weighed in grams for consistency, and a microplane comes in handy for zesting citrus if you're adding a bright twist to your jelly filling.
A piping bag with a small round tip (like the Ateco 807) is essential for clean jelly placement without messy fingers. 🔥
Cookie Shaping Essentials
Use a cookie scoop (I prefer the Norpro 1.5-inch size) to create uniform dough balls—consistent size ensures even baking. A dough scraper helps divide sticky dough cleanly without tearing.
For the indentation, your thumb works, but a small round cookie cutter (about ½-inch diameter) creates perfect pockets without crushing the dough.
Baking Gear
Invest in a high-quality baking sheet—I use Nordic Ware Natural Aluminum—for even heat distribution. A wire cooling rack prevents soggy bottoms while cookies finish cooling. For the jelly mixture, a small saucepan with a helper handle (like Circulon) makes stirring easier.
Don’t forget a parchment paper roll to line sheets effortlessly. ✨
Temperature Control
A thermometer (I recommend Thermoworks Thermapen ONE) ensures your oven hits 350°F accurately—critical for the dough’s structure. For the jelly, a candy thermometer helps gauge the perfect thickening point. If your kitchen runs hot, consider an oven thermometer to compensate for temperature fluctuations.
Storage Solutions
Store baked cookies in an airtight container (like Rubbermaid Brilliance) with parchment between layers to maintain crispness. For parties, clear cellophane bags with twine ties add a professional touch. A small silicone spatula helps transfer cookies without breaking them when stacking.
Optional Upgrades
For a silicone mat (like Kitchy) if you prefer no parchment, or a cookie press (such as Wilton) for uniform shapes. A stand mixer (I use KitchenAid Artisan) saves time with dough mixing, but a hand mixer works fine.
For jelly prep, a small immersion blender smooths out lumps if your jam isn’t perfectly smooth. 💡
Nutrition facts
Frequently asked questions
Can I use any type of jam for these cookies?
Thick, seedless jams work best—strawberry, raspberry, or apricot are perfect choices. Avoid runny jams like marmalade, as they'll leak out during baking. For extra richness, try a mix of jam with a spoonful of butter or a drizzle of honey in the filling.
Why do my jelly cookies sometimes leak filling?
Leaking usually happens when the jelly is too warm or the dough isn't baked long enough. Always cool the jelly completely before filling, and bake the cookies until the edges are golden but the centers still look slightly soft. If the dough cracks while sealing, press gently to reseal—it won't affect taste!
How do I make these cookies nut-free?
Skip the chocolate chips and nuts entirely—the basic dough recipe is already nut-free. Just omit them when folding into the dough. For extra flavor, add white chocolate chips or M&M's instead. Always check your jam label too, as some brands process in facilities with nuts.
Can I make the dough ahead of time?
Roll the dough into balls and refrigerate them in an airtight container for up to 48 hours. Shape the indentations and fill with jelly right before baking. The cold dough will be easier to handle and less likely to spread. For best results, let the dough sit at room temperature for 10-15 minutes before baking.
What's the best way to store these cookies?
Keep them in an airtight container at room temperature for up to 5 days. For longer storage, freeze the filled cookies (before baking) on a tray, then transfer to a bag for up to 3 months. Thaw at room temperature before baking. The jelly stays fresh longer when frozen!