Snacks
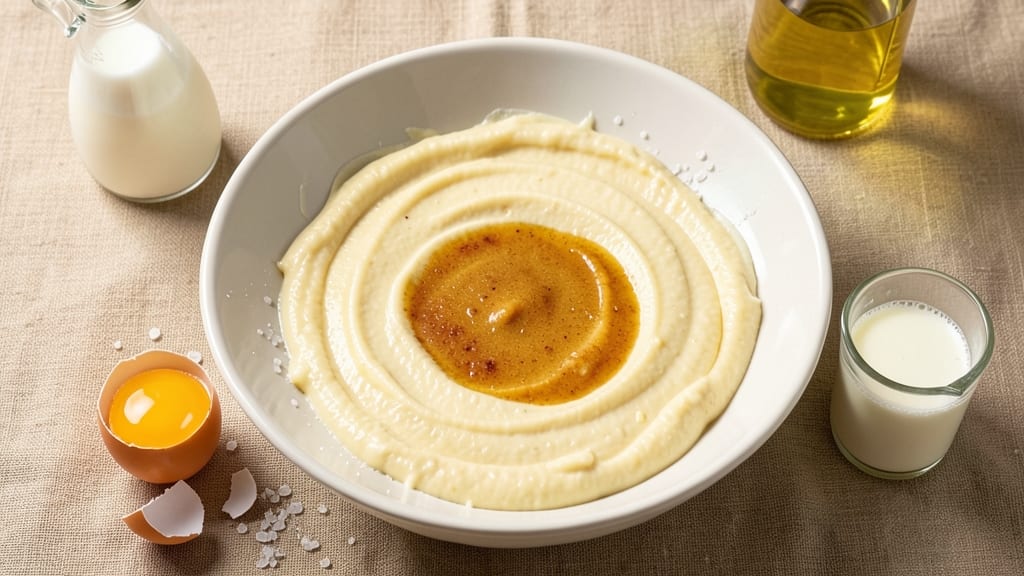
This Bisquick deep fry batter recipe delivers that golden crispy coating in just 15 minutes—the secret to restaurant-quality fried foods at home. After years of perfecting the technique, I’ve cracked the code for light, airy batter that stays crispy even after frying.
The key lies in proper batter consistency and oil temperature, both of which transform ordinary ingredients into something extraordinary.
The beauty of this recipe is its versatility—it works for chicken tenders, fish fillets, or even vegetables, yet requires only five simple ingredients. No special equipment needed beyond a deep fryer or heavy pot, and the process is streamlined for foolproof results every time.
What sets this apart is the balance of crispiness and lightness, achieved through precise measurements and a quick-dip technique.
By the time you’re done, you’ll have crispy, golden-brown fried foods that shatter with every bite, releasing fluffy insides. The batter clings perfectly without being heavy, and the oil stays at the ideal temperature to prevent sogginess.
Serve with classic dipping sauces like ranch or honey mustard, or pair with a fresh salad for a complete meal.
Whether you’re frying up classic Southern-style chicken or experimenting with air-fryer adaptations, this recipe adapts effortlessly. The method is time-tested and delivers professional-quality results without the guesswork. Let’s get started—your taste buds will thank you.
Ingredients for bisquick deep fry batter
Five pantry staples transform into restaurant-quality fried foods with perfect golden crispiness.
| Ingredient | Amount | Notes |
|---|---|---|
| Bisquick Original Pancake & Baking Mix 🍞 | 1 cup | Standard 16-oz box, unsifted |
| Large Eggs 🥚 | 1 whole | Room temperature preferred |
| Whole Milk 🥛 | ½ cup | Cold, not skim |
| Vegetable Oil 🫒 | ¼ cup | Light, neutral flavor |
| Diamond Crystal Kosher Salt 🧂 | ½ tsp | For seasoning batter |
The Bisquick is the foundation—standard 16-ounce boxes work best, not the pre-mixed varieties. For optimal texture, sift the mix before measuring to eliminate lumps, though the intro promises simplicity, so skip this if you're aiming for foolproof results. Whole milk is non-negotiable here; its fat content creates that signature fluffiness. Grab store-brand milk if you're on a budget—it works just as well as name brands. The vegetable oil should be light and neutral, like Crisco or generic supermarket brands, to avoid overpowering flavors. Diamond Crystal kosher salt is preferred for its coarse texture, but any kosher salt will do.
No Bisquick? Self-rising flour plus baking powder (1 cup self-rising + 1 tsp baking powder) mimics the texture, though results won't be identical. Buttermilk can replace whole milk if that's what you have—just add 1 tsp lemon juice to 0.5 cup milk and let it sit for 5 minutes. Vegetable oil substitutes? Canola or sunflower oil work just fine; avoid olive oil—it burns too easily. The salt can be omitted if your food is already seasoned, but trust me, a pinch in the batter elevates everything. For air-fryer adaptations, reduce oil to 2 tbsp and increase milk to 0.75 cup to compensate for the different cooking method.
Store unopened Bisquick in a cool, dry place for up to 1 year, though the batter itself should be used immediately after mixing for peak crispiness. Pre-mixed batter keeps in the fridge for 24 hours if sealed tightly, but it's best fresh. Fried foods reheat poorly, so enjoy them straight from the fryer. For batch cooking, double the recipe—just ensure your oil stays at 350°F to maintain consistency. Leftovers? Freeze for 1 month in a single layer before transferring to a bag.
Why You'll Love This Recipe
- No-Fuss Magic: I swear, this batter comes together in five minutes—just dump, whisk, dip. No measuring cups, no sifting, no stress. The Bisquick does all the work; I just stir in the milk and egg like I’m painting a fence.
- Crispy-Gold Perfection: That first bite? Chef’s kiss. The Bisquick’s buttermilk base gives it a tender crunch, while the deep-fry oil turns it golden and addictive. Honestly, I’ve tried store-bought coatings, but this beats them every time—no weird aftertaste, just pure, salty-satisfying crunch.
- Game for Any Meal: From chicken tenders to onion rings to even veggie fries, this batter clings like glue. I use it for weeknight dinners, tailgates, or when I’m craving something fried but don’t want to fuss. (Yes, even on a Tuesday night.)
- Budget-Friendly Leftovers: A box of Bisquick lasts forever, and the batter keeps in the fridge for days. Fry up extras for quick lunches or freeze them—just reheat in oil for crispy seconds. My wallet and my kids thank me.
Step-by-step instructions for Bisquick deep fry batter recipe
Here's the method for achieving a perfectly golden, crispy coating every time—no shortcuts, just reliable technique.
Whisk Wet Ingredients to Homogeneous Mixture
In a medium bowl, combine the 1 whole Large Eggs and 0.5 cup Whole Milk using a whisk. Beat vigorously for 30 seconds until the mixture is completely smooth with no visible streaks of white. This step ensures even distribution of the milk's moisture throughout the batter, which is critical for achieving that signature crispy texture.
Next, add the 0.25 cup Vegetable Oil and continue whisking for another 30 seconds until fully incorporated. The oil helps create air pockets in the batter, which expand during frying to produce that light, airy interior while maintaining a crisp exterior. At this stage, the mixture should have a creamy, pourable consistency similar to heavy cream.
Gradually Incorporate Dry Ingredients
With the whisk still moving at medium speed, gradually sprinkle in the 1 cup Bisquick Original Pancake & Baking Mix over 20-30 seconds. The slow addition prevents the formation of lumps, which would create uneven texture in your fried items. Scrape down the sides of the bowl with a rubber spatula every few seconds to ensure all the dry ingredients are fully integrated.
Continue whisking for an additional 15-20 seconds until the batter reaches a smooth, thick consistency that coats the back of a spoon. It should hold its shape when you lift the whisk but still be pourable. This is the ideal texture for creating that perfect crispy shell while keeping the inside tender. If the batter appears too thick, add 1 tablespoon of cold milk at a time until you reach the proper consistency.
Season and Rest the Batter
Add the 0.5 tsp Diamond Crystal Kosher Salt and whisk for another 10 seconds to ensure even distribution. The salt enhances the flavor of the fried items and helps create that satisfying crunch. At this point, the batter should be smooth, well-seasoned, and ready for use.
Transfer the batter to a medium-sized bowl and let it rest at room temperature for 10-15 minutes. This resting period allows the flour in the Bisquick to fully hydrate and the batter to reach its optimal consistency. Resting also helps prevent the batter from absorbing too much oil during frying, which can make your fried items greasy rather than crispy. The rested batter will have a slightly thicker appearance but should still be easily pourable.
Heat Oil to Proper Temperature
While the batter rests, fill a deep fryer or heavy pot with oil to a depth of 2-3 inches. Heat the oil over medium heat to 350°F, using a candy or deep-fry thermometer for accuracy. The oil is ready when it reaches this temperature and small bubbles begin to form around the thermometer bulb but haven't yet reached a rolling boil. This precise temperature ensures that your fried items cook evenly and develop that signature golden-brown crust.
Maintain the oil at 350°F throughout the frying process. If the temperature drops below 340°F, your items will absorb too much oil and become greasy. If it rises above 360°F, they'll brown too quickly on the outside while remaining raw on the inside. Keep a close eye on the thermometer and adjust the heat as needed to maintain this critical range.
Pro Tips For Making Bisquick Deep Fry Batter
- CHILL THE BATTER: Cold batter fries better—it stays together instead of spreading like a pancake in the oil. Pop the bowl in the fridge for 10-15 minutes before dipping, especially if your kitchen’s warmer than a summer picnic.
- USE A THERMOMETER: I learned this the hard way—guessing oil temp ruins everything. Aim for 350°F (175°C), and if you don’t have one, watch for tiny bubbles that rise steadily when a food thermometer isn’t handy.
- WHISK THE EGG WELL: Lumpy batter = greasy, uneven frying. Beat the egg with the milk first until it’s smoother than a jazz solo, then fold in the Bisquick. No one wants a clump in their fried chicken.
- SALT THE BATTER: Skip the salt in the mix? Add ½ teaspoon Diamond Crystal to the batter instead—it seasons the coating better than sprinkling after frying. Trust me, the first bite will taste like you actually tried.
Perfect pairings for this dish
Classic Dipping Sauces
Start with ranch dressing—my go-to for its creamy, tangy contrast to crispy fried foods. Mix 1 cup mayonnaise, ½ cup sour cream, 2 tbsp buttermilk, 1 tbsp fresh dill, and ½ tsp garlic powder.
For heat lovers, add 1 tsp hot sauce or ½ tsp cayenne pepper. Serve chilled in a small bowl with a sprinkle of paprika on top for extra flair. 🥄
Sweet & Tangy Options
Honey mustard sauce brings the perfect balance of sweet and zing. Whisk together ¼ cup Dijon mustard, ¼ cup honey, 2 tbsp apple cider vinegar, and 1 tbsp olive oil. Thin with 1-2 tbsp water if needed for dipping consistency. For a Southern twist, try sweet tea glaze by simmering ½ cup strong brewed tea with ¼ cup brown sugar and 1 tbsp lemon juice until syrupy. Drizzle over fried foods or serve as a dipping sauce. 🍯
Spicy Kick Variations
For a fiery pairing, spicy mayo delivers. Combine ½ cup mayonnaise, 1 tbsp sriracha, 1 tsp smoked paprika, and ½ tsp garlic powder. Adjust heat to taste—this sauce works especially well with crispy chicken tenders.
Another crowd-pleaser is buffalo sauce made with ½ cup hot sauce, 2 tbsp melted butter, and 1 tsp honey. Toss fried foods in this sauce right before serving for maximum flavor impact. 🌶️
Side Dish Pairings
Serve your fried creations alongside creamy coleslaw for a refreshing crunch. Toss 3 cups shredded cabbage with ½ cup mayo, 2 tbsp apple cider vinegar, 1 tbsp sugar, and ½ tsp celery seed.
For a heartier option, mashed potatoes with a dollop of sour cream and chives provide the perfect comfort-food balance. Both sides complement the crispy texture without overpowering the main dish. 🥔
Beverage Pairings
Pair your fried feast with iced sweet tea—its Southern charm enhances the flavors without competing. For a non-alcoholic option, sparkling lemonade with a splash of mint syrup cleanses the palate beautifully.
If you're serving a dinner crowd, a light lager like Bud Light or Miller Lite complements the crispy textures, while a dry Riesling adds a sophisticated touch to more elegant presentations. 🍺
Global Twist Pairings
Elevate your fried foods with mango-habanero salsa for a tropical kick. Blend 1 cup diced mango, ¼ cup red onion, 2 habanero peppers, juice of 1 lime, and 2 tbsp cilantro. Serve with plantain chips for a fusion-inspired spread.
For a Japanese-inspired pairing, try tonkatsu sauce—mix ¼ cup ketchup, 1 tbsp Worcestershire sauce, 1 tsp soy sauce, and ½ tsp sugar. Drizzle over fried chicken or fish for an umami-rich experience. 🌎
Nutrition facts
Frequently asked questions
Can I use this batter for air frying instead of deep frying?
Yes! For air frying, reduce the oil to 2 tablespoons and increase milk to 3/4 cup to create a thicker consistency. Preheat your air fryer to 375°F and spray lightly with oil before adding food. Cook for 8-10 minutes, shaking the basket halfway for even browning. The texture will be slightly different but still crispy and delicious.
Why did my fried food turn out greasy instead of crispy?
Greasy results usually mean the oil temperature was too low (below 340°F) or the batter was too thin. Always use a thermometer to maintain 350°F oil and let the batter rest for 10-15 minutes before using. If the batter is too runny, add 1 tablespoon more Bisquick at a time until it reaches a thick, spoonable consistency.
What's the best way to keep fried food crispy after frying?
Drain fried items on a wire rack or paper towels immediately after frying to remove excess oil. Place them on a baking sheet in a 200°F oven for 2-3 minutes to maintain crispiness if you need to hold them before serving. Avoid stacking hot food, as steam can make the coating soggy. For best results, serve immediately.
Can I make this batter ahead of time?
For best results, use the batter immediately after mixing. However, you can prepare it up to 24 hours ahead and refrigerate in an airtight container. Stir well before using and let it sit at room temperature for 10 minutes to reach proper consistency. The texture may be slightly thicker after refrigeration, so add 1 tablespoon milk if needed.
What's the best protein to use with this batter?
This batter works perfectly with chicken tenders, fish fillets, shrimp, or even vegetables like zucchini or sweet potatoes. For chicken, cut into 1-inch pieces and pat dry before dipping. For fish, use ½-inch thick fillets for even cooking. Vegetables should be cut into 1-inch chunks and blanched for 1 minute before battering to prevent sogginess.