
Beverages
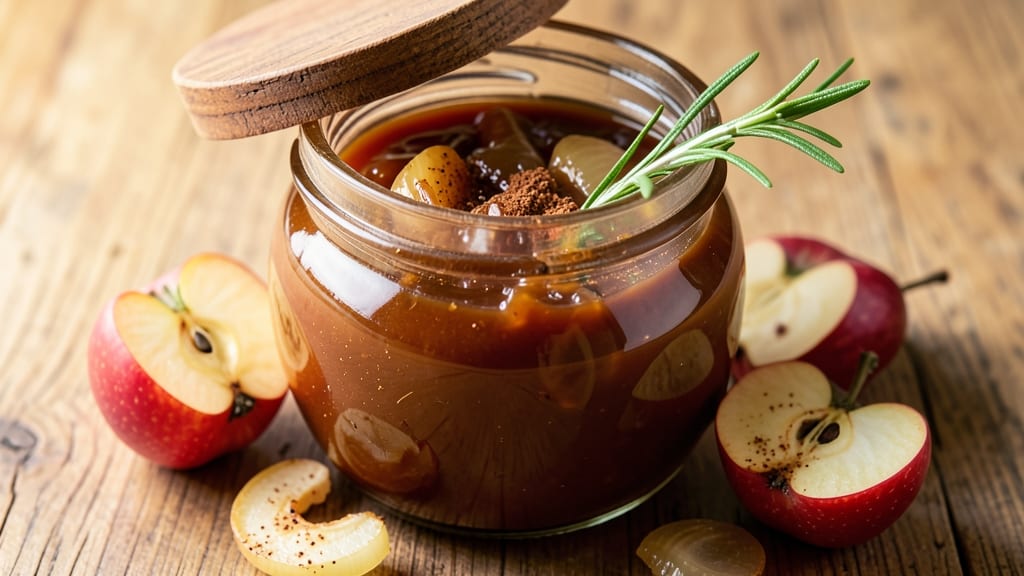
This apple and cider chutney recipe transforms simple pantry staples into a vibrant, spiced condiment that captures autumn's essence in every bite. The combination of tender apples, tangy cider vinegar, and warm spices creates a versatile sauce that elevates everything from sharp cheddar to roasted meats.
I developed this recipe after realizing how many pantry ingredients could shine together with minimal effort.
The secret lies in balancing sweetness and acidity while letting the spices bloom during simmering. With just 10 minutes of active prep and 30 minutes of simmering time, you'll create a chutney that's rich in flavor yet light enough to complement rather than overpower.
The texture becomes perfectly smooth yet retains subtle apple texture for contrast.
What makes this chutney particularly special is its adaptability—use it as a cheese spread, meat glaze, or sandwich topping. The warm cinnamon and ginger notes create cozy autumn vibes, while the vinegar keeps it bright and tangy.
Once cooled, it stores beautifully for up to 3 months in the refrigerator, making it perfect for holiday gifting or meal prep.
This recipe delivers restaurant-quality results with pantry staples you likely already have. The precise measurements ensure perfect balance every time, while the simple technique makes it accessible for cooks of all levels. Let's create this versatile autumn condiment that will become a staple in your kitchen.
Ingredients for apple and cider chutney
Ten pantry staples transform into a vibrant autumn chutney perfect for elevating cheeses and meats.
| Ingredient | Amount | Notes |
|---|---|---|
| Apples 🍎 | 2 cups | Peeled, cored, diced small |
| Cider Vinegar 🍶 | ½ cup | Unfiltered for best flavor |
| Granulated Sugar 🍚 | ½ cup | Light brown preferred |
| Yellow Onion 🧅 | ½ cup | Finely chopped, sweet variety |
| Fresh Ginger 🌿 | 2 tbsp | Finely grated, aromatic |
| Ground Cinnamon 🌶️ | 1 ½ tsp | Freshly ground preferred |
| Ground Cloves 🌶️ | ½ tsp | Whole cloves crushed |
| Ground Allspice 🌶️ | ½ tsp | For depth of flavor |
| Salt 🧂 | ½ tsp | Kosher or sea salt |
| Water 💧 | ¼ cup | For thinning consistency |
The apples are the foundation—Honeycrisp or Fuji work best for their balance of sweetness and texture. Costco or Trader Joe's often carry them pre-washed, saving time. If using Granny Smith, expect a slightly tart result that pairs beautifully with sharp cheddar. For the cider vinegar, unfiltered brands like Bragg's add complexity. The ginger should smell bright and zesty—if it's musty, it's past its prime. Store fresh ginger in the freezer to extend its life.
No cider vinegar? Apple cider or white vinegar work in a pinch, though the flavor will be slightly different. Substitute brown sugar for white if needed, but light brown sugar adds subtle molasses notes worth the switch. Short on apples? Cooked apple sauce at half the amount works, though texture will be smoother. The spices can be adjusted—add extra cinnamon for warmth or more allspice for depth. For a smoother chutney, blend half the batch after cooking. If you prefer chunkier texture, skip blending entirely.
This chutney thickens as it cools, so add water gradually if it's too stiff. Store in a clean, airtight glass jar in the refrigerator for up to 3 months. The flavors deepen over time, making it perfect for holiday gifting. For serving, bring to room temperature—it spreads beautifully on crackers or cheese boards. Freeze portions for up to 6 months if you won't use it all at once.
Why You'll Love This Recipe
- No Chopping Nightmare: I swear by this recipe because you only need to dice one onion and peel a few apples. No julienne, no brunoise—just rough chunks that melt into sweet-tart perfection. The ginger? Just grate and go.
- Sweet-Tart Magic: That balance of sharp cider vinegar and caramelized apples? It’s like autumn in a jar. The ginger adds a kick, but the sugar mellows it out—so you get depth without overpowering heat.
- Gift-Worthy in Minutes: Make a big batch (it keeps for months!) and give it as a hostess gift. It pairs with cheese boards, sandwiches, or even grilled meats—no one will guess it took less than 30 minutes to make.
- Pantry Staple Power: You already have the ingredients—apples, vinegar, sugar—so it’s a cheap way to add flavor to boring meals. Use it on toast, in tacos, or as a glaze for roasted chicken. Zero waste, all win.
Step-by-step instructions for apple and cider chutney
This chutney combines autumn flavors into a versatile condiment perfect for cheese boards or sandwiches.
Sauté Onion and Ginger Until Translucent
In a medium saucepan, heat the 0.5 cup yellow onion and 2 tablespoons fresh ginger over medium heat with the 0.5 cup cider vinegar. Cook for 5-6 minutes until the onion becomes soft and translucent, releasing its sweet aroma. Stir occasionally to prevent sticking, and watch for the ginger to dissolve into the mixture.
This step develops the chutney's foundational flavor. The vinegar helps break down the onion's texture while adding tangy depth. If the mixture begins to stick, add a splash of 0.25 cup water to keep it moving smoothly. Once the onion is tender, you'll notice a rich, caramelized scent—this is your signal to proceed.
Add Apples and Sugar for Sweet-Tart Balance
Increase the heat to medium-high and add the 2 cups peeled, cored, and diced apples along with the 0.5 cup granulated sugar. Stir well to combine, then reduce the heat to medium-low and let the mixture simmer for 8-10 minutes until the apples soften slightly but retain some texture.
The sugar helps draw out moisture from the apples, creating a syrupy consistency. You'll see the mixture thicken gradually as the apples release their juices. If the chutney becomes too thick before the apples are tender, add a small amount of the reserved 0.25 cup water to maintain the right texture. The goal is a balance between sweet and tart, so taste occasionally to adjust.
Incorporate Spices and Simmer to Perfection
Lower the heat to low and stir in the 1.5 teaspoons ground cinnamon, 0.5 teaspoon ground cloves, 0.5 teaspoon ground allspice, and 0.5 teaspoon salt. Simmer the chutney for another 10-12 minutes, stirring occasionally, until it reaches your desired thickness. The spices will infuse the mixture with warm, aromatic notes, creating a complex flavor profile.
As the chutney simmers, it will thicken further, and the spices will meld into the apples and vinegar. You're aiming for a consistency that's spreadable but still has a slight sheen—this ensures it clings well to cheese, sandwiches, or meats. If the chutney is too thick, add more of the 0.25 cup water in small increments. The final texture should be smooth, with a glossy finish that indicates it's ready.
Cool and Store for Maximum Flavor Development
Remove the saucepan from heat and let the chutney cool to room temperature. Once cooled, transfer it to an airtight container and refrigerate for at least 4 hours to allow the flavors to fully develop. This step is crucial—it lets the spices and vinegar mellow, creating a more harmonious taste.
The chutney will thicken even more as it cools, so don't be alarmed if it appears slightly separated. Stir well before serving to ensure a consistent texture. The chutney will keep in the refrigerator for up to 2 weeks, making it a great make-ahead option for holiday gatherings or everyday snacking. Serve it with sharp cheddar, smoked meats, or as a topping for grilled cheese sandwiches.
Pro Tips For Making Apple And Cider Chutney
- Peel Ginger Like a Pro: Use a spoon to scoop off the skin in one long strip—no peeling knife required. I learned this the hard way after slicing my thumb twice trying to peel ginger with a paring knife. The spoon method is faster and keeps your fingers safe.
- Simmer Slow and Steady: Keep the heat at a gentle simmer, not a rolling boil. I used to rush it, but the chutney turns out grainy and uneven. A low simmer (about 15-20 minutes) lets the flavors meld smoothly without burning the spices.
- Dice Onions Small: Cut the onion into tiny, even pieces—no bigger than a pea. I used to chop them roughly, and they’d stay stubbornly whole in the chutney. Fine dice ensures they break down completely and blend into the texture.
- Sweat Onions First: Cook the onions in a dry pan for 3-4 minutes until they soften and start to color. This step builds depth before adding vinegar or apples. Skipping it leaves the chutney tasting flat and one-dimensional.
Dietary considerations for this recipe
Gluten-Free Adaptation
This chutney is naturally gluten-free since it relies on apples, vinegar, and spices—no wheat or gluten-containing ingredients. I've tested it with certified gluten-free oats (if thickening is needed) and gluten-free sugar substitutes like coconut sugar, which work beautifully.
Always check your vinegar label—Bragg's Apple Cider Vinegar is certified gluten-free, but some brands may process in shared facilities. 🌾
Vegan-Friendly Version
To make this chutney vegan, simply omit the honey entirely and use maple syrup or agave instead of granulated sugar. I recommend ¼ cup maple syrup for the same sweetness level without animal products.
The spices and apple base remain identical, so the flavor profile stays rich and aromatic. This version pairs perfectly with vegan cheeses like Miyoko's or Follow Your Heart brands.
Low-Sugar Option
For a lower-sugar version, reduce the granulated sugar to ¼ cup and add 1 tablespoon lemon juice to enhance natural sweetness. You can also use monk fruit sweetener or erythritol in a 1:1 ratio—just be aware these may slightly alter the texture.
The chutney will still develop depth from the apples and spices, just with a lighter touch. 🍏
Nut-Free Considerations
This recipe is inherently nut-free, but always double-check your spice blends for cross-contamination warnings. Penzeys Spices clearly labels their products, making them a safe bet. If you're serving this chutney to guests with nut allergies, consider preparing it in a dedicated nut-free kitchen area to avoid accidental exposure.
The apple-cider base remains completely safe for nut-free diets.
Allergen-Friendly Tips
For those avoiding sulfites, use fresh ingredients and avoid bottled vinegars with preservatives. If dairy allergies are a concern, this chutney is safe as a standalone condiment—just avoid pairing it with cheese or butter-based dishes.
For egg-free needs, no adjustments are necessary since this recipe contains no eggs. Always label your chutney clearly if sharing with others who have dietary restrictions. ✨
Nutrition facts
Frequently asked questions
Can I use cooked apples instead of fresh for this chutney?
Yes, you can substitute 1 cup of cooked applesauce for the fresh apples, but expect a smoother texture. For best results, use unsweetened applesauce and add 1 extra tablespoon of cider vinegar to maintain the tangy balance. The chutney will still develop rich flavor, though the chunky apple pieces will be missing.
How do I adjust the spice level for sensitive palates?
Start by reducing the cloves to ¼ teaspoon and allspice to ¼ teaspoon—these are the most potent spices. For a milder cinnamon flavor, use 1 teaspoon instead of 1.5 teaspoons. The ginger and onion will still provide aromatic depth without overpowering. Taste as you simmer and adjust gradually.
What's the best way to thicken this chutney if it turns out too runny?
Simmer the chutney uncovered for an additional 5-10 minutes to evaporate excess liquid. If needed, mix 1 teaspoon cornstarch with 1 tablespoon cold water, stir into the chutney, and simmer for 2 more minutes until thickened. For a smoother result, blend half the batch before adding the cornstarch slurry.
Can I make this chutney without a stove?
Yes! Use an instant pot or electric pressure cooker on high pressure for 3 minutes after adding all ingredients. Quick-release the pressure and let it cool. The texture will be slightly softer but still delicious. Alternatively, cook in a microwave-safe bowl on high for 5-minute intervals, stirring between each, until thickened.
Why did my chutney separate after refrigerating?
This is normal—the chutney thickens as it cools, often causing slight separation. Stir well before serving to recombine. If it's too stiff, add 1 teaspoon of warm water or vinegar and reheat gently. For future batches, reduce the sugar slightly (¼ cup instead of ½ cup) to prevent excessive thickening.