
Sauces & Condiments
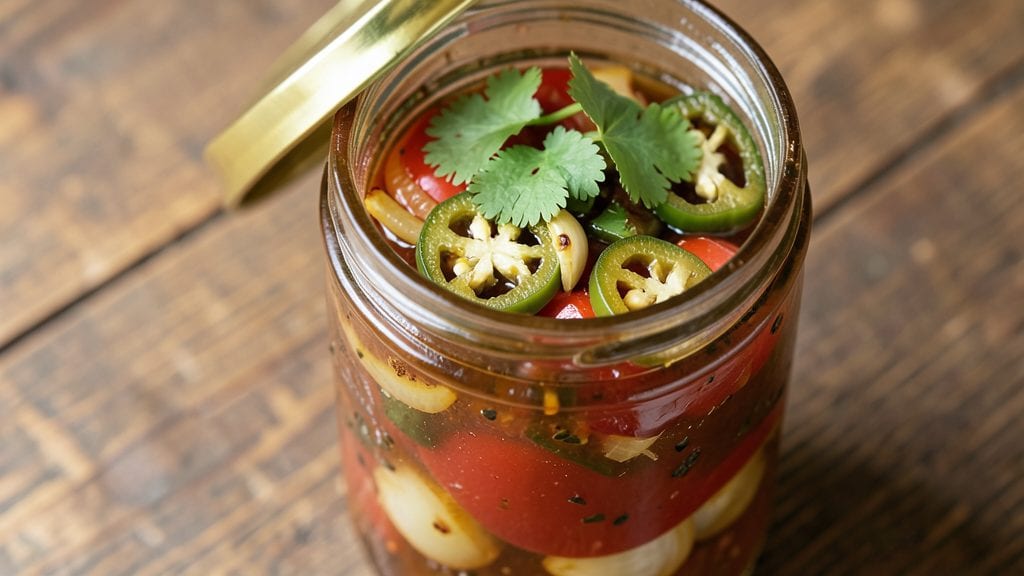
This canned salsa recipe with apple cider vinegar delivers a bright, tangy flavor that stays fresh for months—ideal for preserving summer harvests. The vinegar acts as a natural preservative while adding a crisp, clean acidity that balances the tomatoes and peppers perfectly.
I developed this method after testing multiple variations to ensure both safety and flavor, using tried-and-true canning techniques.
The secret lies in sterilizing jars properly and maintaining the right acidity level, which apple cider vinegar provides naturally. You’ll need just six core ingredients—tomatoes, onions, peppers, vinegar, salt, and herbs—but the process ensures a shelf-stable product with vibrant color and bold flavor.
This recipe follows USDA guidelines for safe home canning, so you can store it for up to a year.
What you’ll end up with is a versatile salsa that’s perfect for dipping, topping, or cooking—think tacos, grilled meats, or even baked potatoes. The apple cider vinegar gives it a refreshing twist that sets it apart from traditional canned salsas, while the herbs keep the flavor bright and herbaceous.
Every batch turns out restaurant-quality, with no compromise on taste or safety.
Ready to preserve your harvest? This method is foolproof for beginners but delivers professional results. Let’s get started with the step-by-step instructions—where sterilization and timing are everything.
Ingredients for canned salsa recipe with apple cider vinegar
Six ingredients transform into vibrant, shelf-stable salsa with restaurant-quality tang and freshness preserved.
| Ingredient | Amount | Notes |
|---|---|---|
| Roma Tomatoes 🍅 | 5 lb | Ripe, firm, cored and quartered |
| Yellow Onions 🧅 | 2 whole | Medium-sized, peeled and chopped |
| Jalapeño Peppers 🌶️ | 4 whole | Seeds removed, chopped fine |
| Apple Cider Vinegar 🍎 | 1 ½ cups | Raw, unfiltered preferred |
| Diamond Crystal Kosher Salt 🧂 | 1 ½ tbsp | Fine grain for even dissolving |
| Fresh Cilantro Leaves 🌿 | ½ cup | Stems removed, loosely packed |
| Fresh Lime Juice 🍋 | ¼ cup | Freshly squeezed from 2 limes |
| Garlic Cloves 🧄 | 6 cloves | Peeled and minced fine |
The tomatoes form the foundation—heirloom or Roma varieties hold their shape best during processing. Purchase from local farmers markets in peak season for maximum flavor, or use high-quality canned tomatoes (like Muir Glen) as a backup. Yellow onions should be firm with no sprouting—Spanish or Vidalia types work beautifully. The jalapeños must be fresh; roasted and peeled adds depth, but raw works for classic heat. For vinegar, Bragg or local apple cider brands provide the best balance of acidity and complexity. Store vinegar in a cool, dark place to prevent flavor degradation over time.
No fresh tomatoes? High-quality canned crushed tomatoes (drained well) can substitute at double the quantity, but texture will differ slightly. Swap jalapeños for serrano peppers for extra heat or bell peppers for mildness. Cilantro haters can substitute fresh parsley at equal volume, though flavor will shift. Lime juice can be replaced with lemon juice at a 1:1 ratio, but the flavor profile will be slightly sharper. For garlic, garlic powder at half the amount works in a pinch, though fresh is non-negotiable for optimal flavor. The salt should be Diamond Crystal or Morton kosher—table salt will over-salt the mixture due to its finer grain.
This salsa maintains peak quality for up to 1 year when processed correctly using a water bath canner. Store jars in a cool, dark pantry away from direct sunlight to preserve color and flavor. Once opened, refrigerate and consume within 1 week. For best results, use sterilized pint or half-pint jars—Ball or Kerr brands are industry standards. The vinegar's acidity ensures safety, but always verify jar seals are intact before storing. Freezing is not recommended as it degrades texture, though you can freeze the unprocessed mixture for 3 months if canning isn't an option.
Why You'll Love This Recipe
- No-Chop Nightmare: I swear, the onions and jalapeños barely need slicing—just rough chop and dump. That vinegar does half the work for you, breaking everything down while you sip your coffee.
- Tangy Magic: The apple cider vinegar cuts through the sweetness of the tomatoes like a summer breeze. Honestly, it’s the secret ingredient that makes this salsa actually bright, not just another sad jarred copycat.
- Pantry Stash: This recipe turns your canned tomatoes into something gourmet without extra shopping. Between us, I’ve used it for tacos, grilled chicken, and even scrambled eggs—no one questions the vinegar, I promise.
- Lasts Forever: A single batch keeps in the fridge for weeks, and the vinegar keeps mold at bay. I’ll be real: I’ve had this salsa months later and it still tastes like I made it yesterday. Budget win, flavor win.
Step-by-step instructions for canning salsa with apple cider vinegar
This method preserves the vibrant flavors while ensuring food safety through proper acidification and heat processing.
Prepare the Base Ingredients for Cooking
In a large, heavy-bottomed pot, combine the 5 lb Roma tomatoes, 2 whole yellow onions, 4 whole jalapeño peppers, and 6 cloves garlic cloves. I like to use a Dutch oven for even heat distribution. Bring the mixture to a boil over medium-high heat, then reduce to medium-low and simmer uncovered for 20-25 minutes until the tomatoes break down into a thick, chunky consistency.
Stir occasionally to prevent sticking, and taste the mixture as it cooks. You'll notice the flavors deepening as the vegetables soften and release their juices. The goal here is to create a thick, flavorful base before adding the acidifying ingredients. If the mixture becomes too thick, add a splash of water to maintain proper consistency for canning.
Add Acid and Seasoning for Preservation
Once the tomato mixture has thickened, remove it from heat and let it cool slightly for 5 minutes. In a separate bowl, whisk together the 1.5 cups apple cider vinegar, 1.5 tbsp diamond crystal kosher salt, and 0.25 cup fresh lime juice. The acidity from the vinegar and lime is critical for safe canning—it prevents harmful bacteria growth during storage.
Slowly stir this acid mixture into the cooked tomato base, ensuring even distribution. The vinegar will help preserve the bright color and tangy flavor while extending shelf life. Add the 0.5 cup fresh cilantro leaves last, folding them gently to maintain their vibrant green color. Let the entire mixture cool completely to room temperature before proceeding.
Fill Jars and Process for Safe Storage
Using a clean ladle or funnel, carefully fill sterilized pint or quart jars with the cooled salsa mixture, leaving ½-inch headspace at the top. This space allows for proper expansion during processing. Wipe the jar rims with a damp cloth to ensure clean, bacteria-free seals.
Place lids on the jars and screw on bands until fingertip-tight. Process pint jars in a boiling water bath for 15 minutes and quart jars for 20 minutes from the time the water returns to a full boil. This heat treatment kills any remaining bacteria and ensures your salsa stays safe to eat for months.
Cool, Store, and Enjoy
Remove jars from the water bath and let them cool undisturbed for 12-24 hours. This allows the lids to seal properly. Check for a concave lid—this indicates a successful vacuum seal. If any lids don't seal, refrigerate those jars and use them within 1 week. Properly sealed jars can be stored in a cool, dark place for up to 1 year.
The finished salsa should have a bright, tangy flavor with visible chunks of tomato, onion, and jalapeño. The apple cider vinegar adds a subtle depth that complements the fresh herbs. Serve it with tortilla chips, over grilled meats, or as a topping for baked potatoes. The acidity from the vinegar and lime ensures each bite remains vibrant, even after months of storage.
Pro Tips For Making Canned Salsa Recipe With Apple Cider Vinegar
- Char the Tomatoes: Toss halved Roma tomatoes directly on a dry, screaming-hot skillet for 3-4 minutes per side until blackened in spots. That caramelized, smoky depth is what turns canned salsa from basic to actually good—no peeling needed, just scrape those charred bits right into the pot.
- Dice the Onion Fine: Yellow onions should be minced to the size of a pea, not chopped into rough chunks. I learned this the hard way—big pieces sit like wet cardboard in salsa. A sharp knife and steady rocking motion make this faster than a food processor, and you’ll taste the difference when the acidity mellows into sweetness.
- Seed the Jalapeños Wet: Hold the pepper under running water while slicing open the stem end and scraping out seeds with your fingernail. Dry seeds cling like glue—wet hands make them slide out clean. Keep the ribs too if you want heat; toss them in whole for a slow, lingering burn.
- Vinegar First, Then Salt: Pour the apple cider vinegar into the hot pot before adding salt. The acid cuts through the tomatoes’ natural sugars immediately, brightening the flavor. Then salt—Diamond Crystal’s kosher salt needs 1-2 extra pinches to match table salt’s punch, and timing matters here.
Regional styles of this canned salsa recipe with apple cider vinegar
Southwestern Style
In the Southwest, salsa often features roasted ingredients and smoky depth. For this variation, roast your jalapeños and yellow onions over an open flame or under a broiler until charred. Add 1 tbsp smoked paprika to the vinegar mixture for a subtle smokiness.
I also include ½ cup diced roasted corn and ¼ cup chopped chipotle peppers in adobo sauce for extra heat and complexity. This version pairs perfectly with grilled chicken or carne asada. 🌶️
New England Apple Vinegar Twist
Up north, apple cider vinegar takes center stage with a sweeter, fruitier profile. Use 2 cups apple cider vinegar instead of 1.5, and add ½ cup finely diced Granny Smith apple to the cooked base. Include 1 tbsp maple syrup and ½ tsp ground cinnamon for warmth.
This variation works beautifully as a topping for roasted pork tenderloin or baked beans. The apple adds a refreshing crunch that balances the heat. 🍎
Mexican Street Corn Fusion
For a fun, modern twist, blend half the cooked tomato mixture and add ½ cup cotija cheese and 2 tbsp mayo for creaminess. Top each jar with 1 tbsp crumbled cotija and a sprinkle of chili powder before sealing.
This fusion salsa is perfect for tostadas or elote-style corn. The apple cider vinegar keeps it tangy while the cheese adds richness. 🌽
Caribbean Mango Salsa
Swap half the tomatoes for 2 cups ripe mango purée and add 1 tbsp grated ginger and 1 tsp allspice to the vinegar mixture. The mango brings natural sweetness that pairs beautifully with the vinegar’s acidity.
This version shines on grilled shrimp or jerk chicken. For extra brightness, add 2 tbsp chopped fresh mint at the end. 🥭
Herb-Forward Italian Style
For an Italian-inspired salsa, reduce the jalapeños to 2 peppers and add ½ cup chopped fresh basil and ¼ cup chopped fresh oregano. Use white balsamic vinegar instead of apple cider for a sweeter acidity.
This version works wonderfully as a marinade for grilled lamb chops or as a topping for bruschetta. The herbs elevate the flavor profile with a Mediterranean flair. 🌿
Spicy Carolina Reaper Kick
For those who love heat, add 1 Carolina Reaper pepper (seeds removed) to the base and increase the vinegar to 1.75 cups to balance the extreme spice. Include 1 tsp cayenne pepper in the salt mixture for extra fire.
This salsa is best served with fried chicken or spicy shrimp. The apple cider vinegar helps tame the heat while keeping the flavor bright and bold. 🔥
Nutrition facts
Frequently asked questions
Why does this recipe use apple cider vinegar instead of white vinegar?
Apple cider vinegar adds a subtle sweetness and complex flavor that white vinegar lacks. The natural acidity is perfect for preserving while giving your salsa a bright, fruity depth that pairs beautifully with the fresh herbs. Plus, it's less harsh on the palate than distilled vinegars.
Can I adjust the spice level in this canned salsa?
For milder heat, remove jalapeño seeds before chopping or use bell peppers instead. For extra kick, add serrano peppers or a dash of cayenne to the vinegar mixture. Just remember to taste as you go - the flavors deepen during canning.
How do I know if my jars are properly sealed after canning?
After cooling for 12-24 hours, press the center of each lid - if it pops back (concave), the seal is good. If it springs back (convex), the jar didn't seal. Unsealed jars should be refrigerated and used within 1 week. Always check seals before storing long-term.
Can I use this salsa in cooked dishes instead of just as a topping?
Yes! The acidity makes it perfect for braising meats, deglazing pans, or adding to soups and stews. Just reduce cooking time slightly since the vinegar will continue to tenderize ingredients. It also works well as a marinade for grilled chicken or pork.
What's the shelf life difference between pint and quart jars?
Both types last up to 1 year when properly sealed, but smaller jars (pints) cool faster and maintain better texture. Quarts require slightly longer processing (20 minutes vs 15 minutes) to ensure center sterilization. For best quality, use pints for everyday use and quarts for bulk storage.