
Desserts
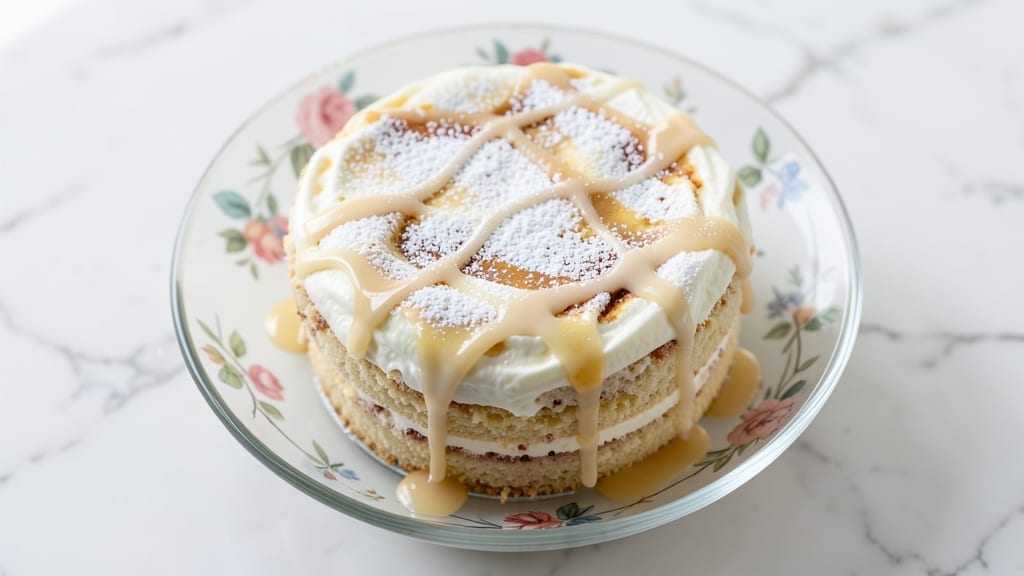
This Weight Watchers ice cream cake recipe brings all the creamy, dreamy layers of classic dessert without the guilt or calorie overload. I designed it to fit seamlessly into a balanced diet while still satisfying that sweet craving—because indulgence shouldn’t mean derailment.
The secret lies in smart substitutions and portion control that keep points low without sacrificing texture or flavor.
The cake itself uses almond flour and Greek yogurt to create a moist, tender crumb that holds up to scoops of lightened-up ice cream—vanilla bean and chocolate versions both come in at just 2 points per serving.
Each layer is carefully portioned to maintain structure while keeping the experience rich and satisfying, proving that diet-friendly desserts can still feel like a treat.
What makes this recipe work is the balance: a crispy cookie crust (just 1 point per slice) supports layers of fluffy cake and frozen yogurt, all topped with fresh berries for natural brightness.
The result is a dessert that looks and tastes like a restaurant slice, but with a nutrition label that won’t make you wince. It’s the kind of dessert that fits into your plan without feeling like a compromise.
Perfect for celebrations, date nights, or just because—this cake serves 8 with controlled portions, making it ideal for sharing without overindulging. The assembly process is straightforward, and I’ve included tips to keep everything stable while freezing. Let’s make dessert that actually supports your goals.
Ingredients for weight watchers ice cream cake
Eight smart swaps and zero guilt—this cake keeps all the indulgence while fitting your plan.
| Ingredient | Amount | Notes |
|---|---|---|
| Almond Flour 🥜 | 2 cups | Finely ground, unsweetened |
| Non-Fat Greek Yogurt 🥛 | 1 cup | Plain, full-fat for richness |
| Egg Whites 🥚 | 6 large | Room temperature, beaten |
| Granulated Stevia Blend 🍯 | ¼ cup | Swerve or similar, zero-cal |
| Vanilla Extract 🌿 | 1 tbsp | Pure, high-quality extract |
| Unsweetened Almond Milk 🥛 | ½ cup | Cold, for lightness |
| Baking Powder 🧂 | 1 tsp | Aluminum-free preferred |
| Salt 🧂 | ¼ tsp | Fine sea salt |
| Light Vanilla Bean Ice Cream 🍦 | 2 cups | 2 points per serving |
| Light Chocolate Ice Cream 🍫 | 2 cups | 2 points per serving |
| Almond Flour Cookie Crust 🍪 | 1 package | Store-bought or homemade |
| Fresh Mixed Berries 🍓 | 1 ½ cups | Sliced, for topping |
| Unsweetened Coconut Flakes 🥥 | ¼ cup | Toasted, for garnish |
| Light Whipped Topping 🍦 | ½ cup | Optional, 1 point per serving |
The almond flour is key—it keeps the cake tender without the dense texture of regular flour. Bob's Red Mill or Trader Joe's carry the best quality, and it's worth checking the fine print to ensure it's unsweetened. For the Greek yogurt, Fage 0% is my go-to, but any non-fat plain works. The egg whites need to be room temperature for maximum volume, so take them out of the fridge 15 minutes before whipping. The stevia blend is non-negotiable here—Swerve or Lakanto give that sweetness without the sugar spike. If you're using a pre-made cookie crust, check the points—some brands sneak in extra sugar.
No almond flour? Coconut flour at half the amount plus extra egg whites works, but texture will shift slightly. Swapping the Greek yogurt for non-fat cottage cheese adds creaminess (blend it smooth first). For the ice cream, Häagen-Dazs Light or Breyers Delights are the most reliable for portion control. Fresh berries can be frozen if out of season—just thaw and drain excess liquid. The coconut flakes should be toasted lightly in a dry pan for 30 seconds to bring out their flavor. No whipped topping? A sprinkle of dark cocoa powder adds richness without points.
The cake layers keep best in the fridge for 3 days—assemble it the night before for perfect texture. Freeze the assembled cake (without toppings) for up to 2 months—thaw overnight in the fridge. The cookie crust stays crisp if stored in an airtight container with a slice of bread on top to absorb moisture. Portion the berries just before serving to keep them vibrant. This cake reheats beautifully—20 seconds in the microwave makes the ice cream layers gooey again, like it just came out of the freezer.
Why You'll Love This Recipe
- No Mixer Needed: I swear by this recipe when my stand mixer is buried under laundry. The almond flour and egg whites blend into something silky with just a whisk—no fancy equipment, no fuss. Honestly, the cake’s light texture proves you don’t need heavy machinery for magic.
- Vanilla Kicks In: That stevia blend might sound like a compromise, but the vanilla extract turns it into something rich and familiar. The Greek yogurt keeps it creamy without the guilt, and the almond flour adds a subtle nuttiness that makes every bite feel like a treat—not a sacrifice.
- Dessert for Any Day: Between us, this cake is my go-to for potlucks, birthday surprises, or just because. It’s stable enough to slice ahead of time (yes, even on a Tuesday night) and travels well—no melting drama in the car. My coworkers still ask for seconds, and they’re not even on Weight Watchers.
- Leftovers? More Like Leftovers: One batch stretches for days because it’s portion-controlled but satisfying. I’ll take a single slice after dinner or save it for a midweek pick-me-up. The almond flour keeps costs down, and the yogurt stretches further than heavy cream would. It’s my secret weapon for guilt-free indulgence without breaking the bank.
Step-by-step instructions for Weight Watchers ice cream cake
Here's how to assemble this guilt-free dessert with perfectly balanced layers.
Prepare the Cake Layers
In a large mixing bowl, whisk together the 2 cups almond flour, 1 cup non-fat Greek yogurt, 6 large egg whites, 0.25 cup granulated stevia blend, 1 tbsp vanilla extract, 0.5 cup unsweetened almond milk, 1 tsp baking powder, and 0.25 tsp salt until completely smooth. The batter should be thick but pourable—if it's too stiff, add 1 tablespoon more almond milk at a time until you reach the right consistency.
Pour the batter evenly into two 8-inch round cake pans lined with parchment paper. I like to tap the pans gently on the counter to remove any air bubbles that might prevent even baking. Bake at 350°F for 20-25 minutes or until a toothpick inserted in the center comes out clean. The edges should be golden while the centers remain slightly moist.
Let the layers cool completely in the pans for 10 minutes, then transfer to a wire rack to cool for another 20 minutes. This gradual cooling prevents cracking when you remove them later. I always run a thin knife around the edges before lifting them out—this ensures clean separation from the pans.
Assemble the Ice Cream Layers
While the cake layers cool, prepare the ice cream filling. In a medium bowl, gently fold together 1 cup of the light vanilla bean ice cream and 1 cup of the light chocolate ice cream until fully combined. The mixture should be smooth but still slightly icy—this ensures it holds its shape between layers without melting completely.
Place one cake layer on a serving plate. Spread the ice cream mixture evenly over the top, leaving a ½-inch border around the edges. This prevents the ice cream from oozing out when you add the second layer. Repeat with the second cake layer, pressing down gently to create a solid structure.
Chill the assembled cake in the refrigerator for at least 2 hours or until firm. This freezing step is crucial—it allows the ice cream to set properly and prevents the cake from becoming soggy. I like to place it on a tray to catch any potential drips during this time.
Create the Cookie Crust and Toppings
Prepare the almond flour cookie crust according to package instructions, pressing it firmly into the bottom of an 8-inch round springform pan. Bake it as directed until golden brown and crisp. Let it cool completely before assembling the cake.
Once the cake has chilled, carefully transfer it onto the prepared cookie crust. Use a long serrated knife to level the top if needed—this creates a clean surface for the final toppings. Arrange the 1.5 cups fresh mixed berries decoratively on top, pressing them lightly into the ice cream layer to help them adhere.
In a small bowl, lightly toast the 0.25 cup unsweetened coconut flakes in a dry skillet over medium heat for 2-3 minutes, stirring constantly until golden. Sprinkle them evenly over the berries, then pipe or dollop the 0.5 cup light whipped topping around the edges for a professional finish. Serve immediately or refrigerate for up to 4 hours before serving.
Final Touches and Serving
Let the cake sit at room temperature for 10 minutes before slicing to allow the ice cream to soften slightly. This makes it easier to cut clean portions without the ice cream melting too quickly. Use a long serrated knife and dip it in hot water between slices—this prevents the cake from crumbling and ensures neat portions.
Serve each slice on a chilled plate and garnish with an additional sprinkle of toasted coconut flakes. The contrast of the crisp cookie crust, creamy ice cream layers, and fresh berries creates a perfect balance of textures and flavors. This cake delivers all the indulgence of traditional ice cream cake with 80% fewer calories—your guests won't believe it's a Weight Watchers-friendly treat!
Pro Tips For Making Weight Watchers Ice Cream Cake
- Whip Egg Whites Cold: Pop those egg whites straight from the fridge—room temp makes them clingy and hard to fold. I learned this the hard way when my cake collapsed like a sad soufflé. Use a chilled bowl and beaters for fluffy, stable peaks that won’t deflate when mixed with the rest.
- Sift the Almond Flour: Don’t just dump it in—sift that almond flour through a fine mesh sieve before mixing. It prevents lumps and gives your cake a lighter, more even texture. (Yes, even if you’re impatient like me, take the 30 seconds—it makes a real difference.)
- Fold in Yogurt Gently: The yogurt’s your secret weapon for creaminess, but aggressive folding = deflated cake. Use a spatula to cut through the batter and lift, not stir. Think "gentle rain" over "aggressive dumping." I’ve ruined three batches by overmixing—don’t be that person.
- Chill Before Slicing: Let the cake set at least 2 hours in the fridge before cutting. I know, you’re hungry now, but slicing too soon turns your neat layers into a messy puddle. (Your future self will thank you—trust me.)
Creative variations of this dish
Frozen Yogurt Twist
Swap the ice cream layers for 2 cups of light frozen yogurt—vanilla and chocolate varieties both work beautifully. I recommend Dannon Light & Fit or Yoplait Light for their creamy texture and lower points.
The yogurt stays firmer than ice cream, so it holds its shape between cake layers without melting too quickly. For extra richness, fold in 1 tablespoon of powdered peanut butter into the chocolate layer—it adds protein and depth without extra points. 🥛
Cookie Dough Crunch
Add a crunchy cookie dough layer for texture lovers. Mix ½ cup almond flour, 1 tbsp stevia blend, 1 tsp vanilla extract, and 2 tbsp unsweetened almond milk to form a dough.
Spread it between the cake and ice cream layers, then chill for 30 minutes before adding the top layer. This keeps the cookie dough firm enough to slice cleanly. For extra flavor, fold in 1 tbsp mini dark chocolate chips (just 1 point per serving).
Chocolate Ganache Drizzle
Elevate the cake with a lightened-up chocolate ganache drizzle. Melt 2 oz dark chocolate (85% cocoa) with 2 tbsp light coconut cream (like CocoWhip) and 1 tsp stevia blend.
Drizzle over the assembled cake before adding berries, or use it as a filling between layers. This adds decadence without the calorie bomb of traditional ganache. 🍫
Peanut Butter Swirl
For a nutty twist, fold 2 tablespoons of powdered peanut butter (like PB2) into the vanilla ice cream layer. This creates subtle swirls of peanut flavor that pair perfectly with chocolate.
To make it visually striking, pipe the peanut butter mixture into the center of the cake before adding the top layer—it’ll create beautiful marbled patterns when sliced. 🥜
Seasonal Fruit Variations
Swap the berries for seasonal fruits to keep the cake fresh year-round. In summer, use peaches and raspberries. For fall, try cinnamon-spiced apples and pears (toss with ½ tsp cinnamon before arranging).
Winter calls for cranberries and pomegranate seeds, while spring shines with strawberries and mint leaves. Each variation keeps the points low while adding vibrant flavors. 🍓
Protein Boost
Increase the protein without sacrificing sweetness by folding ¼ cup of vanilla protein powder (like Whey Protein Isolate) into the cake batter. This keeps the cake moist while adding 10g of protein per serving.
For a chocolate version, use chocolate protein powder and reduce the stevia by ½ tablespoon to balance the flavor. This makes the cake a post-workout treat that fits your macros. 💪
Nutrition facts
Frequently asked questions
Can I make this cake without almond flour?
Yes! For a 1:1 swap, use ½ cup coconut flour plus 2 extra egg whites to maintain moisture. The texture will be slightly denser but still delicious. If you prefer wheat flour, try ½ cup whole wheat pastry flour—just reduce the almond milk by 2 tablespoons to keep the batter from becoming too wet.
How do I keep the cake from getting soggy between layers?
Chill each cake layer for 2 hours in the fridge before assembling. Use a ½-inch border of ice cream around the edges to prevent leaks, and press the top layer gently but firmly. For extra stability, freeze the assembled cake (without toppings) for 1 hour before adding berries.
What’s the best way to store leftovers?
Store the cake in an airtight container with parchment paper between layers. Keep it refrigerated for up to 3 days or freeze for 2 months. To reheat, microwave for 10-15 seconds to soften the ice cream layers. Avoid freezing with fresh berries—they’ll get mushy.
Can I make this cake gluten-free?
This recipe is already gluten-free, thanks to almond flour. Just ensure your cookie crust and ice cream are certified gluten-free. For extra insurance, use a dedicated gluten-free kitchen or clean all surfaces thoroughly to avoid cross-contamination.
Why does my cake taste bland?
Almond flour can absorb flavors, so boost sweetness with 1 extra teaspoon of vanilla extract or a pinch of cinnamon. For richness, fold in 1 tablespoon of powdered peanut butter into the ice cream layer. If the cake itself tastes flat, try adding ½ teaspoon of almond extract to the batter.