
Desserts
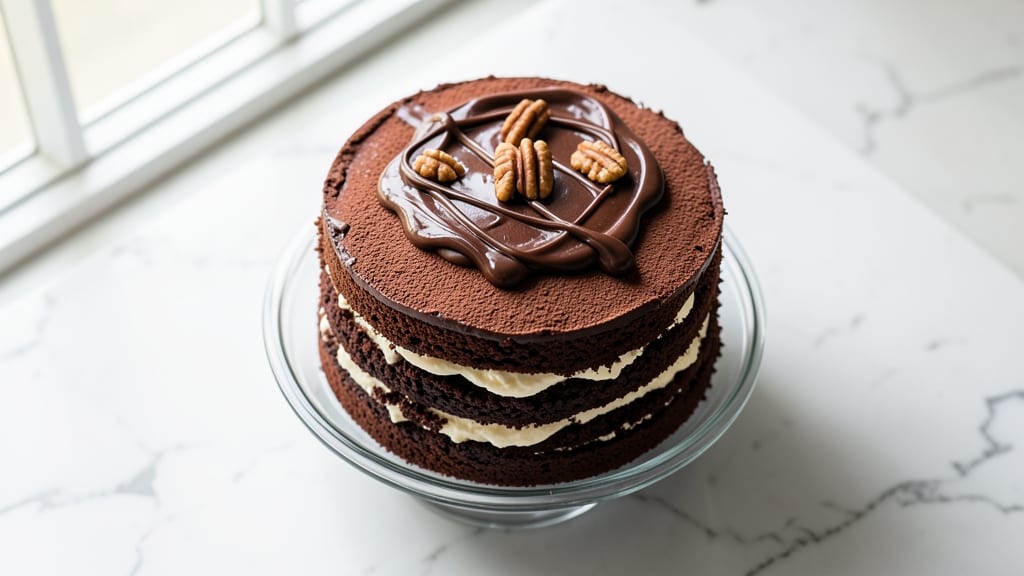
Creating a Kraft ice cream cake that rivals bakery favorites doesn’t require baking—just layering, chilling, and a few clever shortcuts. This no-bake dessert combines rich brownie bases, creamy ice cream fillings, and store-bought mixes to deliver decadence with minimal effort.
The secret lies in precise assembly and proper chilling times to ensure clean slices every time.
This recipe leverages Kraft’s chocolate pudding mix for a foolproof, velvety filling and optional cake mix layers for structure. With just 30 minutes of active prep and 4 hours of chilling, you’ll achieve professional results without the fuss.
The brownie base gets baked to a perfect firmness, while the ice cream layers stay cool and creamy—no melting disasters here.
By the time you’re done, you’ll have a towering dessert with three distinct layers: fudgy brownie, rich chocolate pudding, and velvety ice cream. The texture contrast—crisp edges, creamy centers, and smooth ice cream—makes each bite unforgettable. Top with whipped cream, chocolate shavings, or fresh berries for extra flair.
Perfect for celebrations or spontaneous cravings, this cake requires no special skills—just patience and a few pantry staples. Let’s build a dessert that tastes like a bakery masterpiece without the wait.
Ingredients for kraft ice cream cake
Pantry staples and a few clever shortcuts make this no-bake cake taste like a bakery masterpiece.
| Ingredient | Amount | Notes |
|---|---|---|
| Kraft Chocolate Cake Mix 🍫 | 1 box | Unprepared, for brownie base |
| Kraft Chocolate Pudding Mix 🍫 | 1 box | Instant, for filling layer |
| Unsalted Butter 🧈 | 1 cup | Softened, for brownie batter |
| Granulated Sugar 🍚 | 1 cup | For brownie batter |
| Large Eggs 🥚 | 2 whole | Room temperature, for brownie |
| Vanilla Ice Cream 🍦 | 2 cups | Scoopable, not melted |
| Heavy Whipping Cream 🥛 | 1 cup | Cold, for pudding layer |
| Milk 🥛 | 1 ½ cups | Whole milk preferred |
| All-Purpose Flour 🌾 | ½ cup | For brownie texture |
| Baking Powder 🍞 | 1 tsp | For brownie lift |
| Vanilla Extract 🍯 | 1 tsp | Pure extract preferred |
| Salt 🧂 | ¼ tsp | Fine sea salt |
| Chocolate Chips 🍫 | 1 cup | Semi-sweet, for brownie |
| Unsweetened Cocoa Powder 🍫 | ¼ cup | Dutch-processed preferred |
| Whipped Cream 🥛 | 1 cup | Stiff peaks, for topping |
The Kraft cake mix and pudding mix are the backbone here—boxed mixes keep things foolproof while still delivering rich flavor. Grab the chocolate versions from any grocery store (the yellow boxes with the iconic logo). The ice cream matters too—store-brand vanilla works fine, but premium brands like Breyers or Ben & Jerry's add that next-level creaminess. For the butter, Land O'Lakes or Crisco are solid choices, but European-style unsalted (like Plugrá) gives the brownie extra richness. Pre-measure everything before you start—this isn’t a recipe for guesswork.
No cake mix? Homemade brownie batter works—just use the same ratio of butter, sugar, eggs, and cocoa. Running short on ice cream? Vanilla pudding (prepared with milk) can replace half the ice cream layers, though texture will be slightly denser. The whipping cream for the pudding layer can be swapped for heavy cream if you’re in a pinch, but Cool Whip won’t give the same silky finish. For the brownie, Dutch-processed cocoa (like Hershey’s Special Dark) cuts bitterness, but regular cocoa works too. Need a shortcut? Pre-made brownie mix (like Betty Crocker) saves time—just bake it according to package instructions.
This cake needs time—4 hours minimum in the fridge for clean slices. Wrap the assembled cake tightly in plastic wrap before chilling to prevent freezer burn if storing longer. Leftovers keep for 3 days in the fridge, but the ice cream layers soften after day 2. For make-ahead prep, assemble the cake (without toppings) up to 24 hours ahead—add whipped cream and garnishes right before serving. The brownie base stays firm for 5 days if stored separately, so you can prep ahead and build the cake later.
Why You'll Love This Recipe
- Box Mix Magic: I swear, opening those two little boxes is like unlocking a shortcut to dessert heaven. Mix, bake, layer—no measuring cups, no guesswork, just pure convenience with ingredients I already have.
- Pudding-Packed Richness: That pudding mix isn’t just filling—it’s the secret weapon. The fudgy, creamy swirl cuts through the cake’s density, giving you that perfect balance of texture and decadence in every bite.
- Party in a Pan: Birthdays, potlucks, or just because—this cake travels well, serves a crowd, and still tastes like you slaved over it. (Between us, no one will ever know it’s basically a box mix hack.)
- Budget Dessert Win: For under $5, you get a showstopper that feels gourmet. The butter and sugar boost the box mix to next-level flavor, and leftovers? They disappear faster than my willpower on a bad day.
Step-by-step instructions for Kraft ice cream cake recipe
Here's how to assemble this showstopper without turning on the oven.
Prepare the Brownie Base
In a large mixing bowl, combine the 1 box Kraft Chocolate Cake Mix, 0.5 cup All-Purpose Flour, 1 tsp Baking Powder, and 0.25 tsp Salt. Stir these dry ingredients together until fully blended—this ensures even distribution throughout the batter. In a separate bowl, cream together the 1 cup Unsalted Butter and 1 cup Granulated Sugar until light and fluffy. This should take about 3-4 minutes with an electric mixer.
Add the 2 whole Large Eggs, one at a time, mixing well after each addition. Then stir in the 1 tsp Vanilla Extract and the 0.25 cup Unsweetened Cocoa Powder. Gradually pour the dry ingredients into the wet mixture while stirring on low speed until just combined. Fold in the 1 cup Chocolate Chips by hand using a spatula—this prevents overmixing that could make the base dense. Spread the batter evenly into an 8x8-inch baking dish lined with parchment paper.
Assemble the Pudding Layer
In a medium saucepan, combine the 1 cup Heavy Whipping Cream, 1.5 cups Milk, and the 1 box Kraft Chocolate Pudding Mix. Cook over medium heat, stirring constantly with a whisk, until the mixture thickens to a pudding-like consistency—this should take about 3-5 minutes. You'll know it's ready when it coats the back of a spoon and leaves a slight trail.
Remove the pan from heat and stir in the 1 tsp Vanilla Extract. Let the pudding mixture cool slightly, then spread it evenly over the brownie base, pressing down gently with a spatula to create a smooth layer. This step is crucial for preventing a watery filling later—you want the pudding to adhere well to the brownie but still remain soft enough to scoop.
Freeze the Layers
Cover the assembled cake with plastic wrap and refrigerate for at least 4 hours, or until the pudding layer is completely set. I like to place it in the freezer for the final 2 hours to ensure the ice cream layer stays frozen when added. This chilling step is non-negotiable—it prevents the ice cream from melting too quickly and keeps the entire structure stable.
Once fully chilled, remove the cake from the refrigerator and let it sit at room temperature for about 10 minutes. This brief warm-up makes it easier to slice cleanly. Scoop the 2 cups Vanilla Ice Cream directly onto the pudding layer, spreading it evenly with a spatula. Press down gently to help the ice cream adhere to the pudding—this creates a unified texture rather than distinct layers.
Add the Whipped Cream Topping
In a chilled mixing bowl, whip the 1 cup Whipped Cream to stiff peaks using an electric mixer. You want the whipped cream to hold its shape when spooned—it should be thick enough to create a decorative border but still light enough to eat. Spread the whipped cream evenly over the ice cream layer, creating a smooth surface.
Use a spatula to create decorative swirls or borders around the edges of the cake. This not only looks impressive but also helps contain the ice cream when slicing. Return the cake to the refrigerator for at least 30 minutes before serving to allow the whipped cream to set slightly. This ensures clean slices and prevents the cake from collapsing when cut.
Chill and Serve
Let the cake chill in the refrigerator for a minimum of 2 hours before slicing. This extended chilling time allows all the layers to fully meld together, creating a cohesive texture rather than distinct sections. When ready to serve, run a warm knife through the parchment paper along the sides of the cake to loosen it, then slice into 8 equal portions.
Serve immediately with additional whipped cream and chocolate shavings if desired. The cake should have a rich, fudgy brownie base, a creamy pudding layer, and a cool, velvety ice cream center—each bite delivers a perfect balance of textures and flavors. Real talk: this no-bake dessert is so impressive, guests will never guess it's made with boxed mixes!
Pro Tips For Making Kraft Ice Cream Cake
- Whip Butter First: DESCRIPTION: Take 30 seconds to beat the butter and sugar together until it’s pale and fluffy before adding the cake mix—this lightens the batter and makes the final cake less dense. I learned this the hard way after making a cake so heavy it sank like a brick.
- Don’t Skip the Chill: DESCRIPTION: Let the cake layers cool completely (15–20 minutes) before frosting, or the buttercream will melt into a soupy mess. I used to rush this, and the frosting always slid off like a sad puddle.
- Mix Pudding Dry: DESCRIPTION: Whisk the pudding mix into the dry cake crumbs before adding milk—this prevents clumps and ensures a smooth, creamy texture. My grandmother swore by this, and she was right: the filling stays silky, not grainy.
- Use Cold Eggs: DESCRIPTION: Pull eggs straight from the fridge and let them sit in the bowl for 5 minutes before cracking—this keeps the batter from getting too warm and activating the baking powder too fast. I was skeptical until I tried it: the cake rises higher and stays moister.
Storing and reheating this kraft ice cream cake
Refrigerator Storage
Once assembled, wrap your Kraft ice cream cake tightly in plastic wrap and place it in the refrigerator for at least 4 hours before serving. The 40°F or below temperature keeps the ice cream layers frozen and the pudding layer firm.
I like to store it in an airtight container with a lid to prevent moisture absorption and freezer burn. This setup ensures clean slices for up to 3 days—just remember to add toppings like whipped cream or chocolate shavings right before serving. 🧊
Freezer Prep for Later
For longer storage, assemble the cake (without toppings) and wrap it completely in plastic wrap followed by aluminum foil. Place it in the freezer for up to 1 month. When ready to serve, thaw in the refrigerator overnight.
The brownie base stays firm, while the ice cream and pudding layers soften slightly—ideal for a no-bake dessert that’s ready whenever you need it. 🥶
Reheating (If Needed)
If your cake sits out too long and the ice cream softens, return it to the refrigerator for 30-60 minutes to firm up. For a quick fix, place the cake in the freezer for 10-15 minutes to restore crispness.
Avoid microwaving—it’ll turn the ice cream into a sad, melted puddle. The brownie base can handle slight warming, but the ice cream layers are best enjoyed cold. 🔥
Serving After Storage
Before slicing, run a warm knife through the parchment paper along the sides of the cake to loosen it. This trick ensures clean, even slices every time. Let the cake sit at room temperature for 5-10 minutes to soften slightly, making it easier to cut.
Serve with fresh toppings like chocolate shavings or raspberries to elevate the presentation. 🍫
Make-Ahead Tips
Prep the brownie base up to 5 days ahead and store it separately in an airtight container at room temperature. Assemble the cake (without toppings) 24 hours before serving—this gives the layers time to meld without melting.
Add whipped cream and garnishes just before serving to keep them fresh. This strategy saves time and ensures a bakery-worthy dessert with minimal last-minute effort. ⏰
Topping Preservation
Store whipped cream toppings separately in an airtight container for up to 2 days in the refrigerator. Keep chocolate shavings in a cool, dry place (like the fridge) to prevent melting.
Fresh berries should be added just before serving to maintain their texture. This way, your cake stays fresh-tasting and visually stunning until the last slice. 🍓
Nutrition facts
Frequently asked questions
Can I make this cake without Kraft mixes?
The Kraft mixes are shortcuts, but you can easily swap them. For the brownie base, use a homemade recipe with 1 cup butter, 1.5 cups sugar, 2 eggs, 0.5 cup cocoa powder, and 1 cup flour. For the pudding layer, prepare 1 cup chocolate pudding from scratch with 2 tbsp cornstarch, 1 cup milk, and 1 cup heavy cream. The texture may vary slightly, but the result will still be delicious!
Why does my ice cream layer melt too quickly?
This usually happens if the cake isn’t chilled long enough. The 4-hour minimum in the fridge is critical—skip it, and the ice cream will soften too fast. For extra stability, freeze the cake for the last 2 hours before adding ice cream. Also, use a high-quality ice cream brand that stays firm longer. If it melts anyway, return the cake to the freezer for 10-15 minutes before serving.
Can I use a different flavor of ice cream?
Yes! While vanilla pairs perfectly with the chocolate layers, you can experiment with flavors like chocolate, strawberry, or even mint chip. Just adjust the pudding mix to complement the ice cream—use vanilla pudding mix for chocolate ice cream, or swap the chocolate cake mix for a vanilla one if using chocolate ice cream. The key is balancing flavors so no single layer overpowers the others.
How do I prevent the cake from collapsing when sliced?
Collapse happens when layers aren’t properly set or the cake isn’t chilled enough. Always let the cake rest in the fridge for the full 4 hours before adding ice cream, and chill again for 2 hours after assembly. Use a warm knife to slice—it glides through cleanly without tearing. For extra support, press the ice cream layer firmly into the pudding before chilling. Patience is key!
Is this cake gluten-free or vegan?
This classic recipe isn’t gluten-free or vegan, but you can adapt it! For gluten-free, use a GF cake mix and ensure your pudding mix is certified GF. For vegan, replace the butter with coconut oil, use flax eggs, and swap dairy milk for almond milk. The Kraft mixes don’t have vegan options, so you’d need to make pudding from scratch with aquafaba or silken tofu. The texture will differ, but it’s doable with the right substitutions!