
Side Dishes
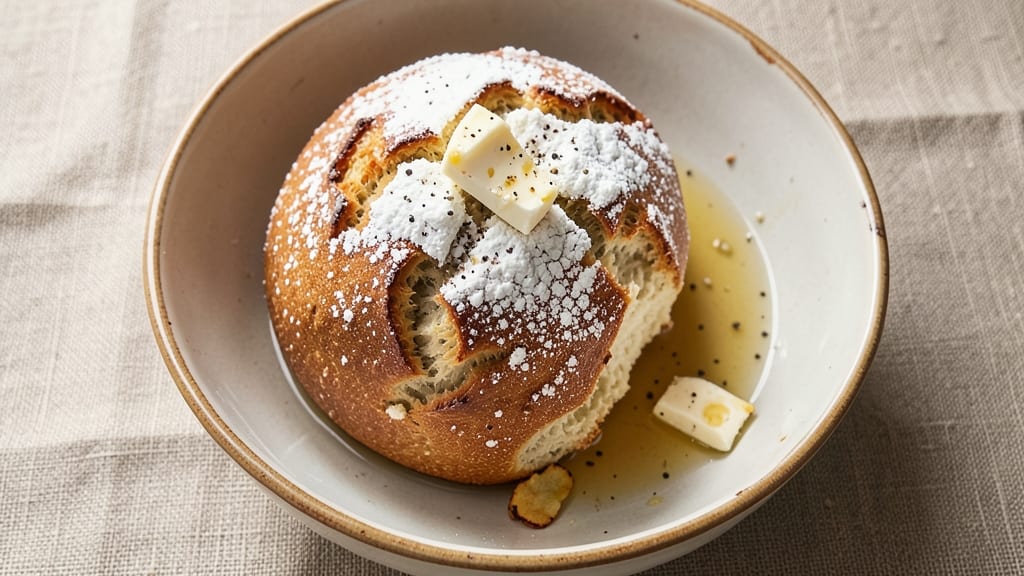
This no-knead potato bread recipe transforms simple pantry staples into a bread so tender it practically melts in your mouth—no kneading, no stress, just moist crumb and fluffy crust from a single bowl.
The secret lies in mashed potatoes, which replace water in the dough to create an airy, almost cake-like texture while keeping every slice wonderfully soft. I developed this recipe after years of struggling with dense, dry potato breads, and this version finally delivers restaurant-quality results with minimal effort.
The beauty of this method is its simplicity: mix, rest, shape, and bake. No stand mixer, no complex techniques—just a bowl, a spoon, and patience. The dough develops its signature texture during an overnight rise, allowing gluten to relax naturally and creating that signature open crumb structure.
For best results, use instant mashed potatoes (the kind that just needs water) for consistent moisture levels, and let the dough proof in a warm spot until it nearly doubles in size.
What you’ll end up with is a loaf with a golden, crackly crust that gives way to an interior so tender it’s almost custardy—perfect for toasted with butter or served alongside soups and stews.
The potatoes add subtle sweetness and moisture that keeps this bread fresh-tasting for days, even when stored at room temperature. This is the kind of bread that makes you forget you ever struggled with dense, dry loaves.
For extra richness, fold in a spoonful of sour cream or a clove of minced garlic into the dough before shaping. The variations are endless, but the base recipe remains foolproof—ideal for beginners or anyone tired of complicated bread-making. Let’s get started on this game-changing loaf.
Ingredients for no knead potato bread
Four simple staples and a few extras transform into bread with a fluffy crust and moist crumb.
| Ingredient | Amount | Notes |
|---|---|---|
| Instant Mashed Potatoes 🥔 | 1 cup | Dry mix, no salt added |
| All-Purpose Flour 🌾 | 3 cups | Sifted for even texture |
| Warm Water 💧 | 1 ¼ cups | 110°F, not boiling |
| Active Dry Yeast 🍞 | ¼ tsp | Fresh or packet equivalent |
| Granulated Sugar 🍚 | ½ tsp | For yeast activation |
| Unsalted Butter 🧈 | ½ cup | Cold, cubed for texture |
| Diamond Crystal Kosher Salt 🧂 | 1 ½ tsp | Adjust to taste |
| Extra-Virgin Olive Oil 🫒 | 2 tbsp | For dough softness |
| Large Eggs 🥚 | 1 whole | Room temperature |
| Sour Cream 🥛 | ½ cup | Optional for richness |
| Garlic Cloves 🧄 | 1 whole | Minced for flavor |
| Cornmeal 🌽 | ½ cup | For dusting bowl |
The instant mashed potatoes are the game-changer here—Bob's Red Mill or Betty Crocker work perfectly, but avoid anything with salt or milk powder. If you're using a different brand, check the package for water-to-potato ratios, as some require less liquid. For the yeast, Saf-Instant is my go-to because it doesn’t need proofing, but regular active dry yeast works too if you give it 5 minutes in warm water with sugar. The butter should be cold and cubed—Land O'Lakes or Plugrá both work, but avoid salted. And trust me, the Diamond Crystal kosher salt makes a difference—it dissolves better than table salt.
No instant mashed potatoes? Homemade mashed potatoes work too, but they’ll make the dough wetter, so you might need to add an extra 0.25 cup of flour. Short on butter? Coconut oil or shortening works in a pinch, but the flavor won’t be as rich. The sour cream is optional but adds that restaurant-style tenderness—full-fat works best, but low-fat is fine if that’s what you’ve got. For the garlic, if you don’t have fresh, garlic powder at half the amount gets you close. And if you’re worried about the dough being too sticky, add a splash more flour, but don’t go overboard or the crumb will get dense.
This dough is best made the night before—cover it and let it proof in a warm spot until it nearly doubles, about 8-12 hours. Once baked, the bread keeps well at room temperature for 3-4 days in a bread bag, but it’s best within the first day or two. For longer storage, wrap tightly in foil and freeze—it reheats beautifully in a 350°F oven for 10 minutes. And if you’re making extra, slice and freeze the loaves—just toast straight from frozen for crispy, fresh-tasting bread.
Why You'll Love This Recipe
- I’ll be real: most bread goes stale in a day. Not this. The potatoes keep it moist for days, so I can toast slices for breakfast or pack them in lunches without the sad, dry crunch. Win.
- No-Knead Magic: I swear, mixing instant mashed potatoes right into the dough? That’s the secret—no yeasty tang, just pure, buttery richness in every bite. The texture’s soft but sturdy, like a hug from your grandma’s kitchen.
- Pantry-Only Powerhouse: Honestly, you’re looking at this and thinking, "I’ve got all that?" Flour, yeast, sugar—basics you already own. No specialty ingredients, no last-minute grocery runs. Just dump, mix, and bake.
- Weeknight Wonder: Between us, this is my go-to when I’ve got a house full of hungry people and zero energy. Toss it in the oven while you’re waiting for pasta to boil, and boom—fresh bread that actually tastes homemade.
Step-by-step instructions for no-knead potato bread
Mix, rest, and bake—this bread delivers a tender crumb and crispy crust without a single knead.
Activate the Yeast and Mix the Dough
In a large bowl, combine the 1.25 cups warm water (around 110°F) with the 0.25 tsp active dry yeast and 0.5 tsp granulated sugar. Let it sit for 5-10 minutes until frothy—this confirms the yeast is alive and ready to work. If it doesn’t bubble, your bread won’t rise properly.
Add the 1 cup instant mashed potatoes to the yeast mixture and stir until fully dissolved. This creates a smooth base that mimics the moisture and richness of traditional dough. Next, whisk in the 3 cups all-purpose flour and 1.5 tsp diamond crystal kosher salt until just combined. Avoid overmixing—you’re aiming for a shaggy, sticky dough, not a smooth batter.
Incorporate the 0.5 cup unsalted butter (cold, cubed) and 2 tbsp extra-virgin olive oil, mixing until the butter melts and the dough thickens. The butter adds richness, while the olive oil keeps the dough soft and pliable. If the dough feels too stiff, add 1 tablespoon warm water at a time until it reaches a thick, sticky consistency—this ensures a moist crumb later.
Incorporate the Egg and Sour Cream for Moisture
Crack the 1 whole large egg into the dough and mix vigorously with a wooden spoon or silicone spatula. The egg binds the ingredients and adds structure, preventing a dense crumb. Stir in the 0.5 cup sour cream—this is the secret to that ultra-moist texture. The sour cream also adds a subtle tang that balances the bread’s richness.
Finally, fold in the 1 minced garlic clove and mix until evenly distributed. The garlic infuses flavor without overpowering the dough. If the dough feels too sticky to handle, dust your work surface with 0.5 cup cornmeal and turn it out to coat lightly. This prevents sticking and makes shaping easier.
Cover the bowl with a damp towel or plastic wrap and let the dough rest at room temperature for 1 hour. This initial rest allows the flour to hydrate fully and the gluten to relax slightly, making the next steps smoother. The dough should puff up slightly but won’t double in size yet.
Shape and Proof the Dough for Rise
After the initial rest, the dough should be more manageable but still sticky. Lightly grease a 9x5-inch loaf pan with olive oil or butter to prevent sticking. Turn the dough out onto a well-floured surface (use the cornmeal if needed) and gently fold it over itself a few times to develop a rough shape. This isn’t about kneading—just coaxing the dough into a loose rectangle.
Roll the dough into a log shape and tuck the ends under to seal. Place it seam-side up in the prepared loaf pan, pressing down lightly to fill the pan completely. This step ensures an even rise and a uniform crumb. Cover the pan with the damp towel or plastic wrap and let it proof in a warm, draft-free place for 1-2 hours, or until the dough has risen to about 1 inch above the rim of the pan. The surface should look slightly domed and feel springy when touched.
Here’s the thing—don’t rush this step. A slow, controlled rise develops the best flavor and texture. If your kitchen is cold, place the pan on top of the refrigerator for a warmer environment. The dough is ready when it springs back slowly when poked with a finger.
Bake for a Crispy Crust and Moist Interior
Preheat your oven to 375°F. While it heats, brush the risen dough with a little extra-virgin olive oil or melted butter. This creates a golden, crispy crust while keeping the interior moist. For extra browning, sprinkle a pinch of diamond crystal kosher salt on top—this enhances flavor and adds to the crust’s texture.
Bake the bread for 45-50 minutes, until the top is deep golden brown and the internal temperature reaches 205°F when measured with an instant-read thermometer. The bread is done when it sounds hollow when tapped on the bottom. If the top browns too quickly, tent the pan with foil to prevent over-browning while ensuring the interior cooks through.
Remove the bread from the oven and let it cool in the pan for 10 minutes before transferring it to a wire rack. This resting period allows the steam inside the bread to redistribute, ensuring a moist crumb. Slice it while still warm for the best texture—each slice should be tender with a crispy, crackly crust. Serve with butter or your favorite spread to enjoy the full flavor.
Pro Tips For Making No Knead Potato Bread
- Mix the Potatoes Cold: Dump the instant mashed potatoes into the flour before adding warm water—this prevents clumping and keeps the dough smoother. I learned this the hard way when my first batch turned into a gummy mess because I tried to mix everything at once.
- Proof Until It Doubles: Don’t rush the rise—wait until the dough hits the top of the bowl and drops back when gently pressed. My grandmother swore by this, and she was right: skipping this step means dense, flat bread no matter how long you bake it.
- Skip the Crowding in Loaf Pan: Fill the pan only 2/3 full or the dough will overflow and stick like glue when you try to remove it. Trust me, I’ve pulled apart three loaves trying to pry them out after ignoring this—now I use a greased pan and a little elbow grease to scrape out the edges before baking.
- Steam the First 10 Minutes: Place a metal tray with boiling water in the oven before baking, then cover the loaf with foil. This traps moisture and gives you that perfect crust without burning the top—something I was skeptical about until I tried it.
Make-ahead tips for leftovers
Overnight Prep Advantage
The real magic of this recipe happens when you let the dough rest overnight. After mixing, place the dough in a lightly oiled bowl, cover with a damp towel, and refrigerate for 8-12 hours.
This extended cold proof creates an open, airy crumb that’s impossible to achieve with a quick rise. The slow fermentation also develops deeper flavor—something you’ll notice immediately when you take that first bite. 💫
Freezer-Friendly Loaves
Bake two loaves and freeze one for future use. Wrap the cooled bread tightly in plastic wrap followed by a layer of aluminum foil to prevent freezer burn. Label with the date and store for up to 3 months.
When ready to eat, thaw at room temperature for 1 hour or warm in a 350°F oven for 10 minutes with a splash of water in the pan for extra moisture. The texture remains just as tender as fresh-baked.
Make-Ahead Dough
Mix the dough up to 24 hours ahead of your baking schedule. Store the mixed dough in an airtight container in the refrigerator. When ready to bake, let it sit at room temperature for 30 minutes to come to ambient temperature before shaping and proofing.
This flexibility makes it perfect for busy schedules—no last-minute stress, just delicious results. ⏰
Portion and Freeze
For ultimate convenience, bake the entire loaf, then slice it into individual portions. Wrap each slice tightly in plastic wrap and freeze for up to 1 month. To serve, simply toast straight from frozen in a toaster or toaster oven.
This is my go-to method for quick breakfasts or snacking—no reheating required, just crispy perfection in seconds.
Double Batch for Meal Prep
Make two loaves at once and store them separately. This gives you fresh bread for multiple meals without the hassle of daily baking. The second loaf keeps beautifully at room temperature for 4-5 days when stored in a bread bag.
I like to use one loaf for breakfast toasts and the other for sandwiches throughout the week—zero waste, maximum convenience.
Proofing Shortcuts
If you’re short on time, use your oven’s proofing function. Place the dough in a greased loaf pan, cover with a damp towel, and turn on your oven to 70°F for 1-2 hours.
This creates a warm, consistent environment that speeds up the proofing process without requiring a warm spot in your kitchen. Just monitor the dough closely to avoid overproofing. 🌡️
Nutrition facts
Frequently asked questions
Why does this potato bread stay moist for days?
The instant mashed potatoes replace water in traditional dough, creating a tender crumb structure. The sour cream and egg add moisture retention, while the olive oil keeps the texture soft. When stored properly, this bread stays fresh for 3-4 days at room temperature.
Can I make this without a stand mixer?
This recipe requires only a large bowl and a wooden spoon. The dough is mixed by hand, and the no-knead method eliminates the need for any mixing equipment. Just stir until everything combines—no heavy kneading required.
What if my dough doesn't rise properly?
Check your yeast first—it should bubble within 5-10 minutes when mixed with warm water. If your kitchen is cold, proof the dough in a 70°F oven with the light on. Overproofing is another issue—look for dough that springs back slowly when poked.
How can I add herbs or cheese to this recipe?
Fold in 1-2 tablespoons chopped fresh herbs (like rosemary or thyme) or ½ cup shredded cheddar during the final mixing stage. For cheese, reduce the flour by ¼ cup to maintain moisture. The dough will be slightly stickier, so use extra cornmeal when shaping.
Is this bread good for sandwiches?
Yes! The soft crumb holds up well to fillings, but slice it while still warm for best texture. For extra structure, add 1 extra tablespoon flour when mixing. This bread works perfectly with grilled meats, soups, or as a toast base.