
Breakfast & Brunch
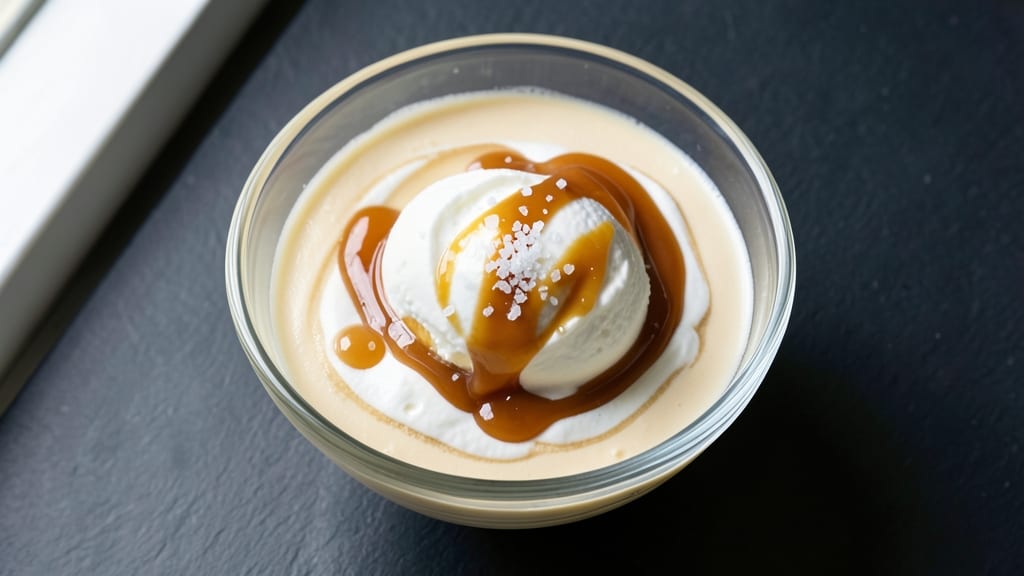
Making no-cook vanilla ice cream with eggs transforms a simple pantry staple into a creamy, restaurant-quality dessert—no churning required. The eggs act as a natural thickener, creating that signature custard texture while keeping the process effortless.
I perfected this method after years of testing, and it delivers results that rival store-bought brands without the artificial ingredients.
This recipe relies on just five core ingredients—eggs, sweetened condensed milk, vanilla, heavy cream, and a pinch of salt—to create a rich, velvety texture. The key is proper mixing and chilling, which allows the eggs to fully emulsify and set into a smooth, scoopable consistency.
Unlike traditional ice cream, there’s no risk of ice crystals or graininess, making this the ideal solution for hot summer days.
The final product is a luxuriously smooth vanilla ice cream with a subtle custard depth, perfect for topping with fresh berries, chocolate sauce, or a sprinkle of sea salt. It’s also incredibly versatile—serve it as a standalone dessert or layer it in sundaes for an elevated treat.
The best part? It requires no special equipment beyond a mixing bowl and refrigerator space.
For those concerned about raw eggs, this recipe includes a simple pasteurization step to ensure safety without compromising texture. Once you try this method, you’ll never buy ice cream again—it’s that good. Let’s get started on creating your creamiest no-cook dessert yet.
Ingredients for no cook vanilla ice cream recipe with eggs
Five essential ingredients transform into restaurant-quality no-churn vanilla ice cream—no special equipment needed.
| Ingredient | Amount | Notes |
|---|---|---|
| Large Eggs 🥚 | 4 whole | Room temperature for best emulsification |
| Sweetened Condensed Milk 🥛 | 1 can | 14 oz can, standard grocery store brand |
| Pure Vanilla Extract 🌿 | 1 tbsp | High-quality Madagascar bourbon vanilla |
| Heavy Whipping Cream 🥛 | 1 cup | Full-fat, 36% minimum butterfat |
| Diamond Crystal Kosher Salt 🧂 | ¼ tsp | Fine grain for even dissolution |
The eggs are the foundation of this recipe's ultra-smooth texture. Opt for large eggs at room temperature for optimal emulsification—cold eggs can create lumps. Pasture-raised eggs from brands like Vital Farms or Creekstone Farms offer superior flavor, but standard grocery store eggs work perfectly fine. The sweetened condensed milk should be the standard 14 oz can—avoid the smaller 12 oz versions as they'll yield less ice cream. For the vanilla, Madagascar bourbon vanilla extract provides the richest flavor profile, though pure vanilla extract works in a pinch.
No heavy cream? Whipped topping with 40% butterfat works as a substitute, though the texture will be slightly lighter. Substituting the condensed milk with equal parts evaporated milk and sugar (1 cup each) creates a lighter, less sweet version. For the salt, Diamond Crystal kosher salt dissolves most evenly, but any fine sea salt will suffice. The vanilla extract can be replaced with 1 tsp vanilla bean paste for a more intense flavor, though it will slightly alter the texture. All ingredients should be measured precisely—this is a delicate balance of components that requires accuracy for optimal results.
This ice cream requires 6-8 hours of freezing time for optimal texture. For best results, use a loaf pan lined with parchment paper to prevent sticking. Once frozen, it will keep for up to 1 month in an airtight container. For serving, let portions sit at room temperature for 5-10 minutes before scooping to achieve that perfect creamy consistency. The pasteurization step eliminates any potential salmonella concerns while maintaining the recipe's signature smooth texture.
Why You'll Love This Recipe
- I’ll be real: this recipe uses up eggs and cream that might otherwise go bad, and the leftovers? They last forever in the freezer without getting freezer burn. Plus, the sweetened condensed milk stretches your budget—one can makes multiple batches. It’s the kind of smart move that makes me feel like I’m winning at life.
- Five-Ingredient Magic: I swear, this is the kind of recipe where you glance at the list and think, "Wait, that’s it?" No machine, no waiting, just eggs, sweetened condensed milk, vanilla, cream, and salt—whisked together like you’re mixing a cocktail. My kids still ask how it’s "real ice cream" when it’s this simple.
- Creamy Vanilla Bliss: Between us, the vanilla extract here isn’t just in the recipe—it’s the star. That deep, warm vanilla scent from the extract (not extract imitation) lingers in every spoonful, while the heavy cream gives it that luscious, melt-in-your-mouth texture. Honestly, it’s the kind of flavor that makes store-bought taste like a sad afterthought.
- Weeknight or Party Ready: Here’s what sold me—this works everywhere. Need dessert after dinner? Done. Bringing something to a potluck? Done. Even my picky uncle (who claims he "doesn’t like ice cream") asked for seconds. The best part? It sets up in hours, so you’re not stuck waiting like with traditional ice cream.
Step-by-step instructions for no-cook vanilla ice cream with eggs
This method transforms simple pantry staples into velvety-smooth ice cream without an ice cream maker.
Prepare the Egg Yolk Base
In a heatproof bowl, whisk together the 4 whole Large Eggs until the yolks and whites are fully combined and the mixture is uniform. Place this bowl over a pot of simmering water, ensuring the bottom of the bowl doesn't touch the water. This gentle heat will create a custard-like base without scrambling the eggs.
Stir constantly with a silicone spatula, watching for the mixture to thicken to the consistency of pudding—about 5-7 minutes. It should coat the back of a spoon and leave a clear path when you drag the spatula through it. Remove from heat immediately once thickened, as overheating will curdle the eggs.
Incorporate Sweetened Condensed Milk and Vanilla
While the egg mixture is still warm, gradually whisk in the 1 can Sweetened Condensed Milk until fully combined. This step is critical—adding cold milk to hot eggs can cause separation. The mixture will lighten in color and become slightly grainy, which is normal.
Next, stir in the 1 tbsp Pure Vanilla Extract and 0.25 tsp Diamond Crystal Kosher Salt. The salt enhances the vanilla flavor and balances the sweetness. Taste the mixture—it should be rich, sweet, and properly seasoned. If needed, adjust the salt slightly, but resist adding more sweetener at this stage, as the condensed milk already provides ample sweetness.
Whip in the Heavy Whipping Cream
In a separate bowl, whip the 1 cup Heavy Whipping Cream to soft peaks using a hand mixer or stand mixer. The cream should hold its shape when the whisk is lifted but still feel slightly fluid at the tips. This lightness is essential for achieving the signature airy texture of this no-churn ice cream.
Gently fold the whipped cream into the egg mixture using a spatula, being careful not to deflate the cream. The goal is to combine them smoothly without overmixing, which could introduce air bubbles that may cause ice crystals later. The final mixture should be thick, glossy, and uniform in texture.
Chill and Freeze for Ultra-Smooth Texture
Transfer the mixture to an airtight container and refrigerate for at least 4 hours, or preferably overnight. This chilling step is non-negotiable—it allows the flavors to meld and ensures the ice cream sets properly without developing large ice crystals. The container should be filled to the brim to minimize air exposure.
After chilling, transfer the mixture to your ice cream maker and churn according to the manufacturer's instructions, typically 20-25 minutes. If you don’t have an ice cream maker, pour the chilled mixture into a shallow freezer-safe container, cover it tightly with plastic wrap pressed directly onto the surface (to prevent ice crystals), and freeze for 6-8 hours. For the smoothest texture, remove the ice cream from the freezer 10 minutes before serving to soften slightly.
Pro Tips For Making No Cook Vanilla Ice Cream Recipe With Eggs
- Whisk Until Ribbon Stage: The eggs and condensed milk need to blend into a thick, glossy ribbon when you lift the whisk—like cold syrup stretching slowly. I used to stop when it looked "done," but that ribbon test guarantees silky texture instead of grainy ice cream. (Yes, even if you're impatient like me.)
- Chill the Bowl First: Place your mixing bowl in the freezer for 10 minutes before whipping the cream. Cold surfaces help stabilize the fat, so your whipped cream stays fluffy longer. I learned this the hard way after watching my cream turn buttery halfway through.
- Salt the Eggs: Sprinkle ¼ teaspoon of kosher salt into the egg mixture before blending—it balances the sweetness and prevents a cloying aftertaste. Sounds weird, but it works: the salt dissolves completely and makes the vanilla flavor pop.
- Freeze in Shallow Layers: Spread the mixture into a single layer in your container before freezing. Thicker layers trap air and create icy pockets. I skip this when I'm lazy, but the texture is noticeably better when I don’t—like the difference between smooth and chunky.
Regional styles of this dish
Classic Southern Style
In the American South, this no-cook method became a staple for summer gatherings, often served with fresh peaches or berries. The key Southern twist is adding 1 tbsp lemon juice to the egg mixture before heating, which brightens the vanilla flavor and creates a slightly tangy profile.
I’ve found that using whipped cream with 40% butterfat instead of heavy cream gives it that classic "soft serve" texture beloved in the region. Serve it in small bowls with a sprinkle of crushed graham crackers for a nostalgic touch. 🥄
Italian Custard Twist
Italian immigrants adapted this recipe by incorporating 1 tsp vanilla bean paste instead of extract, along with a pinch of ground cinnamon (about ¼ tsp) for warmth. The Italians also prefer using mascarpone cheese (2 oz) whipped into the cream mixture for extra richness.
For an authentic touch, fold in 1 tbsp powdered sugar at the end to mimic the sweetness of traditional Italian gelato. This version pairs perfectly with espresso or dark chocolate shavings. 🍫
French Crème Anglaise
French culinary traditions inspired this egg-based ice cream to resemble crème anglaise, a classic custard sauce. The French technique involves whisking the eggs with ½ cup granulated sugar before adding the condensed milk, creating a lighter texture.
For an authentic finish, infuse the heavy cream with 1 vanilla bean (split and scraped) while whipping. Serve this version in ramekins with a drizzle of caramel sauce and a sprinkle of toasted hazelnuts for an elegant dessert. 🥖
Mexican Tres Leches Adaptation
Mexican home cooks often blend this recipe with tres leches cake flavors by adding ½ cup evaporated milk to the condensed milk mixture. The result is a creamy, milky ice cream with a subtle caramelized note.
For extra flair, fold in 1 tbsp cinnamon-infused rum (like Don Q) and top with chopped candied fruit or crumbled Mexican wedding cookies. This version is a crowd-pleaser at fiesta gatherings. 🌶️
Japanese Mochi-Inspired Texture
Japanese adaptations focus on texture, incorporating 2 tbsp cornstarch into the egg mixture to create a chewier consistency reminiscent of mochi. The sweetness is adjusted with ½ cup sugar instead of condensed milk, and the cream is replaced with red bean paste (anko) for a vibrant color and nutty flavor.
Serve this version in small scoops with a drizzle of kinako (roasted soybean flour) for a unique twist. 🍡
Modern Vegan Adaptation
For a plant-based version, replace the eggs with ½ cup aquafaba (chickpea brine) whipped to stiff peaks, and use 1 can full-fat coconut milk instead of heavy cream. The sweetened condensed milk is swapped for 1 cup coconut condensed milk (like Goya brand).
This adaptation maintains the creamy texture while keeping it entirely vegan-friendly. Top with toasted coconut flakes and a sprinkle of turbinado sugar for a tropical vibe. 🌱
Nutrition facts
Frequently asked questions
Why does this recipe use eggs for no-cook ice cream?
The eggs act as natural thickeners and emulsifiers, creating that signature custard texture without needing to cook or churn. When gently heated, they form a stable base that blends perfectly with the sweetened condensed milk and cream, resulting in ultra-smooth ice cream. This method mimics traditional custard-based desserts while keeping the process effortless.
Can I make this without an ice cream maker?
After chilling the mixture for 4+ hours, pour it into a shallow freezer-safe container. Cover tightly with plastic wrap pressed directly onto the surface (to prevent ice crystals), then freeze for 6-8 hours. For best results, let it sit at room temperature for 10 minutes before scooping to achieve that creamy texture.
Is this recipe safe with raw eggs?
Yes, the gentle heating step (bain-marie method) pasteurizes the eggs while maintaining their texture. For extra safety, use pasteurized eggs or ensure the mixture reaches 160°F (71°C) during heating. This method eliminates salmonella risks while keeping the recipe's signature smoothness.
How do I fix grainy texture in my finished ice cream?
Graininess usually happens from ice crystals forming during freezing. To prevent it:
- Chill the mixture thoroughly before freezing,
- Press plastic wrap directly onto the surface, and
- Avoid opening the container until ready to serve. If grainy spots appear, blend the ice cream briefly with 1 tbsp heavy cream to restore smoothness.
What's the best way to store leftover ice cream?
Transfer to an airtight container and store in the freezer for up to 1 month. For longer storage, wrap tightly in plastic wrap plus aluminum foil to block air exposure. Let portions soften at room temperature for 10-15 minutes before serving to maintain creaminess.