
Main Courses
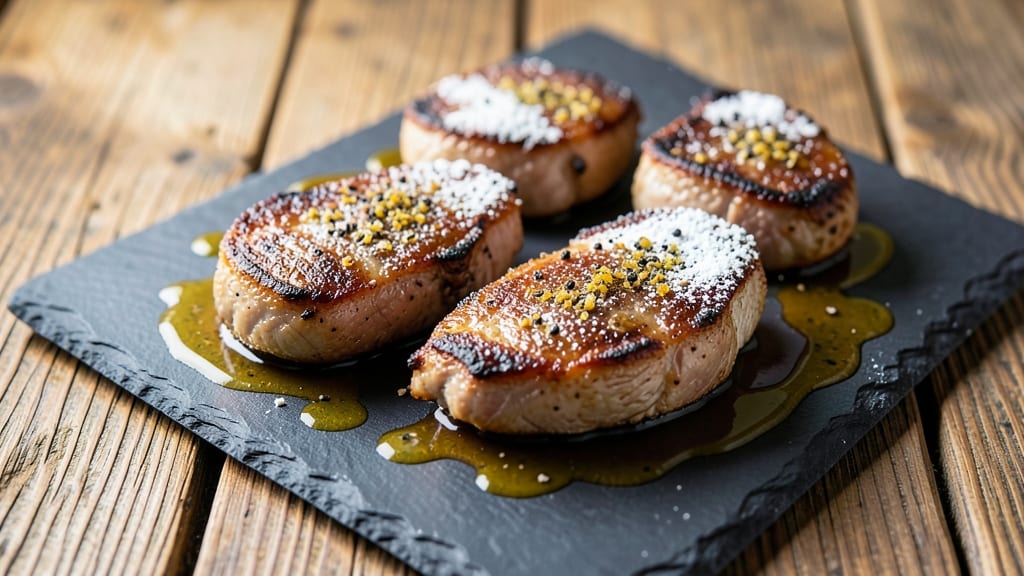
This Knorr pork chops recipe delivers restaurant-quality results with just 20 minutes of active time and a pantry staple that cuts prep in half. As someone who judges barbecue contests across the Southeast, I know seasoning makes the difference—and Knorr’s blend turns average chops into flavor bombs without the fuss.
The secret lies in a quick rub followed by a perfect sear, creating crispy edges and tender meat every time.
What sets this recipe apart is how Knorr’s seasoning transforms basic pork chops into something special with minimal effort. You’ll start with bone-in chops for better flavor, then coat them in the seasoning mix for a savory crust.
A hot cast-iron skillet delivers that coveted caramelization while keeping the inside juicy, all in under 10 minutes of actual cooking time. The rest is just letting the meat rest—no complicated techniques required.
By the time you serve these, you’ll have golden-brown chops with a crackling crust and meat that’s perfectly cooked through to 145°F internal temperature. The Knorr seasoning adds depth without overpowering, making it versatile enough for weeknight dinners or weekend gatherings.
Pair with roasted potatoes or a simple salad for a complete meal that feels restaurant-worthy.
This method works for both boneless and bone-in chops, and the seasoning keeps well in your pantry, so you can always have a quick, flavorful dinner ready. Let’s get cooking—your taste buds will thank you.
Ingredients for knorr pork chop
Four simple ingredients plus Knorr's secret blend—no fancy technique needed.
| Ingredient | Amount | Notes |
|---|---|---|
| Bone-In Pork Chops 🥩 | 4 whole | 1-inch thick, center-cut preferred |
| Knorr Garlic Herb Seasoning Mix 🧂 | 2 tbsp | Or homemade blend with garlic powder |
| Extra-Virgin Olive Oil 🫒 | 2 tbsp | For searing, high smoke point |
| All-Purpose Flour 🌾 | ½ cup | For dredging, light coating |
| Salt 🧂 | 1 tsp | Kosher or sea salt, coarse grain |
| Black Pepper 🌶️ | ½ tsp | Freshly ground for best flavor |
| Garlic Powder 🧄 | ½ tsp | For extra depth if not using Knorr |
| Unsalted Butter 🧈 | 2 tbsp | For basting, full-fat preferred |
| Fresh Parsley 🌿 | ¼ cup | Chopped, for garnish (optional) |
| Lemon Wedges 🍋 | 2 whole | For serving, brightens flavors |
The Knorr seasoning is your shortcut to restaurant-quality flavor, but bone-in chops are worth hunting for—they stay juicier and add depth. Costco or local butchers often carry them pre-portioned, but if you're buying whole, ask for center-cut cuts about 1-inch thick. The seasoning mix itself? Check the expiration date—it loses potency fast once opened. I keep mine in a small jar in my pantry so it's always ready for quick weeknight dinners. For extra crispiness, pat the chops dry with paper towels before seasoning—moisture is the enemy of a good sear.
No Knorr seasoning? Mix 1 tbsp garlic powder, 1 tbsp onion powder, 1 tsp dried thyme, 1 tsp paprika, and 1/2 tsp salt for a close substitute. The flour dredge isn't mandatory but adds texture—use all-purpose or breadcrumbs if you prefer. Short on butter? Olive oil works in a pinch, but butter gives that rich flavor. Fresh parsley is ideal, but dried oregano at half the amount works if you're in a hurry. The lemon wedges? Store-bought is fine, but freshly squeezed juice works even better if you've got time.
These chops reheat beautifully—just 5 minutes in a 350°F oven with a splash of broth. Store leftovers in an airtight container for 3-4 days or freeze for 2 months. I like to portion them into individual containers so they're ready for quick lunches. The seasoning mix? Good for 6 months once opened, so buy a small box if you won't use it all. Always let the chops rest 5 minutes after cooking—this keeps them juicy when you slice.
Why You'll Love This Recipe
- No-Fuss Flavor Boost: I love how Knorr’s seasoning mix turns plain pork chops into something special—just a shake, a sprinkle, and boom, you’ve got that savory garlic-herb punch without the fuss of making a sauce from scratch.
- One-Step Crisp: Dredging in flour and a quick sear in olive oil gives these chops that perfect crust. Honestly, the contrast between the crispy outside and juicy center? That’s the kind of magic that makes me want to make this every week.
- Budget Meal Powerhouse: Bone-in chops are cheaper than you’d think, and this recipe stretches them into a satisfying meal without breaking the bank. I’ve fed my family four with leftovers for lunch the next day—solid value.
- Weeknight Hero: Between work and errands, I’m not cooking gourmet. But these? I can toss them in the pan while I’m waiting for the coffee to brew. Twenty minutes later, dinner’s done—and everyone’s happy.
Step-by-step instructions for Knorr pork chops
Here's how to achieve perfectly crispy, flavorful pork chops with just a few simple steps.
Prep and Season the Pork Chops
Pat the 4 whole bone-in pork chops dry with paper towels—this is crucial for getting that crispy crust. I like to press firmly to remove any moisture that could prevent browning. Place them on a clean cutting board and sprinkle each side evenly with the 2 tablespoons of Knorr garlic herb seasoning mix. The seasoning should adhere lightly to the surface.
Next, season both sides with the 1 teaspoon of salt and 0.5 teaspoon of black pepper. I find it helps to use my fingers to press the seasoning into the meat slightly, especially around the edges. Let the seasoned chops sit at room temperature for 10-15 minutes while you prepare the rest. This brief resting period ensures even cooking from edge to center.
Create the Flour Coating
In a shallow dish, combine the 0.5 cup of all-purpose flour with the 0.5 teaspoon of garlic powder. I like to mix this lightly with my fingers to distribute the garlic powder evenly—this adds an extra layer of flavor that complements the Knorr seasoning. The flour mixture should be fine and free of lumps, but don't overmix or you'll create a gummy paste.
Here's the thing—don't skip this step. The flour creates that golden-brown crust that makes all the difference. When you're ready to cook, dip each pork chop into the flour mixture, pressing gently to ensure an even coating on all sides. Let any excess flour fall off before transferring to the pan. I like to work with one chop at a time to maintain the perfect coating.
Sear the Pork Chops in Olive Oil
Heat a large skillet over medium-high heat until it's properly preheated. Add the 2 tablespoons of extra-virgin olive oil and let it get hot enough to shimmer—this should take about 2-3 minutes. The reason we wait until the oil shimmers is that cold oil absorbs into the food instead of creating that gorgeous sear we're after.
Place the coated pork chops in the skillet, leaving space between them so they don't steam. Cook for 3-4 minutes per side, pressing down gently on the chops during the first minute to ensure even contact with the pan. You'll know they're ready to flip when the edges start to turn golden brown and the underside releases easily from the pan. Don't rush this step—patience here leads to perfect results.
Finish with Butter and Fresh Parsley
Reduce the heat to medium and add the 2 tablespoons of unsalted butter to the skillet. Tilt the pan slightly and spoon the melted butter over the pork chops, basting them for about 1 minute. This adds richness and helps create a glossy finish. The butter should foam slightly but not burn—watch it carefully as it can go from perfect to burnt in seconds.
Remove the pork chops from the skillet and transfer them to a warm serving plate. Sprinkle with the 0.25 cup of chopped fresh parsley right away while they're still hot. The parsley adds a fresh contrast to the rich flavors and makes the dish look beautiful. Let the pork chops rest for 3-5 minutes before serving—this resting period allows the juices to redistribute, ensuring each bite is moist and flavorful.
Serve with Lemon Wedges
Slice the pork chops into individual portions if desired, though I often serve them whole for that impressive presentation. Place a lemon wedge on each plate alongside the pork chops. The acidity from the lemon brightens the rich flavors and cuts through the fat beautifully. Serve immediately while the chops are still warm and the butter is melting.
Here's what you should see when it's perfect: golden-brown crust on the outside, juicy pink meat inside, and that delicious aroma of garlic and herbs filling your kitchen. The lemon wedge should look fresh and vibrant, ready to be squeezed over each bite for that final pop of flavor. Enjoy your restaurant-quality pork chops made with minimal effort!
Pro Tips For Making Knorr Pork Chop
- Pat Dry First: DESCRIPTION: That Knorr seasoning mix is potent, but if your pork chops are damp, the flour won’t stick properly—and neither will the crust. Use paper towels to aggressively dry the meat before dredging, or you’ll end up with a soggy bottom instead of that golden crust.
- Skip the Double-Dredge: DESCRIPTION: One light coat of flour is enough for this recipe—no need to dredge twice. Over-flouring makes the chops dense and turns the Knorr seasoning into a dusty mess. Just shake off the excess after dipping, and you’ll get crispier edges without a powdery coating.
- High Heat, Quick Flip: DESCRIPTION: You want that Knorr seasoning to caramelize into a flavor bomb, not steam. Hit the pan on high heat until the flour turns golden (about 2-3 minutes per side), then reduce to medium to finish cooking. Flipping too soon? You’ll lose the crust.
- Check for 145°F: DESCRIPTION: Bone-in pork chops can look done before they’re actually safe. Use a meat thermometer to confirm they hit 145°F in the thickest part—no guessing. The Knorr seasoning will mask undercooked meat, and that’s a recipe for trouble.
Pro cooking tips for perfect results
Knorr Seasoning Magic
That Knorr garlic herb seasoning is where the real flavor transformation happens. I've found the best results come from using the Knorr seasoning mix directly on the chops before the flour dredge—this creates a flavor base that locks into the meat during cooking.
The blend's garlic and herb combination works perfectly with pork's natural sweetness, but here's the trick: lightly press the seasoning into the meat with your fingers after sprinkling. This ensures it sticks and infuses evenly during the sear. 💡
If you're using a homemade substitute (like my mix of garlic powder, onion powder, and paprika), toast the spices in the dry skillet for 30 seconds before adding oil—this deepens their flavors and removes any raw taste.
The Knorr mix itself contains salt, so I reduce the additional kosher salt to ½ teaspoon total when using it, but always taste before cooking.
Perfect Sear Science
The secret to that restaurant-worthy crust lies in temperature control and oil choice. Use a heavy-bottomed cast-iron skillet (I swear by my Lodge 10.25-inch) and heat it until it's smoking hot before adding oil.
The oil should shimmer like water but not burn when you flick a drop with your finger. Extra-virgin olive oil works great here because it has a high enough smoke point for searing while adding subtle fruity notes that complement the Knorr seasoning.
Here's my foolproof timing: 3-4 minutes per side for 1-inch thick chops. Press down gently on the chops during the first minute of cooking—this ensures maximum contact with the hot surface and prevents steam from forming between the meat and pan.
The edges should be deep golden brown by the time you flip, with a slight crust forming on the underside. If they're browning too quickly, reduce heat to medium-high.
Butter Basting Technique
The butter basting step is where these chops go from good to extraordinary. After the initial sear, reduce heat to medium and add 2 tablespoons of cold unsalted butter. The cold butter helps prevent the pan from burning while it melts.
Tilt the pan and spoon the melted butter over the chops for 30-60 seconds—this creates that glossy finish and adds richness that balances the seasoning. I like to use European-style butter (like Plugrá) for its higher fat content, but any good-quality butter works.
Watch the butter carefully—it should foam slightly but not brown. If it starts to darken too quickly, remove the chops and reduce heat. The butter should coat the chops completely, creating a beautiful sheen.
This is also when I add a pinch of fresh parsley to the pan for a quick infusion before transferring the chops to the plate. 🌟
Resting Rules
This is where most home cooks mess up—skipping the rest. After cooking, transfer the chops to a warm plate and let them rest for 3-5 minutes before serving. This might seem counterintuitive, but it's crucial for juicy results.
During this time, the meat's juices redistribute from the surface back into the center, preventing them from pooling out when you cut in. I like to loosely tent the chops with aluminum foil during resting to keep them warm.
Pro tip: Use this resting time to finish your sides. The chops will stay warm and continue cooking slightly from residual heat. If you're serving with roasted potatoes, this is perfect timing to add a final sprinkle of fresh herbs.
And remember—never skip the lemon wedges. The acid cuts through the richness and brightens all the flavors. 🍋
Nutrition facts
Frequently asked questions
Can I use boneless pork chops instead of bone-in?
Boneless chops work perfectly for this recipe. Since they cook faster, reduce cooking time to 2-3 minutes per side and check for doneness at 145°F internal temperature. The flavor won't suffer—just watch them closely to avoid overcooking.
What if I don't have Knorr seasoning?
No problem! Mix 1 tbsp garlic powder, 1 tbsp onion powder, 1 tsp dried thyme, 1 tsp paprika, and ½ tsp salt for a homemade blend. Toast the spices in the dry skillet for 30 seconds before adding oil to deepen the flavors. The Knorr mix contains salt, so adjust your additional salt accordingly.
How do I know when the pork chops are done?
Use a meat thermometer to check the thickest part of the chop—it should reach 145°F internal temperature. For bone-in chops, avoid piercing the bone. The edges should be golden brown, and the meat should feel firm but still spring back slightly when pressed with a finger.
Can I cook these pork chops in the oven instead of pan-searing?
Yes! Preheat oven to 400°F, place chops on a wire rack over a baking sheet, and bake for 12-15 minutes (1-inch thick). Broil for 2-3 minutes at the end for extra crispiness. The flavor will be slightly different but still delicious—great for hands-off cooking.
Why did my pork chops turn out dry?
Most likely, you skipped the resting time or overcooked them. Always let chops rest 3-5 minutes after cooking to redistribute juices. For thicker cuts, reduce heat slightly after the initial sear. Using a meat thermometer prevents overcooking—145°F is perfect for juicy results.