Soups & Stews
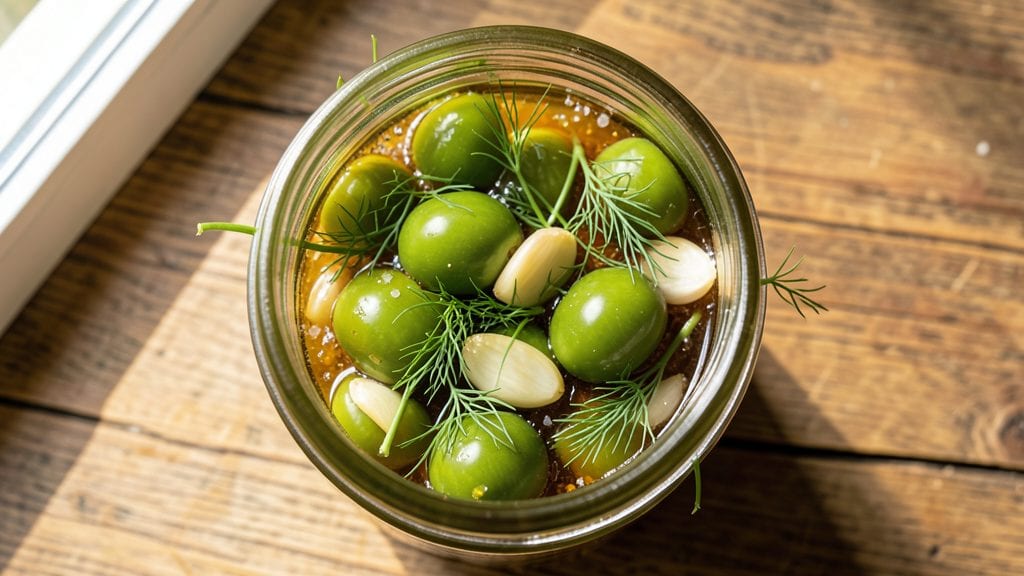
This green cherry tomato pickles recipe transforms tart, bright tomatoes into vinegar-bright preserves in under 10 minutes—no fermentation required.
The secret lies in a precise balance of apple cider vinegar, salt, and aromatic spices that preserve the tomatoes' vibrant green hue while creating a tangy, crunchy condiment perfect for sandwiches, charcuterie boards, or summer salads.
Quick-pickling eliminates the need for canning equipment or weeks of waiting, making this method both beginner-friendly and foolproof. The process relies on high-acid brine to safely preserve the tomatoes while enhancing their natural sweetness with garlic, dill, and a touch of red pepper flakes.
This recipe delivers restaurant-quality pickles without the fuss of traditional fermentation.
What you’ll end up with is a jar of crisp, vinegar-kissed tomatoes that stay fresh for up to 3 months in the refrigerator. Their bright green color and satisfying crunch make them a standout condiment—ideal for pairing with grilled meats, cheese platters, or even as a tangy topping for burgers.
The simplicity of the method ensures consistent results every time.
For those who prefer fermented pickles, a simple adjustment to the recipe—reducing vinegar and adding water—creates a probiotic-rich version with deeper flavor development over 3-5 days. Always store properly sealed jars in the refrigerator for safety. Let’s get pickling!
Ingredients for green cherry tomato pickles
Tart green tomatoes meet aromatic vinegar and spices for a restaurant-quality quick-pickle in minutes.
| Ingredient | Amount | Notes |
|---|---|---|
| Green Cherry Tomatoes 🍅 | 2 lbs | Firm, unblemished, vine-ripened preferred |
| Apple Cider Vinegar 🍏 | 1 ½ cups | Raw, unfiltered for optimal flavor |
| Granulated Sugar 🍚 | 1 cup | White or raw cane preferred |
| Diamond Crystal Kosher Salt 🧂 | 1 ½ tbsp | Coarse grain for proper dissolution |
| Fresh Dill Sprigs 🌿 | ½ cup | Tender stems included for aroma |
| Garlic Cloves 🧄 | 4 cloves | Thinly sliced for subtle infusion |
| Red Pepper Flakes 🌶️ | 1 tsp | Adjust for desired heat intensity |
| Extra-Virgin Olive Oil 🫒 | 2 tbsp | Light fruity variety preferred |
The tomatoes are the foundation—vine-ripened green cherry tomatoes deliver the brightest color and crispest texture. Avoid overripe or soft specimens, as they'll turn mushy during pickling. Local farmers markets often carry the best selection, particularly in late summer when they're at peak. For grocery stores, look for tomatoes labeled 'green' or 'unripe' in the produce section. If you can only find red cherry tomatoes, their flavor will be sweeter but less tangy, though still perfectly usable. The vinegar must be raw, unfiltered apple cider vinegar—this variety contains the mother culture that enhances preservation and flavor complexity. Bragg or Texas Pete are reliable brands for consistent results.
Substitutions are flexible but require adjustments. White vinegar can replace apple cider vinegar at the same quantity, though the flavor profile will be sharper. For sugar, honey or agave nectar works at a 1:1 ratio, though the texture may be slightly softer. Fresh dill can be substituted with 1 tbsp dried dill, but the flavor will be less vibrant. If you prefer no heat, simply omit the red pepper flakes entirely. The olive oil isn't strictly necessary but adds a subtle richness—avocado oil works equally well. For a fermented version, reduce vinegar to 1 cup and add 1 cup water, increasing salt to 2 tbsp for proper brine development.
These pickles maintain their crispness for up to 3 months when stored in the refrigerator. Always use sterilized glass jars with airtight lids to prevent contamination. The pickles will continue to develop flavor over time, becoming more tangy as they sit. For best texture, consume within the first 2 months. If you notice any softening or off odors, discard immediately. The brine can be reused for subsequent batches up to 3 times, though flavor will diminish slightly with each use. Portion into smaller jars for convenience—single-serving sizes make these perfect for lunches or charcuterie boards.
Why You'll Love This Recipe
- No Fuss, No Mess: I swear by this recipe because it’s basically hands-off after the initial chop. Toss those green cherry tomatoes into a jar with vinegar, sugar, and salt, then let them sit—no boiling, no fussing. The dill sprigs wilt into the brine just enough to add that herby punch without overpowering.
- Sweet-Tangy Magic: That balance of bright vinegar and just enough sugar? It’s the kind of flavor that makes you reach for seconds. The cherry tomatoes stay crisp, and the dill gives it a freshness that works in everything from sandwiches to charcuterie boards.
- Pantry Staple Power: Honestly, you’re already stocked for this. Vinegar, sugar, salt—these are things I always have on hand. No last-minute grocery runs, no weird ingredients. Just grab whatever’s in your cupboard, and you’re good to go.
- Jars of Versatility: These pickles last for weeks, and I mean weeks. Use them on burgers, toss them into salads, or just snack straight from the jar. They’re my go-to for picnics, lunchboxes, or when I need something quick to brighten up a plate.
Step-by-step instructions for green cherry tomato pickles
Here's the method for vibrant, tangy pickles that capture summer's freshness in minutes.
Prepare the Tomatoes and Aromatics
Wash the 2 lbs of green cherry tomatoes thoroughly and trim off any stems. I like to leave them whole for even cooking, but you can halve larger tomatoes if preferred. In a large bowl, combine the tomatoes with the 0.5 cup of fresh dill sprigs and the 4 cloves of thinly sliced garlic. Toss gently to distribute the herbs evenly—this ensures every pickle infuses with their bright flavors.
Add the 1 tsp of red pepper flakes and mix lightly, being careful not to crush the tomatoes. The flakes will add subtle heat that balances the sweetness later. Set aside while you prepare the brine mixture. This step is where the foundation of flavor begins—don't skip the gentle tossing, as it helps the aromatics adhere to the tomatoes' surfaces.
Create the Brine Mixture
In a separate medium saucepan, combine the 1.5 cups of apple cider vinegar, 1 cup of granulated sugar, and 1.5 tbsp of diamond crystal kosher salt. Bring the mixture to a gentle simmer over medium heat, stirring occasionally until the sugar and salt dissolve completely. This should take about 3-4 minutes—you'll know it's ready when the liquid becomes clear and the sugar crystals disappear entirely.
Remove the pan from heat and let the brine cool slightly for 2-3 minutes. Then stir in the 2 tbsp of extra-virgin olive oil. The oil will add a silky texture to the finished pickles and help preserve their vibrant color. For best results, work quickly once the tomatoes are prepared—warm brine works more effectively for flavor infusion.
Combine and Pack the Pickles
Carefully pour the warm brine over the tomatoes in the bowl, ensuring all pieces are fully submerged. Use a wooden spoon to gently stir the mixture, making sure the tomatoes are evenly coated. The acidity of the vinegar will begin working immediately, so don't let them sit uncovered for long—this preserves their crisp texture.
Transfer the tomatoes to clean, sterilized glass jars, packing them tightly. I use a large spoon to press them down gently, removing any air bubbles that might form. Leave about 1/2 inch of headspace at the top of each jar—this prevents overflow during processing. The tight packing also helps maintain the tomatoes' shape during the pickling process.
Process and Store for Maximum Flavor
Seal the jars tightly with lids and let them cool to room temperature. Once cool, refrigerate the pickles for at least 24 hours before eating—the longer they sit, the more flavor they develop. I typically wait 48 hours for maximum tang and aroma infusion. The vinegar will continue working subtly over time, creating that perfect balance of sweet, tangy, and herby notes.
These pickles will keep in the refrigerator for up to 3 months, though they're often gone long before then. The green cherry tomatoes maintain their vibrant color and crisp texture, while the dill and garlic infuse throughout. For best results, store them in their brine and serve chilled—perfect for sandwiches, charcuterie boards, or as a refreshing snack straight from the jar.
Pro Tips For Making Green Cherry Tomato Pickles
- STERILIZE JARS HOT: I learned this the hard way—cold jars straight from the cabinet will trap moisture and ruin your pickles faster. Run them through the dishwasher’s sanitize cycle or boil for 10 minutes, then keep them hot until filling. Cold jars mean soggy dill and cloudy brine in weeks.
- USE FIRM TOMATOES ONLY: Overripe or soft green cherry tomatoes turn mushy in the jar. Pick ones that dent slightly when squeezed but don’t squish like overripe fruit. If they’re too soft, slice them thinner—otherwise, they’ll fall apart before the flavor develops.
- WEIGH THE SALT: Diamond Crystal kosher salt clumps like crazy, and eyeballing it leads to either bland or overly salty pickles. Use a kitchen scale for precision—1 tablespoon per quart jar is the sweet spot. No scale? Measure by volume, but tap the measuring spoon firmly to break up clumps.
- PACK TOMATOES TIGHT: Loose tomatoes in the jar leave gaps that fill with weak brine. Stand them upright in the jar first, then press down gently with a spoon to nestle them. This ensures every bite gets that tangy punch. (Yes, even if it looks crowded—your future self will thank you.)
Serving suggestions for this green cherry tomato pickles
Sandwich & Wrap Topper
These tangy green cherry tomato pickles are a game-changer for sandwiches and wraps. I love adding 3-4 pickles to a classic Reuben sandwich alongside sauerkraut—they balance the richness of corned beef and Swiss cheese with their bright acidity.
For wraps, try pairing them with grilled chicken, creamy goat cheese, and arugula in a whole wheat tortilla. The pickles' crunch contrasts perfectly with soft fillings. 🥪
Charcuterie Board Star
Create a showstopping board by arranging the pickles alongside aged cheddar cubes, prosciutto slices, and marinated olives. Their vibrant green color pops against creamy cheeses and cured meats.
I like to add toasted walnuts for crunch and honey drizzle for sweet contrast. These pickles become the visual centerpiece while adding a refreshing tang. 🧀
Grilled Meat Pairing
Serve these pickles alongside grilled meats to cut through richness. I pair them with grilled pork chops or steak sandwiches—the acidity cleanses the palate between bites. For a Mediterranean twist, serve with grilled lamb skewers and tzatziki sauce. The pickles' herbal notes complement smoky grilled flavors beautifully. 🔥
Salad Brightener
Toss ½ cup of these pickles into summer salads for instant flavor. I add them to cucumber-tomato salads or garden salads with feta cheese and olive oil dressing. Their tangy crunch elevates simple greens. For a protein boost, mix with grilled shrimp or chickpeas. 🥗
Cheese & Charcuterie Pairings
These pickles elevate cheese boards with their bright acidity. I pair them with brie, Gouda, and blue cheese for a flavor explosion. The pickles' crunch contrasts perfectly with soft cheeses.
Add crackers and nuts for texture variety. For a sweet-savory combo, serve with fig jam and prosciutto. 🧅
Snacking Straight from Jar
Don't underestimate these pickles as a standalone snack! Serve them chilled straight from the jar with crusty bread or pretzel sticks. I often enjoy them as a refreshing palate cleanser between bites of rich foods. Their bright flavor makes them perfect for picnics or backyard gatherings. 🍽️
Nutrition facts
Frequently asked questions
Can I use red cherry tomatoes instead of green ones?
Yes, but the flavor will be sweeter and less tangy. Green cherry tomatoes have a firmer texture and brighter acidity that works perfectly for quick-pickling. If using red, reduce sugar to ½ cup to balance their natural sweetness. The color will turn pinkish, but the crunch and tangy flavor will still shine.
How long do these pickles stay fresh?
Properly stored in the refrigerator, these pickles remain crisp and flavorful for up to 3 months. The vinegar brine acts as a natural preservative, but always check for any softening or off odors before eating. For best texture, consume within 2 months. The longer they sit, the more tangy they become!
Can I make these pickles without vinegar?
No—vinegar is essential for both flavor and safety. Without it, the tomatoes won't properly preserve and could spoil. For a fermented version (like sauerkraut), you'd need to use a 3% salt brine and wait 3-5 days for probiotics to develop. This recipe relies on vinegar's acidity to quickly create safe, tangy pickles in minutes.
Why did my pickles turn mushy?
Mushy pickles usually mean the tomatoes were overripe or the brine didn't fully submerge them. Always use firm, unblemished green cherry tomatoes and ensure they're completely covered in warm brine. If pickles soften after storage, they may have absorbed too much liquid—drain them slightly before serving. For extra crunch, add ½ tsp citric acid to the brine.
What can I do with extra brine?
Save the leftover brine for up to 3 uses—it's perfect for quick-pickling cucumbers, radishes, or even green beans! Strain out any solids and store in a clean jar in the fridge. The flavor will mellow slightly with each use, but it's great for adding to dressings or marinades. Never reuse brine that smells off or has mold.