
Main Courses
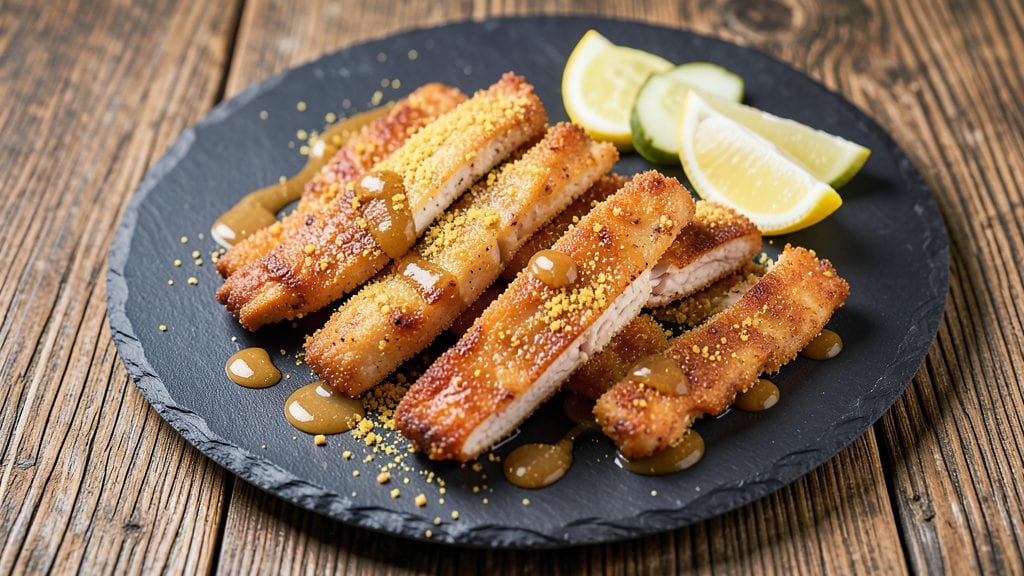
Recreating Chick-fil-A style chicken strips at home delivers that signature buttery cornmeal crunch and impossibly juicy white meat—without the drive-thru wait. The secret lies in a precise breading technique using a mix of flour, cornmeal, and spices that creates an irresistibly crispy exterior while keeping the chicken tender inside.
I've perfected this method through years of testing, ensuring every strip emerges golden-brown and flavorful, just like the original.
This recipe transforms simple chicken strips into a restaurant-quality dish with minimal effort. The process involves a quick breading and air-frying (or deep-frying) method that guarantees a crispy texture without sacrificing juiciness.
Whether you're serving them as an appetizer, meal prep for the week, or a quick weeknight dinner, the results are consistently delicious. The key is maintaining the right temperature and cooking time to avoid overcrowding the pan or air fryer.
What you'll end up with is a plate of golden, buttery chicken strips that are crispy on the outside and tender on the inside, perfect for dipping in honey mustard or BBQ sauce.
The cornmeal breading gives them that signature crunch, while the juicy white meat ensures every bite is satisfying. This recipe is designed to be foolproof, so even beginners can achieve professional results.
Serve with your favorite dipping sauces, and enjoy the convenience of homemade Chick-fil-A style chicken strips anytime. Let's get started on creating this crowd-pleasing dish!
Ingredients for chick fil a strips
Buttery cornmeal crunch meets impossibly juicy white meat—here's the exact ingredient lineup.
| Ingredient | Amount | Notes |
|---|---|---|
| Boneless, Skinless Chicken Breast 🍗 | 1 ½ lb | Cut into 1-inch strips |
| All-Purpose Flour 🌾 | ½ cup | For dredging |
| Fine Yellow Cornmeal 🌽 | ½ cup | Bob's Red Mill preferred |
| Paprika 🌶️ | 1 tbsp | Smoked variety for depth |
| Garlic Powder 🧄 | 1 tsp | Freshly ground preferred |
| Onion Powder 🧅 | 1 tsp | For subtle sweetness |
| Salt 🧂 | 1 ½ tsp | Diamond Crystal kosher |
| Black Pepper 🌶️ | ½ tsp | Freshly cracked |
| Baking Powder 🍞 | 1 tsp | For extra crispiness |
| Unsalted Butter 🧈 | ¼ cup | Melted, full-fat |
| Buttermilk 🥛 | ¼ cup | For tenderizing |
| Large Eggs 🥚 | 1 whole | Room temperature |
| Vegetable Oil 🫒 | 2 cups | For frying (or air fryer) |
The chicken breast is non-negotiable—look for plump, uniform strips at the meat counter. Whole Foods or Trader Joe's often have pre-cut strips, but cutting your own ensures even thickness. If using whole breasts, slice against the grain for maximum tenderness. The cornmeal? Bob's Red Mill is my go-to—it's finely ground and stays crispy. For the buttermilk, grab the full-fat version (it's worth the extra minute to shake it well). The baking powder might seem odd, but trust me—it creates that signature crunch.
No cornmeal? Crushed cornflakes or panko work in a pinch, but the texture won't be identical. Short on buttermilk? Mix 1 tbsp vinegar or lemon juice with 1/4 cup milk. The spices are flexible—swap smoked paprika for regular, but reduce to 1/2 tbsp if you prefer milder flavor. For the oil, vegetable or canola are neutral choices, but peanut oil gives a slightly richer taste. If air frying, use 1/2 inch of oil in the basket—just enough to coat the bottom.
Store leftover chicken strips in an airtight container for 3 days—they reheat beautifully in a skillet with a splash of butter. For meal prep, freeze portions on a tray first (so they don't stick), then transfer to a bag for up to 3 months. The breading mix keeps dry for 1 week in a sealed container, but I usually make fresh each time for maximum crispiness. Pro tip: Keep a small bowl of hot oil ready before frying—it helps maintain the perfect temp.
Why You'll Love This Recipe
- No-Fuss Crispy Magic: I swear by this method—no breading machine, no fancy prep. Just slice the chicken thin, toss it in flour and cornmeal, and let the oven do the work. That golden crust? It’s foolproof, even if I’m distracted by the dog.
- Garlic-Paprika Crunch: Between us, the secret’s in the dry rub. That paprika gives it a smoky warmth, while the garlic powder sneaks in depth without overpowering. The cornmeal adds a texture that’s dangerously addictive—crispy outside, tender inside.
- Weeknight Workhorse: I keep a bag of these frozen in my freezer for lazy Tuesdays. Toss them in a skillet with pre-cooked rice or serve them over a salad—no one ever questions where they came from. (Yes, even on a Tuesday night.)
- Budget-Friendly Protein: A single chicken breast stretches to feed four, and the pantry staples (flour, cornmeal) cost pennies. Honestly, it’s the kind of recipe that makes me feel like I’m feeding my family gourmet food without breaking the bank. Leftovers? They disappear faster than I can reheat them.
Step-by-step instructions for Chick fil a style chicken strips
Here's how to create that iconic buttery crunch and melt-in-your-mouth tenderness at home.
Prepare the Chicken and Seasoning Mix
Begin by cutting the 1.5 lb boneless, skinless chicken breast into 1-inch strips—this size ensures even cooking and maximum crispiness. I like to work quickly while keeping the chicken cold to prevent premature cooking. Pat the strips dry with paper towels to remove any moisture, which helps the coating adhere better.
In a medium bowl, whisk together the 0.5 cup all-purpose flour, 0.5 cup fine yellow cornmeal, 1 tbsp paprika, 1 tsp garlic powder, 1 tsp onion powder, 1.5 tsp salt, 0.5 tsp black pepper, and 1 tsp baking powder. This blend creates the signature crunch while adding subtle depth of flavor. Let the mixture sit for 5 minutes to allow the baking powder to activate fully—this ensures extra crispiness when fried.
Create the Buttermilk Egg Wash
In a separate shallow bowl, whisk together the 0.25 cup melted unsalted butter (cooled to room temperature), 0.25 cup buttermilk, and 1 whole large egg. The buttermilk tenderizes the chicken while the melted butter adds richness that carries through the crispy coating. I prefer room-temperature ingredients here—they blend smoother and create a more consistent coating.
Crack the egg into the bowl and whisk vigorously for 30 seconds until fully emulsified. The mixture should be smooth with no streaks of egg white. This step is crucial for achieving that signature Chick-fil-A texture—skip it, and you'll end up with uneven coating and less crispiness.
Assemble the Coating Process
Set up three shallow bowls: one with the seasoning mix, one with the buttermilk egg wash, and one empty for the coated strips. Working with 4-5 pieces of chicken at a time, dip each strip into the buttermilk egg wash, letting any excess drip off. Then press the strip into the seasoning mix, coating all sides thoroughly. I press gently but firmly—this ensures the coating sticks well and creates that perfect crunch.
Let the coated strips rest for 10 minutes while you prepare your frying method. This brief resting period allows the coating to adhere more securely, preventing it from falling off during frying. Don't skip this step—it makes a noticeable difference in the final texture.
Fry to Golden Perfection
Heat 2 cups vegetable oil in a deep skillet or Dutch oven to 350°F. Use a thermometer to monitor the temperature—this precision is key to getting that signature crispy exterior without overcooking the interior. Once the oil reaches temperature, carefully add the chicken strips in a single layer, being careful not to overcrowd the pan.
Fry for 3-4 minutes per side until the chicken reaches an internal temperature of 165°F and the coating is deep golden brown. You'll know it's ready when the strips float to the surface and the coating looks dry and crispy. I use tongs to flip them—this prevents the coating from breaking apart. Transfer the fried strips to a paper towel-lined plate to drain excess oil.
Maintain Juiciness and Serve
For maximum juiciness, let the chicken strips rest for 2-3 minutes before serving. This brief resting period allows the juices to redistribute throughout the meat. Serve immediately with your favorite dipping sauce—Chick-fil-A style strips are best enjoyed fresh while they're still crispy.
Here's the secret to keeping them crispy: If you're not serving them immediately, tent loosely with foil and place on a wire rack to prevent sogginess. These strips should be tender yet juicy inside with that iconic buttery cornmeal crunch on the outside—just like the restaurant version.
Pro Tips For Making Chick Fil A Strips
- USE COLD CHICKEN: Grab the chicken breasts straight from the fridge—no thawing, no warming. Cold chicken sears better and stays juicier when you’re frying those strips. I learned this the hard way after dealing with greasy, overcooked batches when I skipped it.
- DOUBLE-DREDGE FOR CRUST: Dip the strips in flour first, then cornmeal—then back in flour—before frying. The extra flour layer locks in that signature crunch. Sounds tedious, but it’s the thing that matters most for that Chick-fil-A texture.
- WATCH THE HEAT: Start the oil smoking hot (350–375°F), but pull the strips out when they’re just golden, not brown. Overcooking turns them rubbery, and no one wants sad, dry chicken. A quick 3–4 minutes per side is all you need.
- SALT THE CORNMEAL: Mix ½ teaspoon salt into the cornmeal before dredging—it cuts through the blandness and makes the crust taste like it came from the restaurant. I was skeptical until I tried it; now I can’t skip it.
Best sauces and condiments for this recipe
Classic Honey Mustard
This iconic pairing brings sweet and tangy notes that cut through the richness of the fried chicken. I make mine with 3 tbsp mayonnaise, 1 tbsp Dijon mustard, 1 tbsp honey, and a pinch of garlic powder.
Mix everything in a small bowl and adjust the honey to mustard ratio to your preference—more honey for sweetness, more mustard for tang. Serve in a small dipping cup for that authentic Chick-fil-A experience. 🍯
Smoky BBQ Sauce
For a smoky, slightly sweet alternative, use a quality BBQ sauce like Sweet Baby Ray's Original or Stubb's Original. The smokiness complements the cornmeal crunch beautifully. Warm the sauce slightly before serving to enhance its aroma.
I like to drizzle it over the strips rather than using it strictly as a dip—it adds a delicious glaze effect. 🔥
Spicy Ranch Dip
This creamy, spicy dip takes the classic ranch to the next level. Mix ½ cup sour cream, ¼ cup mayonnaise, 1 tbsp ranch seasoning mix, 1 tsp hot sauce, and ½ tsp smoked paprika.
The heat from the hot sauce balances the richness of the fried chicken perfectly. Serve chilled for the best texture. 🌶️
Sweet Chili Sauce
A slightly sweet and tangy option that's perfect for balancing the richness. Combine ¼ cup ketchup, 2 tbsp soy sauce, 1 tbsp honey, 1 tbsp rice vinegar, and 1 tsp chili flakes.
Simmer for 5 minutes to let the flavors meld together. This sauce adds a unique umami depth that pairs wonderfully with the cornmeal coating. ✨
Buttermilk Dip
For a lighter option, use the leftover buttermilk from your recipe! Mix ¼ cup buttermilk with 1 tbsp melted butter and a pinch of salt. The tanginess cleanses your palate between crispy bites.
This is a great option if you want to keep things simple and use what you already have on hand. 🥛
Finishing Touches
For an extra-special presentation, sprinkle the finished strips with flaky sea salt right after frying while they're still hot. This adds another layer of flavor and texture. Serve with toothpicks for easy handling, especially when paired with sauces.
The key is to serve the strips immediately—they're best enjoyed while the coating is still crispy and the chicken is juicy. 💫
Nutrition facts
Frequently asked questions
Can I use chicken thighs instead of breasts for this recipe?
Chicken thighs have more fat, which can make them juicier but may affect crispiness. For best results, stick with boneless, skinless chicken breasts. If you must use thighs, trim excess fat, pat them very dry, and reduce cooking time to 2-3 minutes per side to avoid overcooking. The cornmeal coating will still adhere, but texture may differ slightly.
How do I keep the coating from falling off during frying?
Follow these key steps: Pat chicken strips completely dry, rest coated strips for 10 minutes before frying, and don't overcrowd the pan. Also, maintain oil at 350°F—too-hot oil burns the coating, while too-cool oil makes it greasy. Use tongs to flip gently, not a fork, to preserve the crunch.
Can I bake these instead of frying for a healthier version?
Yes! Preheat oven to 425°F and bake strips on a wire rack set over a baking sheet for 12-15 minutes, flipping halfway. Brush with 1 tbsp melted butter before baking for extra crispiness. The texture won't be identical to fried, but you'll save 70% of the fat. For air frying, cook at 375°F for 8-10 minutes, shaking the basket once.
What's the secret to making the coating extra crispy?
Three critical factors: Use cold chicken (prevents premature cooking), press coating firmly (not just a quick dip), and maintain oil temperature. Also, let the coating mixture sit for 5 minutes before using—this activates the baking powder for maximum crunch. For extra crispiness, add 1 tbsp cornstarch to the seasoning mix.
How do I reheat leftover chicken strips without making them soggy?
Reheat in a 350°F oven for 5-7 minutes on a wire rack (no plate) to allow air circulation. For stovetop, use a nonstick skillet over medium heat with 1 tbsp butter for 2-3 minutes per side. Microwave reheating is not recommended—it steams the coating. Always reheat until internal temp reaches 165°F.