
Beverages
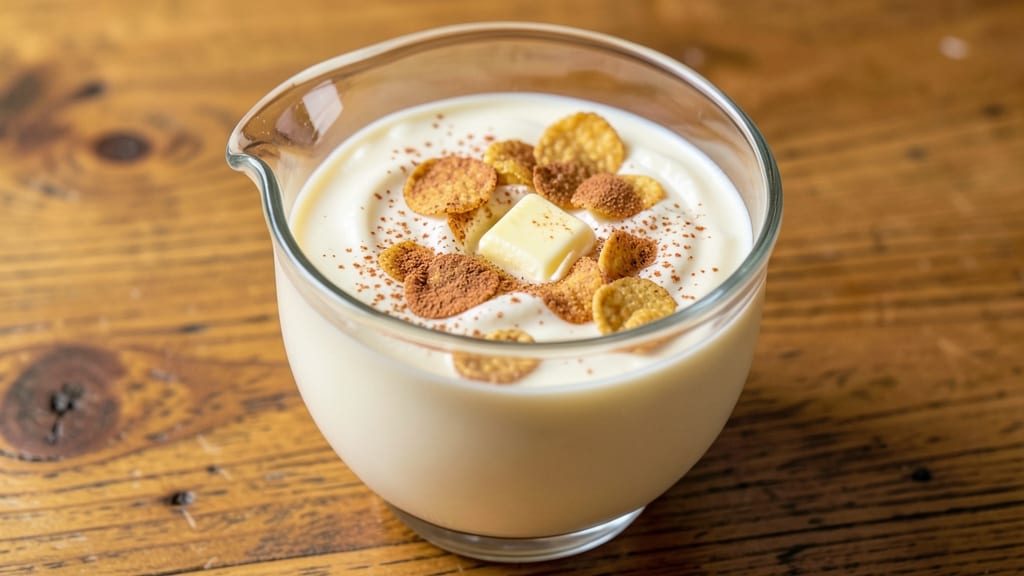
Creating homemade cereal milk transforms a simple breakfast staple into a customizable, additive-free treat with rich vanilla creaminess. The secret lies in blending cooked cereal with warm milk and a touch of sugar until perfectly smooth—no store-bought powders needed.
I developed this recipe after realizing how much better homemade versions taste compared to boxed alternatives.
This method delivers a velvety texture that's naturally sweetened and packed with the familiar comfort of cereal flavor. Using plain or flavored cereal (like cornflakes or graham crackers) and whole milk creates a balanced, nostalgic taste, while optional vanilla extract or cinnamon adds depth.
The process takes just 10 minutes and requires minimal ingredients, making it ideal for busy mornings or satisfying cravings.
What you'll achieve is a warm, creamy beverage that's perfect for breakfast or an afternoon pick-me-up. Unlike store-bought versions, this recipe lets you control sweetness and thickness—adjust to your preference.
The aroma alone will transport you back to childhood, but with the quality of a gourmet drink. Ready to make it?
This versatile drink works as a standalone treat or as a base for modern twists, like adding protein powder or spices. Whether you're recreating childhood memories or experimenting with new flavors, this homemade version delivers restaurant-quality results at home.
Ingredients for cereal milk
Eight simple ingredients transform your pantry into a nostalgic, velvety cereal milk experience—better than any boxed version.
| Ingredient | Amount | Notes |
|---|---|---|
| Plain Cornflakes 🍚 | 1 cup | Lightly crushed for smoother texture |
| Whole Milk 🥛 | 2 cups | Full-fat for creaminess (or 2% for lighter version) |
| Pure Vanilla Extract 🌿 | 1 tsp | High-quality, pure vanilla preferred |
| Granulated Sugar 🍚 | ¼ cup | Adjust to taste for sweetness |
| Ground Cinnamon 🍃 | ½ tsp | Optional for warmth (or cinnamon stick for infusion) |
| Unsalted Butter 🧈 | 1 tbsp | Softened for blending (or coconut oil for dairy-free) |
| Pinch of Salt 🧂 | ⅛ tsp | Enhances flavor balance |
| Graham Cracker Crumbs 🍪 | ¼ cup | Optional for depth (or oatmeal for nutty flavor) |
| Heavy Cream 🥛 | ¼ cup | Optional for ultra-creamy texture |
| Lemon Juice 🍋 | ½ tsp | Brightens flavor (optional) |
The cereal is the heart of this recipe, so pick one you love. Cornflakes are classic, but graham crackers or even puffed rice add unique textures. For the best flavor, grab plain, unsweetened cereal from the bulk bins at Whole Foods or Trader Joe's—they’re fresher than the boxed versions. If you’re using cornflakes, lightly crush them in a bag with a rolling pin for a smoother blend. The milk? Whole milk gives the richest texture, but 2% works too if you prefer lighter. Just avoid skim—it won’t be as creamy. For extra depth, add a splash of vanilla bean paste instead of extract if you’re feeling fancy.
No vanilla extract? A splash of vanilla bean paste or even a scraped vanilla bean pod works wonders. Short on sugar? Honey or maple syrup at half the amount adds natural sweetness with extra flavor. Want it dairy-free? Swap the whole milk for coconut milk or almond milk**>, and use coconut oil instead of butter. The cinnamon is optional but adds warmth—if you skip it, a pinch of nutmeg gives a cozy twist. For a modern twist, stir in protein powder or cocoa powder after blending. And if you’re feeling experimental, a dash of espresso powder creates a mocha cereal milk vibe. The butter isn’t mandatory, but it adds richness—think of it like a cereal milk ‘emulsifier’.
This recipe keeps beautifully in the fridge for up to 5 days, though it’s best enjoyed fresh. If you make a big batch, store it in a glass jar with a tight lid to preserve flavor. The texture thickens as it cools, so reheat gently in the microwave or on the stovetop with a splash of milk to restore creaminess. For a quick breakfast hack, pre-mix the dry ingredients (cereal, sugar, cinnamon) in a jar and just add milk when ready. Freezes for up to 3 months if you want to stock up—thaw overnight in the fridge and stir well before serving. Pro tip: Add a few ice cubes to your glass before pouring for an iced cereal milk treat.
Why You'll Love This Recipe
- Five-Ingredient Magic: This is the kind of recipe that makes me groan at how simple it is—just toast the cornflakes lightly, warm the milk with vanilla and sugar until it smells like a bakery, then stir in cinnamon. No measuring cups, no stress, just pure, effortless satisfaction.
- Vanilla-Cinnamon Dream: That first sip? It’s like biting into a warm cookie but in drink form—the vanilla’s depth and the cinnamon’s warmth play off each other perfectly. Honestly, I’ve tried store-bought versions, and this homemade mix beats them every time.
- Breakfast or Bedtime: Make it in the morning for a cozy start, or whip up a pitcher before bed when you’re craving something sweet but not heavy. My kids even ask for it on school nights—(yes, even on a Tuesday night)—because it’s that universally loved.
- Stretches Every Drop: A single batch keeps for days in the fridge, and it’s the perfect way to use up milk before it goes bad. Plus, it costs pennies per serving—way cheaper than fancy coffee drinks but just as comforting. Budget-friendly doesn’t get much better than this.
Step-by-step instructions for homemade vanilla cereal milk
Transform simple pantry staples into velvety cereal milk with this foolproof method.
Prepare the Base Ingredients
In a medium saucepan, combine the 2 cups whole milk, 1 tbsp unsalted butter, 0.25 cup granulated sugar, 0.5 tsp ground cinnamon, and the 0.125 tsp pinch of salt. This combination creates the foundational flavor profile that will develop into rich, creamy cereal milk. Stir gently over medium-low heat until the mixture reaches 180°F, which should take about 8-10 minutes. You'll notice the butter melts completely and the sugar fully dissolves, creating a smooth, slightly sweetened base.
While the milk mixture heats, lightly crush the 1 cup plain cornflakes in a food processor or by placing them in a resealable bag and gently pressing with a rolling pin. This step ensures a smoother texture in your final cereal milk. The cornflakes should be broken down into small, irregular pieces rather than fine powder—think of it as creating a light, crunchy element rather than a thick paste.
Infuse with Vanilla and Graham Cracker Depth
Once the milk mixture reaches 180°F, remove it from heat and stir in the 1 tsp pure vanilla extract and 0.25 cup graham cracker crumbs. The vanilla will immediately perfume the mixture with its warm, sweet aroma, while the graham cracker crumbs add a subtle nutty depth that complements the cornflakes. Let the mixture steep off the heat for 5 minutes, allowing the flavors to meld together. You'll notice the graham cracker crumbs begin to soften slightly, releasing their rich flavor into the warm milk.
For a brighter finish, stir in the 0.5 tsp lemon juice at this stage. This small addition brightens the overall flavor profile, cutting through any potential sweetness and adding a subtle tang that enhances the vanilla. The lemon juice also helps stabilize the milk mixture, preventing it from curdling as it cools. If you prefer a more pronounced vanilla flavor, you can add an extra ¼ tsp of vanilla extract at this point, but don't exceed 1½ tsp total—this could make the cereal milk taste overly artificial.
Create Ultra-Creamy Texture
Return the saucepan to low heat and gradually whisk in the 0.25 cup heavy cream. The cream will create a luxurious, velvety texture that elevates the cereal milk from simple to indulgent. Continue whisking for 2-3 minutes until the cream is fully incorporated and the mixture becomes noticeably thicker. You're looking for a consistency similar to store-bought cereal milk—smooth enough to pour easily but thick enough to coat cereal generously.
If you find the mixture is too thick after adding the cream, you can thin it slightly by whisking in 1-2 tablespoons of hot milk from the original 2 cups (set aside before heating). The heat from the milk helps the cream blend seamlessly without causing separation. For an extra touch of richness, you could also whisk in 1 additional tablespoon of butter, but this is optional and should only be done if you're using the cereal milk immediately rather than storing it.
Incorporate the Cornflakes and Cool
With the saucepan still on low heat, gradually add the crushed cornflakes while whisking continuously. The heat helps the cornflakes soften slightly and absorb the flavorful milk mixture, creating that signature cereal milk taste. Whisk for 3-4 minutes until the cornflakes are fully coated and the mixture reaches a uniform consistency. You'll notice the cornflakes begin to plump up slightly, indicating they're absorbing the liquid properly.
Remove the saucepan from heat and let the cereal milk cool to room temperature, stirring occasionally to prevent any separation. This cooling process is crucial—it allows the flavors to fully meld and the texture to stabilize. Once cooled, transfer the cereal milk to a clean jar or airtight container. For best results, refrigerate for at least 2 hours before using, as this allows the flavors to develop even further and the texture to become perfectly smooth.
Store and Use Like Store-Bought
The cereal milk will keep in the refrigerator for up to 5 days, maintaining its creamy texture and rich flavor. When ready to use, simply shake the jar gently to redistribute any settled cornflakes, then pour over your favorite cereal. The result should be a velvety, vanilla-infused milk that coats each cereal piece beautifully, with subtle notes of cinnamon and graham cracker depth.
For an even smoother texture when serving, you can strain the cereal milk through a fine-mesh sieve before pouring. This removes any remaining cornflake pieces while keeping the rich, creamy liquid. If you prefer a slightly thicker consistency, you can chill the cereal milk for an additional 1-2 hours before serving—this helps the natural starches in the milk set slightly, creating a more luxurious mouthfeel.
Pro Tips For Making Cereal Milk
- Soak the Cornflakes: Toss them in warm milk for 5 minutes first—this softens the edges so they don’t turn into a gritty mess when blended. I learned this the hard way after making a sludge instead of silky milk.
- Sweeten Gradually: Start with half the sugar, taste, then add more—cornflakes soak up sweetness differently than cereal. My first batch was cloyingly sweet because I assumed "more sugar = better," but balance is everything.
- Whisk the Cinnamon: Mix it into the milk before blending to avoid clumps that turn your milk into a speckled disaster. A quick 10-second whisk keeps it smooth—trust me, you’ll notice the difference.
- Chill Before Serving: Let it sit in the fridge for 20 minutes after blending—this thickens it naturally and cools the vanilla flavor. I used to serve it warm and wondered why it tasted flat; cold brings out the richness.
Storing and reheating this cereal milk
Fridge Storage Tips
Store your homemade cereal milk in a glass jar with an airtight lid—I use Pyrex 16-ounce jars for their durability. Keep it refrigerated at 40°F or below for up to 5 days, though the flavor peaks within the first 3 days.
The texture naturally thickens as it cools, so give it a gentle shake before serving to redistribute any settled cornflakes. 🥛
Freezing for Later
For long-term storage, freeze cereal milk in silicone ice cube trays or quart-sized freezer bags—leave 1 inch of headspace to prevent expansion cracks. Thaw overnight in the fridge, then stir vigorously to restore creaminess.
The texture may separate slightly after freezing, but a quick 30-second microwave reheat (covered) with 1 tablespoon of milk smooths it right out. ❄️
Reheating Perfection
For stovetop reheating, transfer to a saucepan with 2 tablespoons of milk and warm over low heat, stirring constantly until reaching 160°F. Avoid boiling—just enough to melt any separated cream.
Microwave reheating works too: 1-minute intervals on 50% power, stirring between each, until steaming hot. Add a pinch of salt if needed to balance flavors. 🔥
Texture Recovery Hacks
If your cereal milk separates after storage, whisk in 1 tablespoon of cold heavy cream or 1 teaspoon of cornstarch slurry (mix ½ tsp cornstarch + 1 tsp cold milk) until smooth.
For ultra-creamy results, chill the reheated milk for 10 minutes before serving—this lets the natural starches thicken again. A splash of lemon juice can also help emulsify any oil separation. ✨
Portion Control
Divide into 8-ounce servings before freezing or refrigerating to avoid waste. Use small mason jars for individual portions—they’re perfect for breakfast prep. Label with dates to track freshness. Pro tip: Freeze ½ cup portions in silicone molds for single-serving cereal milk shots—just pop one out when you need it! 📅
Dairy-Free Adaptations
For plant-based storage, use coconut milk (full-fat for creaminess) and store in glass containers to prevent absorption of freezer odors. Reheat gently—coconut milk can curdle if overheated.
Almond milk versions hold up best in the fridge for 3-4 days but may separate more after freezing. Always stir thoroughly after thawing. 🌱
Nutrition facts
Frequently asked questions
Can I make cereal milk without cooking the milk first?
You can try a no-cook version, but the texture won't be as smooth or creamy. For best results, heating the milk to 180°F helps dissolve sugar and butter completely while preventing separation. If you skip cooking, whisk everything together cold and refrigerate for at least 4 hours to let flavors meld. The result will be thinner and less velvety, but still delicious with a quick shake before serving.
What's the best cereal to use for this recipe?
Classic choices like cornflakes or graham crackers work perfectly, but you can experiment! For a nutty twist, try oatmeal cereal, or rice cereal for a lighter flavor. Avoid overly sweet or chocolate cereals—they'll make the milk too sweet. Lightly crush your cereal for smoother blending, but leave some texture for that nostalgic crunch.
How do I fix cereal milk that's too thick or too thin?
For thick cereal milk, whisk in 1-2 tablespoons of warm milk until smooth. If it's too thin, stir in 1 tablespoon of cornstarch mixed with 1 teaspoon cold milk and heat gently for 1 minute while stirring constantly. For a quick fix, chill the milk for 30 minutes—it naturally thickens as it cools. Always adjust gradually to avoid lumps.
Can I make cereal milk with powdered milk instead of fresh?
Yes, but the texture will be less creamy. Use whole powdered milk and add 1 extra tablespoon of butter to compensate for the lack of natural fat. You may need to adjust sweetness too—powdered milk is often less sweet than fresh. For best results, dissolve the powder in warm water first, then proceed with the recipe as written.
What are some creative ways to use cereal milk?
Beyond pouring it over cereal, try these ideas: Use it as a smoothie base (blend with banana and peanut butter), drizzle over pancakes or waffles, or mix into coffee or tea for a creamy twist. For dessert, freeze into cereal milk popsicles or use it to make milkshakes. The vanilla flavor pairs beautifully with chocolate or caramel toppings too!