
Sauces & Condiments
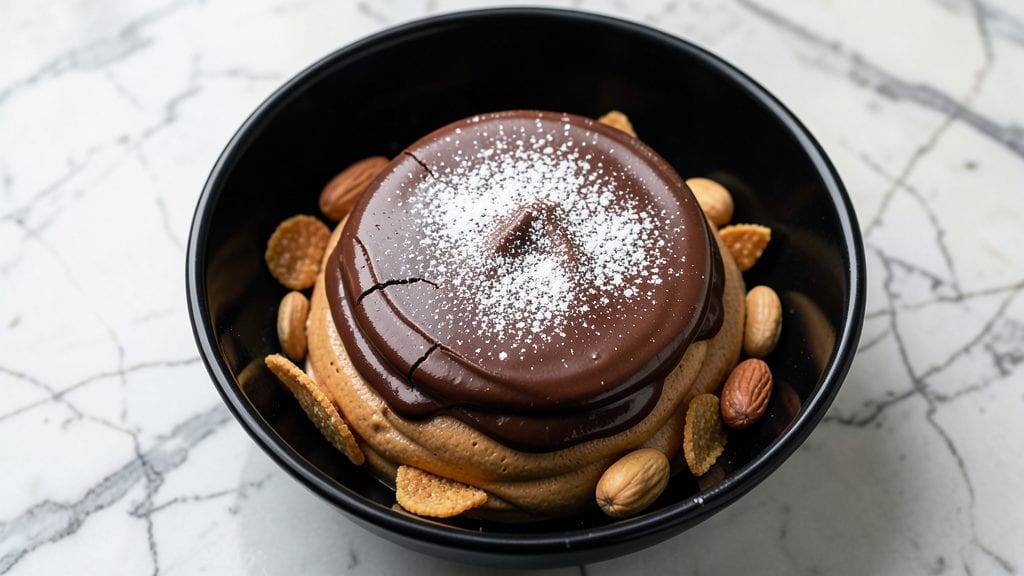
This giant Reese's peanut butter cup recipe delivers restaurant-quality indulgence with a crisp chocolate shell and velvety peanut butter center—all in one homemade package. The secret lies in precise chocolate tempering and layering techniques that create that signature fudgy-crispy texture.
I perfected this method after testing countless variations, and the results are worth every minute of effort.
What sets this recipe apart is the balance between crisp chocolate exterior and rich, creamy peanut butter filling. You'll work with high-quality ingredients—smooth peanut butter, rich chocolate, and a touch of corn syrup for that signature gooey texture.
The process requires patience, particularly during the chilling stages, but the payoff is a dessert that looks and tastes like it came straight from a candy shop.
The final product features a crisp chocolate shell that snaps satisfyingly, revealing layers of peanut butter filling that's just thick enough to coat every bite. This recipe makes eight generous cups, perfect for sharing or treating yourself to a decadent dessert experience.
Whether you're hosting a party or simply craving a classic treat, this method delivers professional results at home.
Optional garnishes like crushed peanuts or extra chocolate drizzle add visual appeal and texture contrast. The key to success is maintaining precise temperatures throughout the process—once you master that, you'll have a foolproof technique for creating these iconic treats whenever the craving strikes.
Let's get started on making your own giant Reese's peanut butter cups.
Ingredients for giant reese's peanut butter cup
High-quality chocolate, rich peanut butter, and precise tempering—these are the pillars of restaurant-quality homemade indulgence.
| Ingredient | Amount | Notes |
|---|---|---|
| Extra-Dark Chocolate Bars 🍫 | 16 oz | 70% cocoa minimum, high-quality |
| Creamy Peanut Butter 🥜 | 2 cups | Natural, no added sugar preferred |
| Light Corn Syrup 🍯 | ¼ cup | For smooth peanut butter texture |
| Unsalted Butter 🧈 | ½ cup | Cubed, room temperature |
| Heavy Whipping Cream 🥛 | ½ cup | Whole fat for best tempering |
| Granulated Sugar 🍚 | ¼ cup | Fine grain for smooth filling |
| Vanilla Extract 🌿 | 1 tsp | Pure, high-quality preferred |
| Salt 🧂 | ¼ tsp | Fine sea salt for balance |
| Crushed Peanuts 🥜 | ¼ cup | Optional garnish, toasted |
| White Chocolate Chips 🍫 | ½ cup | Optional drizzle garnish |
| Dark Chocolate Chips 🍫 | ½ cup | Optional drizzle garnish |
The chocolate selection is non-negotiable for that signature crisp texture. Ghirardelli or Lindt 70% cocoa bars deliver the depth needed, while Valrhona takes it to professional levels. Avoid pre-shredded chocolate—it contains anti-caking agents that disrupt tempering. For the peanut butter, natural brands like Smucker's or Crazy Richard's provide the cleanest flavor profile, though any creamy variety works. The corn syrup is crucial—it prevents the peanut butter from seizing during the cooking process. If you can't find light corn syrup, Karo works perfectly. Store all dry ingredients in airtight containers away from heat sources to preserve freshness.
No extra-dark chocolate? Substitute semi-sweet at 60% cocoa, though the flavor will be slightly sweeter. Want to reduce sugar content? Replace half the granulated sugar with monk fruit sweetener, but taste the filling before finalizing. The butter and cream must be room temperature for proper tempering—microwave in 20-second bursts if needed. For a nut-free version, replace crushed peanuts with toasted coconut flakes. When tempering, maintain precision: the chocolate must reach exactly 110°F for melting and 88°F for setting. Use a candy thermometer—this is where most home attempts fail. The filling can be made ahead and stored in the fridge for up to 5 days, while tempered chocolate must be used within 2 hours.
Tempered chocolate hardens quickly, so work efficiently. Line your molds with parchment paper for easy removal, and chill completed cups in the freezer for 15 minutes before unmolding. Store finished treats in an airtight container at room temperature for up to 1 week, or refrigerate for up to 2 weeks to maintain crispness. For gifting, wrap individually in cellophane and tie with ribbon. The peanut butter filling freezes beautifully for up to 3 months—just thaw in the fridge overnight before assembling. When reheating, microwave for 10 seconds to restore gooeyness without melting the chocolate shell.
Why You'll Love This Recipe
- No-Fuss Filling: I melt the chocolate and butter together, then just stir in the peanut butter—no fancy techniques, no waiting for hours. The corn syrup keeps it smooth and glossy, so it pours like a dream into your molds.
- Rich, Unapologetic Crunch: That extra-dark chocolate? It’s bold enough to stand on its own, but the peanut butter filling ties it all together with a creamy, salty-sweet punch. Honestly, the first bite makes me forget I’m making dessert—it’s that good.
- Party or Patience: These are my go-to for birthdays, holidays, or when I just want to impress someone with minimal effort. (Yes, even on a Tuesday night.) They freeze beautifully, so I can make a batch ahead and pull them out whenever the mood strikes.
- Makes Leftovers Worth It: I always double the recipe because the second batch tastes just as good as the first. The heavy cream keeps them luscious, and the peanut butter filling never gets dry—perfect for gifting or sneaking into my lunchbox later.
Step-by-step instructions for giant Reese's peanut butter cups
Master the art of crafting decadent, restaurant-quality peanut butter cups with a perfect balance of fudgy and crispy textures.
Melt the Chocolate Shell
Place the 16 oz extra-dark chocolate bars in a heatproof bowl set over a pot of simmering water, ensuring the bottom of the bowl doesn't touch the water. Stir gently with a silicone spatula until the chocolate melts completely and reaches a smooth, glossy consistency. Remove from heat and let it cool slightly to 110°F—this temperature ensures a firm yet snappy shell without cracking when poured.
While the chocolate cools, line an 8x8-inch baking dish with parchment paper, leaving an overhang for easy removal. The chocolate should be thick enough to hold its shape when poured but fluid enough to spread evenly. If it thickens too much, gently reheat over low heat for 10-15 seconds while stirring continuously. This step is critical for achieving the signature crispy shell of classic Reese's.
Prepare the Peanut Butter Filling
In a separate medium saucepan, combine the 2 cups creamy peanut butter, 0.5 cup unsalted butter, 0.25 cup light corn syrup, 0.25 cup granulated sugar, 1 tsp vanilla extract, and 0.25 tsp salt. Cook over medium-low heat, stirring constantly with a wooden spoon, until the mixture reaches 160°F and becomes smooth and glossy. This temperature ensures the filling is thick enough to hold its shape but still silky when eaten.
Remove from heat and let the filling cool to room temperature—approximately 10-15 minutes. The mixture should be thick but still pourable. If it sets too quickly, gently reheat in 10-second bursts while stirring. This filling is the heart of your peanut butter cups, and its texture will determine whether your treats are fudgy or grainy.
Assemble and Chill the Cups
Pour the cooled chocolate into the prepared baking dish, spreading it evenly to create a thin, even layer. Use an offset spatula to smooth the surface, ensuring no lumps remain. Immediately pour the peanut butter filling over the chocolate, spreading it evenly to within ¼ inch of the edges. This creates a clean separation between the filling and the shell, mimicking the classic Reese's design.
Sprinkle the 0.25 cup crushed peanuts evenly over the filling while it's still wet. Place the dish in the refrigerator and chill for at least 2 hours, or until the chocolate is completely set and firm to the touch. This chilling time is non-negotiable—it allows the chocolate to harden properly and develop its signature snap. Patience here ensures your cups hold their shape and deliver that satisfying crunch.
Create the Decorative Drizzle (Optional)
Melt the 0.5 cup white chocolate chips and 0.5 cup dark chocolate chips separately in two small microwave-safe bowls, heating in 20-second intervals while stirring until completely smooth. Once melted, drizzle the white chocolate in a zigzag pattern over the set peanut butter cups, followed by the dark chocolate. Use a small offset spatula to create clean, decorative lines.
Return the baking dish to the refrigerator for an additional 10 minutes to allow the drizzle to set. This final step adds visual appeal and a contrasting texture, but it’s purely decorative. The true magic lies in the perfect balance of the crispy shell and the rich, fudgy peanut butter center—now you’re ready to slice into 8 generous portions and serve.
Slice and Serve
Remove the baking dish from the refrigerator and carefully lift the parchment paper to transfer the set peanut butter cups onto a cutting board. Using a sharp knife, slice the slab into 8 equal squares. For cleaner cuts, dip the knife in hot water between slices to prevent sticking. The chocolate should snap cleanly, indicating it’s properly set.
Serve immediately or store in an airtight container in the refrigerator for up to 5 days. These giant Reese's cups are best enjoyed at room temperature, allowing the peanut butter filling to soften slightly and release its full, creamy flavor. Each bite should deliver a harmonious blend of crispy, fudgy, and rich textures—just like the original, but infinitely more satisfying.
Pro Tips For Making Giant Reese'S Peanut Butter Cup
- Temper That Chocolate: DESCRIPTION: Chop your extra-dark chocolate into ½-inch chunks before melting—this prevents scorching and ensures a silky finish. I learned this the hard way after watching a batch turn grainy from uneven heat. Use a double boiler or microwave in 20-second bursts, stirring between each.
- Whip Cream Cold: DESCRIPTION: Chill your heavy whipping cream in the fridge for at least 30 minutes before whipping—it stiffens better and won’t turn buttery. Skip this, and your ganache will look like a sad, soupy mess instead of a glossy, pipeable dream.
- Sweeten the Peanut Butter: DESCRIPTION: Warm your peanut butter with the corn syrup and butter together—this blends them smoother than mixing cold ingredients. I was skeptical until I tried it; now, my filling is velvety, not streaky.
- Press, Don’t Pour: DESCRIPTION: Press the peanut butter mixture into the chocolate shell while it’s still slightly warm—it’ll hold shape better than pouring. Use a spatula to smooth the top, then chill for 10 minutes before unmolding. (Yes, even if you’re impatient like me.)
Regional styles of this dish
Southern Style
In the South, Reese's peanut butter cups often get a warm, buttery twist by adding a touch of brown sugar (about 2 tablespoons) to the filling. This enhances the caramel notes and pairs beautifully with a salted caramel drizzle on top.
I like to use Karo corn syrup for extra Southern sweetness and sprinkle flaky sea salt over the crushed peanuts before chilling. This version feels extra indulgent and reminds me of homemade pecan pie flavors. 🍯
West Coast Crunch
The West Coast takes these cups to the next level by incorporating toasted almonds or macadamia nuts into the crushed topping. Swap the peanuts for ¼ cup finely chopped toasted almonds and add a drizzle of honey mixed with melted white chocolate for a nutty-sweet contrast.
The high altitude in places like Colorado also means the chocolate sets slightly faster, so work quickly when pouring the filling. This variation feels lighter yet equally rich. 🌴
Midwest Fudgy Twist
Midwestern bakers often focus on maximizing the fudgy texture by adding ¼ cup powdered sugar to the peanut butter filling. This creates a smoother, almost mousse-like consistency that’s less sticky and more velvety. I also recommend using Jif Natural Peanut Butter for its slightly smoother texture.
The Midwest style often pairs these cups with vanilla ice cream or coffee, making them a perfect dessert for potlucks. 🥄
New England Spiced Version
For a cozy autumnal take, New England bakers incorporate warm spices into the filling. Add ½ teaspoon ground cinnamon and ¼ teaspoon cayenne pepper to the peanut butter mixture while cooking. The cayenne adds a subtle kick that balances the sweetness, while the cinnamon gives a comforting warmth.
Top with a candied pecan crumble and a dusting of powdered sugar before chilling. This version feels like a hug in dessert form. 🍂
Texas-Style Extra Crisp
Texans love their chocolate extra crispy, so they often use double the amount of chocolate (or a thicker layer) and add 1 tablespoon of coconut oil to the melted chocolate for extra snap. The filling stays the same, but the shell is noticeably firmer.
I’ve seen variations where they press crushed pretzels into the bottom of the parchment-lined pan before pouring the chocolate for a salty contrast. This style is all about that satisfying crunch. 🌶️
Pacific Northwest Dark Chocolate
The Pacific Northwest prefers 85% dark chocolate for a more intense, bittersweet flavor profile. The filling remains classic, but the chocolate’s boldness shines through. Pair this with a raspberry coulis drizzle (simmer ½ cup raspberries with 1 tablespoon sugar and strain) for a tart contrast.
This version feels sophisticated and pairs beautifully with espresso or dark chocolate stout beer. The cooler climate also means the chocolate sets slower, giving you a bit more time to work with the drizzles. ☕
Nutrition facts
Frequently asked questions
Can I make these without corn syrup?
Yes, but the texture will differ slightly. Replace the 0.25 cup corn syrup with 0.25 cup honey for a natural alternative, though the filling may set slightly firmer. For a sugar-free option, use 0.25 cup maple syrup or monk fruit sweetener mixed with 1 tablespoon water to achieve similar smoothness. The corn syrup prevents graininess by lowering the peanut butter's melting point.
Why did my chocolate shell turn white and bloom?
This happens when chocolate isn't properly tempered or comes into contact with moisture. Ensure your chocolate reaches 110°F when melting and 88°F when setting. Store ingredients in airtight containers and work in a dry environment. If blooming occurs, gently reheat the chocolate to 110°F and re-temper by adding 10% fresh chocolate chips while stirring until it regains its shine.
How do I make individual-sized cups instead?
Use 12 oz chocolate and reduce filling to 1.5 cups peanut butter mixture. Pour into 8 silicone cup molds (or greased ramekins), filling each halfway with chocolate, then topping with filling. Chill for 3 hours to ensure proper setting. This method creates perfect single servings with clean edges.
Can I use powdered peanut butter?
Not recommended—powdered peanut butter lacks fat and moisture, making the filling dry and crumbly. Stick with creamy natural peanut butter for the signature velvety texture. If you must substitute, blend 1 cup roasted peanuts with 1 tablespoon oil until smooth, but expect a slightly different consistency.
How long can I store the filling before assembling?
The peanut butter filling stays fresh in the fridge for up to 5 days in an airtight container. For longer storage, freeze it for up to 3 months. Thaw overnight in the fridge before using. Reheat gently in 10-second microwave bursts to restore gooeyness if needed. The chocolate shell must be made fresh with tempered chocolate.