
Desserts
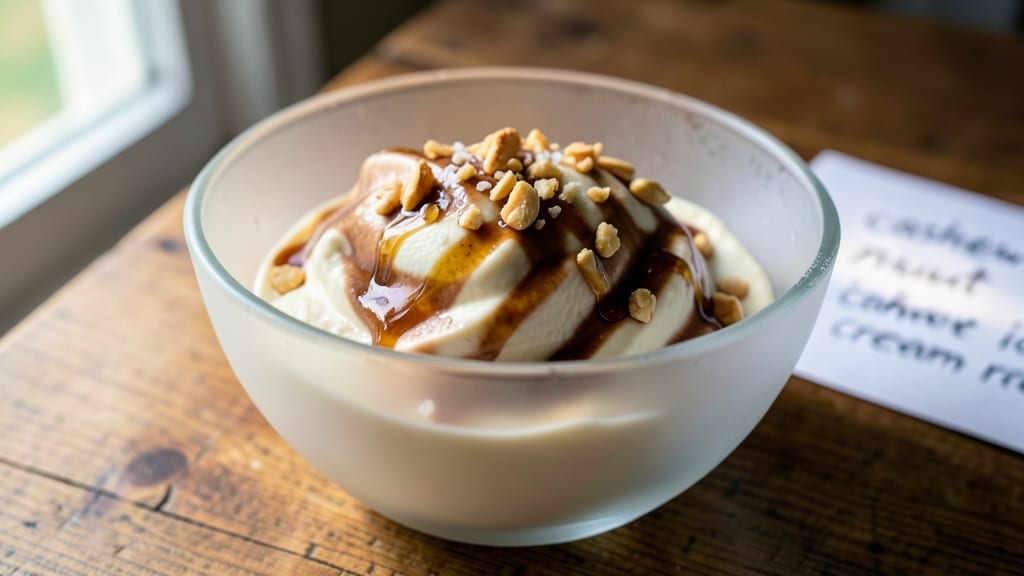
This cashew nut ice cream recipe delivers ultra-creamy plant-based bliss in just 10 minutes of active prep time—simpler than you’d expect. This vegan-friendly recipe transforms simple soaked cashews into a luscious, dairy-free dessert that rivals traditional ice cream.
The key lies in proper soaking and blending techniques that eliminate the need for specialized equipment.
What makes this recipe stand out is its versatility—you can customize flavors with vanilla, cocoa, or fresh fruit while maintaining that signature creamy texture. The process begins with soaking raw cashews to soften them, then blending with sweetener until perfectly smooth.
No ice cream maker required; we'll use a simple freezing technique that delivers professional results.
By the time you're done, you'll have a batch of velvety cashew nut ice cream that's rich, satisfying, and completely plant-based. The texture is remarkably smooth with just the right amount of bite, while the flavor profile lets you experiment with endless variations.
This is dessert that feels indulgent without the guilt.
Perfect for warm weather, potlucks, or satisfying sweet cravings guilt-free. The recipe scales easily, so you can make enough to share or freeze portions for later. Let's get started on creating this creamy, plant-powered treat that everyone will love.
Ingredients for cashew nut ice cream
Eight ingredients transform into velvety cashew nut ice cream—rich, creamy, and completely plant-powered.
| Ingredient | Amount | Notes |
|---|---|---|
| Raw Cashews 🥜 | 1 ½ cups | Unsalted, soaked for 4+ hours |
| Extra-Virgin Coconut Oil 🫒 | ¼ cup | Melted for smooth texture |
| Pure Maple Syrup 🍯 | ½ cup | Grade B for richer flavor |
| Vanilla Extract 🌿 | 1 tbsp | Pure Madagascar vanilla |
| Filtered Water 💧 | ¼ cup | For blending consistency |
| Pinch Sea Salt 🧂 | ⅛ tsp | Diamond Crystal preferred |
| Fresh Vanilla Bean Paste 🌿 | 1 tsp | Optional for depth |
| Unsweetened Cocoa Powder 🍫 | ¼ cup | For chocolate variation |
| Fresh Blueberries 🫐 | ½ cup | Optional fruit mix-in |
| Unsweetened Almond Milk 🥛 | ¼ cup | For extra creaminess |
The raw cashews are the heart of this recipe. Unsalted and high-quality is non-negotiable—store-bought roasted cashews won't work. Soak them for at least 4 hours (overnight is best) in filtered water to soften completely. Trader Joe's and bulk bins at Whole Foods carry excellent raw cashews. Drain and rinse them thoroughly before blending—any residual water can make your ice cream icy. The maple syrup should be Grade B for its deeper, caramel notes, but Grade A works in a pinch. Fresh vanilla bean paste adds that restaurant-quality depth, but pure extract gets you 90% there.
No maple syrup? Agave nectar or date syrup works in equal amounts, though maple has the best flavor. Want chocolate? The cocoa powder is there for you—just blend it in with the wet ingredients. Running low on vanilla? Almond extract at half the amount gives a similar floral note. The coconut oil is crucial for that ultra-creamy texture—don't substitute with regular vegetable oil. For fruit variations, blueberries or raspberries blend right in, but avoid anything with pits like cherries. The almond milk is optional but makes the texture even smoother if you're serving it immediately.
This ice cream keeps beautifully. Portion into airtight containers with parchment between layers to prevent freezer burn—it'll stay creamy for up to 2 months. For serving, let it sit at room temperature for 5-10 minutes before scooping. The texture improves overnight as the flavors meld. Double the batch and freeze half—it's perfect for potlucks or last-minute dessert cravings. No churning required; just blend, freeze, and enjoy that silky-smooth plant-based indulgence.
Why You'll Love This Recipe
- No Soak, No Stress: Soaking cashews is a myth—just toss them in hot water for 15 minutes, and they soften perfectly. No waiting overnight, no forgotten bowls. I’ll never go back.
- Creamy, Not Cloying: The coconut oil makes it rich but never heavy, while maple syrup adds just the right hint of sweetness—like dessert without the guilt. Trust me, it’s addictive.
- Freezer-Friendly Magic: Make a big batch and freeze it. Scoop by the bowl or the spoon—it’s perfect for lazy mornings or post-dinner crunch. My kids even ask for seconds.
- Budget’s Your Friend: Cashews are pricey, but a small bag lasts forever. And with just five ingredients, you’re not wasting money on fancy mix-ins. Solid value.
Step-by-step instructions for cashew nut ice cream
Here's how to create velvety-smooth plant-based ice cream that rivals dairy versions.
Soak and Prepare the Cashews
Begin by soaking the 1.5 cups raw cashews in filtered water for at least 4 hours (or overnight for best results). This hydration step is crucial—it transforms the cashews from hard to tender, creating that signature creamy texture we're after. Use enough water to cover them by about an inch in a bowl. After soaking, drain thoroughly using a fine-mesh strainer, shaking gently to remove excess water.
While the cashews soak, melt the 0.25 cup extra-virgin coconut oil in a small saucepan over low heat. You'll know it's ready when it's completely liquid and just begins to shimmer. Remove from heat and let it cool slightly—this melted oil will become the rich, velvety base of our ice cream. The coconut oil's fat content is what gives plant-based ice cream that luxurious mouthfeel.
Blend the Base Ingredients
Transfer the drained cashews to a high-speed blender. Add the melted coconut oil, 0.5 cup pure maple syrup, 1 tablespoon vanilla extract, 0.25 cup filtered water, 0.125 teaspoon pinch sea salt, and 1 teaspoon fresh vanilla bean paste. Here's the thing—blend everything together until completely smooth. You'll notice the mixture starts thick, then gradually becomes silky and homogeneous. This process typically takes about 2-3 minutes of continuous blending. The result should be a pale, velvety liquid with no visible cashew particles.
Taste the mixture at this stage. It should be sweet but balanced by the salt and vanilla. If you're making the chocolate variation, now's the time to add the 0.25 cup unsweetened cocoa powder and blend again for 30 seconds until fully incorporated. The cocoa will darken the mixture slightly, but it should still maintain that smooth, creamy consistency. For the berry version, hold off on adding the blueberries until after chilling.
Chill and Incorporate Mix-Ins
Pour the blended mixture into a clean glass container with a lid. Here's where patience pays off—refrigerate for at least 4 hours, or preferably overnight. This chilling step is essential for two reasons: it prevents ice crystals from forming during freezing, and it allows the flavors to meld completely. You'll notice the mixture thickens slightly as it cools, which is perfect for our next steps.
Once chilled, give the mixture one final stir to ensure even consistency. Now's the time to fold in any mix-ins. For the berry version, gently stir in the 0.5 cup fresh blueberries and 0.25 cup unsweetened almond milk. For the chocolate version, simply add the almond milk now if you haven't already. The almond milk adds that extra creaminess promised in the title, while the blueberries will create delightful pockets of fruity surprise throughout each scoop.
Freeze for Ultra-Creamy Texture
Pour the mixture into your ice cream maker and process according to the manufacturer's instructions. Most home models take about 20-25 minutes to transform the liquid into soft-serve consistency. The key here is to stop just before it becomes too firm—you want that perfect scoopable texture where it's creamy but holds its shape.
For the best results, transfer the soft-serve to a lidded container and freeze for an additional 1-2 hours. This secondary freezing step ensures the ice cream maintains its creamy texture when scooped. When ready to serve, let it sit at room temperature for 5-10 minutes before scooping. The contrast between the cold ice cream and warm spoon creates that satisfying eating experience we all love.
Serve and Enjoy
Scoop your cashew nut ice cream immediately into bowls. The texture should be smooth and creamy, with no ice crystals if properly processed. For the chocolate version, you'll notice rich cocoa notes that complement the natural sweetness. In the berry version, each bite should offer bursts of blueberry flavor against the creamy cashew base.
Here's a pro tip: if the ice cream becomes too firm after initial freezing, simply let it sit at room temperature for 10-15 minutes before scooping. The fat content from the cashews and coconut oil helps maintain that creamy texture even after freezing. Store any leftovers in an airtight container for up to 1 week, though I doubt it will last that long!
Pro Tips For Making Cashew Nut Ice Cream
- Soak Cashews Overnight: Don’t skip this step—raw cashews need at least 6–8 hours (or overnight) soaking in hot water to soften properly. I learned this the hard way after blending under-soaked cashews and ending up with a gritty, sad texture. Trust me, your future self will thank you for the patience.
- Use Boiling Water: Cover your cashews with boiling water, not just hot. This ensures they soften evenly and quickly, avoiding any stubborn, chewy bits. Pour the water directly from the kettle into the bowl—no room temperature shortcuts here.
- Blend Until Silky: Pulse the cashews first, then blend on high for 2–3 minutes until the mixture is completely smooth, like thick pudding. I used to stop too soon and ended up with tiny cashew bits—your ice cream will taste better (and look prettier) if it’s truly silky.
- Chill the Base First: Let the blended mixture cool to room temperature before freezing. Skipping this step can cause ice crystals to form later, ruining the texture. Pop it in the fridge for 1–2 hours after blending—it’s a small step that makes a real difference.
Troubleshooting perfect results
Grainy Texture Fix
If your cashew nut ice cream turns out grainy, it’s usually because the cashews weren’t blended long enough or weren’t soaked properly. For next time, blend the soaked cashews for an extra 1-2 minutes until completely smooth—no visible particles should remain.
Also, ensure your cashews are fully drained after soaking; excess water can cause ice crystals during freezing. 💫
Too Soft or Mushy
If your ice cream is too soft after freezing, it likely didn’t firm up enough during the secondary freeze. Try freezing it for an additional 1-2 hours or transfer it to a colder section of your freezer.
For a firmer texture, reduce the almond milk to just 2 tablespoons instead of ¼ cup—this cuts down on liquid content while keeping creaminess.
Icy or Crunchy Texture
Ice crystals happen when the mixture freezes too quickly or isn’t properly chilled before freezing. Always refrigerate the blended base for at least 4 hours (overnight is ideal) to stabilize the mixture.
If you’re short on time, stir in 1 tablespoon of vodka or lemon juice before freezing—these act as natural anti-freeze agents, preventing large ice crystals from forming.
Not Sweet Enough
If your cashew nut ice cream tastes bland, the maple syrup might not have been sweet enough or the flavors didn’t meld properly. Next time, increase the sweetener to ⅔ cup instead of ½ cup or add 1 extra tablespoon of vanilla extract.
For deeper flavor, let the chilled mixture sit uncovered in the fridge for 30 minutes before freezing—this allows the alcohol in the vanilla to evaporate slightly, intensifying the aroma.
Oily or Greasy Aftertaste
An oily aftertaste usually means the coconut oil wasn’t fully incorporated or the mixture was over-blended. To fix this, blend the base for exactly 2-3 minutes—no longer. If you notice oil separation, stir in 1 extra tablespoon of almond milk before freezing to help emulsify the fats.
For a richer but balanced flavor, reduce the coconut oil to ¼ cup and add 1 tablespoon of tahini for extra creaminess without overpowering the taste.
Fruit Mix-Ins Separate
If your berries or other mix-ins sink to the bottom or don’t blend evenly, fold them in gently after the mixture has fully chilled. For a smoother texture, lightly mash the blueberries before stirring them in.
If you’re adding chunks like chocolate or nuts, toss them in a bit of the blended base before mixing—this helps them distribute evenly throughout the ice cream. 🍫
Nutrition facts
Frequently asked questions
Can I make this cashew ice cream without an ice cream maker?
Skip the ice cream maker by spreading the chilled mixture in a shallow, freezer-safe container. Cover with parchment paper (pressed directly on the surface) and freeze for 4-6 hours, stirring with a fork every 1 hour to break up ice crystals. This "no-churn" method works well for small batches.
Why does my cashew base taste bland after blending?
The flavor develops during the 4-hour chilling step. For richer taste, add 1 extra tablespoon of vanilla extract or ½ teaspoon of cinnamon to the blended mixture. Also, ensure your maple syrup is Grade B (darker = more flavor). Let the chilled base sit uncovered in the fridge for 30 minutes before freezing to intensify aromas.
What's the best way to store leftovers?
Portion into airtight containers with parchment paper between layers to prevent freezer burn. It stays creamy for up to 2 months in the freezer. For serving, let it soften at room temperature for 5-10 minutes—this prevents scooping issues. The texture actually improves after the first night as flavors meld.
Can I use roasted cashews instead of raw?
No—roasted cashews won't soften properly and will create a gritty texture. The key is using raw, unsalted cashews soaked for 4+ hours. For a shortcut, try cashew butter (unsweetened) instead: blend 1 cup cashew butter with ¼ cup coconut oil and ½ cup maple syrup for a quicker version (skip soaking).
How do I make this recipe nut-free?
Replace cashews with 1.5 cups cooked and cooled white beans (like cannellini) or 1 cup silken tofu. Blend with the same wet ingredients (coconut oil, maple syrup, etc.) for a creamy base. The texture will be slightly lighter but still delicious. For extra richness, add 1 tablespoon of sunflower seed butter.