Side Dishes
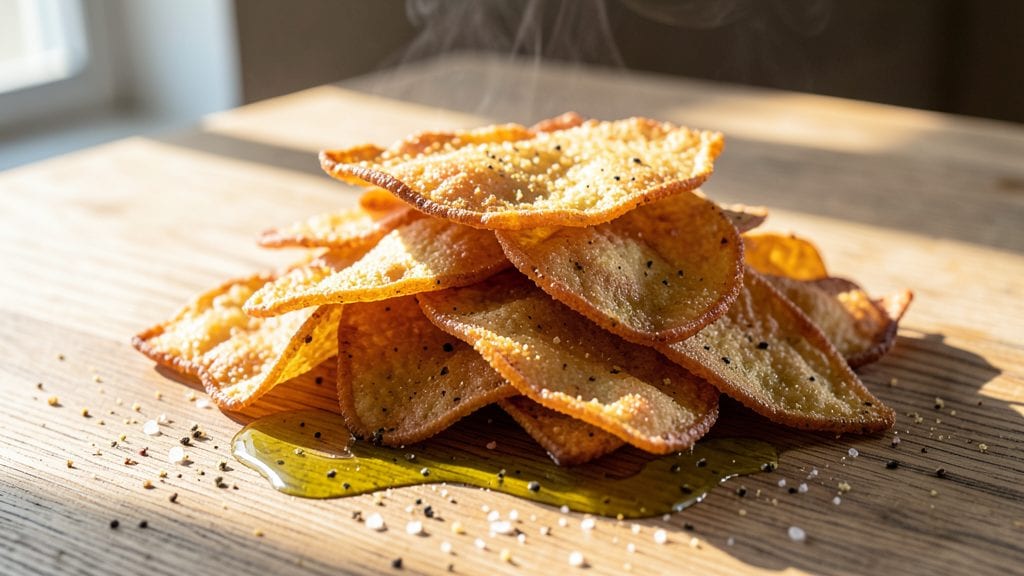
This bread and butter pickle chips recipe transforms a pantry staple into addictive, vinegar-kissed crisps with a perfect balance of sweet and tangy flavors. The secret lies in thin, even slices and a precise baking technique that delivers a satisfying crunch without losing that signature pickle taste.
I developed this method after years of perfecting homemade chips—where store-bought versions fall short.
The process is surprisingly straightforward: slice pickles paper-thin, pat them dry, and coat in a light dusting of cornstarch for that signature crisp. Baking at 325°F for 15-20 minutes ensures even cooking, while the vinegar in the brine preserves that bright, zesty punch.
What you’ll end up with is a batch of crunchy, golden chips that taste like a cross between a classic pickle and a gourmet snack.
These chips are foolproof—no frying required, and they stay crisp for days when stored in an airtight container. Perfect for game day, charcuterie boards, or as a tangy alternative to potato chips.
The flavor profile is bold enough to stand alone but versatile enough to pair with cheeses, meats, or even a cold beer.
Once you try homemade, you’ll never go back to the store-bought versions. The key is patience in slicing and consistency in baking—trust the process, and you’ll have a snack that’s restaurant-quality at home. Let’s get started on making these vinegar-kissed crisps!
Ingredients for bread and butter pickle chips
Pickles, cornstarch, and patience—these are your keys to addictive, vinegar-kissed crunch.
| Ingredient | Amount | Notes |
|---|---|---|
| Bread and Butter Pickles 🥒 | 2 cups | Drained, sliced paper-thin |
| Cornstarch 🌾 | ¼ cup | Light coating for crispiness |
| Extra-Virgin Olive Oil 🫒 | 1 tbsp | Light brush before baking |
| Diamond Crystal Kosher Salt 🧂 | ½ tsp | Fine grain preferred |
| Black Pepper 🌶️ | ¼ tsp | Freshly ground for flavor |
| Garlic Powder 🧄 | ¼ tsp | Optional for depth |
| Unsalted Butter 🧈 | 1 tbsp | Melted for finishing |
| White Vinegar 💧 | 1 tsp | Extra tang boost |
| Paper Towels 🧻 | 2 sheets | For thorough drying |
| Baking Sheet 🍳 | 1 whole | Heavy-duty preferred |
| Parchment Paper 📄 | 1 sheet | For easy cleanup |
The pickles make or break this. Look for bread and butter pickles with thick slices—they hold shape better when sliced thin. Heinz or Vlasic work perfectly, but avoid the extra-sweet varieties. Slice them paper-thin using a mandoline or sharp knife (safety first!). Pat them dry with paper towels—this step can't be skipped. The cornstarch is your secret weapon: toss the slices in it until lightly coated. Bob's Red Mill is my go-to brand, but any food-grade cornstarch works. Pro tip: do this in batches to avoid soggy slices.
No cornstarch? Arrowroot powder or rice flour work in a pinch, but cornstarch gives that signature crisp. Short on pickles? Dill pickles with a splash of vinegar mimic the flavor, though the sweetness will be different. The olive oil brush is optional but adds a subtle richness—Trader Joe's brand is my favorite for its fruity notes. Want extra zing? Toss in a pinch of celery seed with the garlic powder. And if you're feeling fancy, swap the white vinegar for apple cider vinegar—it adds a subtle sweetness that pairs beautifully with the pickles.
These chips stay crisp for 5-7 days in an airtight container, but honestly, they won't last that long. Store them at room temperature—humidity is the enemy of crunch. For extra crispiness, reheat at 300°F for 3-5 minutes before serving. I always make a double batch: one for snacking, one to gift. The parchment paper makes cleanup a breeze, and the baking sheet? All-Clad or similar heavy-duty prevents warping. Freeze extras for up to 1 month—just bring to room temp before eating to preserve that satisfying crunch.
Why You'll Love This Recipe
- Five-Ingredient Magic: I swear, this recipe is the kind of thing that makes me feel like a genius—just pickles, cornstarch, olive oil, and salt. That’s it. No fancy prep, no waiting for dough to rise, just slice, toss, bake. Honestly, I’ve made it while scrolling through my phone.
- Sweet-Savory Crunch: The moment those chips hit the oven, the sweetness of the bread and butter pickles caramelizes just enough while the cornstarch gives them that addictive crisp. The olive oil keeps them from turning greasy, and the salt? Just enough to make every bite ridiculously good. (Yes, even on a Tuesday night.)
- Party Snack Hero: Between us, these chips disappear at gatherings—no one can resist the tangy, crunchy combo. I’ve used them as a dipper for ranch, a topping for burgers, or just straight-up as a snack when I’m hosting. They’re the kind of thing that makes you look like you planned ahead, even if you didn’t.
- Budget Crunch: A jar of pickles and a bag of cornstarch cost next to nothing, and one batch stretches for days. I’ll be real: I’ve had them last a week in my house, and they’re still just as good. Plus, no weird leftovers—just crispy, flavorful chips until they’re gone.
Step-by-step instructions for bread and butter pickle chips
Here's how to transform sweet-tart pickles into crispy, vinegar-kissed chips with perfect texture every time.
Prepare the Pickles for Maximum Crispiness
Start by draining the 2 cups of bread and butter pickles thoroughly, then pat them completely dry using the 2 sheets of paper towels. I press down firmly and fold the paper towels to ensure no moisture remains—this is absolutely critical for achieving crispy chips. You'll know they're properly dried when the paper towels come away clean after the final press.
Next, slice the pickles paper-thin using a sharp knife. Aim for uniform slices about ⅛-inch thick—this ensures even cooking. Arrange them on a clean work surface and lightly toss with the 0.25 cup of cornstarch, coating each slice evenly. The cornstarch creates a crispy barrier while baking, giving you that satisfying crunch we're after.
Season and Arrange for Perfect Baking
In a small bowl, combine the 0.5 teaspoon of diamond crystal kosher salt, 0.25 teaspoon of black pepper, and 0.25 teaspoon of garlic powder. Toss the cornstarch-coated pickle slices with this seasoning mixture until evenly distributed. I like to do this in batches to ensure every slice gets the same treatment.
Line the 1 whole baking sheet with the 1 sheet of parchment paper for easy cleanup. Arrange the seasoned pickle slices in a single layer, leaving about ½-inch space between each piece. This spacing prevents them from steaming and ensures crispy edges. For extra flavor, lightly brush each slice with the 1 tablespoon of extra-virgin olive oil using a pastry brush.
Bake to Golden Crispness
Preheat your oven to 400°F. Once fully preheated, place the baking sheet in the center rack. Bake for 15-18 minutes, flipping the chips halfway through at the 8-minute mark. This ensures even browning on both sides. You'll know they're done when the edges are deep golden brown and the centers are just starting to crisp up.
Watch carefully during the last 2 minutes—they burn quickly once they reach that perfect crunch. If you notice any slices browning too fast, rotate the baking sheet for more even cooking. The chips should be crisp enough to hold their shape but still flexible enough to snap when bent.
Finish with Tangy Butter and Vinegar
Remove the chips from the oven and immediately transfer them to a wire rack to cool completely. While they're still warm, melt the 1 tablespoon of unsalted butter in a small saucepan over low heat. Once melted, remove from heat and stir in the 1 teaspoon of white vinegar—this adds that signature tangy kick.
Using a pastry brush, lightly coat each chip with the butter-vinegar mixture. The heat from the chips will cause the butter to set slightly, creating a glossy finish. Let the chips cool completely on the wire rack before serving—this prevents them from becoming soggy from any residual moisture in the air.
Serve Immediately for Maximum Crunch
These chips are best enjoyed fresh from the oven when they're at their crispest. Serve them warm as a tangy snack, alongside charcuterie boards, or as a unique topping for burgers and sandwiches. The combination of sweet, tangy pickle flavor with the crispy texture creates a perfect balance that's both satisfying and addictive.
For extra flavor, sprinkle with additional salt or a pinch of garlic powder right before serving. Store any leftovers in an airtight container at room temperature for up to 3 days, though I find they're always gone before then—these chips disappear fast!
Pro Tips For Making Bread And Butter Pickle Chips
- PAT THEM DRY: Bread and butter pickles are juicy—way juicier than you’d expect. Wipe each slice with a paper towel before coating in cornstarch, or your chips will turn to mush instead of crisp. I learned this the hard way after tossing a batch that ended up soggy enough to eat with a spoon.
- COAT LIKE SNOW: Don’t just dump cornstarch on the pickles and call it a day. Toss them in a bowl with 2–3 tablespoons of cornstarch, then shake them in a plastic bag or sealable container for 30 seconds. This ensures even coverage—no bare spots, no uneven crisping. (Yes, it’s extra work, but your chips will thank you.)
- FRIE THEM TWICE: First fry at 350°F until they’re pale gold (about 2–3 minutes). Let them drain on a rack for 5 minutes, then hit them again at 375°F for another 1–2 minutes. This second fry deepens the color and crunch—like a second chance at perfection. Skip it, and you’ll get chips that look done but taste underwhelming.
- SALT AFTER DRAINING: Seasoning the pickles before frying just makes them sweat more oil. Instead, toss the hot chips with a pinch of kosher salt right after they come out of the oil—while they’re still sizzling. The heat helps the salt stick, and you’ll avoid that sad, greasy aftermath. (Pro move: Add a crack of black pepper right after for a little kick.)
Regional styles of bread and butter pickle chips
Southern Sweet & Tangy
In the South, these chips get a sweet-spiced twist by adding 1 teaspoon cinnamon and ½ teaspoon smoked paprika to the cornstarch coating. I like to use Heinz Sweet Gourmet pickles for this version—their caramelized onions add natural sweetness.
Serve warm with a side of peanut butter for a Southern-inspired snack that’s perfect for tailgates or church potlucks. 🌶️
Midwest Crunchy Twist
The Midwest takes a simpler approach, focusing on bold pickle flavor. Here, I recommend using Vlasic Bread and Butter Pickles and adding ½ teaspoon celery seed to the seasoning mix for that classic dill pickle vibe.
A light brush of garlic-infused olive oil before baking gives it a savory depth that’s popular in states like Ohio and Michigan. These chips pair perfectly with cheddar cheese and beer at football games. 🏈
Pacific Northwest Smoky Style
Out West, they love adding a smoky element. Toss the cornstarch-coated slices with ½ teaspoon chipotle powder and ¼ teaspoon liquid smoke before baking. I use Broadway Pickles for their bright, tangy flavor, and finish with a sprinkle of flaky sea salt.
This version is a hit in Washington and Oregon, where it’s often served alongside smoked salmon or sharp cheddar. 🌲
Northeast Vinegar-Kissed
The Northeast keeps it classic but adds an extra tang. I recommend using Bick’s Pickles (a local favorite) and brushing the baked chips with a mix of 1 tablespoon white vinegar and 1 tablespoon honey** after baking.
This sweet-tangy glaze is a signature of New England-style chips, often paired with lobster rolls or clams casino. Store in an airtight container to preserve that bright, zesty flavor. ⚡
Nutrition facts
Frequently asked questions
Why do my homemade pickle chips turn out soggy instead of crispy?
Soggy chips usually mean moisture wasn't fully removed before baking. Always pat slices thoroughly dry with paper towels—no shortcuts! Also, check your oven temperature—400°F is critical. If your oven runs hot/cold, use an oven thermometer. Finally, avoid overcrowding the baking sheet—½-inch spacing between slices is key for even airflow.
Can I make these chips without cornstarch?
Yes, but the texture will differ. Swap cornstarch for arrowroot powder or rice flour (same ratio), though cornstarch gives that signature crisp. For extra crunch, try a light coating of potato starch. Just remember: the starch creates a crispy barrier, so skip it at your own risk—your chips may turn out softer and chewier.
How do I store these chips to keep them crispy?
Store in an airtight container at room temperature for up to 5-7 days. Avoid refrigeration—moisture ruins the crunch! For longer storage, freeze for 1 month, then reheat at 300°F for 3-5 minutes to restore crispness. Pro tip: Add a silica gel packet to absorb any moisture if storing beyond 3 days.
What's the best way to slice pickles paper-thin?
Use a mandoline slicer for perfect uniformity, but a sharp knife works too. For safety, secure the pickle with a damp towel and slice against the grain. Aim for ⅛-inch thickness—thinner slices crisp faster but may burn. Always wear oven mitts when handling hot mandolines!
Can I use dill pickles instead of bread and butter pickles?
Yes, but the flavor will be more tart. To mimic bread and butter's sweetness, toss the dill pickle slices in 1 teaspoon sugar or honey before baking. For extra tang, add ½ teaspoon vinegar to the cornstarch coating. The texture remains the same—just expect a bolder, brinier taste.