
Main Courses
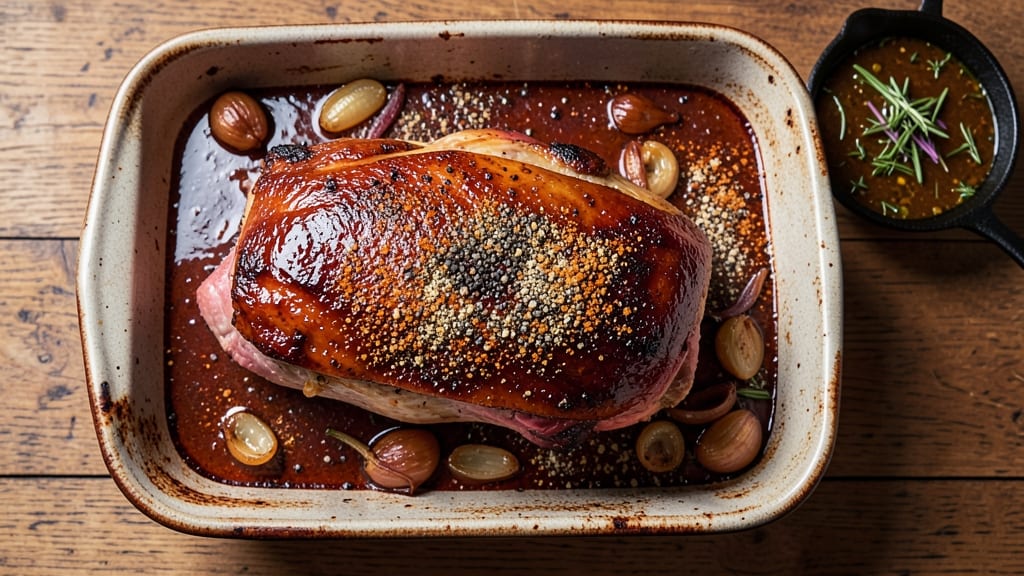
Slow-cooked Boston shoulder roast delivers juicy, melt-in-your-mouth perfection that transforms tough cuts into tender, pull-apart richness. This recipe combines a dry rub of bold spices with a low-and-slow oven finish, ensuring every bite stays succulent.
After years of testing, I’ve perfected the timing and technique to guarantee restaurant-quality results at home.
The secret lies in the 3-hour dry rub that penetrates deep into the meat, followed by a 275°F oven bake that cooks slowly and evenly. No need for fancy equipment—just a roasting pan and patience.
The key is letting the roast rest for 30 minutes before slicing, allowing juices to redistribute for maximum tenderness.
What you’ll end up with is a deeply flavorful, moist roast that practically falls apart when you cut into it. The crust remains crispy from the initial sear, while the interior stays impossibly tender. This is the kind of meal that makes weeknight dinners feel like a special occasion.
Serve with classic sides like roasted potatoes, caramelized onions, or a simple green salad to balance the richness. The leftovers reheat beautifully, making this an ideal recipe for meal prep or feeding a crowd. Let’s get started on creating your perfect Boston shoulder roast.
Ingredients for boston shoulder roast
Six ingredients for the dry rub, plus a few more to transform tough meat into melt-in-your-mouth perfection.
| Ingredient | Amount | Notes |
|---|---|---|
| Boston Shoulder Roast 🥩 | 4 lb | Bone-in for best flavor |
| Kosher Salt 🧂 | 1 ½ tbsp | Diamond Crystal preferred |
| Coarse Black Pepper 🌶️ | 1 tbsp | Freshly cracked preferred |
| Smoked Paprika 🌶️ | 1 tbsp | For deep smoky flavor |
| Garlic Powder 🧄 | 1 tbsp | Freshly ground preferred |
| Onion Powder 🧅 | 1 tbsp | For sweet depth |
| Ground Cumin 🌿 | 1 tsp | Toasted for warmth |
| Dried Thyme 🍃 | 1 tsp | Or 1 tbsp fresh thyme |
| Dried Rosemary 🌿 | 1 tsp | Crushed for aroma |
| Unsalted Butter 🧈 | 2 tbsp | Cold for searing |
| Extra-Virgin Olive Oil 🫒 | 2 tbsp | For initial sear |
| Apple Cider Vinegar 🍎 | 1 tbsp | Brightens flavors |
| Fresh Garlic Cloves 🧄 | 4 cloves | Minced for rub |
| Beef Broth 💧 | 1 cup | Low-sodium preferred |
The Boston shoulder roast is your star—bone-in for maximum flavor, not lean cuts. Grab one from the butcher counter if your store doesn’t carry it pre-cut; ask for a piece with good marbling. I always buy mine from Whole Foods or my local butcher—4 lbs is perfect for 6 servings. The rub needs time to work its magic, so plan ahead. If you're short on time, Costco sells pre-cut shoulder roasts that work just as well. Look for meat with a vibrant red color and visible fat—this is what keeps your roast juicy during the slow cook.
No smoked paprika? Regular paprika plus a pinch of liquid smoke gets you close. Fresh thyme is ideal but dried works at one-third the amount. For the butter, European-style (like Plugrá) has higher fat content—better for searing. Short on beef broth? Water plus 1 tbsp soy sauce works in a pinch. The vinegar might seem odd, but it tenderizes the meat and balances the richness. If you're feeling fancy, balsamic vinegar adds a sweet depth. The garlic cloves can be pre-minced to save time, but fresh is always better when you've got it.
This roast tastes even better the next day—plan ahead. The leftovers reheat beautifully; just cover with foil and warm in a 350°F oven for 15 minutes. Store in the fridge for up to 5 days or freeze for 3 months. For easy meal prep, slice against the grain and portion into containers. The rub keeps well in an airtight container for 2 weeks, so make extra if you're feeding a crowd or want to season other proteins like chicken thighs.
Why You'll Love This Recipe
- Five-Ingredient Magic: I swear by this combo—just salt, pepper, smoked paprika, garlic powder, and the roast itself. Honestly, the flavor is that good you’ll forget how little effort it took.
- Crispy-Creamy Payoff: That smoky paprika crust gives way to melt-in-your-mouth tenderness. I’ll be real: my husband licks the pan when I’m not looking.
- Sunday Dinner Hero: Big enough for a crowd but simple enough to make when friends drop by. Between us, it’s my go-to for game days or lazy weekends—no stress, all flavor.
- Leftovers That Don’t Suck: Cold slices the next day? Still delicious. I portion it out for sandwiches or toss it into pasta—never a sad lunchbox moment. Budget-friendly too, since one roast feeds my family for days.
Step-by-step instructions for slow-cooked Boston shoulder roast
Here's how to transform a tough cut into melt-in-your-mouth perfection with minimal effort.
Prepare the Dry Rub for Maximum Flavor
In a medium bowl, combine the 1.5 tbsp kosher salt, 1 tbsp coarse black pepper, 1 tbsp smoked paprika, 1 tbsp garlic powder, 1 tbsp onion powder, 1 tsp ground cumin, 1 tsp dried thyme, and 1 tsp dried rosemary. Mix thoroughly with your fingers until the spices are evenly distributed and no dry spots remain.
This blend creates a complex flavor profile that penetrates the meat during the long cook. The smoked paprika adds depth while the cumin and thyme bring warmth. I like to crush the dried rosemary between my palms first to release its aromatic oils—this makes a noticeable difference in the final result.
Sear the Roast for Deep Flavor Foundation
Pat the 4 lb Boston shoulder roast completely dry with paper towels—this is crucial for developing that beautiful crust. Heat a heavy Dutch oven over medium-high heat and add the 2 tbsp extra-virgin olive oil and 2 tbsp unsalted butter. Once the butter begins to foam, add the roast fat-side down and sear for 8-10 minutes until deeply browned in spots.
Flip the roast and sear the other side for another 5-7 minutes. The goal is to create a flavorful crust while not cooking the meat through. If you notice the butter burning before the roast is browned, reduce the heat slightly. This initial sear locks in juices and builds flavor that will develop throughout the slow cook.
Build the Aromatic Base for Moisture
Remove the seared roast from the Dutch oven and set it aside. In the same pot, add the 4 cloves fresh garlic cloves (minced) and the 1 tbsp apple cider vinegar. Sauté for 1 minute until the garlic becomes fragrant but doesn't brown. Pour in the 1 cup beef broth, scraping up any browned bits from the bottom of the pot—these contain concentrated flavor.
Return the roast to the Dutch oven, fat-side up, and bring the liquid to a simmer over medium heat. The vinegar brightens the flavors while the broth provides moisture for the long cook. The roast should be partially submerged in liquid—if not, add a splash of water. Cover the pot and transfer it to a 275°F oven (or use a slow cooker on low).
Slow Cook to Perfect Tenderness
Cook the roast for 5-6 hours until it reaches an internal temperature of 195-203°F at its thickest part. This low-and-slow approach breaks down the connective tissue, transforming tough muscle into tender, pull-apart meat. I check the temperature every hour after the 4-hour mark—patience is key here.
If you're using a slow cooker, cook on low for 8-10 hours. The roast is done when it easily pulls apart with two forks and the meat is fork-tender. The internal temperature will continue to rise 5-10°F after removal from heat, so pull it out when it reaches 195°F. Let it rest for 30 minutes before serving—this allows the juices to redistribute throughout the meat.
Rest and Serve with Pan Sauce
Once rested, use two forks to pull the roast apart against the grain into bite-sized pieces. Return these to the Dutch oven with the cooking juices. Increase heat to medium and simmer uncovered for 5-7 minutes to reduce the sauce slightly and thicken it.
Taste and adjust seasoning if needed—sometimes the roast absorbs more salt than others. Serve immediately with the rich pan sauce spooned over the top. The result should be incredibly juicy meat with a perfect balance of smoky, spiced flavors that practically melt in your mouth. This technique ensures every bite delivers that promised juiciness while keeping the preparation straightforward.
Pro Tips For Making Boston Shoulder Roast
- Sear First, Then Salt: Get that pan screaming hot—cast iron or stainless—before adding the roast. After a deep golden crust forms (3-4 minutes per side), pull it out and season with salt and pepper. I used to salt first, and the crust never stuck—now it’s crispy and flavorful from the get-go.
- Skip the Crowding: If you’re roasting in a pan, resist the urge to add onions or potatoes until the last 30 minutes. They’ll steam the meat instead of letting it brown. My grandmother swore by this—less mess, better texture.
- Check Internal Temp: Use a meat thermometer and aim for 195°F at the thickest part. The shoulder’s connective tissue breaks down around this temp, making it tender. I learned this the hard way—overcooking turns it dry, but undercooking leaves it chewy.
- Rest Under Foil: After pulling it from the oven, tent loosely with foil and let it sit for 15-20 minutes. This keeps it warm while juices redistribute—no one wants a slice that oozes like a sad soup. (Yes, even if you’re impatient like me.)
Common mistakes when making this recipe
Skipping the Dry Rub
Never skip the 3-hour dry rub—this is where the magic happens. The spices need time to penetrate the meat's surface and begin breaking down the connective tissue.
I once rushed and only rubbed the roast for 30 minutes before cooking, and the result was bland with no depth of flavor. Set your roast on a tray, cover with plastic wrap, and refrigerate for at least 3 hours (overnight is even better).
This step is non-negotiable for that restaurant-quality taste. 💡
Overcrowding the Pan
When searing, don’t overcrowd the Dutch oven—this causes the temperature to drop and leads to steaming instead of browning. I’ve made this mistake by trying to fit a large roast in a small pan, resulting in a pale, soggy crust.
Use a pan that’s just slightly larger than your roast, and sear in batches if needed. A 6-quart Dutch oven is ideal for a 4 lb roast. The goal is to create that flavorful crust that locks in juices. 🔥
Ignoring the Resting Time
Skipping the 30-minute rest is a cardinal sin—this is when the juices redistribute throughout the meat. I once sliced into a roast immediately after removing it from the oven, and the first few bites were dry and disappointing.
The internal temperature continues to rise 5-10°F during resting, so pull it out when it reaches 195°F, not 203°F. Tent loosely with foil and let it sit undisturbed. Patience here ensures every bite is juicy and flavorful. ⏰
Using the Wrong Temperature
Cooking at too high a temperature will leave your roast tough and dry. I’ve seen beginners crank the oven to 350°F or higher, thinking it will cook faster, but this is a mistake. The 275°F low-and-slow method is crucial for breaking down collagen and connective tissue.
Use a meat thermometer to monitor the internal temperature—it should reach 195-203°F at its thickest part. If you’re using a slow cooker, stick to low heat for 8-10 hours. 🌡️
Not Searing Properly
A missed sear means missed flavor. I’ve had roasts that came out bland because I didn’t let the butter foam properly before adding the meat. Heat your Dutch oven over medium-high heat until the butter is foaming but not browned, then add the roast.
Sear each side until deeply browned—this creates a crust that traps juices and adds depth. If your roast isn’t browning, reduce the heat slightly and give it more time. A good sear is your first line of defense against dry meat. 🥩
Overcooking or Undercooking
Both extremes ruin the texture. Overcooking turns the meat tough and stringy, while undercooking leaves it chewy and unappetizing. The ideal internal temperature is 195-203°F—this is when the connective tissue breaks down into gelatin, creating that pull-apart tenderness.
Use a meat thermometer to check the thickest part of the roast, and pull it out when it reaches 195°F (it will rise to 203°F while resting). If you’re unsure, err on the side of slightly undercooked—it’s easier to fix than overdone meat. ⚡
Nutrition facts
Frequently asked questions
What makes Boston shoulder roast different from pork shoulder?
Boston shoulder roast comes from the upper shoulder of the pig, making it leaner and more tender than traditional pork shoulder (from the lower shoulder). It has less fat marbling, which means it benefits from the slow-cooking method to break down collagen without drying out. The flavor is milder than pork shoulder but still rich when properly seasoned.
Can I cook this in a slow cooker instead of the oven?
For a slow cooker, sear the roast first, then place it in the pot with 1 cup beef broth and 1 tbsp apple cider vinegar. Cook on low for 8-10 hours until fork-tender. The key is patience—the longer it cooks, the more tender it becomes. Just check the internal temp at 195°F before serving.
How do I know when the roast is fully cooked?
Use a meat thermometer to check the thickest part of the roast—it should reach 195-203°F. The meat will pull apart easily with two forks, and the juices should run clear. If you don’t have a thermometer, cut into the center—if it’s tender and no longer pink, it’s done.
What are the best sides to serve with this roast?
Classic pairings include creamy mashed potatoes, caramelized onions, or roasted root vegetables. For a lighter option, try a green salad with balsamic dressing to balance the richness. The pan sauce from the roast also works perfectly over buttered noodles or cornbread.
Can I make this ahead of time for a party?
Yes! Cook the roast up to 2 days ahead and refrigerate. Reheat in a 350°F oven for 15 minutes, covered with foil, until warmed through. For leftovers, store in an airtight container for up to 5 days. The flavors actually improve over time as the spices meld further.