Desserts
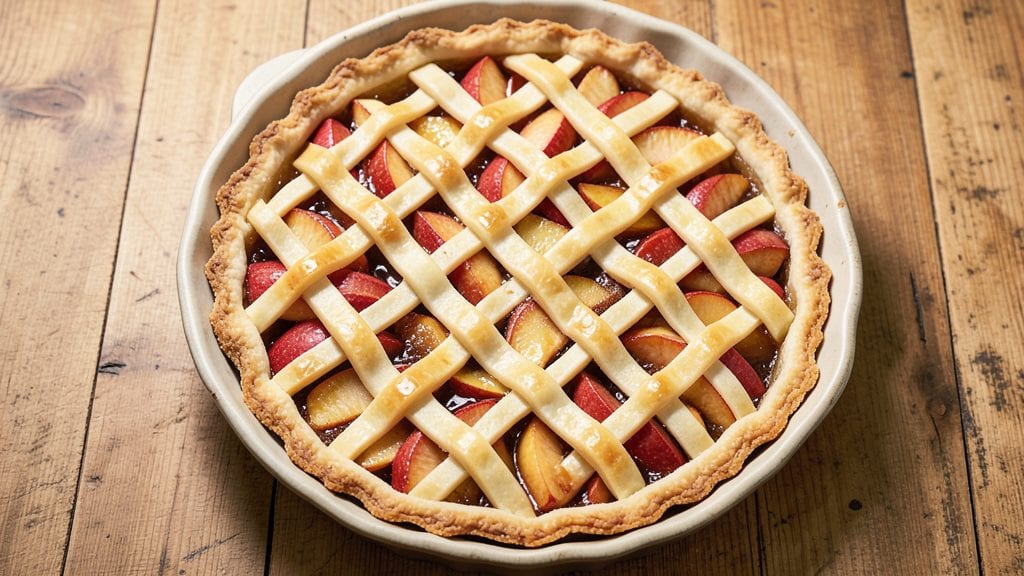
Betty Crocker’s apple tart recipe delivers that nostalgic, buttery perfection we all crave—flaky crust hugging tender, spiced apples in a golden embrace. This classic dessert combines a foolproof tart shell with a filling so rich in cinnamon and caramelized fruit that every slice tastes like a homemade hug.
I’ve perfected the balance between crisp edges and a tender center, ensuring the apples stay juicy while the crust achieves that signature golden-brown finish.
The secret to this tart lies in the crust’s buttery richness and the apples’ precise preparation—thinly sliced and lightly tossed with sugar and spices before baking. Betty Crocker’s approach emphasizes simplicity without sacrificing depth, making it ideal for both beginners and seasoned bakers.
With just a few key ingredients and a little patience, you’ll achieve a dessert that looks as impressive as it tastes, perfect for holidays or cozy weeknight treats.
What makes this recipe stand out is how the warm spices—cinnamon, nutmeg, and a touch of allspice—infuse the apples with flavor while they caramelize. The crust, made with a classic pie dough or pre-made tart shell, stays crisp yet tender, holding up to each forkful of spiced fruit.
The result? A tart that’s visually stunning, aromatic, and packed with the kind of comfort that turns ordinary days into special moments.
Whether you’re baking for a family gathering or simply craving a slice of nostalgia, this apple tart delivers. The best part? It’s versatile—serve it warm with vanilla ice cream or at room temperature for a delightful contrast. Let’s get baking!
Ingredients for betty crocker apple tart
Buttery crust meets spiced apples—just six key ingredients transform into nostalgic dessert perfection.
| Ingredient | Amount | Notes |
|---|---|---|
| All-Purpose Flour 🌾 | 2 ½ cups | Sifted for light texture |
| Unsalted Butter 🧈 | 1 cup | Cold, cubed for crust |
| Granulated Sugar 🍚 | ½ cup | Plus 2 tbsp for filling |
| Ice Water 💧 | ½ cup | Chilled for dough |
| Large Apples 🍎 | 4 whole | Honeycrisp or Granny Smith |
| Brown Sugar 🍚 | ¼ cup | Packed for caramelization |
| Ground Cinnamon 🌿 | 2 tsp | Freshly ground preferred |
| Ground Nutmeg 🌿 | ½ tsp | Freshly grated nutmeg |
| Ground Allspice 🌶️ | ¼ tsp | For depth of flavor |
| Lemon Juice 🍋 | 1 tbsp | Freshly squeezed |
| Salt 🧂 | ½ tsp | Fine sea salt |
| Vanilla Ice Cream 🍦 | 2 cups | For serving suggestion |
The butter in the crust is non-negotiable—use European-style butter like Plugrá or Land O’Lakes for maximum flakiness. Whole Foods or King Arthur Flour sell it in bulk, or check the refrigerated section at Walmart for the best deals. For apples, Honeycrisp or Granny Smith deliver the ideal balance of sweetness and tartness. Avoid red delicious—they turn mushy. If you can’t find those, Fuji or Braeburn work well too. The spices should be fresh; Penzeys or the bulk section at Trader Joe’s are great sources for high-quality ground spices. Store them in airtight containers away from light to preserve their flavor.
No European butter? Regular unsalted butter works fine, though it’ll be slightly less tender. Substituting apples? Pears or Asian pears add a lovely twist, but adjust the sugar to taste. For the spices, cinnamon sticks can be ground in a spice grinder if you prefer whole spices. If you’re short on time, pre-made tart shells from the freezer aisle save effort without sacrificing quality. The lemon juice is crucial—it prevents the apples from browning and adds brightness. If you’re out, a splash of apple cider vinegar works in a pinch, but use half the amount.
The crust dough can be made a day ahead and chilled—it actually tastes better after resting. Wrap it tightly in plastic and store in the fridge. The apples should be prepped just before baking to prevent browning, but you can slice them up to 4 hours ahead if you toss them with a bit of lemon juice and store them in the fridge. Once baked, the tart keeps well at room temperature for 3 days or can be refrigerated for 5 days. For longer storage, freeze slices between parchment paper for up to 3 months. Reheat individual slices in the oven for 5 minutes at 350°F to restore that fresh-baked magic.
Why You'll Love This Recipe
- No-Roll Crust Magic: I swear by this cold butter and flour trick—no food processor, no chilling stress. Just toss, press, bake. The crust comes out golden and sturdy every single time, even when I forget to preheat the oven.
- Apple Butter Bliss: That caramelized sugar crust? It’s the star. The apples stay tender while the edges get just crisp enough to cut through—like biting into autumn in one perfect bite. Honestly, the first time I made it, I ate a slice straight from the pan.
- Picnic to Potluck: Pack it for a tailgate or bring it to a holiday gathering—it travels well and looks impressive. The apples hold up for days, so you can slice it ahead and serve it at room temp. (Yes, even on a Tuesday night.)
- Pantry Staple Power: You’re using flour, butter, and sugar you already own. No specialty ingredients, no last-minute grocery runs. And the leftovers? They’re the best part—warm slices with vanilla ice cream or cold for lunch the next day. Budget-friendly and foolproof.
Step-by-step instructions for betty Crocker's apple tart recipe
Here's how to create a classic apple tart with a perfect buttery crust and spiced apple filling.
Prepare the Tart Dough
In a large mixing bowl, combine the 2.5 cups all-purpose flour and 0.5 teaspoon salt. Cut in the 1 cup unsalted butter using a pastry cutter or your fingers until the mixture resembles coarse crumbs with pea-sized butter pieces remaining. Gradually add the 0.5 cup ice water, mixing just until the dough comes together. Avoid overworking the dough to prevent toughness.
Divide the dough into two equal parts and flatten each into a disk. Wrap each disk tightly in plastic wrap and refrigerate for at least 30 minutes. This chilling step is crucial for easier rolling and prevents shrinking during baking. While the dough rests, preheat your oven to 375°F and lightly grease a 9-inch tart pan with removable bottom.
Roll and Assemble the Crust
On a lightly floured surface, roll out one dough disk into a 12-inch circle, about 1/8-inch thick. Gently transfer the rolled dough to the prepared tart pan, pressing it evenly into the bottom and up the sides. Trim any excess dough hanging over the edge with a sharp knife. Prick the bottom of the crust all over with a fork to prevent puffing during baking.
Place the tart shell on a baking sheet and blind-bake for 15 minutes until the edges begin to set. Remove the baking sheet from the oven and carefully line the crust with parchment paper, filling it with pie weights or dried beans. Return to the oven and bake for an additional 10 minutes until the crust is fully set. Remove the weights and parchment, then bake for 5 more minutes until lightly golden.
Prepare the Apple Filling
While the crust bakes, peel, core, and slice the 4 whole large apples into 1/4-inch thick slices. In a large bowl, combine the apple slices with 0.25 cup brown sugar, 2 teaspoons ground cinnamon, 0.5 teaspoon ground nutmeg, 0.25 teaspoon ground allspice, and 1 tablespoon lemon juice. Toss gently to coat the apples evenly with the spiced mixture. This ensures every bite has that perfect balance of sweetness and warm spices.
Arrange the apple slices in a circular pattern over the baked tart shell, slightly overlapping each slice. Sprinkle the remaining 2 tablespoons granulated sugar evenly over the top of the apples. This extra sugar will caramelize during baking, adding a beautiful golden sheen and enhanced flavor. Return the tart to the oven and bake for 30-35 minutes until the apples are tender and the filling is bubbling.
Finish and Serve
Remove the tart from the oven and let it cool for 10 minutes before transferring to a wire rack to cool completely. The filling should be set but still slightly soft in the center. For serving, scoop 2 cups vanilla ice cream into individual bowls and place a slice of tart on top. The contrast of warm spiced apples with cool vanilla ice cream creates a perfect balance of flavors and textures.
This classic apple tart is best served fresh from the oven, but you can also prepare it a day ahead and store it in the refrigerator. Reheat briefly in the oven before serving to restore the filling's warmth and caramelized texture. The combination of the buttery crust, spiced apple filling, and vanilla ice cream makes this a timeless dessert that's sure to impress.
Pro Tips For Making Betty Crocker Apple Tart
- CHILL THE DOUGH: I learned this the hard way—rolling out cold dough makes all the difference. Wrap the butter-flour mixture in plastic and refrigerate for at least 30 minutes before shaping. The butter stays solid, so your crust won’t turn greasy or collapse when it hits the oven. (Yes, even if you're impatient like me.)
- PEEL AND CORE APPLES RIGHT: Skip the messy knife work—use a paring knife to remove the peel in one long strip, then cut the fruit into ½-inch slices. For even cooking, core the apples from the bottom up with a melon baller, leaving a flat base. Uneven slices = uneven baking, and nobody wants a soggy bottom.
- BLIND BAKE THE CRUST: Don’t skip the parchment paper trick. Line the crust with a circle of parchment, fill it with pie weights or dried beans, and bake for 10 minutes before adding apples. This prevents shrinking and guarantees a crisp bottom—no more floppy, undercooked crusts. (Your future self will thank you.)
- BROWN THE APPLES: Toss sliced apples with 1 tablespoon sugar and let them sit for 10 minutes before baking. The natural juices will start caramelizing, and the fruit will develop deeper flavor. Spread them in a single layer in the crust—crowding leads to steam, which makes the apples mushy instead of tender.
Common mistakes when making this dish
Overmixing the Dough
I’ve seen this happen more times than I can count—dough that turns tough and chewy instead of flaky. The key is to mix just until the dough comes together. Overworking it develops gluten, which makes the crust dense.
Use your fingers or a pastry cutter to cut in the butter until you see pea-sized pieces, then add ice water 1 tablespoon at a time. Stop mixing as soon as the dough holds together when pressed—it should still look shaggy, not smooth. 💡
Skipping the Chill
Rushing the 30-minute chill is a recipe for disaster. Cold butter is essential for flaky layers, and unchilled dough shrinks in the pan. If you’re in a hurry, pop the dough disks in the freezer for 15 minutes—it works in a pinch.
But trust me, the extra time prevents a soggy bottom and uneven baking. Patience here pays off big time.
Uneven Apple Slicing
Thick apple slices won’t cook through evenly, leaving you with mushy centers and undercooked edges. Aim for ¼-inch thick slices—use a mandoline if you’re not confident with a knife. For extra precision, slice the apples while they’re still whole, then toss them with spices immediately.
This ensures consistent cooking and that perfect balance of tender and slightly firm fruit. 🍎
Overfilling the Tart
Piling too many apples into the crust causes spillage and a messy bake. The filling should sit about ½ inch below the tart pan’s rim—this gives the apples room to caramelize without overflowing.
If your apples are particularly juicy, like Honeycrisp, reduce the amount by 1-2 slices or bake for 5 minutes less to avoid a watery mess.
Ignoring the Blind Bake
Skipping the blind bake leads to a soggy crust from the apple juices. The 25-minute pre-bake (15 minutes without weights, 10 with) ensures the crust is sturdy enough to hold the filling.
If you’re short on time, bake the crust for 10 minutes at 400°F instead—just watch it closely to prevent burning.
Underestimating Rest Time
Cutting into the tart too soon releases all those delicious juices, turning your beautiful presentation into a soggy disaster. Let it cool for at least 10 minutes before slicing—this lets the filling set properly.
For a restaurant-worthy look, chill the tart for 1 hour before serving. The flavors will meld even more, and the crust will hold its shape perfectly. ✨
Nutrition facts
Frequently asked questions
Can I make this apple tart without a tart pan?
Use a 9-inch pie dish or even a deep cake pan lined with parchment paper. For a rustic look, try a free-form crust on a baking sheet—just bake it on the lower oven rack for 10 minutes first to crisp the edges before adding the filling. The key is ensuring your crust is sturdy enough to hold the juicy apples.
What’s the best way to store leftover apple tart?
Keep it airtight at room temperature for up to 3 days or refrigerate for 5 days. For longer storage, freeze slices between parchment paper for 3 months. Reheat individual slices in a 350°F oven for 5 minutes to restore that fresh-baked texture.
Can I substitute pie crust for the tart dough?
Yes! Use a pre-made pie crust or even a homemade double-crust pie dough. For a tart shell, press the crust into a 9-inch pan and bake it blind (with weights) for 15 minutes at 375°F before adding the filling. The texture will be slightly different but still delicious.
How do I adjust the recipe for fewer servings?
For 4 servings, halve all ingredients: 1.25 cups flour, ½ cup butter, 2 apples, and reduce baking time to 25-30 minutes. Use a 7-inch tart pan or small pie dish. The proportions stay the same, just scaled down.
Why did my crust turn out puffy instead of flat?
This happens when air gets trapped during baking. Prick the crust all over with a fork before blind-baking, and avoid overfilling it. If puffiness occurs, bake the crust longer (5-10 extra minutes) to flatten it. For next time, press the dough firmly into the pan and chill it longer (1 hour) before baking.