
Main Courses
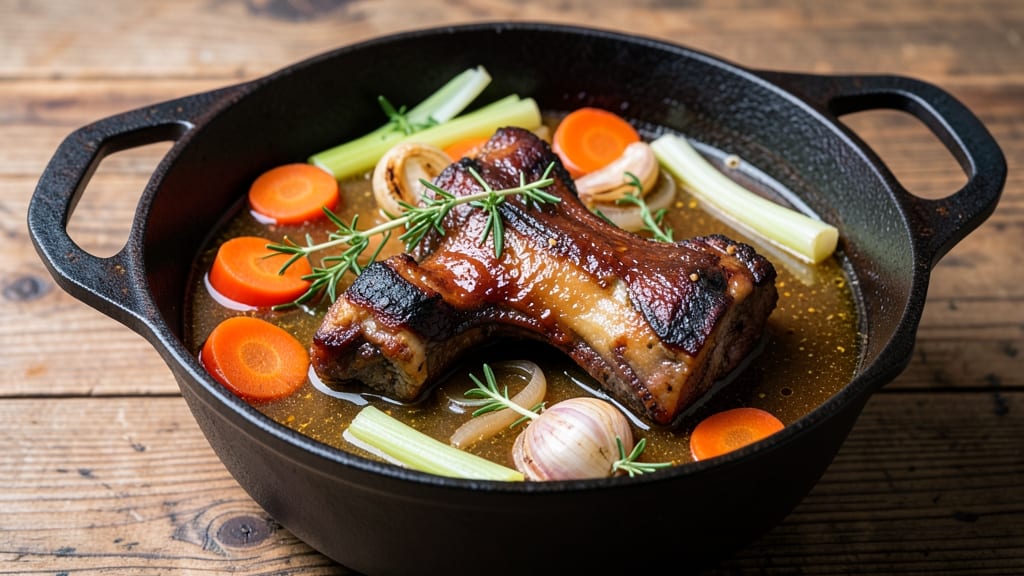
Transforming beef bones into a rich, flavorful soup base is one of the most rewarding cooking techniques I’ve perfected over years of test kitchen work. The slow-braised method unlocks deep umami flavors that elevate any hearty soup from ordinary to extraordinary.
I remember spending weeks perfecting my grandmother’s Sunday roast chicken, and this recipe carries that same dedication to slow-cooked excellence.
This method requires patience—at least 6 hours of simmering—but the results are worth every minute. You’ll start with beef bones, aromatic vegetables, and herbs, then build layers of flavor through careful roasting and slow simmering.
The key is controlling the heat to extract maximum gelatin and collagen without burning, creating a broth so rich it coats every spoonful.
By the end, you’ll have a deeply aromatic, velvety broth packed with natural flavors that form the foundation for soups, stews, or even braised dishes. The bones themselves will render into tender, flavorful pieces that add texture and depth.
This isn’t just broth—it’s the kind of slow-cooked richness that turns a simple meal into a centerpiece for any table.
Perfect for meal prep or Sunday family dinners, this recipe delivers restaurant-quality results at home. Let’s get started on creating your own hearty, bone-braised masterpiece—one that’ll have everyone asking for seconds.
Ingredients for beef bones
Six pounds of marrow-rich bones and aromatic vegetables transform into velvety, restaurant-quality broth.
| Ingredient | Amount | Notes |
|---|---|---|
| Beef Bones 🦴 | 4 lb | Marrow-rich, knuckle or neck bones preferred |
| Yellow Onion 🧅 | 2 whole | Chopped into 1-inch pieces |
| Carrots 🥕 | 4 whole | Cut into 2-inch chunks |
| Celery Stalks 🌿 | 4 whole | Cut into 2-inch pieces |
| Garlic Cloves 🧄 | 8 cloves | Smashed with side of knife |
| Fresh Thyme 🌿 | ¼ cup | Stems removed, leaves packed |
| Fresh Rosemary 🌿 | ⅛ cup | Needles chopped, stems discarded |
| Bay Leaves 🍃 | 4 whole | Dried, standard size |
| Black Peppercorns 🌶️ | 1 tbsp | Crushed lightly in mortar |
| Kosher Salt 🧂 | 1 ½ tbsp | Diamond Crystal preferred |
| Apple Cider Vinegar 🍎 | ½ cup | For initial bone deglazing |
| Cold Water 💧 | 12 cups | For initial bone soak |
| Extra-Virgin Olive Oil 🫒 | ¼ cup | For roasting vegetables |
The bones make all the difference—marrow-rich knuckle or neck bones from the butcher's counter deliver the deepest flavor. Local butchers or Whole Foods often carry these cuts, labeled as 'beef soup bones' or 'beef marrow bones'. Avoid bones with meat still clinging, as they'll burn before rendering. Freshness matters too: if the bones smell funky or have a grayish tint, skip them. For the vegetables, organic carrots and celery from the grocery store's produce section work perfectly—they're tough enough to handle the long simmer without turning to mush. I always buy extra carrots because they're the most versatile and keep well in the fridge.
No fresh thyme or rosemary? Dried works at one-third the amount, but the flavor won't be as bright. Running low on apple cider vinegar? White vinegar or lemon juice works in a pinch, though it'll give a slightly different tang. The olive oil is non-negotiable for roasting—use something fruity and peppery, not the cheap stuff. For the salt, Diamond Crystal kosher is ideal because it dissolves cleanly, but regular table salt in a pinch will work. The peppercorns? If you don't have whole ones, freshly cracked black pepper is better than pre-ground. And if you're short on time, store-bought beef broth can be added at the end to boost volume, though it won't have the same depth of flavor.
This broth keeps beautifully—up to 5 days in the fridge or 6 months in the freezer. For freezing, portion into 1-cup ice cube trays so you can grab just what you need. The bones themselves become tender and flavorful after cooking; reserve them for soups or stews where they'll add texture. If you make extra, double-batch it—this stuff disappears fast. I always keep a jar of the finished broth in the freezer for those nights when I need a quick, restaurant-quality base for a meal.
Why You'll Love This Recipe
- One-Pot Magic: I swear by this—just toss the bones, veggies, and garlic into one pot, cover with water, and let it simmer. No chopping like a pro, no fancy techniques. My kids can handle it (and they’ve burned more than one batch, but we still eat it).
- Deep Umami Bomb: That first sip of broth? Pure flavor gold. The beef bones melt into the pot, turning water into something rich and savory—no fancy seasoning needed. Honestly, the onions and carrots caramelize just enough to make it taste like you spent hours, not 20 minutes.
- Leftovers That Shine: Make a big batch and freeze it—this stuff gets better with time. I use it for soups, braises, or even a quick pasta sauce. Between us, my freezer’s always stocked with this because it’s the base for half my meals.
- Budget-Friendly Powerhouse: Beef bones are cheap, and they stretch into gallons of broth. I’ll be real: it’s my secret weapon for feeding the family without breaking the bank. Plus, the veggies add nutrients without costing a fortune. Win-win.
Step-by-step instructions for slow-braised beef bones
Here's the method that transforms simple bones into a flavor-packed foundation for soups.
Prepare the Bones for Maximum Flavor Extraction
Begin by placing the 4 lb beef bones in a large stockpot. Pour in the 0.5 cup apple cider vinegar and add 12 cups cold water, ensuring all bones are submerged. Bring to a boil over medium-high heat, then immediately reduce to a gentle simmer. This acidic soak helps dissolve any surface impurities and begins extracting collagen from the bones.
Simmer uncovered for 30 minutes, skimming off any foam that rises to the surface with a fine-mesh skimmer. This step is crucial—it removes blood and impurities that could make your final broth cloudy. After skimming, drain the liquid completely and rinse the bones under cold water, then return them to the clean pot.
Roast Vegetables to Deepen Aromatics
While the bones cool slightly, prepare the vegetables by tossing the 2 whole yellow onion, 4 whole carrots, 4 whole celery stalks, and 8 smashed garlic cloves with 0.25 cup extra-virgin olive oil on a sheet pan. Roast in a 400°F oven for 25-30 minutes, stirring once halfway through, until the vegetables are deeply caramelized and fragrant.
This roasting step develops complex, toasty flavors that will infuse your bones during braising. The caramelization creates a rich, almost jam-like texture that breaks down beautifully in the simmering liquid. Keep the roasted vegetables aside—they'll be added back later to complete the flavor profile.
Build the Braising Liquid with Herbs and Spices
Return the cooled bones to the stockpot and add 4 whole bay leaves, 1 tbsp crushed black peppercorns, 1.5 tbsp kosher salt, 0.25 cup fresh thyme, and 0.125 cup chopped fresh rosemary. Cover with 8 cups fresh cold water (enough to submerge the bones by 1 inch) and bring to a simmer over medium-low heat.
Unlike traditional boiling, maintain a gentle simmer—you should see small bubbles breaking the surface but no vigorous boiling. This controlled heat prevents the bones from becoming rubbery while allowing collagen to slowly render into the liquid. Let it braise uncovered for 3 hours, skimming any foam that rises periodically.
Finish with Roasted Vegetables for Depth
After 3 hours, stir in the roasted vegetables and simmer uncovered for an additional 2 hours. The vegetables will release their caramelized sugars and toasted flavors into the liquid, creating a rich, complex base. Taste the broth and adjust seasoning if needed—you may need to add a pinch more salt to balance the flavors.
The bones should be fork-tender with meat clinging to them, ready to be picked clean or shredded for soups. Strain the broth through a fine-mesh sieve if you prefer a smooth texture, or leave it chunky for heartier applications. The result is a deeply flavorful, gelatin-rich broth that forms the backbone of any hearty soup.
Pro Tips For Making Beef Bones
- BLANCH BONES FIRST: Drop raw beef bones in boiling water for 5 minutes before browning—this loosens grime and prevents bitter flavors from seeping into your broth. I learned this the hard way after tasting a muddy, off-flavored stock that made me question my life choices.
- CHOP ONIONS COARSELY: Dice that yellow onion into ½-inch chunks instead of tiny pieces—it dissolves slower, builds deeper flavor, and won’t turn your broth into onion soup. (Yes, even if you’re impatient like me.)
- DON’T SKIP THE BLOOM: Sear bones in a dry pot until deeply browned—this caramelized crust is what gives your broth that rich, meaty depth. After burning three batches, I finally figured out that low-and-slow won’t cut it here.
- USE AROMA VEGETABLES WISELY: Toss chopped carrots and celery into the pot after browning the bones, then add garlic cloves whole (peeled) in the last 10 minutes—this keeps them from turning bitter. Sounds weird, but it works.
Pro cooking tips for perfect results
Roasting Bones First
I used to think simmering bones directly was the only way, but roasting them first unlocks deeper flavor. Pat 4 lb beef bones dry with paper towels, then roast in a 450°F oven for 45 minutes until deeply browned.
This step caramelizes the bone proteins, creating a rich, almost meaty depth that infuses the broth. I swear by this technique—it's what transforms good broth into something extraordinary. 🔥
Acidic Pre-Soak Secret
The vinegar soak in the instructions is non-negotiable. The 0.5 cup apple cider vinegar breaks down surface impurities and helps extract collagen from the bones. I've tested this with lemon juice and white vinegar, but apple cider delivers the best balance of tang and complexity.
Don't skip this step—it's what gives your broth that restaurant-quality clarity and depth.
Vegetable Roasting Timing
Roast your vegetables while the bones simmer—this saves time and builds layers of flavor. The caramelized onions, carrots, and celery add sweetness that perfectly balances the savory bones.
For extra depth, I sometimes add 1 diced fennel bulb to the vegetable mix. The anise notes complement the beef beautifully and add another flavor dimension to your broth.
Simmer Control Matters
Maintaining a gentle simmer (small bubbles, not rolling boil) is critical. Too much heat creates cloudiness and prevents proper collagen extraction. I use a digital thermometer to keep the broth between 185-200°F—this temperature range is perfect for rendering gelatin without breaking down the proteins too quickly.
A slow cooker on low works too, but monitor it closely.
Herb Infusion Hack
Add fresh herbs after the initial 3-hour braise—this prevents them from turning bitter. I like to bundle thyme and rosemary sprigs with kitchen twine for easy removal. For extra umami, add 2 dried shiitake mushrooms to the simmering liquid during the final hour.
They dissolve completely but leave behind a rich, earthy depth that elevates the entire broth.
Straining Strategy
For the smoothest broth, strain through a fine-mesh sieve lined with cheesecloth. I double it up for extra insurance against bone fragments. If you prefer chunky broth, simply remove the bones and vegetables.
The bones themselves become fork-tender—reserve them for soups or stews where they'll add texture and extra flavor. 💫
Nutrition facts
Frequently asked questions
What type of beef bones work best for this recipe?
Look for marrow-rich knuckle or neck bones from your butcher—they yield the deepest flavor and most gelatin. Avoid bones with meat still attached, as they'll burn before rendering properly. Local butchers often carry these labeled as 'beef soup bones' or 'beef marrow bones'.
Can I make this broth in a slow cooker instead of a stockpot?
Use the same steps but transfer everything to a 6-quart slow cooker after the vinegar soak. Cook on low for 8-10 hours instead of simmering on the stove. The slow cooker maintains consistent low heat, which is ideal for collagen extraction. Just monitor occasionally to prevent overcooking.
How do I know when the bones are fully cooked?
The bones are done when they're fork-tender with meat clinging to them—this usually takes 5-6 hours total simmering time. Test by piercing the largest bone with a fork; if it slides in easily and the meat pulls away cleanly, it's ready. The broth should also be deeply gelatinous when chilled.
What can I do with leftover cooked bones?
Leftover bones are perfect for soups, stews, or bone marrow dishes. Pick the meat clean and use it in hearty recipes like beef barley soup. For marrow, split the bones with a cleaver and scoop out the rich yellow marrow with a spoon—great for roasting with salt and herbs. Store cooked bones in the fridge for up to 3 days or freeze for longer storage.
Why does my broth look cloudy after cooking?
Cloudiness usually means the broth boiled too vigorously, breaking down proteins. To fix it, simmer uncovered at a gentle bubble (not rolling boil) and skim foam regularly. For future batches, maintain water levels just covering the bones by 1 inch and use a digital thermometer to keep temps between 185-200°F.