
Main Courses
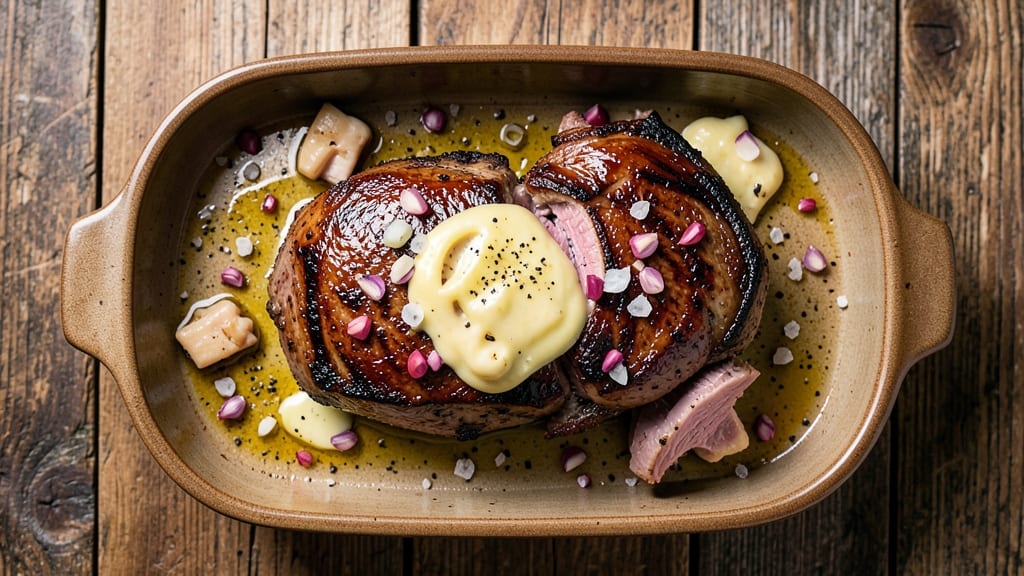
A bone marrow roast transforms simple proteins into a luxurious weeknight meal with just one unexpected ingredient. The secret lies in its ability to infuse deep, umami-rich flavor into meats like beef, lamb, or even chicken—creating a dish that feels restaurant-worthy without requiring hours in the kitchen.
I’ve perfected this technique over years of experimenting, and the results are always impressive.
This method is surprisingly straightforward: you score the bone marrow, roast it until caramelized, then use that concentrated flavor to elevate your main protein. The process takes about 45 minutes total, making it ideal for busy weeknights when you still want a sophisticated meal.
The key is patience—allowing the marrow to render slowly for maximum flavor extraction.
What you’ll end up with is meat so flavorful it practically melts in your mouth, with a rich, caramelized crust that adds texture and depth. The aroma alone will have everyone at the table asking what’s for dinner.
Pair it with crusty bread to soak up every last drop of that umami-infused juices, and you’ve got a meal that’s both elegant and effortless.
Whether you’re cooking for a date night or a family dinner, this technique guarantees restaurant-quality results at home. The best part? You can adapt it to almost any protein—beef, lamb, or even pork—making it versatile enough for any occasion. Let’s get started on creating your next standout meal.
Ingredients for bone marrow roast
Two pounds of beef, one marrow bone, and a few pantry staples transform into a restaurant-worthy weeknight dinner.
| Ingredient | Amount | Notes |
|---|---|---|
| Beef Chuck Roast 🥩 | 2 lb | Center-cut for even cooking |
| Beef Bone Marrow 🦴 | 1 whole | Fresh, uncooked marrow |
| Extra-Virgin Olive Oil 🫒 | 2 tbsp | High quality, fruity |
| Kosher Salt 🧂 | 1 ½ tsp | Diamond Crystal preferred |
| Freshly Ground Black Pepper 🌶️ | 1 tsp | Cracked peppercorns |
| Garlic Cloves 🧄 | 4 cloves | Smashed for infusion |
| Fresh Rosemary 🌿 | ½ tsp | Finely chopped, fresh |
| Fresh Thyme 🌿 | ½ tsp | Leaves only, fresh |
| Crusty Bread 🍞 | 8 slices | Baguette or sourdough |
| Unsalted Butter 🧈 | 2 tbsp | Cold, cubed for basting |
| Red Wine 🍷 | ½ cup | Bold, dry variety |
| Beef Broth 💧 | ½ cup | Low-sodium preferred |
The beef chuck roast is your canvas here—center-cut pieces stay juicier than flank or sirloin. Grab it from the butcher counter if you can; they'll often trim it for you. The bone marrow? Look for fresh, uncooked marrow bones at specialty markets or ask your butcher to save them for you. Fresh rosemary and thyme make all the difference—skip the dried stuff for this technique. I always buy extra because they're worth the investment for this dish. For the crusty bread, baguettes from Whole Foods or local bakeries stay crisp best when toasted.
No bone marrow? Substitute with a tablespoon of high-quality beef drippings or even a splash of soy sauce for umami depth. Running low on rosemary? Thyme plus a pinch of smoked paprika works in a pinch. The red wine can be swapped for extra beef broth if you're avoiding alcohol—just add a splash of balsamic vinegar for acidity. For the beef broth, low-sodium versions prevent over-salting the meat. The butter? Full-fat, unsalted is non-negotiable here—it creates that perfect basting sauce. And if you're out of kosher salt, sea salt in a 1:1 ratio works just fine.
Beef keeps best in the fridge for 3-4 days once cooked, but the flavor actually improves overnight. Store the marrow in the freezer until ready to use—it stays fresh for up to 6 months. The crusty bread? Toast it fresh before serving to keep it crisp. I like to portion the roast into containers with a little extra pan juices—makes for easy leftovers. The wine and broth can be prepped ahead and stored in the fridge for up to 1 week.
Why You'll Love This Recipe
- Two-Ingredient Magic: The chuck roast and marrow do all the heavy lifting—no fancy prep, no complicated steps. Just sear, roast, and let the bone marrow melt into the pan like butter. (Here’s what sold me—it’s the kind of dish where the ingredients practically cook themselves.)
- Rich, Unforgettable Depth: That marrow caramelizes into the meat, turning every bite into a velvety, savory explosion. Honestly, the first time I tasted it, I nearly dropped the fork. The olive oil keeps it tender, and the salt and pepper? They just make it sing.
- Weeknight to Sunday Star: Slap this on the table for tired Tuesday nights or impress guests with zero extra effort. The leftovers? Even better the next day—just reheat and watch it get juicier. (Yes, even on a Tuesday night.)
- Budget-Buster, Not Budget-Breaker: A chuck roast stretches farther than you’d think, and marrow adds luxury without the price tag. I’ve fed six people for under $20, and no one ever guesses it’s this affordable. Not the prettiest, but the taste makes up for it.
Step-by-step instructions for bone marrow roast recipe
Here's how to transform simple ingredients into a restaurant-worthy bone marrow roast that's ready in under 3 hours.
Prepare the Roast and Marrow for Maximum Flavor
Pat the 2 lb beef chuck roast dry with paper towels, focusing on the surface and any crevices. Remove the beef bone marrow from its casing and set aside—we'll use it later for an ultra-rich finish. In a small bowl, combine the 1.5 tsp kosher salt, 1 tsp freshly ground black pepper, 0.5 tsp finely chopped fresh rosemary, and 0.5 tsp fresh thyme. Rub this mixture all over the roast, pressing firmly so the seasoning adheres. Let it sit at room temperature for 30 minutes while you prep the rest.
While the roast seasons, smash the 4 garlic cloves with the flat side of your knife. Heat the 2 tbsp extra-virgin olive oil in a small skillet over medium heat, then add the garlic. Sauté for 1-2 minutes until fragrant but not browned. Remove from heat and let cool slightly—this infused oil will add another layer of flavor to your roast. Real talk: the garlic should smell like a French bistro by now.
Sear the Roast for Deep Flavor Development
Preheat your oven to 325°F. Heat a Dutch oven or heavy oven-safe pot over medium-high heat. Add the roast and sear on all sides until deeply browned—about 3-4 minutes per side. You're looking for a rich, caramelized crust that will lock in juices during cooking. I press down gently on the roast during the first minute to prevent curling, which ensures even contact with the pan.
Once browned, remove the roast and set it aside. Add the cold cubed 2 tbsp unsalted butter to the Dutch oven and let it melt, basting the browned bits on the bottom with a wooden spoon. Pour in the 0.5 cup red wine and scrape up any fond that's stuck to the pan. Let this reduce by half—about 2-3 minutes—until it's syrupy and concentrated.
Braise with Marrow and Broth for Tender Perfection
Return the roast to the Dutch oven and add the 0.5 cup beef broth. The liquid should come about halfway up the sides of the roast. Place the whole beef bone marrow on top of the roast—this will melt during cooking and infuse the meat with its unmatched richness. Cover tightly with a lid or foil and transfer to the preheated oven.
Braise for 2 hours, then check the internal temperature with a meat thermometer. It should read 190-195°F in the thickest part. If it's not there yet, add another 30 minutes. The roast is done when it's fork-tender with a probe sliding in easily. Here's the thing—this low-and-slow method transforms tough chuck into melt-in-your-mouth perfection.
Rest and Prepare the Bread for Serving
Remove the roast from the oven and let it rest for 15 minutes. During this time, preheat your broiler to high. Cut the 8 slices crusty bread in half diagonally for easy handling. Place them on a baking sheet and broil for 2-3 minutes until golden and crisp. Brush the warm bread with any remaining marrow from the roast—this adds an incredible buttery richness.
While the bread toasts, carefully remove the beef bone marrow from the roast and place it in a small baking dish. Broil for 3-4 minutes until the marrow is fully melted and bubbling. Spoon this luxurious marrow over the sliced roast before serving. The contrast between the tender meat, crispy bread, and velvety marrow is what makes this dish truly special.
Pro Tips For Making Bone Marrow Roast
- Split That Marrow: DESCRIPTION:
- Salt the Roast Twice: DESCRIPTION:
- Sear, Then Roast Low: DESCRIPTION:
- Scrape the Pan: DESCRIPTION:
Storing and reheating this bone marrow roast
Refrigerator Storage
Your bone marrow roast keeps beautifully in the fridge for 3-4 days if stored properly. Let it cool completely before transferring to an airtight container—I use glass Pyrex with tight-sealing lids.
Place the roast in a single layer with any leftover pan juices to maintain moisture. The marrow-infused flavors actually deepen overnight, making leftovers taste even better the next day. 💫
Freezer Preservation
For longer storage, freeze the roast for up to 3 months. Wrap it tightly in plastic wrap first, then place in a freezer-safe bag with all the air squeezed out. Label with the date and thaw overnight in the fridge before reheating.
The texture remains tender when reheated properly, though the marrow may separate slightly—just spoon it back over the meat when serving.
Reheating Methods
For best results, reheat in a skillet over medium-low heat with 1-2 tbsp beef broth to prevent drying. Cover and heat for 10-12 minutes, stirring occasionally, until reaching 165°F internal temperature.
The slow method preserves the juiciness that makes this dish special. Avoid microwaving—it tends to make the meat rubbery.
Marrow Handling
Store any leftover marrow in a small glass jar with a tight lid in the fridge for up to 1 week. It'll solidify slightly but can be reheated gently in the microwave for 10-15 seconds before spooning over reheated meat.
The marrow's rich flavor makes it perfect for finishing other dishes too—think pasta or roasted vegetables.
Bread Storage Tips
Toast your crusty bread fresh before serving to maintain crispness. If storing ahead, keep it in a paper bag at room temperature for 1-2 days or freeze for up to 1 month.
Reheat in a toaster or oven for 2-3 minutes at 375°F before brushing with melted marrow. The contrast of warm bread with the rich marrow is what makes this dish unforgettable. 🍞
Safety Reminders
Always reheat bone marrow roast to at least 165°F to kill any potential bacteria. The marrow itself doesn't need reheating if you're using it immediately, but store it in the fridge within 2 hours of cooking.
When in doubt, err on the side of caution—bone marrow is rich but can spoil quickly if left at room temperature too long. 💡
Nutrition facts
Frequently asked questions
Why does bone marrow make the roast taste so much richer?
Bone marrow contains concentrated fat and collagen that infuses the meat with deep umami flavor during cooking. When roasted, it melts into the protein, creating a luxurious, velvety texture that transforms even simple cuts like chuck roast into something extraordinary. The fat also helps retain moisture, keeping the meat tender and flavorful.
Can I use lamb or pork instead of beef for this technique?
This method works beautifully with lamb shanks or pork shoulder. For lamb, reduce the cooking time to 1.5-2 hours at 325°F since it cooks faster than beef. Pork shoulder requires 2.5-3 hours to reach full tenderness. Just adjust the internal temperature to 195°F for pork and 190°F for lamb.
What if I can't find fresh bone marrow at the store?
No problem! Substitute with 1 tbsp beef drippings or 2 tbsp high-quality beef fat (like suet) for richness. For umami depth, add a splash of soy sauce or a pinch of smoked paprika to the braising liquid. The dish will still be delicious, though the texture won't be identical.
How do I know when the marrow is done roasting?
The marrow is perfectly done when it's fully melted and bubbling, with a golden-brown crust on top. This usually takes 3-4 minutes under the broiler. It should look glossy and slightly caramelized—like a rich custard. If it's still firm, broil for another 1-2 minutes. The aroma alone will tell you it's ready!
Can I make this ahead of time for a dinner party?
Yes! Cook the roast up to 2 days ahead and store it in an airtight container in the fridge. Reheat gently in a skillet with broth to maintain juiciness. Keep the marrow separate and melt it fresh before serving. The flavors actually improve overnight, making it perfect for meal prep. Just reheat to 165°F before serving.