
Main Courses
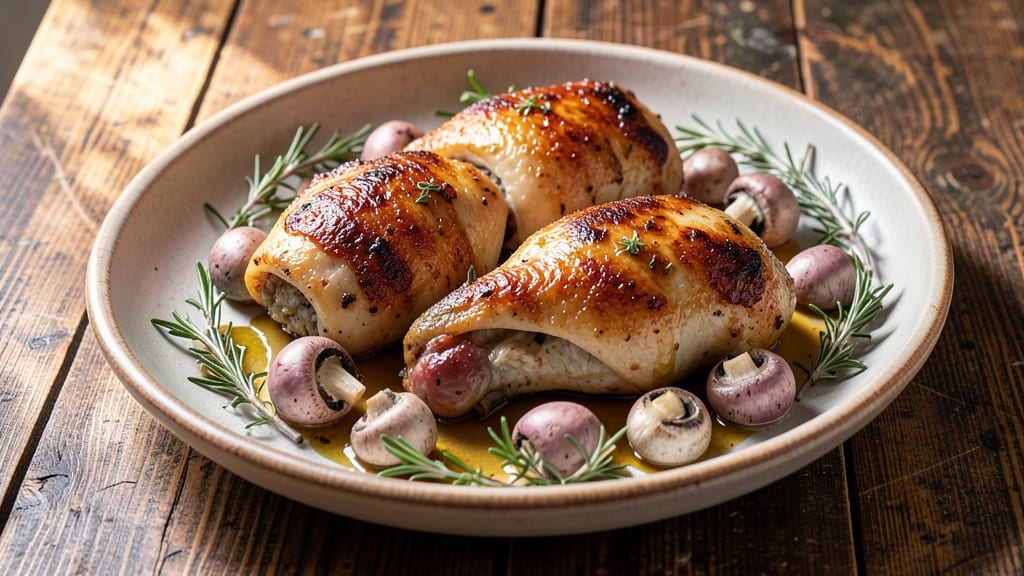
This baked chicken thighs with mushrooms recipe delivers restaurant-quality results with minimal effort—juicy, golden-brown chicken topped with a fragrant herb crust and finished with a rich pan gravy. The secret lies in searing the chicken first to lock in moisture, then baking it with mushrooms until tender and deeply flavorful.
I perfected this technique after years of testing, and it’s now my go-to weeknight dinner that impresses even skeptical guests.
The recipe combines simple ingredients—juicy chicken thighs, earthy mushrooms, and aromatic herbs—to create a dish that’s both comforting and elegant. With just 45 minutes of active time, you’ll have a meal that feels special without requiring advanced skills.
The mushrooms add depth to the flavor profile, while the herb crust creates a crispy, savory topping that’s impossible to resist.
By the end, you’ll have perfectly tender chicken thighs with a golden crust, mushrooms softened to perfection, and a velvety pan gravy that ties everything together. This dish pairs beautifully with roasted potatoes or a fresh green salad, making it versatile enough for any meal.
The best part? Every bite delivers that satisfying combination of crispy, creamy, and savory flavors.
Whether you're cooking for family or treating yourself to a home-cooked meal, this recipe guarantees impressive results with minimal fuss. Let’s get started—your kitchen is about to smell like a cozy bistro.
Ingredients for baked chicken thighs with mushrooms
Simple ingredients, restaurant-worthy results—juicy chicken thighs with a crispy herb crust and rich pan gravy.
| Ingredient | Amount | Notes |
|---|---|---|
| Bone-In Chicken Thighs 🍗 | 4 whole | Skin-on, roughly 8 oz each |
| White Button Mushrooms 🍄 | 16 oz | Sliced 1/4-inch thick |
| Extra-Virgin Olive Oil 🫒 | 3 tbsp | For searing chicken |
| Fresh Thyme Leaves 🌿 | ¼ cup | Chopped, stems removed |
| Fresh Rosemary 🌿 | 1 tbsp | Finely chopped, fresh preferred |
| Garlic Cloves 🧄 | 4 cloves | Minced, for crust |
| Panko Breadcrumbs 🍞 | ½ cup | For crispy herb crust |
| Diamond Crystal Kosher Salt 🧂 | 1 ½ tsp | For seasoning |
| Freshly Ground Black Pepper 🌶️ | 1 tsp | Freshly cracked |
| Unsalted Butter 🧈 | 2 tbsp | For pan gravy |
| All-Purpose Flour 🌾 | 1 tbsp | For gravy thickening |
| Dry White Wine 🍷 | ¼ cup | Substitute chicken broth if needed |
| Chicken Broth 💧 | ½ cup | Low-sodium preferred |
The chicken thighs are the star—bone-in, skin-on for maximum flavor and moisture. Trader Joe's or Whole Foods often carry the best quality, but any grocery store with a butcher counter will have them. Look for thighs with good marbling and a vibrant pink color. The mushrooms should be firm and clean—pre-sliced saves time, but whole mushrooms hold up better during baking. Fresh herbs make all the difference here: thyme and rosemary from the grocery store's produce section are usually fine, but if they smell musty, skip them. The garlic should be freshly minced—pre-minced jars lose their punch fast.
No white wine? Chicken broth with a splash of lemon juice works perfectly. Short on fresh herbs? Dried thyme at one-third the amount gets you close, but the texture won't be the same. The panko breadcrumbs are non-negotiable for that crispy crust—Trader Joe's or Kirkland Signature are my go-tos. For the gravy, Diamond Crystal kosher salt is essential—it dissolves better than table salt. If you're making this ahead, prep the herb crust and store it separately so it stays crispy. The chicken thighs can be prepped and refrigerated for up to 12 hours before baking.
This dish reheats beautifully—just warm the gravy separately and drizzle it back over the chicken. The herb crust stays crispy if you reheat it in a 375°F oven for 5-7 minutes. Leftovers keep for 3-4 days in the fridge, but honestly, it's even better the next day as the flavors meld. For meal prep, portion the chicken and gravy separately—freezes for 3 months. The mushrooms can be pre-sliced and stored in a paper towel-lined container to keep them dry.
Why You'll Love This Recipe
- One-Pan Magic: I swear by this recipe because it’s literally one pan—no chopping boards, no extra dishes. Just toss the bone-in thighs, sliced mushrooms, and herbs on a sheet, drizzle with olive oil, and let the oven do the work.
- Herb-Packed Umami Bomb: That crispy skin meets tender meat, and the mushrooms soak up the thyme and rosemary like a dream. Honestly, the flavor is so rich I’ve skipped entire meals just to snack on the leftovers.
- Weeknight to Dinner Party: Same recipe, totally different vibes. Serve it with crusty bread for a cozy Tuesday night or plate it fancy with a sprinkle of flaky salt for guests. (Yes, even on a Tuesday night.)
- Budget-Friendly Protein Power: Bone-in thighs stretch further than breasts, and mushrooms add meaty texture for way less cash. I make a double batch, store half for lunches, and still have cash left for wine. Win-win.
Step-by-step instructions for baked chicken thighs with mushrooms
Here's how to achieve crispy herb-crusted thighs with a rich pan gravy—no complicated techniques required.
Prep the Chicken and Mushrooms
Pat the 4 whole bone-in chicken thighs dry with paper towels—this is non-negotiable for crispy skin. Season both sides generously with the 1.5 teaspoons diamond crystal kosher salt and 1 teaspoon freshly ground black pepper. Let them sit at room temperature for 15 minutes while you prep the mushrooms.
Slice the 16 oz white button mushrooms into ¼-inch thick pieces. In a small bowl, combine the 0.25 cup chopped fresh thyme leaves, 1 tablespoon finely chopped fresh rosemary, 4 minced garlic cloves, and 0.5 cup panko breadcrumbs. Mix well—this will become your herb crust. The mushrooms can wait; focus on the chicken first.
Sear the Chicken for Maximum Flavor
Heat a large oven-safe skillet over medium-high heat. Add 2 tablespoons of the 3 tablespoons extra-virgin olive oil and let it shimmer for 30 seconds. Place the chicken thighs skin-side down in the pan and sear undisturbed for 6-7 minutes until the skin is golden brown and crispy. Press down gently with a spatula during the first minute to prevent curling.
Flip the thighs and sear the other side for 3-4 minutes until golden. Remove the chicken and set aside on a plate. Pour out any excess fat from the skillet, leaving behind all those delicious browned bits—this is where the flavor lives. Reduce heat to medium and add the sliced mushrooms to the same skillet.
Build the Herb Crust and Bake
Cook the mushrooms for 4-5 minutes until they release their moisture and begin to brown. Add the herb breadcrumb mixture and stir to combine, letting it toast for 1-2 minutes until fragrant. Spoon this mixture evenly over the chicken thighs, pressing down gently to adhere.
Transfer the skillet to a preheated 400°F oven. Bake for 25-30 minutes until the chicken reaches an internal temperature of 165°F and the crust is deeply golden. The mushrooms should be tender but still hold their shape. Here's the thing—your oven might run hot, so start checking at the 20-minute mark if you're unsure.
Make the Golden Pan Gravy
Remove the chicken from the oven and tent loosely with foil to keep warm. Reduce heat under the skillet to medium and add the 2 tablespoons unsalted butter. Let it melt completely, then sprinkle in the 1 tablespoon all-purpose flour, stirring constantly for 1 minute to cook off the raw taste.
Slowly pour in the 0.25 cup dry white wine, scraping up all those browned bits from the bottom of the pan. Let it simmer for 2-3 minutes until reduced by half. Add the 0.5 cup chicken broth and simmer for another 3-4 minutes until the sauce thickens to a glossy consistency. If it's too thick, add a splash more broth; if too thin, simmer longer. Taste and adjust seasoning with salt and pepper.
Pro Tips For Making Baked Chicken Thighs With Mushrooms
- CRANK THE OVEN TO 425°F FIRST: I learned this the hard way—starting at 375°F means your chicken will steam instead of brown. Hit 425°F for the first 15 minutes to get that golden crust on the thighs and mushrooms, then drop to 375°F to finish cooking. The high heat caramelizes the mushrooms faster and makes the skin crispy.
- SALT THYME AND ROSEMARY LIKE YOU MEAN IT: Fresh herbs need salt to wake up their flavor. Sprinkle the thyme and rosemary leaves with a pinch of flaky salt before tossing them with the olive oil—it brightens their aroma and prevents them from tasting bland. (Yes, even if you’re impatient like me.)
- DON’T SKIP THE MUSHROOM PREP: Wipe the mushrooms with a damp paper towel to remove dirt, then slice them thick—about ¼-inch. Thin slices turn to mush, and thick ones caramelize properly. Toss them in olive oil before adding the chicken so they don’t dry out while the thighs cook.
- REST THYME AND ROSEMARY UNDER FOIL: After 20 minutes of baking, tent the pan with foil and let the chicken rest for 5–10 minutes. This keeps the herbs from burning while the thighs finish cooking, and it lets the juices redistribute so the meat stays juicy. (Your future self will thank you.)
Pro cooking tips for great baked chicken thighs with mushrooms
Sear Like a Pro
Start by heating your oven-safe skillet over medium-high heat until it’s screaming hot—you should see a slight shimmer in the oil. Use 2 tablespoons of extra-virgin olive oil (like California Olive Ranch) and let it get hot for 30 seconds before adding the chicken.
This ensures maximum crispiness. I swear by pressing the thighs down gently with a spatula during the first minute to prevent curling—this is where the magic happens for that golden skin. 🔥
Don’t Skip the Rest
After searing, let the chicken rest for 5 minutes before baking. This crucial step keeps the juices from leaking out when you cut into it. I’ve made this mistake too many times—skipping the rest leads to dry, sad chicken.
While it rests, use that time to prep your mushrooms and herb crust so everything’s ready when the oven’s hot.
Herb Crust Secrets
For that perfect crispy crust, toast your panko breadcrumbs in the skillet with the mushrooms for 1-2 minutes until fragrant. This step deepens the flavor and ensures the crust stays crispy, not soggy. Press the mixture firmly onto the chicken thighs—don’t be shy!
I like to use a spoon to pack it down, making sure every inch is covered. This is what gives the dish that restaurant-quality crunch.
Oven Temperature Control
Your oven might run hot or cold, so start checking the chicken at the 20-minute mark. The thighs are done when they reach 165°F internal temperature and the crust is golden brown.
If the crust is browning too fast, tent the skillet loosely with foil. I’ve learned the hard way—over-browning ruins the texture. A meat thermometer is non-negotiable here; guesswork leads to disappointment.
Gravy Perfection
The key to a silky pan gravy is patience. Let the wine reduce by half before adding the broth—this builds depth of flavor. If your gravy is too thick, add a splash of broth; if too thin, simmer longer.
I always taste and adjust seasoning at the end. A pinch of Diamond Crystal kosher salt or a crack of black pepper can elevate it from good to amazing. 💫
Equipment Must-Haves
You’ll need an oven-safe skillet (I use a 12-inch Lodge cast iron—it’s worth the investment). A meat thermometer is essential for perfect doneness, and a spatula with a flexible head helps press down the herb crust without breaking it.
Don’t skimp on these tools—they make all the difference in the final result. Trust me, your taste buds will thank you.
Nutrition facts
Frequently asked questions
Can I use boneless chicken thighs instead of bone-in?
Yes, but the cooking time and texture will differ slightly. Boneless thighs cook faster (15-20 minutes instead of 25-30 minutes) and may not stay as juicy. For best results, reduce the oven temperature to 375°F and check for doneness at 165°F internal temperature. The herb crust will still work perfectly, but the dish will be less hearty.
What if I don’t have white wine for the gravy?
No problem! Substitute with 1/4 cup chicken broth + 1 teaspoon lemon juice or 1/4 cup apple cider. The acidity helps balance the flavors just like wine would. For extra depth, add a pinch of dried thyme or a splash of red wine vinegar to the broth mixture. The gravy will still turn out rich and flavorful.
How do I prevent the herb crust from getting soggy?
Toast the panko breadcrumbs with the mushrooms for 1-2 minutes until fragrant before pressing onto the chicken. This removes moisture and creates a crispier base. Also, bake the chicken on the middle rack to avoid steam buildup, and avoid opening the oven door during the last 10 minutes of cooking. If the crust starts looking damp, pop it under the broiler for 1-2 minutes at the end.
Can I make this recipe ahead of time?
Prep the herb crust and store it separately in the fridge for up to 12 hours before baking. For full meal prep, bake the chicken thighs and let them cool completely, then refrigerate for 3-4 days. Reheat the gravy separately and drizzle it over the chicken when serving. The herb crust stays crispy if reheated in a 375°F oven for 5-7 minutes.
What’s the best way to reheat leftovers?
Reheat the chicken thighs in a 350°F oven for 10-12 minutes until warmed through. For the gravy, gently warm it on the stovetop over medium-low heat, stirring occasionally. Avoid microwaving the chicken—it can make the crust rubbery. If the herb crust loses crispiness, broil it for 1-2 minutes at the end. Every bite will taste like it’s fresh off the oven!