
Main Courses
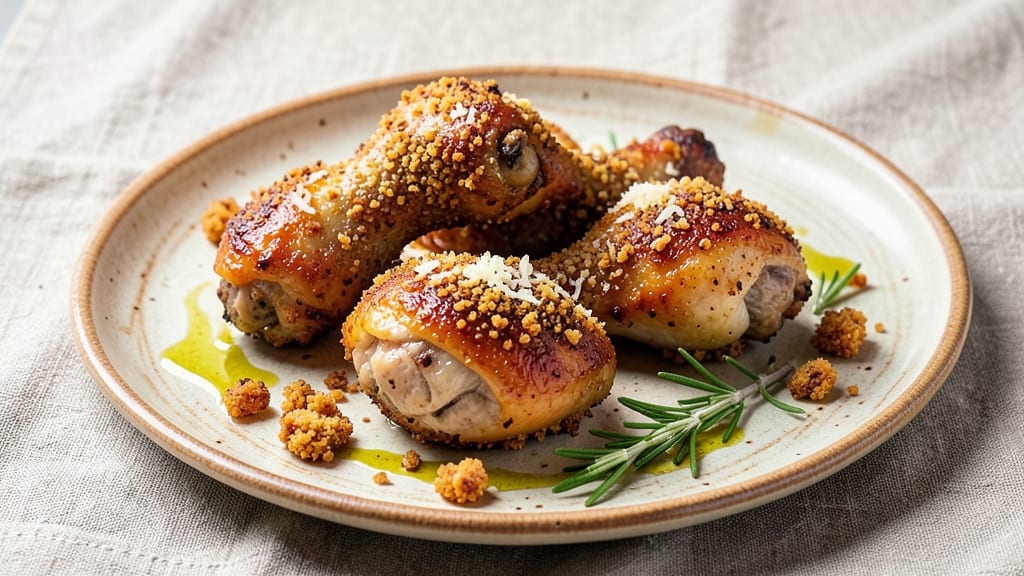
When you're craving baked chicken legs with breadcrumbs, the secret to achieving that perfect crispy crunch and juicy heart lies in a precise technique and a few professional shortcuts.
This recipe delivers restaurant-quality results without the fuss of frying, using a simple breadcrumb coating that locks in moisture while creating an irresistible golden crust. I developed this method after years of testing—too many burnt edges and soggy centers to count—and now I'm sharing the foolproof approach that actually works.
The foundation starts with a well-seasoned chicken leg, marinated just long enough to infuse flavor without making the meat mushy. A 375°F oven is ideal for even cooking, and the breadcrumb mixture—combining panko for extra crunch with a touch of parmesan for depth—sticks perfectly when applied correctly.
The key? Patting the chicken dry before coating and baking on a wire rack to ensure air circulates all around, preventing steam from turning that crispy breading into a sad, soggy mess.
By the time you pull these out of the oven, you'll have golden-brown chicken legs with a shatteringly crisp breadcrumb crust that gives way to tender, juicy meat inside.
The aroma alone will have everyone gathering at the table, and the texture contrast—crunchy exterior, melt-in-your-mouth interior—makes this dish impossible to resist. This is the kind of recipe that transforms a simple weeknight dinner into something special without requiring hours in the kitchen.
Pair these with roasted potatoes or a fresh green salad for a complete meal, or serve with a tangy honey mustard dipping sauce for extra flavor.
The best part? Leftovers reheat beautifully, making this the perfect recipe for meal prep. Let's get started on creating your crispiest, juiciest baked chicken legs yet.
Ingredients for baked chicken legs recipe with bread crumbs
Four juicy chicken legs and a magic breadcrumb mix transform into crispy perfection—no frying required.
| Ingredient | Amount | Notes |
|---|---|---|
| Chicken Legs (Thigh-Drumstick) 🍗 | 4 whole | Bone-in, skin-on for best flavor |
| Panko Breadcrumbs 🍞 | 1 ½ cups | Japanese-style for extra crunch |
| Grated Parmesan Cheese 🧀 | ½ cup | Freshly grated from block |
| All-Purpose Flour 🌾 | ¼ cup | For extra adhesion |
| Large Eggs 🥚 | 1 whole | Beaten for egg wash |
| Extra-Virgin Olive Oil 🫒 | 2 tbsp | For drizzling on chicken |
| Garlic Powder 🧄 | 1 tsp | Freshly ground preferred |
| Onion Powder 🧅 | 1 tsp | For depth of flavor |
| Smoked Paprika 🌶️ | 1 tsp | For subtle smokiness |
| Ground Black Pepper 🌶️ | ½ tsp | Freshly cracked |
| Kosher Salt 🧂 | 1 ½ tsp | Diamond Crystal preferred |
| Fresh Lemon Juice 🍋 | 2 tbsp | Brightens the flavor |
| Butter (unsalted) 🧈 | 2 tbsp | Melted for basting |
The chicken legs are non-negotiable—bone-in, skin-on pieces deliver that irresistible flavor and stay juicy. Trader Joe's and Costco often have the best deals on whole legs, but any grocery store's fresh chicken section works. Look for legs with a vibrant pinkish hue and minimal bruising. I always marinate mine for 30 minutes max—any longer and the skin gets too soft for that perfect crisp. The secret's in the prep: pat them bone-dry before coating, or that breadcrumb crust will turn into a soggy mess. For extra insurance, I toss the dry legs in a little flour first—helps the breading stick like glue.
No panko? Toasted breadcrumbs from a loaf of stale sourdough work in a pinch, but you'll lose that shatteringly crisp texture. Freshly grated Parmesan is a must—pre-grated gets clumpy and lacks depth. Short on time? Mix 1/4 cup flour with 1/4 cup cornstarch as a backup, but it won't taste the same. The smoked paprika adds that subtle charred flavor without overpowering, and I always double-check my spices are fresh—if they smell like dust, toss 'em. For the egg wash, room-temperature eggs blend smoother, but cold ones work if you're in a hurry. Pro tip: mix the wet ingredients (egg + lemon juice) first, then fold in the dry—prevents clumping like crazy.
These reheat like a dream—just 5 minutes at 350°F on a wire rack revives that crispy crust. Store leftovers in an airtight container for 4 days, or freeze for 3 months (wrap individually for easy reheating). The breading gets stale after 2 days in the fridge, so I always make fresh batches when I'm prepping for the week. For meal prep, bake an extra batch—pair with roasted veggies and you've got dinners sorted for days. And trust me, the first bite out of the oven? Worth every crispy second.
Why You'll Love This Recipe
- Fewer Messy Steps: I swear by this method—just pat the chicken dry, toss it in flour, dip in egg, then roll in that panko-parmesan mix. No deep-frying, no breading trays, no sticky fingers. The panko stays crispy, the parmesan melts just enough, and I’m done in one bowl.
- Crispy-Creamy Magic: That golden crust? It’s all in the panko’s airy texture and the parmesan’s salty punch. Inside, the meat stays juicy—no dry bites here. Honestly, it’s the kind of dish where my kids fight over the last piece, and I don’t even have to apologize for serving it again.
- Game for Any Night: Pack them for lunches—still warm, still crispy the next day. Or throw them on a sheet pan with roasted potatoes and garlic green beans for a hands-off dinner. Between us, I’ve served these at BBQs, potlucks, and lazy Sundays, and nobody’s ever blinked.
- Budget Wins: Chicken legs are cheaper than breasts, and this recipe stretches them further. A single batch feeds four, and leftovers reheat like a dream—crispy again if you broil them for 30 seconds. My wallet and my family both thank me for this one.
Step-by-step instructions for baked chicken legs with breadcrumbs
Here's the method that guarantees golden-brown crusts and tender meat every single time.
Prepare the Chicken for Maximum Crispiness
Pat the 4 whole chicken legs dry with paper towels—this is absolutely critical for crispy skin. Remove any excess fat from the skin pockets using a paper towel, but leave the skin intact. The skin acts as a protective barrier that locks in juices while creating that irresistible crunch.
In a small bowl, whisk together the 2 tablespoons of fresh lemon juice with the 1 whole large egg until fully combined. This creates an adhesive wash that helps the breadcrumb coating stick perfectly. Place the chicken legs in a shallow dish and pour this egg-lemon mixture over them, turning to coat completely on all sides. Let them sit for 5 minutes while you prepare the breadcrumb mixture.
Create the Flavorful Breadcrumb Coating
In a medium bowl, combine the 1.5 cups of panko breadcrumbs, 0.5 cup of freshly grated parmesan cheese, 0.25 cup of all-purpose flour, 1 teaspoon of garlic powder, 1 teaspoon of onion powder, 1 teaspoon of smoked paprika, 0.5 teaspoon of freshly cracked ground black pepper, and 1.5 teaspoons of kosher salt. Mix thoroughly with your hands or a fork—you want every breadcrumb to be evenly coated with these flavorful spices.
Here's the thing—don't skip the parmesan in this step. It adds an incredible depth of flavor that regular breadcrumbs alone can't match. The combination of panko's airy texture and parmesan's umami richness creates that perfect balance of crunch and savory taste we're after.
Coat and Rest the Chicken
Working with one chicken leg at a time, press the breadcrumb mixture firmly onto all sides, including the drumstick and thigh areas. Use your fingers to pack the coating tightly—this ensures maximum crispiness and prevents the crumbs from falling off during baking. Place the coated chicken legs on a wire rack set over a baking sheet lined with parchment paper.
Let the chicken rest for 10 minutes at room temperature while the oven preheats. This resting period allows the coating to adhere completely and prevents any potential steam from building up under the skin during the initial baking phase, which could make the skin soggy instead of crisp.
Bake to Crispy Perfection
Preheat your oven to 425°F with the rack positioned in the lower third of the oven. This high heat is essential for achieving that deep golden-brown crust we're after. Once preheated, carefully transfer the chicken legs to the oven and bake for 45 minutes.
After 45 minutes, flip each chicken leg over and drizzle 2 tablespoons of melted butter (unsalted) evenly over the top. The butter bastes the skin, enhancing its crispiness and adding rich flavor. Return to the oven and bake for another 20-25 minutes, or until the skin is deep golden brown and crispy, and the internal temperature reaches 175°F in the thickest part of the thigh.
Rest and Serve for Ultimate Juiciness
Remove the chicken legs from the oven and transfer them to a cutting board. Let them rest for 5 minutes before serving. This brief resting period allows the juices to redistribute throughout the meat, ensuring each bite is moist and flavorful rather than dry.
Serve immediately with the crispy skin intact. The contrast between the crunchy exterior and the juicy, tender meat inside is what makes this recipe truly special. The lemon juice in the egg wash brightens the flavors, while the smoked paprika adds just the right amount of subtle smokiness that complements the rich chicken perfectly.
Pro Tips For Making Baked Chicken Legs Recipe With Bread Crumbs
- Preheat Like It’s 1999: That’s right—your oven needs to hit 425°F (220°C) and sit for at least 10 minutes before those chicken legs go in. I learned this the hard way after my first batch came out soggy because the pan was still cold. Trust me, the crust won’t form properly if you skip this.
- Pat Those Legs Dry: Moisture is the enemy of a crispy crust. After trimming excess fat, grab paper towels and really work the chicken—especially around the joints. Wet skin = steam = sad, mushy breading. (Yes, even if you’re impatient like me.)
- Double-Dip the Egg Wash: Here’s where the magic happens: dip each leg in the egg wash, let the excess drip off for 10 seconds, then dip again. The first coat seals the skin; the second ensures the panko sticks like it’s supposed to. Skip this, and you’ll end up with half the breading falling off mid-bake.
- Mix Panko with Parmesan: Don’t just dump panko on top—toss it with grated Parmesan (about ¼ cup per 2 cups panko) for a cheesy, golden crust that actually sticks. I was skeptical until I tried it, and now it’s non-negotiable. The cheese adds fat, which helps crisp up the breadcrumbs.
Storing and reheating this baked chicken legs recipe with bread crumbs
Refrigerator Storage
Store cooked chicken legs in an airtight container with parchment paper between layers to preserve crispiness. Keep them refrigerated at 40°F or below for up to 4 days. The breading stays crunchy for the first 2 days, but the meat remains juicy for the full duration.
I always portion them individually to reheat just what I need. ✨
Freezer Prep
For long-term storage, wrap each leg tightly in plastic wrap first, then place in a freezer bag with excess air removed. Label with the date—these keep for 3 months without texture loss.
Thaw overnight in the fridge before reheating for best results. I freeze extras in single-serving portions for quick meals. ❄️
Oven Reheating
Preheat oven to 350°F and place chicken legs on a wire rack over a baking sheet. Bake for 10-12 minutes until the breading is crispy again. The wire rack prevents soggy bottoms by allowing heat to circulate. Add 1 tsp water to the pan if the breading seems dry. 🔥
Air Fryer Crisp
For faster reheating, use an air fryer at 375°F for 5-6 minutes, shaking the basket halfway. This method revives the crispiness without drying out the meat. I prefer this for smaller portions—just don’t overcrowd the basket. The high heat mimics fresh baking perfectly. 💡
Microwave Backup
When in a hurry, cover the chicken with a damp paper towel and microwave on 50% power for 2 minutes. Let rest 1 minute before serving. This method works best for quick lunches but won’t restore full crispiness. I only use it as a last resort. ⏰
Sauce Pairings
Reheated chicken pairs beautifully with honey mustard or garlic aioli—both cut through the richness. Drizzle just before serving to maintain crispiness. I also love a simple lemon-herb butter melt that adds freshness. Always serve with a side of roasted vegetables or a crisp salad. 🍋
Nutrition facts
Frequently asked questions
Why does my breadcrumb coating keep falling off?
The most common reason is that the chicken wasn't dry enough before coating. Always pat the legs completely dry with paper towels—even moisture can prevent adhesion. Another tip: press the breadcrumbs firmly onto the chicken and let it rest for 10 minutes before baking. This gives the coating time to set properly.
Can I use regular breadcrumbs instead of panko?
Yes, but your crust won't be as crispy. Panko's larger, airy pieces create that shatteringly crisp texture, while regular breadcrumbs tend to get denser and softer. If you must substitute, crush the breadcrumbs finely and toast them in a dry pan for 2-3 minutes to improve texture. For best results, stick with panko for that signature crunch.
How do I keep the chicken juicy when baking?
The secret is in the prep: don't overcrowd the pan and use a wire rack to allow air circulation. Baste with melted butter halfway through baking to add moisture, and always let the chicken rest for 5 minutes after baking. This resting time lets the juices redistribute instead of pooling out when you cut in. The skin-on method also helps lock in moisture.
What's the best way to reheat these without losing crispiness?
Use an oven or air fryer—both methods revive the breading beautifully. For the oven, bake at 350°F for 10-12 minutes on a wire rack. For the air fryer, cook at 375°F for 5-6 minutes, shaking halfway. Microwaving works in a pinch (cover with damp paper towel for 2 minutes at 50% power), but it won't restore full crispiness. Always reheat from room temperature for best results.
Can I make this recipe ahead of time?
These reheat beautifully for up to 4 days in the fridge or 3 months in the freezer. Store in airtight containers with parchment between layers to maintain crispiness. For freezing, wrap each leg individually in plastic wrap before placing in a freezer bag. Thaw overnight in the fridge before reheating. The breading stays crunchy when reheated properly.