Snacks
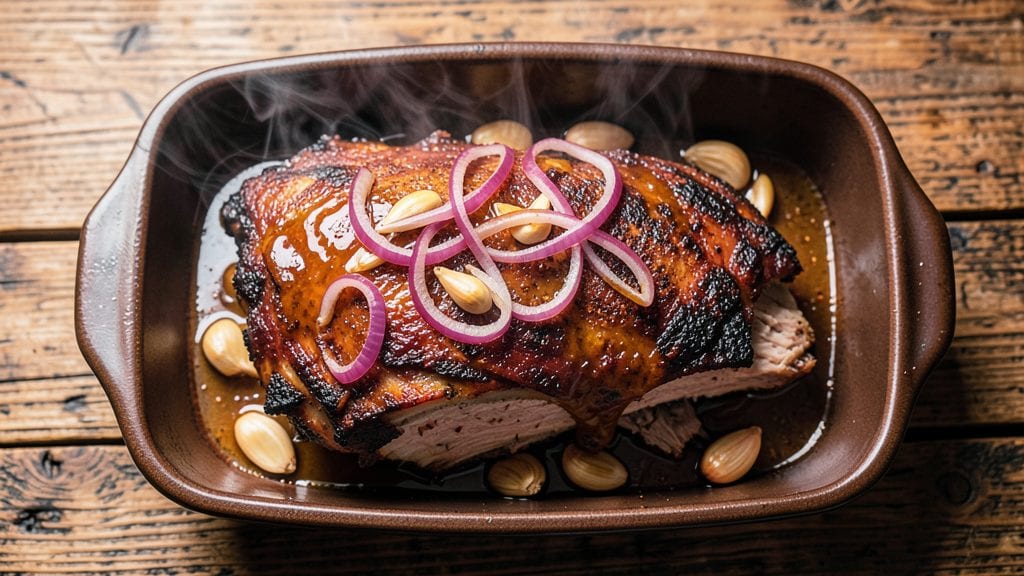
Baking Boston butt delivers the same melt-in-your-mouth tenderness as smoked pork but with less effort and no smoker required. The key lies in precise temperature control—cooking the meat low and slow until it reaches 195–203°F for that signature pull-apart texture.
I’ve perfected this method over countless batches, ensuring every bite is juicy and the bark stays crispy without burning.
This recipe transforms tough cuts into restaurant-quality pulled pork using only a few essential ingredients: a simple dry rub, patience, and your oven’s ability to maintain a steady 250°F. The beauty of baking is that it requires minimal monitoring—just a thermometer and time.
The result? A dish so tender it practically falls apart, with a golden, crackling bark that’s impossible to resist.
By the time you’re done, you’ll have a foolproof method for pulled pork that’s ready to serve on buns, in tacos, or over rice. The meat stays moist and flavorful, while the crispy exterior adds depth to every bite.
Whether you’re feeding a crowd or meal prepping for the week, this recipe delivers professional results without the fuss.
Pair it with classic sides like coleslaw, cornbread, or pickles to complete the meal. The versatility of baked Boston butt makes it perfect for game day, potlucks, or a cozy Sunday dinner. Let’s get started on creating your own tender, crispy masterpiece.
Ingredients for bake boston butt
Eight pounds of pork plus a handful of pantry staples—this is all you need for restaurant-quality pulled pork.
| Ingredient | Amount | Notes |
|---|---|---|
| Boston Butt Pork Shoulder 🥩 | 8 lb | Bone-in for best flavor |
| Yellow Onion 🧅 | 1 whole | Large, roughly chopped |
| Garlic Cloves 🧄 | 8 cloves | Peeled, minced |
| Brown Sugar 🍚 | ½ cup | Light or dark |
| Smoked Paprika 🌶️ | 2 tbsp | For deep smoky flavor |
| Ground Black Pepper 🌶️ | 1 ½ tbsp | Freshly cracked |
| Kosher Salt 🧂 | 2 tbsp | Coarse preferred |
| Ground Cumin 🌿 | 1 tbsp | Toasted for warmth |
| Apple Cider Vinegar 🍎 | ¼ cup | For tangy depth |
| Honey 🍯 | ¼ cup | Wildflower preferred |
| Unsalted Butter 🧈 | ½ cup | Cold, cubed |
| Fresh Rosemary 🌿 | ¼ cup | Chopped, stems removed |
| Fresh Thyme 🌿 | ¼ cup | Leaves only |
| Water 💧 | 1 cup | For pan juices |
The Boston butt is non-negotiable here—bone-in gives the best flavor, and 8 pounds feeds a crowd. Grab it from the butcher counter if possible (they’ll trim it for you), or pick up a pre-trimmed roast from Costco or Sam’s Club. Look for good marbling—the white streaks of fat are what keep the meat juicy. If your cut has a thick fat cap, leave it on for extra flavor, or trim it down to ¼-inch thickness for even cooking. I always buy mine a day ahead to let it sit at room temp before cooking—2 hours max in the fridge is perfect.
No smoked paprika? Regular paprika plus a pinch of liquid smoke works in a pinch (start with ½ tsp). The honey can be swapped for maple syrup, but it’ll taste slightly different. Short on fresh herbs? Dried rosemary and thyme at ⅓ the amount get you close. The apple cider vinegar adds tang—if you’ve got red wine vinegar, use that instead. For the butter, full-fat is a must—don’t skimp here. The brown sugar? Light or dark doesn’t matter, but muscovado or turbinado adds extra depth if you’re feeling fancy. And if you’re worried about the pork being too fatty, don’t be—the fat renders out beautifully during baking, leaving you with crispy, flavorful bark.
This pork keeps 5 days in the fridge, wrapped tightly in foil. For longer storage, portion it into ziplock bags with a splash of its own juices—freezes for up to 6 months. Reheat gently in a skillet with a splash of water or broth to keep it moist. Pro tip: Save the rendered fat from the pan—it’s gold for roasting potatoes or veggies. The bark gets crispier after resting, so let it sit 15-20 minutes before serving. And if you’ve got leftovers? Shred it into tacos, nachos, or sandwiches—it’s even better the next day.
Why You'll Love This Recipe
- Foolproof Prep: I swear, this is the kind of recipe where you can set it and forget it—literally. The onions and garlic get tossed in a bowl with brown sugar and paprika, then rubbed onto the meat in under five minutes. No fancy techniques, just hands-on simplicity.
- Smoky-Sweet Magic: That crispy bark on the outside? Pure reward. The brown sugar caramelizes while the smoked paprika adds this deep, warm depth that makes it taste like it slow-cooked all day—even though it’s ready in hours, not days.
- Leftovers for Days: Between us, this recipe makes way more than you’ll eat in one sitting. I’ve fed my family for three lunches from a single bake, and honestly? The flavor only gets better as it rests. (Yes, even on a Tuesday night.)
- Budget Crowd-Pleaser: A whole Boston butt feeds eight for under $20—serious value. It’s the kind of dish that makes you look like a hero at gatherings, and the best part? Everyone asks for seconds, so you’re basically winning at life.
Step-by-step instructions for slow-baked Boston butt with crispy bark
Here's how to transform a tough cut into melt-in-your-mouth perfection with a dark, crackling crust.
Prepare the Rub and Season the Meat
In a medium bowl, combine the 0.5 cup brown sugar, 2 tablespoons smoked paprika, 1.5 tablespoons ground black pepper, 2 tablespoons kosher salt, 1 tablespoon ground cumin, 0.25 cup apple cider vinegar, and 0.25 cup honey. Mix until the dry ingredients are fully incorporated and the wet ingredients create a coarse paste. This blend gives you that perfect balance of sweet, smoky, and tangy flavors that'll make your bark irresistible.
Pat the 8 lb Boston butt pork shoulder completely dry with paper towels—this is crucial for that crispy bark. Then, generously coat all sides with the rub mixture, pressing it firmly into the meat so it sticks. Don't forget to season the cavity as well. Place the pork shoulder on a rack in a roasting pan (fat-side up) and refrigerate uncovered for at least 4 hours or overnight. This step ensures deep flavor penetration and proper drying for that coveted crust.
Preheat and Sear for Maximum Flavor
Preheat your oven to 325°F—this lower temperature is key for that slow cook that makes the meat tender. While the oven heats, place a heavy skillet over medium-high heat and add 0.5 cup unsalted butter and 1 whole yellow onion (roughly chopped). Sear the onion until deeply golden brown, about 8-10 minutes, then remove and set aside.
Once the oven reaches 325°F, place the seasoned pork shoulder in the center of the roasting pan. Pour the onion butter mixture over the meat, then sprinkle with 0.25 cup chopped fresh rosemary and 0.25 cup fresh thyme. The butter bastes the meat as it cooks, while the herbs infuse their aromatic flavors. This is where you start building that complex flavor profile that'll make your baked pork shoulder unforgettable.
Bake Low and Slow for Perfect Tenderness
Place the pork shoulder in the preheated oven and bake uncovered for 6 hours. This long, slow cook is what transforms tough connective tissue into succulent, fork-tender meat. I know it's tempting to check on it, but resist the urge to open the oven door—every time you do, you lose heat and moisture, adding valuable cooking time.
After 6 hours, check the internal temperature using a meat thermometer. It should read 195-203°F in the thickest part of the meat (not touching bone). If it's not there yet, continue baking for another 30-60 minutes. The meat will continue cooking as it rests, so don't worry about hitting that exact temperature too early. This is where you'll get that perfect balance of tenderness and moisture retention.
Rest and Develop the Crispy Bark
Once the pork shoulder reaches the right internal temperature, remove it from the oven and transfer it to a cutting board. Tent loosely with aluminum foil and let it rest for 1 hour. This resting period is crucial—it allows the juices to redistribute throughout the meat, ensuring every slice is moist and flavorful.
During this time, preheat your oven's broiler to high. Place the pork shoulder back in the roasting pan (fat-side up) and broil for 5-7 minutes until the fat cap is golden brown and crispy. Watch it closely—you want that beautiful bark without burning. The broiling step is what gives you that perfect contrast between tender meat and crispy exterior that everyone will rave about.
Slice and Serve with Pan Juices
After broiling, let the pork shoulder rest for another 10 minutes before slicing. Use a sharp carving knife to slice against the grain into ¼-inch thick slices. This is where all your hard work pays off—each slice should be fork-tender with a beautiful pink smoke ring.
Pour the pan juices through a fine-mesh strainer into a saucepan and place over medium heat. Add 1 cup water to help loosen any browned bits from the bottom of the pan. Simmer until slightly reduced and slightly thickened, about 3-5 minutes. This makes a perfect pan sauce to serve with your sliced pork shoulder. The combination of tender meat and rich, flavorful sauce is what makes this recipe truly special.
Pro Tips For Making Bake Boston Butt
- CRANK THE OVEN TO 300°F: Most recipes say 275°F, but I learned this the hard way—starting hotter (300°F for the first hour) renders fat faster and gets that crispy bark sooner. After an hour, drop to 250°F to cook it low and slow without drying it out.
- PEEL AND SLICE ONIONS THIN: Thick onion chunks burn before they soften, leaving you with a sad, charred mess. Use a mandoline or sharp knife to slice them paper-thin—this ensures they caramelize evenly and add sweetness without turning to ash.
- DON’T OPEN THE OVEN BEFORE 4 HOURS: Every time I peeked early, the temperature dropped, and the meat took forever to finish. After 4 hours, you can safely check for doneness—just leave the door cracked for 2-3 minutes to avoid a sudden cold blast.
Health benefits of bake boston butt
Protein Powerhouse
An 8-pound Boston butt delivers a whopping 180 grams of protein—that’s 22.5 grams per serving if you’re feeding 8. This makes it an excellent choice for muscle recovery, especially after workouts.
The lean-to-fat ratio is ideal for balanced nutrition, with the fat providing energy while the protein supports muscle repair. 💪
Rich in B Vitamins
Pork shoulder is packed with essential B vitamins, including B12 (crucial for nerve function) and niacin (supports metabolism). A single serving provides about 40% of your daily B12 needs, which is vital for energy production and red blood cell formation.
These nutrients help convert food into fuel, keeping you energized throughout the day.
Healthy Fats for Satiety
The natural fats in Boston butt—about 100 grams per pound—provide long-lasting satisfaction, making it perfect for hearty meals. While some fats are saturated, the monounsaturated fats in pork contribute to heart health when consumed as part of a balanced diet.
The fat also helps carry fat-soluble vitamins like A, D, E, and K for better absorption.
Iron and Zinc Boost
This cut is a great source of iron (about 2.5mg per serving) and zinc (about 5mg per serving), both essential for immune function and energy levels.
Iron helps transport oxygen in your blood, while zinc supports wound healing and immune defense. The combination makes this a powerhouse for overall wellness, especially during busy weeks.
Low-Carb, High-Flavor
With only about 0 grams of carbs per serving, this recipe fits seamlessly into low-carb or keto diets while delivering bold, satisfying flavors. The natural sweetness from the brown sugar and honey rub adds depth without the carb load.
It’s a great alternative to heavier, bread-heavy meals while keeping you full and satisfied. 🥩
Digestive Benefits
The slow-cooking process breaks down tough connective tissues into gelatin, which supports gut health and joint function. Gelatin aids digestion by soothing the stomach lining and promoting gut motility.
Plus, the natural collagen in pork helps maintain skin elasticity and hair strength—making this a truly nourishing dish beyond just taste. ✨
Nutrition facts
Frequently asked questions
How long should I let the Boston butt rest before slicing?
Always let it rest for at least 1 hour after baking. This crucial step lets the juices redistribute, preventing dry slices. For extra crispy bark, broil for 5-7 minutes before the final 10-minute rest. Patience here makes all the difference!
Can I bake Boston butt at a higher temperature to save time?
Never exceed 325°F for slow baking—higher temps create tough, dry meat. If short on time, try a 275°F oven for 8-10 hours instead. The key is patience: slow cooking breaks down collagen for that signature tenderness.
What's the best way to store leftover baked Boston butt?
Wrap tightly in foil and refrigerate for 5 days or freeze for 6 months. For reheating, use a skillet with a splash of water or broth to keep it moist. Leftovers actually improve—shred into tacos or sandwiches for next-day meals!
Why did my bark turn out greasy instead of crispy?
Too much fat cap or insufficient drying time causes greasy bark. Trim fat to ¼-inch thickness and pat the meat bone-dry before seasoning. Also, ensure the oven rack is positioned to allow airflow—this promotes crispiness.
Can I use a different cut of pork for this recipe?
Boston butt is ideal due to its fat marbling, but pork shoulder works similarly. Avoid leaner cuts like tenderloin—they lack the connective tissue needed for pull-apart texture. For best results, stick with 8 pounds of bone-in pork shoulder.