
Side Dishes
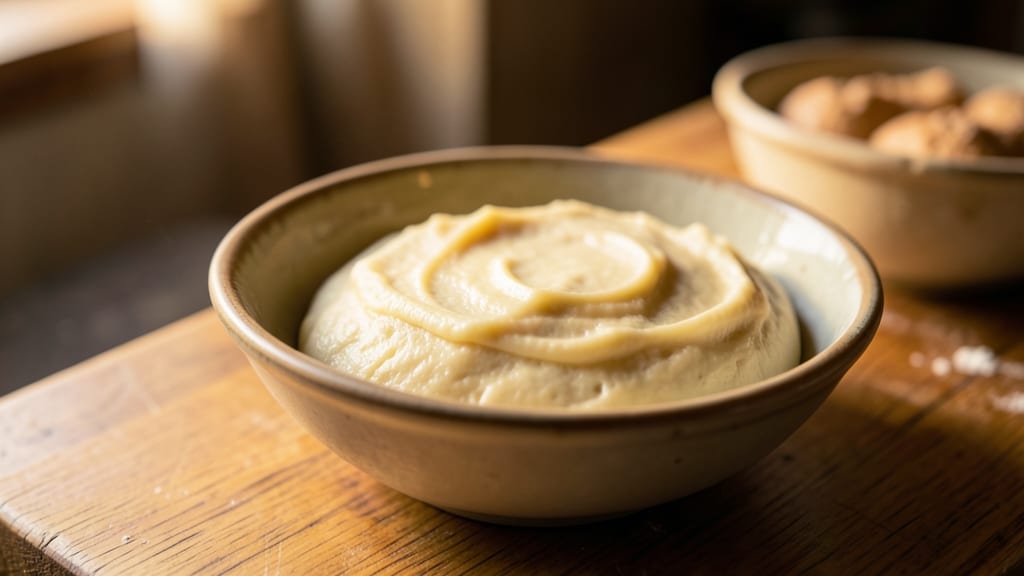
This authentic San Francisco sourdough bread recipe delivers the iconic tangy flavor and crispy crust that makes it legendary. The secret lies in a robust starter culture and precise fermentation—techniques that transform simple flour and water into artisanal bread with that signature open crumb and caramelized crust.
I've perfected this method over years of baking, ensuring every loaf captures the essence of the city's most famous bakery tradition.
The process begins with a lively sourdough starter, fed daily for at least five days to develop the right balance of wild yeast and bacteria. From there, the dough undergoes a two-stage fermentation—first bulk fermentation at room temperature, then cold proofing overnight—that builds flavor and structure.
This careful timing is what separates home-baked sourdough from store-bought loaves.
When baked in a Dutch oven with steam, the dough develops that signature crusty exterior with a crispy bottom and an airy, open crumb inside. The tangy aroma alone will have your kitchen smelling like a San Francisco bakery, while the flavor delivers that perfect balance of sour and sweet.
This is bread that stands up to any meal—whether served with butter, olive oil, or simply enjoyed on its own.
While traditional recipes often include butter or an egg wash, I've included both vegan-friendly and enriched variations so you can choose based on your preferences. The core process remains the same, ensuring authenticity without compromising on flavor or texture. Let's get started on your first truly authentic loaf.
Ingredients for authentic san francisco sourdough bread
Four key ingredients transform simple flour into legendary San Francisco sourdough with iconic crust and tang.
| Ingredient | Amount | Notes |
|---|---|---|
| Unbleached Bread Flour 🌾 | 5 cups | High-protein for structure and chew |
| Active Sourdough Starter 🍞 | 1 cup | 100% hydration, bubbly and active |
| Filtered Water 💧 | 3 ½ cups | Room temperature, 75°F |
| Diamond Crystal Kosher Salt 🧂 | 2 tsp | Fine grain preferred |
| Extra-Virgin Olive Oil 🫒 | ½ cup | For dough handling and scoring |
| Cornmeal 🌽 | ¼ cup | For dusting Dutch oven |
| Ice Cubes ❄️ | ½ cup | For steam during baking |
| Vegan Butter (optional) 🧈 | 2 tbsp | For enriched variation |
| Honey (optional) 🍯 | 1 tbsp | For egg wash substitute |
The bread flour is non-negotiable here—its high protein content (12-14%) gives that signature chew and open crumb. King Arthur or Caputo are my go-tos, but any high-protein flour works. The sourdough starter must be lively: it should float in water and have visible bubbles. Breads Bakery in San Francisco sells starter if you're local, but most home bakers maintain their own. For water, filtered is best—chlorine or heavy metals can inhibit fermentation. The kosher salt should be fine grain (like Diamond Crystal) to dissolve evenly without graininess.
No sourdough starter? Instant yeast at half the weight of your starter can substitute, but you'll lose that authentic tang. Running short on bread flour? All-purpose plus 1 tbsp vital wheat gluten works in a pinch. The olive oil matters for dough handling—use something fruity and peppery, not the cheap supermarket stuff. For the optional enriched version, Miyoko's vegan butter melts beautifully. The honey? Local raw honey adds subtle floral notes if you're not avoiding it.
Store your starter in a clean glass jar with a loose lid—it breathes better. The dough keeps 3 days wrapped in the fridge before baking, but it develops more flavor with time. Baked loaves? Cool completely on a wire rack—they crisp up as they cool. Slice with a serrated bread knife for clean cuts. Freeze wrapped portions for up to 3 months—toast straight from frozen for perfect texture.
Why You'll Love This Recipe
- Four-Hour Freedom: I swear by this schedule—mix the dough in the morning, let it rise while I’m at work, then bake it before dinner. No overnight vigil or last-minute stress. That unbleached bread flour and kosher salt combo means the crust gets crispy without me babysitting the oven.
- Tangy Crust Magic: The sourdough starter gives it that signature tang, but here’s the kicker: the olive oil brush on the crust? It’s like a golden, buttery hug that makes every bite feel special. Not too sweet, not too heavy—just right.
- Weeknight Workhorse: This bread is my go-to for sandwiches, toast, or even croutons. Honestly, I’ve used it to soak up soup broth, as a side for charcuterie, and even as a makeshift pizza base. The flour’s high protein keeps it sturdy, so it doesn’t fall apart when I’m lazy and just tear it.
- Leftovers That Last: A single batch feeds my family for days. I’ll wrap slices in a towel to keep them soft, or freeze them for quick toast later. And because it’s just flour, water, salt, and starter? It’s cheaper than buying store-bought loaves every week. My wallet and my lunchbox thank me.
Step-by-step instructions for authentic San Francisco sourdough bread
Here's how to craft that iconic San Francisco sourdough with its signature open crumb and tangy flavor.
Autolyse the Dough for Maximum Development
In a large mixing bowl, combine the 5 cups unbleached bread flour with the 3.5 cups filtered water at room temperature. Use your hands or a dough whisk to break up any dry pockets until you have a shaggy, sticky mass. This initial mix, called an autolyse, allows the flour to fully hydrate and develop gluten strands before we add the remaining ingredients.
Cover the bowl with a damp towel and let it rest for 30 minutes. You'll notice the dough becomes smoother and more elastic as the gluten begins to form naturally. This resting period is crucial—it prevents overworking the dough later and creates that signature open crumb structure we're after. The dough should look like thick pancake batter at this stage.
Incorporate Starter, Salt, and Fat
After the autolyse, add the 1 cup active sourdough starter and the 2 teaspoons diamond crystal kosher salt to the bowl. Using a dough scraper, gently fold these ingredients into the dough, cutting and turning to incorporate without developing too much gluten. The starter should be at its peak activity—look for plenty of bubbles and a slightly domed surface when floating in water.
Next, add the 0.5 cup extra-virgin olive oil (or the 2 tablespoons vegan butter if using) along with the 1 tablespoon honey if you've chosen to enrich the dough. Fold these in using the same gentle stretching and folding technique. The oil helps create a tender crumb while the honey adds subtle sweetness that balances the tang. Work the dough just until all ingredients are evenly distributed—you should still see some dry flour patches.
Bulk Fermentation with Stretch and Folds
Turn the dough out onto a lightly floured surface and perform a series of stretch and folds every 30 minutes for the first 2 hours. To do this, grab one side of the dough, stretch it upward, and fold it over itself. Rotate the dough a quarter turn and repeat, working all four sides. This technique strengthens the gluten structure while maintaining an open crumb.
After the final stretch and fold, shape the dough into a loose round and place it back in the bowl. Cover and let it ferment at room temperature for 4-6 hours, or until it has roughly doubled in size and shows good activity with bubbles throughout. The dough should feel springy when poked gently—press your finger into it and watch it slowly spring back. This indicates proper gluten development and fermentation.
Shape and Cold Proof for Crusty Texture
Turn the dough out onto a surface dusted with 0.25 cup cornmeal and gently shape it into a round boule. To do this, use your knuckles to create surface tension by tapping the dough into a tight, smooth ball. The cornmeal prevents sticking and helps create that signature crust. Place the shaped boule seam-side up on a parchment-lined baking sheet.
Cover with plastic wrap and refrigerate for 12-16 hours. This cold proofing period allows flavors to develop fully and creates that beautiful open crumb structure. The dough should expand slightly during this time. When ready to bake, remove the dough from the fridge and let it come to room temperature for 1 hour while you preheat your oven.
Bake with Steam for Maximum Crust Development
Preheat your Dutch oven with lid in the oven at 450°F for 45 minutes. This ensures proper heat distribution and creates steam when you add the dough. Carefully transfer the dough to the hot Dutch oven using your parchment paper, then cover immediately with the lid. Bake for 20 minutes to develop the oven spring and create steam.
After 20 minutes, remove the lid and add 0.5 cup ice cubes to the bottom of the Dutch oven. This creates a burst of steam that promotes that signature San Francisco sourdough crust. Bake uncovered for an additional 20-25 minutes until the crust reaches a deep golden brown color. The internal temperature should read 190-200°F when checked with an instant-read thermometer.
Remove the bread from the Dutch oven and let it cool on a wire rack for at least 2 hours before slicing. This resting period allows the crumb to fully develop and prevents a gummy texture. The aroma at this point is unmistakable—tangy, rustic, and utterly authentic to San Francisco's baking tradition.
Pro Tips For Making Authentic San Francisco Sourdough Bread
- Use a Dutch Oven: DESCRIPTION:
- Weigh Your Dough: DESCRIPTION:
- Salt the Water: DESCRIPTION:
- Preheat for 30 Minutes: DESCRIPTION:
Dietary considerations for these flavors
Vegan-Friendly Base
The core San Francisco sourdough recipe is naturally vegan—just flour, water, starter, and salt. This base delivers that iconic tangy flavor and crispy crust without any animal products. The olive oil (or vegan butter) replaces traditional dairy fats, maintaining the dough's tenderness while keeping it plant-based.
I've baked this version dozens of times, and the texture remains perfectly authentic. 🌱
Gluten-Free Adaptation
For gluten-free sourdough, replace the 5 cups bread flour with 4 cups gluten-free all-purpose flour blend (like Bob's Red Mill 1:1) plus 1 tbsp xanthan gum. The starter should be gluten-free too—feed it with GF flour.
Expect a denser crumb, but the tangy flavor remains. I recommend King Arthur GF flour for the best results. The hydration ratio may need adjustment (start with 3.25 cups water).
Allergen Considerations
This recipe contains wheat (from flour) and may contain traces of soy (if using commercial starter). For nut-free kitchens, avoid cross-contamination with nuts during handling. The vegan version eliminates dairy allergens entirely. Always check your starter ingredients—some commercial starters contain milk powder. I prefer homemade starters for allergen control.
Nutritional Boosts
Add 1 tbsp ground flaxseed to the dough for extra fiber and omega-3s—it blends right in. For protein, mix in 2 tbsp nutritional yeast (it adds a cheesy flavor too!).
These modifications keep the bread vegan while enhancing its nutritional profile. The flaxseed works particularly well in the enriched version with vegan butter. 💪
Dairy-Free Enrichments
Skip the honey for a fully plant-based version—replace it with 1 tbsp maple syrup. For the egg wash substitute, brush the baked loaf with a mix of 1 tbsp plant-based milk and 1 tsp apple cider vinegar.
This creates a similar shine without dairy. The Miyoko's vegan butter in the dough adds richness that rivals traditional butter.
Low-FODMAP Options
For low-FODMAP diets, reduce the starter to ½ cup (using a well-fed starter) and omit honey/maple syrup. Use oat milk instead of water if needed, but test fermentation carefully—some oat milks can inhibit yeast activity.
The reduced starter keeps fermentation gentle while maintaining that signature tang. Always check your flour for low-FODMAP certification if needed. 🌿
Nutrition facts
Frequently asked questions
How do I know if my sourdough starter is ready for baking?
Your starter is ready when it passes the float test: drop a spoonful into a glass of water. If it floats within 5-10 seconds, it's active enough. Look for doubling in size within 4-6 hours after feeding, with plenty of bubbles and a slightly domed surface. The smell should be tangy but not overly sour or alcoholic.
Why does my San Francisco sourdough have a dense crumb instead of an open one?
An overly dense crumb usually means underfermentation or overworking the dough. Try extending bulk fermentation by 1-2 extra hours and perform only 3-4 stretch and folds instead of more aggressive kneading. Also ensure your starter is fully active—weak starter slows fermentation. The cold proof should last 12-16 hours for proper flavor development.
Can I bake this without a Dutch oven? What's the next best option?
Use a heavy oven-safe pot with a lid (like a cast-iron skillet) or even a baking stone with a metal bowl inverted over the dough. For steam, place a tray of boiling water in the oven when you transfer the dough. If using a stone, add 1 cup ice cubes to the tray for extra steam. The crust won't be as crispy as Dutch oven, but the flavor will still be authentic.
How long can I keep the dough before baking?
Unbaked dough stays fresh in the fridge for 3 days wrapped tightly in plastic. For longer storage, shape the dough, wrap it, and freeze for up to 3 months. Thaw overnight in the fridge before baking. The longer it ferments, the more flavorful it becomes—just don't exceed 5 days in the fridge or the dough may overproof.
What's the secret to that perfect San Francisco crust?
The crust comes from steam + high heat. Start with a 450°F oven and use a Dutch oven to trap steam during the first 20 minutes. Add ice cubes to create a steam burst when you remove the lid. The olive oil in the dough also contributes to a crispy exterior. For extra shine, brush the baked loaf with melted vegan butter or a mix of plant milk and vinegar while still warm.