
Side Dishes
Mastering Arthur's bread recipe delivers that signature crusty exterior and airy interior without requiring hours of kneading or baking expertise. This no-knead rustic loaf achieves professional results with minimal effort, using a simple mix of flour, yeast, and water that transforms into an irresistible loaf.
The secret lies in precise dough hydration and controlled proofing—techniques that create that coveted crispy bite while keeping the crumb tender.
What sets this recipe apart is its foolproof method, designed for home bakers who want restaurant-quality bread without the complexity. With just five ingredients and 30 minutes of active time (plus overnight proofing), you'll bake a loaf that rivals artisanal bakery versions.
The dough develops flavor naturally during its long fermentation, while the high-heat bake creates that signature crackly crust.
By the time your oven timer dings, you'll have a loaf with a crusty bite that shatters satisfyingly and a soft, open crumb that's perfect for sandwiches or serving alongside soups.
The aroma alone will transform your kitchen into a bakery, and every slice will taste like it came from a professional oven. This is bread that builds confidence with every batch.
Whether you're preparing for a family dinner or treating yourself to homemade bread, this recipe delivers consistent results. The technique scales easily for larger batches, and variations like adding herbs or seeds let you customize without sacrificing quality. Let's get started on your perfect loaf.
Ingredients for arthur bread
Five simple ingredients transform into a loaf with that signature crusty bite and airy crumb.
| Ingredient | Amount | Notes |
|---|---|---|
| Bread Flour 🌾 | 3 ½ cups | High-protein for structure and chew |
| Instant Yeast 🍞 | ½ tsp | Active dry works too |
| Kosher Salt 🧂 | 1 ½ tsp | Diamond Crystal preferred |
| Water 💧 | 1 ¾ cups | Room temperature, not warm |
| Olive Oil 🫒 | 1 tbsp | Extra-virgin for flavor |
| Cornmeal 🌽 | ¼ cup | For dusting baking sheet |
| Ice Water ❄️ | ¼ cup | For dough shaping |
The flour is non-negotiable here—bread flour gives you that professional chew and open crumb. King Arthur or Caputo are my go-tos, but any high-protein (12-14%) will work. The yeast? Instant yeast dissolves faster, but active dry works if you let it proof longer. Salt matters too—Diamond Crystal dissolves more easily, but regular kosher works. Water temp is critical: too warm and it kills the yeast; too cold and the dough won't rise. Aim for 75°F—just lukewarm to the touch. The olive oil adds flavor and helps with browning, so don't skip it.
No bread flour? All-purpose plus 1 tbsp vital wheat gluten gets you close. Short on yeast? Baking powder can't replace it, but if you're in a bind, use 1 tsp baking powder plus 0.25 tsp baking soda—it'll be lighter but not the same. The cornmeal is just for dusting, but if you're feeling fancy, try semolina for extra crunch. For shaping, keep that ice water handy—it helps the dough hold its shape better. And if your kitchen feels too warm, proof the dough in the fridge overnight for better control.
This dough is patient—it keeps 24 hours in the fridge before shaping, so make it ahead. Once shaped, it's ready to proof for 1-2 hours at room temp or overnight in the fridge. The baked loaf stays fresh 3 days at room temp, wrapped in a towel. For longer storage, freeze slices—toast straight from frozen. Pro tip: Slice the loaf while still warm for cleaner cuts. The crust gets crispier as it cools, so resist slicing too soon.
Why You'll Love This Recipe
- Five-Ingredient Magic: I swear, this bread only needs flour, yeast, salt, water, and olive oil—no fancy add-ins. The simplicity means I never overthink it, and somehow, that makes it better.
- Crispy-Gold Perfection: That olive oil brush? Oh my gosh. It turns the crust into shatteringly crisp layers while keeping the inside pillowy soft. (Yes, I’ve tested it—no regrets.)
- Weeknight Hero: I pull this dough together in 10 minutes, let it rise while I eat dinner, and bake it while I clean up. It’s my “I’m too tired to order pizza” lifesaver—every single time.
- Budget Stretch: A single batch feeds my family for days: toast for breakfasts, sandwiches for lunches, and dinner rolls. No waste, just pure, stretchable goodness that costs pennies.
Step-by-step instructions for Arthur's bread recipe
This no-knead method delivers a rustic loaf with a crispy crust and chewy interior—minimal effort, maximum reward.
Mix the Dough with Minimal Handling
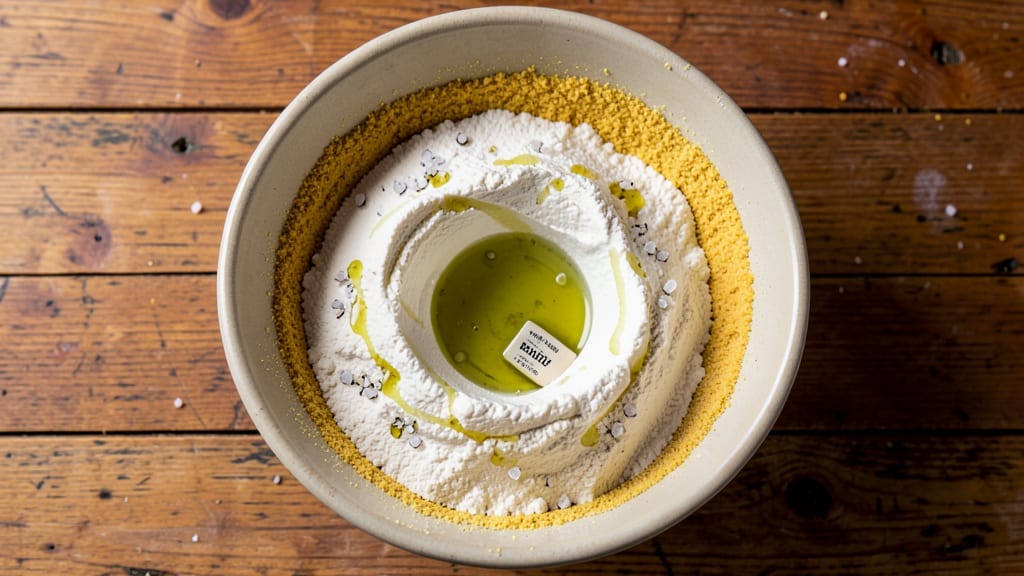
In a large bowl, combine the 3.5 cups bread flour and 1.5 tsp kosher salt. Whisk briefly to distribute the salt evenly through the flour—this ensures uniform flavor and structure. Create a well in the center and pour in the 1.75 cups water and 1 tbsp olive oil. Let the water and oil sit undisturbed for 1 minute to allow the flour to absorb them gradually.
Using a wooden spoon or your hands, gently mix the ingredients until a shaggy dough forms. Avoid overworking the dough at this stage—just combine until no dry flour remains. The dough will be sticky, but that's normal. Cover the bowl loosely with plastic wrap and let it rest at room temperature for 1 hour. This initial rest allows the flour to fully hydrate and the gluten to begin developing without your intervention.
Shape the Dough with Ice Water
After the 1-hour rest, the dough should be slightly more cohesive but still sticky. Lightly wet your hands with the 0.25 cup ice water to prevent sticking. Gently gather the dough into a loose ball, using just enough pressure to bring the edges together. Place it on a lightly cornmeal-dusted surface—this prevents sticking and creates that signature rustic texture.
Shape the dough into a round boule by tucking the edges underneath and sealing the seam. The ice water helps tighten the surface tension, giving you cleaner edges and a more professional-looking loaf. Cover the shaped dough with a damp towel and let it proof at room temperature for 2-3 hours, or until it has nearly doubled in size. You'll know it's ready when the dough springs back slowly when poked gently with a finger.
Preheat and Prepare for Baking
Preheat your oven to 450°F with a Dutch oven inside for 45 minutes. The Dutch oven creates steam, which is crucial for developing that crispy crust and open crumb. While the oven preheats, dust a baking sheet with 0.25 cup cornmeal—this will support the dough as it expands and prevents sticking. Remove the Dutch oven from the oven and place it on a heatproof surface.
Carefully transfer the proofed dough to the hot Dutch oven, seam-side up. The dough should be relaxed and jiggly—if it resists, it needs more proofing time. Sprinkle the top with a pinch of kosher salt for flavor and to enhance browning. Cover the Dutch oven with the lid and return it to the oven.
Bake for Maximum Crust and Crumb
Bake the dough covered for 30 minutes to allow the steam to build and the structure to set. After 30 minutes, remove the lid and bake for an additional 15-20 minutes until the crust is deep golden brown and sounds hollow when tapped on the bottom. The internal temperature should reach 190-200°F—this ensures a fully baked loaf without over-browning.
Here's the thing—don't open the oven during baking. The sudden temperature drop can cause the crust to collapse. If you're unsure, use an oven thermometer to confirm the 450°F setting. Once baked, transfer the loaf to a wire rack to cool completely before slicing. This resting period allows the gluten to relax and the crumb to set properly, preventing a gummy texture.
Cool and Serve for Optimal Texture
Let the bread cool on the wire rack for at least 1 hour before slicing. This might feel like forever, but it's worth the wait—the crust will crisp up further, and the crumb will develop that signature chewy texture. If you can't resist, tear off a piece to test the progress after 30 minutes, but save most of the loaf for later.
Store any leftovers wrapped in a bread bag or cloth at room temperature for up to 3 days, or freeze for longer storage. When reheating, wrap the bread in foil and warm in a 350°F oven for 5-10 minutes to restore that fresh-baked feel. Each slice should offer a perfect balance of crispy crust, chewy interior, and an open, airy crumb—proof that great bread doesn't require complicated techniques.
Pro Tips For Making Arthur Bread
- Weigh Your Flour: Bread flour varies wildly in density—scooping leads to inconsistent dough. Use a kitchen scale for 500g (plus or minus 5g) to guarantee the right hydration. I learned this the hard way after making dough that was either too stiff or too sticky to handle.
- Autolyse First: Mix just the flour and water (no yeast, no salt) and let it rest for 30 minutes before adding yeast. This relaxes the gluten, making the dough easier to shape and giving you a smoother crumb—no fancy equipment needed, just patience.
- Skip the Over-Kneading: Arthur bread dough only needs 4-5 minutes of hand-stretching (or 3-4 minutes in a stand mixer with a dough hook). Overworking it develops too much gluten, making the bread dense instead of light and airy. Feel for resistance, not exhaustion.
- Proof at Room Temp: Let the dough rise in a warm spot (75-80°F) until it’s almost doubled—about 1.5 to 2 hours. Cold proofing slows fermentation; room temp keeps the yeast active without rushing the flavor. (Yes, even if you’re impatient like me.)
Essential equipment for perfect results
Dutch Oven Essentials
Your Dutch oven is the MVP of this recipe—it traps steam to create that signature crusty bite while keeping the crumb tender. I recommend a Le Creuset or Lodge cast iron Dutch oven (5-6 quart size) for even heat distribution.
The lid should fit snugly to lock in moisture during the initial bake. If you don't own one, a heavy oven-safe pot with a tight lid works in a pinch, though results may vary slightly. 🌡️
Digital Thermometer
Oven temperatures fluctuate, so a Thermoworks Smoke or Meater Plus digital thermometer ensures your oven hits 450°F accurately. Place it near the Dutch oven during preheating to confirm the temperature.
I’ve seen home ovens run 25°F hotter or colder than their settings—this small investment prevents underbaked or burnt loaves. Pro tip: Calibrate your thermometer annually for precision.
Bread lame or Razor
A baker’s lame (or even a sharp razor blade) scores the dough before baking, creating those beautiful, even cracks. Hold it at a 45-degree angle and press firmly but evenly. I use a West Bend lame—it’s razor-sharp and stays that way.
If you don’t have one, a single-edge razor blade works, but be careful not to cut too deeply. Score just before baking while the dough is still jiggly.
Dough Scraper
A stainless steel dough scraper (like OXO Good Grips) is your best friend for transferring sticky dough to the Dutch oven. Its flexible edge helps lift without tearing. Keep one handy for shaping too—wet it slightly to prevent sticking.
I’ve ruined more loaves than I’d admit trying to slide dough across a dry surface. A well-wetted scraper makes all the difference.
Proofing Basket
While not mandatory, a proofing basket (or a bowl lined with a floured towel) elevates the dough for better rise and shape. I use a King Arthur proofing basket—it’s lightweight and lets air circulate. If you’re improvising, a bowl lined with a floured kitchen towel works fine.
Just ensure the dough doesn’t stick when transferring to the Dutch oven. A light dusting of cornmeal or semolina on the towel prevents adhesion.
Wire Rack
A cooling rack is non-negotiable for crispy crusts. I swear by the OXO Good Grips rack—it’s sturdy and fits perfectly under Dutch ovens. Place it on a baking sheet to catch any crumbs. Cooling the loaf on a plate traps steam, making the crust soggy.
The rack allows airflow, letting the crust firm up beautifully. For extra crispiness, I even slide the cooled loaf back into a 200°F oven for 5 minutes after slicing.
Nutrition facts
Frequently asked questions
Why does Arthur's bread need such a long proofing time?
The extended proofing (up to 24 hours) develops deeper flavor and a better crumb structure. The slow fermentation allows gluten to relax and sugars to caramelize naturally, creating that signature chewy texture. Cold-proofing in the fridge enhances this process without requiring active time.
Can I use all-purpose flour instead of bread flour?
Yes, but add 1 tablespoon vital wheat gluten per 3.5 cups to mimic bread flour's protein content. The gluten helps create that professional chew and open crumb. Without it, your loaf may be denser but still edible.
What if my dough doesn't rise properly?
Check your yeast first—it may be old or stored improperly. Use fresh yeast and test it in warm water with sugar (it should foam in 5-10 minutes). Also ensure your kitchen is at least 70°F—cool environments slow fermentation. Try proofing in a warmer spot or extend the time.
How do I get a crispier crust without burning the bread?
Bake at 450°F with steam (covered) for 30 minutes, then uncover and reduce heat to 375°F for the final 15-20 minutes. This two-stage bake builds crust gradually. For extra crispiness, broil for 1-2 minutes at the very end—watch closely to avoid burning.
Can I make this bread without a Dutch oven?
Yes, but results will differ. Use a heavy baking sheet or pizza stone and spray with water before baking to create steam. Place the dough on parchment paper for easier transfer. The crust won't be as crispy, but the crumb will still be good—just less dramatic.