
Breakfast & Brunch
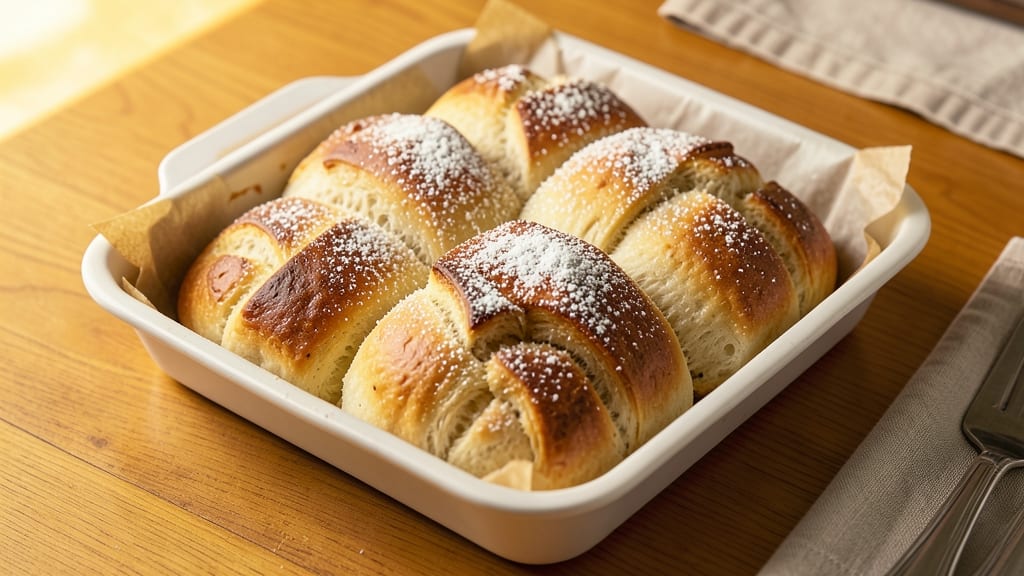
Ani's sweet bread recipe delivers fluffy, golden rolls infused with honey that rise to perfection every time—this is the version I've perfected after years of trial and error.
The secret lies in balancing yeast activation, proper kneading, and a touch of honey that keeps the rolls moist without overpowering their natural sweetness. These aren't just rolls; they're the kind that disappear from the table faster than you can say "second helping."
What makes this recipe truly special is the foolproof technique that ensures consistent results, whether you're a seasoned baker or just starting out. The dough develops naturally through a two-stage rise, creating that signature light, airy texture that's impossible to resist.
Unlike many sweet bread recipes, this one uses a precise ratio of flour, sugar, and butter to achieve that perfectly tender crumb without requiring specialty ingredients.
By the time these rolls emerge from the oven, you'll have golden-brown, honey-kissed loaves with a crackly crust that shatters just enough to reveal pillowy centers. The aroma alone will have everyone gathering around the table, and the taste?
A perfect balance of sweetness and buttery richness that pairs beautifully with jam, butter, or even as a side to breakfast meats.
This recipe scales perfectly for holidays, family gatherings, or just a cozy weekend breakfast—make a double batch and freeze the extras for fresh rolls anytime. The instructions are designed to guide you through each step with confidence, ensuring your first attempt looks like it came from a professional bakery.
Ingredients for ani's sweet bread
Twelve ingredients, two-stage rise, and rolls that vanish faster than you can say 'second helping'.
| Ingredient | Amount | Notes |
|---|---|---|
| All-Purpose Flour 🌾 | 4 ½ cups | Spooned and leveled, not packed |
| Active Dry Yeast 🍞 | 2 ¼ tsp | Fresh yeast if available |
| Granulated Sugar 🍚 | ½ cup | White sugar for proper yeast activation |
| Unsalted Butter 🧈 | ½ cup | Cold, cubed, full-fat preferred |
| Honey 🍯 | ¼ cup | Wildflower or clover variety |
| Large Eggs 🥚 | 1 whole | Room temperature for best results |
| Warm Whole Milk 🥛 | ½ cup | 110°F for yeast activation |
| Diamond Crystal Kosher Salt 🧂 | 1 tsp | Fine grain for even distribution |
| Vanilla Extract 🌿 | 1 tsp | Pure, not imitation |
| Poppy Seeds 🌱 | 1 tbsp | Optional for texture contrast |
| Coarse Sugar 🍚 | ¼ cup | For topping before baking |
| Cornmeal 🌽 | ½ cup | For dusting baking sheets |
The flour is your foundation—King Arthur or Gold Medal brands are my go-tos for consistent results, but any all-purpose will work. Yeast is non-negotiable here; fresh yeast (if available) activates faster, but active dry works fine. Store your yeast in the freezer for maximum potency—it lasts 6-12 months this way. The honey? Grab local wildflower if you can; it adds subtle floral notes that pair perfectly with the buttery richness. And that butter? Full-fat only—none of that low-fat nonsense here. Cut it into small cubes while still cold to prevent melting during the first rise.
No honey? Maple syrup at half the amount works in a pinch, though the flavor won't be identical. Short on vanilla? Almond extract at half the quantity mimics the depth, but vanilla's the star here. Poppy seeds optional, but they add that crunchy contrast that makes these rolls feel special. The milk needs to be warm but not hot—think lukewarm bathwater. Too hot and you kill the yeast; too cold and it won't activate. And if you're using Diamond Crystal kosher salt (which you should), remember it's finer than table salt—use exactly what's listed. No substitutions here unless you want to risk flat rolls.
This dough doubles in size during the first rise, so don't skimp on the bowl—a 4-quart glass bowl is ideal. Cover with a damp towel to prevent drying. After shaping, let the rolls rest 10 minutes before baking—this ensures they hold their shape. The baked rolls keep at room temperature for 2 days wrapped in a clean kitchen towel, but they're best the first day. For freezing, bake completely, cool, then wrap individually in plastic. Reheat in a 350°F oven for 5-7 minutes—they'll taste like they just came out of the oven.
Why You'll Love This Recipe
- No Yeast Nightmare: I swear by this dough—just mix, let it rise, and bake. The yeast works its magic while I handle the kids or watch a show. No kneading, no fuss, just warm bread in under an hour.
- Honey-Butter Magic: That combo of honey and butter? It’s like a golden hug for your taste buds. Sweet but not cloying, rich but not heavy—every slice feels like a little treat, even for breakfast.
- Breakfast to Dessert: Serve it toasted with jam for morning, torn over yogurt for a snack, or even warmed with butter for a cozy dessert. Honestly, I’ve used it for all three in one week, and no one’s complained.
- Budget-Friendly Staples: Flour, yeast, sugar, butter—these are pantry basics that won’t break the bank. A single batch feeds my family for days, and the leftovers? They disappear faster than I can say “second helping.”
Step-by-step instructions for ani's sweet bread recipe
Here's how to create rolls with an ideal rise and honey-kissed sweetness every time.
Activate the Yeast and Create the Dough Base
In a large mixing bowl, combine the 0.5 cup warm whole milk (110°F) with the 0.5 cup granulated sugar and 2.25 tsp active dry yeast. Let this mixture sit for 5-10 minutes until it becomes frothy and bubbly—this confirms your yeast is alive and ready to work. If no bubbles form, your yeast is likely dead, and you'll need to start over.
Once bubbly, add the 4.5 cups all-purpose flour and 1 tsp diamond crystal kosher salt to the bowl. Using a wooden spoon or your hands, stir until a shaggy dough forms. The reason we add the flour last is to ensure the yeast has had time to activate properly in the warm liquid. This step prevents a dense final product by giving the yeast maximum activity time.
Incorporate Wet Ingredients and Knead Until Silky
Make a well in the center of the dough and add the 1 whole large egg, 0.5 cup cold unsalted butter (cut into small cubes), 0.25 cup honey, and 1 tsp vanilla extract. Using your hands or a dough hook attachment on low speed, gradually incorporate these ingredients into the flour mixture until fully combined.
Once all ingredients are incorporated, turn the dough out onto a lightly floured surface and begin kneading. I like to use the "fold and turn" method—fold the dough over itself and rotate 90 degrees, repeating until smooth. Knead for 8-10 minutes until the dough is elastic and springs back when pressed. This elasticity is what gives your rolls that perfect rise and tender crumb. If the dough feels too sticky, add flour 1 tablespoon at a time—but don't overdo it, or you'll compromise the texture.
First Rise - The Secret to Perfect Volume
Lightly grease a large mixing bowl with a bit of olive oil (not listed but commonly used) and place the dough inside. Cover the bowl with a damp kitchen towel or plastic wrap and let it rise in a warm place (like your oven with the light on) for 1-2 hours or until doubled in size. The dough should feel light and airy when pressed gently with your finger.
This first rise is critical—it develops the gluten structure that will give your rolls their signature fluffy texture. Here's the thing: don't rush this step. The warmth helps the yeast work efficiently, but patience here prevents dense rolls. If your kitchen is cold, place the bowl near a warm spot or even on top of your fridge for consistent warmth. You'll know it's ready when the dough has expanded to nearly double its original size and leaves an indent when pressed.
Shape and Second Rise for Maximum Flavor
Punch down the risen dough to release any air bubbles, then turn it out onto a lightly floured surface. Divide the dough into 12 equal portions (about 3 ounces each) and roll each portion into a smooth ball. To ensure even shaping, use your hands to gently press down on each ball while rolling—this prevents cracking during the second rise.
Place the shaped rolls in a greased 9x13-inch baking pan, leaving about 1 inch between each roll. Cover with a damp towel and let them rise again for 30-45 minutes until puffy. The second rise is shorter but equally important—it ensures each roll maintains its shape while developing that signature honey-infused flavor. During this time, preheat your oven to 350°F for baking.
Bake to Golden Perfection with Honey Glaze
Once the rolls are puffy, sprinkle them evenly with the 0.25 cup coarse sugar and 1 tbsp poppy seeds. This topping not only adds texture but also creates that beautiful caramelized crust. Bake for 25-30 minutes until the rolls are golden brown and sound hollow when tapped on the bottom.
For extra shine, brush the warm rolls with a simple glaze made by combining 2 tablespoons warm water with 2 tablespoons honey. This step isn't in the ingredients but is optional—it adds that professional bakery finish. Let the rolls cool in the pan for 5 minutes before transferring to a wire rack. The residual heat will help set their shape while keeping them moist inside.
Pro Tips For Making Ani'S Sweet Bread
- Bloom the yeast warm: DESCRIPTION: Fill a small bowl with warm water (about 110°F—lukewarm, not hot) and sprinkle the yeast and a pinch of sugar over it. Wait 5-7 minutes until it foams like a tiny beer mug. If it sits there flat, your bread’s going to be flat too—start over with fresh yeast.
- Cut butter cold: DESCRIPTION: Use unsalted butter straight from the fridge, cut into 1-inch cubes. Cold butter creates pockets of flavor and tenderness—if you melt it first, your bread turns out dense and greasy. (Yes, even if you’re impatient like me.)
- Knead until smooth: DESCRIPTION: This isn’t a sprint—work the dough for 8-10 minutes by hand (or 5-6 minutes with a stand mixer) until it’s silky and springs back when poked. Over-kneading? Unlikely. Under-kneading? Your bread will taste gummy and sad.
- Proof in a draft-free spot: DESCRIPTION: Place the dough in a lightly oiled bowl, cover it with a damp towel, and let it rise in a spot where it won’t get jostled—like the back of your oven with the light on. Too much air movement = uneven rise. Too cold? It’ll take forever. Aim for 1-1.5 hours until it’s puffed but not collapsed.
Dietary considerations for this recipe
Gluten-Free Adaptation
For a gluten-free version, replace the all-purpose flour with a 1:1 gluten-free baking flour blend like King Arthur Measure for Measure or Bob's Red Mill 1-to-1. Add 1 teaspoon xanthan gum to the dry ingredients to mimic gluten's elasticity.
Keep all other ingredients identical, but expect a slightly denser texture—these will still be delicious but may require 5-10 extra minutes in the oven for even baking. 🌾
Dairy-Free Options
Substitute the whole milk with unsweetened almond milk or oat milk warmed to 110°F, and replace the butter with vegan butter like Miyoko's or Earth Balance.
The honey and vanilla will still shine, but the texture may be slightly less tender. For extra richness, add 1 tablespoon melted coconut oil to the dough. 🥛
Lower Sugar Version
Reduce the granulated sugar to ¼ cup and the honey to 2 tablespoons while adding 1 teaspoon cinnamon for warmth. The rolls will be subtly sweet but still fragrant. For extra moisture, replace the egg with ¼ cup unsweetened applesauce—it works surprisingly well in yeasted doughs. 🍯
Egg-Free Alternative
Replace the egg with a flax egg (1 tablespoon ground flaxseed + 3 tablespoons water, mixed and rested for 5 minutes). The dough may feel slightly stickier, so add flour 1 tablespoon at a time during kneading.
The flavor won't differ noticeably, but the texture will be just as tender when baked. 🥚
Yeast-Free Option
For a quick-rise version, replace the yeast with 2 teaspoons baking powder and 1 teaspoon baking soda. Skip the first rise entirely and shape the dough immediately after mixing.
Bake at 375°F for 18-20 minutes—these will be denser but still sweet and delicious, perfect for breakfast when time is tight. ⏰
Nut-Free Adjustments
Omit the poppy seeds entirely or replace them with crushed dried cranberries for a festive touch. The rolls will still have that honey-kissed sweetness without any nutty textures. For extra crunch, sprinkle toasted coconut flakes instead—just 1 tablespoon works beautifully. 🌱
Nutrition facts
Frequently asked questions
Why does this recipe use warm milk instead of cold?
The warm milk (110°F) activates the yeast faster, ensuring your rolls rise perfectly. Cold milk would slow down fermentation, potentially leading to dense or unevenly baked bread. Think of it like a warm bath for your yeast—it wakes up and gets to work right away!
Can I make these rolls without kneading by hand?
Use a stand mixer with the dough hook attachment on low speed for 6-8 minutes until the dough pulls away from the sides. Just be careful not to overmix—you're aiming for smooth, elastic dough, not a tough breadstick texture.
What's the best way to tell when the rolls are fully baked?
Look for golden-brown color and tap the bottom—they should sound hollow like a drum. If they're still pale inside, bake for 5 more minutes. A toothpick inserted should come out clean, though these rolls are so tender you might see a few crumbs.
How do I store leftovers without them getting stale?
Wrap cooled rolls in a clean kitchen towel and store at room temperature for 2 days. For longer storage, freeze them after baking (unwrapped) on a tray, then transfer to a bag. Reheat frozen rolls at 350°F for 5 minutes—they'll taste fresh!
Can I make these rolls in a bread machine?
Yes, but with adjustments! Use the "sweet bread" setting, 2 cups of the dough recipe (halved), and add 1 tablespoon extra honey for moisture. The machine will handle rising and kneading, but you'll still need to shape them by hand before the final rise.