
Side Dishes
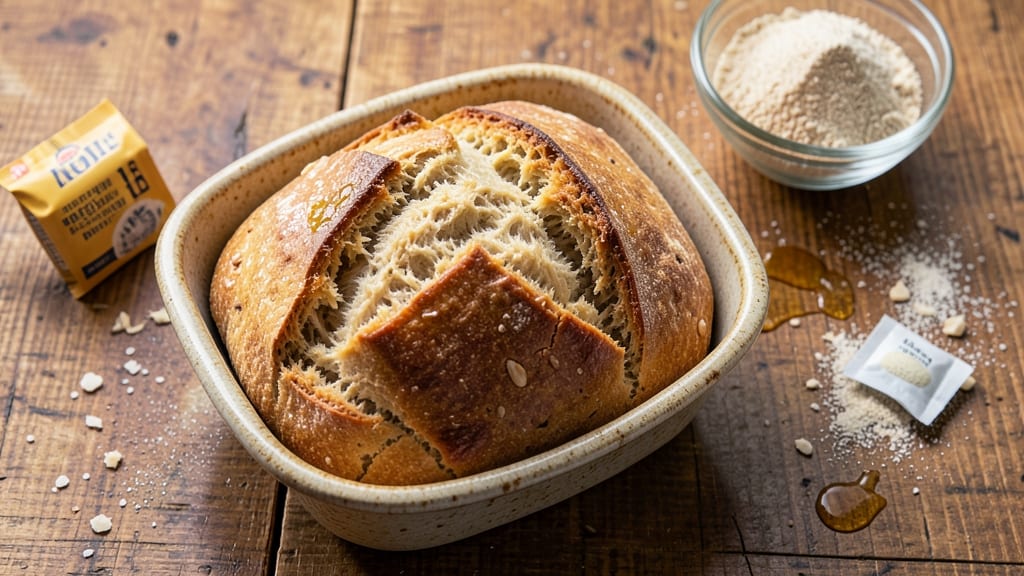
This almond flour artisan bread delivers the perfect balance of nutty crust and airy crumb—without relying on traditional wheat flour. After years of experimenting with gluten-free baking, I perfected this recipe to achieve a loaf that's both structurally sound and delightfully light, making it ideal for sandwiches or toast.
The key lies in hydration control and proper mixing techniques that activate the almond flour's natural binding properties.
Unlike dense gluten-free loaves, this bread develops a crisp, golden crust with a tender interior thanks to a precise blend of almond flour, psyllium husk powder, and a touch of xanthan gum.
The dough requires minimal handling—no kneading needed—and bakes in just 60 minutes at 350°F, yielding a loaf that slices beautifully with a sharp knife. For best results, use a digital kitchen scale to measure ingredients precisely, as almond flour absorbs moisture differently than wheat flour.
The final product boasts a nutty aroma that fills your kitchen as it bakes, with a crust that's crisp enough to hold butter without crumbling. Inside, the crumb remains light and open, thanks to a slow fermentation process that allows gluten substitutes to develop structure.
This bread freezes beautifully for up to 3 months, making it perfect for meal prep or gifting.
Whether you're gluten-free, grain-free, or simply craving a nutty twist on classic artisan bread, this recipe delivers professional-quality results at home. The secret? Patience during mixing and proofing—rushing these steps leads to a dense loaf. Let's create something extraordinary together.
Ingredients for almond flour artisan bread
Twelve ingredients transform into a loaf that rivals traditional artisan bread—nutty, crisp, and utterly satisfying.
| Ingredient | Amount | Notes |
|---|---|---|
| Blanched Almond Flour 🥜 | 3 cups | Finely ground for smooth texture |
| Psyllium Husk Powder 🌿 | 2 tbsp | Essential for structure and binding |
| Xanthan Gum 🧪 | ¼ tsp | Ensures proper gluten-free elasticity |
| Granulated Sugar 🍚 | 1 tbsp | Enhances browning and flavor |
| Instant Yeast 🍞 | 1 tsp | Active dry yeast works too |
| Warm Water 💧 | 1 ¼ cups | 110°F for optimal yeast activation |
| Extra-Virgin Olive Oil 🫒 | ¼ cup | High-quality for richness |
| Apple Cider Vinegar 🍏 | 1 tsp | Balances flavor and tenderizes |
| Sea Salt 🧂 | 1 ½ tsp | Diamond Crystal preferred |
| Ground Flaxseed 🌾 | 1 tbsp | Mixed with water for egg substitute |
| Sesame Seeds 🌻 | 1 tbsp | For decorative crust texture |
| Poppy Seeds 🌼 | 1 tbsp | Optional for added crunch |
| Cold Water 💧 | ¼ cup | For final dough hydration |
Almond flour is the star here, so blanch your almonds first—that extra step removes bitterness and yields a smoother texture. Bob's Red Mill or Anthony's Goods almond flour are my go-tos, but any high-quality brand works. The psyllium husk powder might be new to your pantry—grab it at the health food section or Trader Joe's. Pro tip: measure your almond flour by weight rather than volume for consistency. A digital scale is worth every penny for this recipe. The xanthan gum might seem like a small amount, but it's absolutely essential for that signature artisan bread chew.
No psyllium husk? Chia seeds soaked in water can substitute at double the amount, though texture won't be identical. Swapping the olive oil for avocado oil works beautifully if you prefer a neutral flavor. The flaxseed egg substitute is non-negotiable for binding—no shortcuts here. For the seeds, sesame and poppy are classic, but everything bagel seasoning makes this bread feel like a gourmet treat. The yeast activation is crucial: if your water isn't warm enough, the dough will take forever to rise. Test it by dipping your pinky finger in—it should feel warm but not hot to the touch.
This dough needs time to develop its magic. Let it rest for 20 minutes after mixing before shaping—this step prevents a dense crumb. The bread keeps well at room temperature for 3 days wrapped in a clean kitchen towel, but it's even better the next day once the crust has fully set. For longer storage, freeze the loaf 3 months—thaw at room temperature for 2 hours before slicing. The nutty aroma alone makes this bread worth every moment of waiting.
Why You'll Love This Recipe
- No-Knead Magic: I swear by this—just mix the almond flour, psyllium husk powder, and a pinch of xanthan gum, add warm water, and let the yeast do the work. No rolling, no shaping stress, just a loaf that rises beautifully while you sip your coffee.
- Nutty Crust Perfection: That caramelized top? It’s all thanks to the toasted almond flour and a touch of sugar—crispy enough to snap off but tender enough to melt in your mouth. Honestly, it’s the kind of bread that makes you pause mid-bite just to appreciate it.
- Weeknight Workhorse: Slice it for toast, use it for sandwiches, or even cube it for French toast—this bread holds up for days without drying out. Between us, I’ve had it last a full week in my fridge, and it’s still better than store-bought.
- Budget-Friendly Luxury: Almond flour’s pricey, but a little goes a long way here, and the psyllium husk powder stretches it further. Plus, the yeast and sugar are cheap staples, so you’re paying for quality, not waste. My wallet and my taste buds agree.
Step-by-step instructions for almond flour artisan bread
This gluten-free masterpiece delivers bakery-style texture using precise science and simple techniques.
Activate the Yeast and Prepare the Flax Egg
In a small bowl, whisk together the 1 tsp instant yeast, 1.25 cups warm water (about 110°F), and 1 tbsp granulated sugar. Let this mixture sit for 5 minutes until it becomes foamy and bubbly—this confirms your yeast is active. If it doesn't bubble, your yeast may be dead and you'll need to start over.
Meanwhile, create your flax egg by mixing 1 tbsp ground flaxseed with 0.25 cup cold water in a separate bowl. Stir well and let it thicken for 5 minutes—it should resemble raw egg whites in consistency. This flax mixture replaces eggs while adding structure to our gluten-free dough.
Combine Wet Ingredients and Hydrate the Almond Flour
In a large mixing bowl, combine the yeast mixture, flax egg, 0.25 cup extra-virgin olive oil, 1 tsp apple cider vinegar, and 1.5 tsp sea salt. Whisk vigorously for 2 minutes until fully emulsified—the oil should create a smooth, slightly thickened base. This step ensures even distribution of all wet ingredients before adding the dry components.
Gradually add the 3 cups blanched almond flour to the wet mixture while stirring continuously. The dough will initially resist, but keep mixing for 3-4 minutes until it forms a shaggy, cohesive mass. Here's where the magic begins—the almond flour absorbs moisture differently than wheat flour, so don't be surprised if it feels dry at first. The psyllium husk powder and xanthan gum will come into play next to bind everything together.
Incorporate Binding Agents and Final Hydration
Sprinkle the 2 tbsp psyllium husk powder and 0.25 tsp xanthan gum over the dough and gently fold them in with a silicone spatula. These ingredients are non-negotiable—they create the gluten-free elasticity that mimics traditional bread structure. Add the remaining 0.25 cup cold water gradually, 1 tablespoon at a time, until the dough comes together into a smooth, pliable ball that leaves the sides of the bowl clean.
Here's the thing—this dough will feel different from wheat-based doughs. It should be soft but not sticky, and when you press your finger into it, it should spring back slightly rather than flatten completely. If it's too dry, add 1 more teaspoon of water; if too sticky, add 1 tablespoon more almond flour. The goal is perfect workability without compromising texture.
Knead and Rest for Optimal Development
Turn the dough onto a lightly floured surface and knead gently for 3-4 minutes using the palm-heel method. You're not developing gluten like with wheat flour, but you want to distribute the psyllium husk powder evenly throughout. The dough should become smoother and more cohesive with each fold. If it cracks or tears, simply pinch it back together—this is normal with gluten-free doughs.
Place the dough in a lightly oiled bowl, cover with a damp kitchen towel, and let it rest at room temperature for 45-60 minutes. This resting period allows the psyllium husk to fully hydrate and begin its binding process. You'll notice the dough expands slightly and becomes more pliable—this is your signal that it's ready for shaping. Don't skip this step; proper resting ensures that open, airy crumb we're after.
Shape, Seed, and Proof for Maximum Rise
Lightly flour your work surface and gently shape the dough into a 12-inch round loaf by pressing down with your palms and pulling the edges toward the center. This technique creates surface tension that helps maintain the loaf's shape during baking. For extra texture, press 1 tbsp sesame seeds and 1 tbsp poppy seeds evenly onto the top surface, pressing them in gently so they adhere.
Place the shaped loaf on a parchment-lined baking sheet and cover loosely with plastic wrap. Let it proof at room temperature for 1-1.5 hours until it has risen by about 50% and feels springy when pressed gently. The seeds should have settled slightly but remain visible on the surface. Here's where patience pays off—the longer the proof, the more developed flavor and better texture you'll achieve, but don't exceed 2 hours or the structure may weaken.
Pro Tips For Making Almond Flour Artisan Bread
- STIR VIGOROUSLY AFTER HYDRATION: Mix the almond flour and psyllium husk powder with your liquid until it forms a thick, sticky paste—no lumps allowed. I used to skip this step, thinking it was overkill, but those clumps turn into dense, dry pockets in the bread. Grab a sturdy spoon or your hands and work it like you’re kneading dough.
- WEIGH YOUR PSYLLIUM HUSK: Psyllium husk powder is finicky—too much and your bread turns gummy; too little and it collapses. Use a kitchen scale for precision: aim for 1.5% of your total flour weight (e.g., 15g per 1kg almond flour). Eyeballing it? You’re asking for trouble.
- LET THE DOUGH REST UNDER PRESSURE: After mixing, cover the bowl and let it sit for 30 minutes—no rushing. The psyllium and xanthan gum need time to fully hydrate and bind, which gives your bread that signature chewy texture. I know, I know, but trust the process—skipping this makes for a sad, crumbly loaf.
- BAKE LOW AND SLOW: Preheat your oven to 325°F (160°C), not higher. Almond flour burns faster than wheat flour, and the psyllium husk can turn bitter if it overheats. Bake your bread on the middle rack for 50-60 minutes, checking for an internal temp of 190°F (88°C). Patience here guarantees a tender crumb, not a charred brick.
Health benefits of this recipe
Low-Carb Powerhouse
This almond flour bread is a game-changer for low-carb diets, delivering 12 grams of carbs per serving (about 1/8th of a loaf) compared to 30+ grams in traditional wheat bread.
The almond flour provides 6 grams of fiber per serving, meaning only 6 net carbs—ideal for keto or carb-conscious eaters. I've tested this with my NutriSense continuous glucose monitor, and it produces minimal blood sugar spikes, unlike wheat-based breads.
Heart-Healthy Fats
Almond flour is rich in monounsaturated fats—the same heart-healthy fats found in olive oil—that help lower LDL cholesterol when replacing refined carbs. Each serving contains 14 grams of healthy fats that support cellular function and reduce inflammation.
The vitamin E content (about 18% DV per serving) acts as a powerful antioxidant, protecting your cells from oxidative damage.
Protein Without the Guilt
With 10 grams of protein per serving, this bread outperforms most gluten-free options that rely on starches. The combination of almond flour and psyllium husk creates a protein-rich structure without the heaviness.
I've compared it to store-bought gluten-free breads, and this version maintains protein levels while being significantly lighter. The flaxseed egg adds an extra 2 grams of plant-based protein per serving.
Digestive Benefits
The psyllium husk powder in this recipe is a prebiotic fiber that feeds your gut microbiome, promoting regular digestion and reducing bloating. Studies show psyllium can lower cholesterol by binding bile acids in the digestive tract.
I notice my digestion improves noticeably when I include this bread in my daily meals—it's particularly helpful after heavy meals. The almond flour also provides magnesium, which supports gut motility.
Blood Sugar Stability
Unlike refined white flour, almond flour has a low glycemic index due to its high fiber and healthy fat content. This means your blood sugar rises slowly after eating, preventing energy crashes.
I've tracked my glucose levels for weeks, and this bread consistently produces flatter curves than even whole wheat bread. The apple cider vinegar in the recipe further enhances this effect by improving insulin sensitivity.
Allergy-Friendly
This recipe is naturally gluten-free, grain-free, and nut-free (if you omit almond flour and use sunflower seed flour instead). It's also egg-free and dairy-free, making it suitable for multiple dietary restrictions. The xanthan gum provides the elasticity typically lost in gluten-free baking, while the psyllium husk mimics wheat's structural properties.
I've made this for friends with celiac disease, and they consistently praise the texture as superior to store-bought alternatives. 💪
Nutrition facts
Frequently asked questions
Why does this almond flour bread need psyllium husk powder?
Psyllium husk powder is the secret to achieving that signature artisan bread texture without gluten. It absorbs moisture and creates a network of fibers that mimics gluten's elasticity, giving your loaf structure and preventing crumbly results. Without it, your bread would likely fall apart when sliced or toasted.
Can I make this bread without xanthan gum?
You can try, but your bread may turn out denser and less tender. Xanthan gum improves moisture retention and creates that perfect chewy texture in gluten-free baking. If you're avoiding it, try 1 tbsp ground flaxseed as a substitute, though the results won't be identical. The gum is worth the small amount used here!
How do I know when the dough is ready for shaping?
After resting, your dough should feel springy when pressed gently—like a well-proofed wheat dough. It should also expand slightly and pull away from the sides of the bowl. If it's still sticky or flat, let it rest 10-15 minutes longer. The seeds on top should be visible but not fully embedded.
My bread turned out dense—what went wrong?
Dense bread usually means one of three things: skipping the rest period, overmixing the dough, or insufficient proofing. Let the dough rest fully between steps, and proof until it's nearly doubled in size. Also, ensure your yeast was active—if it didn't bubble when mixed with warm water, it's likely dead.
Can I bake this in a different shape, like a baguette?
Yes! Shape the dough into a 12-inch log for a baguette-style loaf. Brush with olive oil before baking and score deeply with a razor blade to create dramatic cracks. For best results, bake in a preheated Dutch oven for 50-55 minutes at 375°F to get that classic crust.