
Desserts
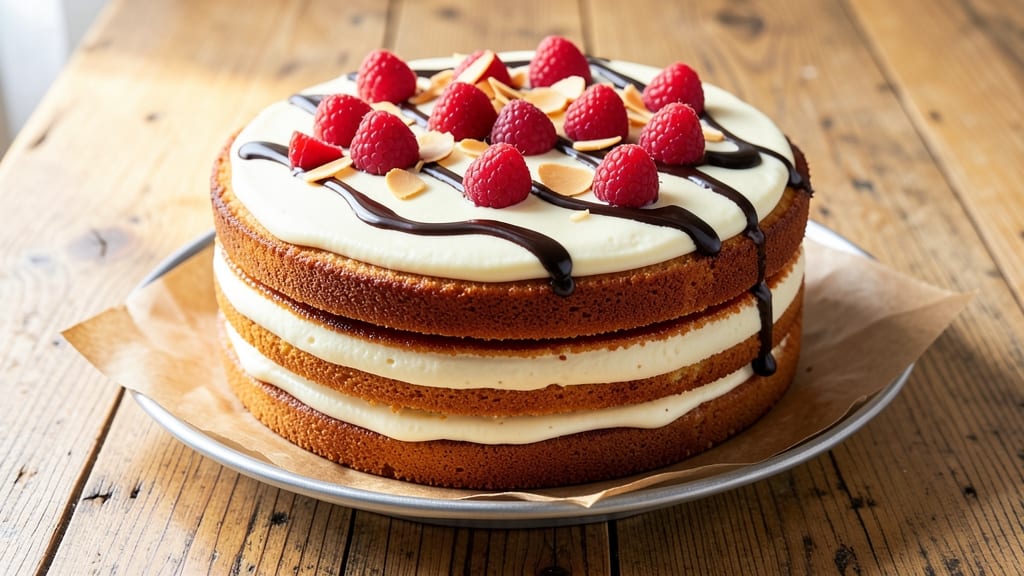
Mastering a 12x18 sheet cake recipe transforms any celebration into a showstopper—whether it's a wedding reception, office party, or family gathering. This professional approach delivers a flawlessly baked, evenly layered cake that feeds dozens without sacrificing texture or flavor.
The key lies in precise measurements and a foolproof method that ensures consistent results every time.
What sets this recipe apart is its versatility—you can adapt it to any flavor profile, from classic vanilla and chocolate to fruit-infused or spiced variations. The cake bakes in a single sheet pan, eliminating layering challenges, while the frosting options range from smooth buttercream to rich ganache.
Each step is designed for professional-quality outcomes with simple techniques.
The result is a decadent, uniform cake with crisp edges and a tender crumb, perfectly portioned for crowd service. The frosting creates a smooth, professional finish that holds up to cutting and serving.
Whether you're decorating with fresh berries, sprinkles, or intricate piping, this recipe provides the sturdy foundation you need.
Perfect for events where presentation matters as much as taste, this sheet cake delivers restaurant-quality results at home. Let’s get started with the ingredients and step-by-step instructions to create your showstopping dessert.
Ingredients for 12x18 cake
Precision ingredients transform a simple sheet cake into a flawless crowd-pleaser.
| Ingredient | Amount | Notes |
|---|---|---|
| All-Purpose Flour 🌾 | 6 cups | Sifted for even texture |
| Granulated Sugar 🍚 | 2 ½ cups | Superfine preferred for smoothness |
| Unsalted Butter 🧈 | 2 cups | Cold, cubed for even mixing |
| Large Eggs 🥚 | 6 whole | Room temperature for even distribution |
| Vanilla Extract 🌸 | 2 tbsp | Pure Madagascar preferred |
| Baking Powder 🍞 | 2 tbsp | Aluminum-free for consistent rise |
| Salt 🧂 | 1 ½ tsp | Fine sea salt for balance |
| Whole Milk 🥛 | 1 ½ cups | Room temperature for optimal hydration |
| Vanilla Bean Paste 🌸 | 1 tbsp | For intensified vanilla flavor |
| Buttercream Frosting 🍰 | 4 cups | Prepared separately for smooth finish |
| Powdered Sugar 🍚 | 8 cups | Sifted for silky frosting |
| Heavy Whipping Cream 🥛 | 2 cups | Chilled for stable peaks |
| Confectioners' Glaze 🍬 | 1 cup | Optional for professional shine |
| Decorative Sprinkles 🎀 | 1 ½ cups | Assorted colors for visual appeal |
The foundation begins with high-quality all-purpose flour—King Arthur or Gold Medal brands ensure optimal gluten structure for that professional crumb. Butter must be cold and cubed to prevent overmixing, while eggs should be at room temperature for even distribution. Vanilla extract from Madagascar delivers a richer aroma than imitation varieties, and vanilla bean paste adds depth without altering texture. For the frosting, powdered sugar from Dominion or C&H brands prevents graininess when sifted properly. Heavy whipping cream should be chilled to achieve stable peaks for the buttercream. Wilton or Mise en Place brands offer reliable baking tools for precise measurements.
Substitutions require careful balance—almond flour can replace up to 25% of the all-purpose flour, but texture will differ slightly. Coconut sugar works 1:1 for granulated sugar but adds a caramel note. Greek yogurt can replace milk for a denser crumb, though hydration levels may vary. For frosting, cream cheese adds tanginess but alters consistency; whipped cream lightens the texture but lacks stability. Store-bought frosting can be used as a shortcut, though homemade yields superior smoothness. Dairy-free alternatives like coconut cream require adjustments to fat ratios for proper structure.
Store dry ingredients like flour and sugar in airtight containers for up to 6 months, while butter and eggs should be used within 2 weeks of purchase for optimal freshness. Frosting components keep for 3 days in the refrigerator but can be frozen for 3 months in airtight containers. Decorative elements like sprinkles and glaze should be added just before serving to maintain crispness. Portioning the cake into 12x18-inch pans ensures even baking, while cooling completely before frosting prevents melting.
Why You'll Love This Recipe
- No Mixer Needed: I swear by this—just cream butter and sugar by hand (or use a fork if you’re lazy) until it’s light. The eggs fold in like butter, and the vanilla? That’s the secret to it tasting homemade, not store-bought.
- Butter-Sugar Magic: That first bite of tender crumb with buttery richness? It’s the kind of cake that makes you pause mid-slice. The sugar caramelizes just enough to give it a subtle depth, while the vanilla ties everything together in a way that’s simple but ridiculously satisfying.
- Crowd-Pleaser Pan: One big sheet pan means no fussing with layers or tiny pans—just bake, slice, and serve. It’s perfect for potlucks, office parties, or when your kid’s soccer team shows up hungry. (Yes, I’ve fed 12 people with one batch.)
- Leftovers? Even Better: This cake stays moist for days, so you can bake it once and enjoy it all week. I often make a double batch and freeze half—thawed slices taste just as good, and it’s cheaper than buying pre-sliced cake. (My wallet thanks me.)
Step-by-step instructions for 12x18 sheet cake baking
A professional approach ensures flawless layers and perfect texture for crowd-sized celebrations.
Prepare the Cake Batter with Precision
Preheat your oven to 350°F and grease three 12x18-inch sheet pans with unsalted butter, then line them with parchment paper for easy removal. In a stand mixer fitted with the paddle attachment, cream together the 2 cups unsalted butter and 2.5 cups granulated sugar on medium speed for 5-6 minutes until light and fluffy. This step is critical—you'll know it's ready when the mixture nearly triples in volume and becomes pale.
Add the 6 whole large eggs, one at a time, mixing well after each addition. Incorporate the 2 tablespoons vanilla extract and 1 tablespoon vanilla bean paste, mixing until fully combined. In a separate bowl, whisk together the 6 cups all-purpose flour, 2 tablespoons baking powder, and 1.5 teaspoons salt. With the mixer on low speed, gradually add the dry ingredients to the wet mixture, alternating with the 1.5 cups whole milk in three additions. Begin and end with the flour to ensure even distribution.
Bake the Layers Evenly for Perfect Rise
Divide the batter evenly among the three prepared sheet pans. Using a spatula, spread the batter into an even layer, tapping the pans gently on the counter to eliminate air bubbles. Bake in the preheated oven for 20-25 minutes, or until a toothpick inserted into the center comes out clean and the edges are lightly golden. Rotate the pans halfway through baking for even heat distribution.
Remove the cakes from the oven and let them cool in the pans for 10 minutes. This brief cooling period prevents cracking when you transfer them to wire racks. Once cooled, carefully peel away the parchment paper and let the layers cool completely before assembling. This patience ensures clean slices and prevents soggy layers.
Assemble the Cake with Professional Technique
Place the first cake layer on a clean work surface and spread a thin, even layer of 4 cups buttercream frosting using an offset spatula. This "crumb coat" prevents crumbs from mixing into the final frosting. Repeat with the second layer, then place it on top of the first. Level the cake by trimming any uneven edges with a serrated knife if necessary.
Apply a final, thicker layer of buttercream frosting to the entire cake, including the sides. Use a bench scraper to create smooth, straight edges by holding the scraper at a 45-degree angle and dragging it from one corner of the cake to the opposite corner. Press gently to ensure the frosting adheres evenly. Chill the assembled cake in the refrigerator for 30 minutes to firm up the frosting before adding decorative sprinkles.
Finish with Professional Decorating
Once the frosting is set, spread the 1.5 cups decorative sprinkles evenly over the top of the cake, pressing them gently into the frosting so they adhere. For added shine, prepare the 1 cup confectioners' glaze by whisking together 2 cups heavy whipping cream and 8 cups powdered sugar until smooth. Drizzle the glaze over the cake immediately before serving to create a professional, glossy finish.
Slice the cake into 36 equal portions using a sharp, hot knife for clean edges. The combination of precise layering, proper frosting technique, and professional finishing ensures a showstopping result that meets any crowd's expectations.
Pro Tips For Making 12x18 Cake
- Cream Butter Slowly: I learned this the hard way—dumping cold butter into warm sugar makes a greasy mess that never dissolves. Use a hand mixer on medium, add butter 1 tablespoon at a time, and let each bit fully incorporate before adding the next. Your batter will be smoother, and the cake won’t turn out dense.
- Sift the Flour Twice: Skimping on sifting means lumps hiding in your batter, which leads to uneven texture. Do a quick sift into your mixing bowl first, then sift again right before folding it in. Yes, it’s an extra step, but your cake’s crumb will thank you—no dry pockets or tough spots.
- Don’t Overmix the Eggs: Beat the eggs and sugar just until the mixture lightens and doubles in volume—about 3-4 minutes. Keep going, and you’ll end up with a cake that’s tough as a boot. Pull the bowl off the mixer the second the sugar dissolves completely and the mixture turns pale.
- Grease the Pan Like It’s 1950: Butter the 12x18 pan, then dust it with flour—then flip it upside down and shake off the excess. Sounds old-school, but this guarantees your cake won’t stick, even if you’re cutting it straight from the pan. (I’ve tried parchment paper, and it still sticks sometimes.)
Troubleshooting this recipe
Uneven Baking
If your cake emerges with dark edges or pale centers, the issue is likely uneven heat distribution. First, ensure your oven racks are positioned in the middle and lower third of the oven—most ovens run hotter at the top.
Rotate your pans halfway through baking (after 12-15 minutes) to promote even browning. For stubborn hot spots, try baking on the center rack only or use an oven thermometer to confirm your oven isn’t running 25°F hotter than set. 🌡️
Cracked Top
A cracked or sunken center usually means overmixing the batter or opening the oven too soon. To fix this, mix the batter just until combined—stop as soon as the flour disappears. Avoid opening the oven door during the first 15 minutes of baking, even to check doneness.
If the cake cracks after cooling, brush the top with simple syrup (equal parts sugar and water, heated until dissolved) to restore moisture and prevent further drying.
Dense or Gummy Texture
If your cake turns out dense or gummy, it’s likely due to overmixing or underbaking. Whisk the dry ingredients by hand or use a mixer on low speed to avoid developing gluten.
For underbaked cakes, return them to the oven for 5-10 minutes at 325°F (covered loosely with foil) until a toothpick comes out clean. If the issue persists, reduce the milk by ¼ cup—too much liquid can weigh down the structure.
Frosting Issues
Buttercream frosting that melts too quickly or doesn’t hold shape often means the cake layers weren’t fully cooled before assembly. Let each layer sit at room temperature for at least 2 hours or refrigerate for 30 minutes to stabilize.
For extra stability, chill the assembled cake for 1 hour before adding sprinkles. If the frosting is too soft, chill it for 10 minutes before spreading—this helps it firm up faster.
Sticky or Soggy Layers
Soggy layers usually result from condensation during cooling or overfrosting. After baking, let the cakes cool in the pans for 10 minutes, then transfer to a wire rack to cool completely.
If the layers still feel damp, place them in a low oven (200°F) for 5-10 minutes to dry them out. For frosting, apply a thin crumb coat first, then chill the cake for 15 minutes before adding the final layer—this prevents excess moisture from seeping in.
Cake Sticking to Pan
If your cake sticks to the parchment paper or pan, proper preparation is key. Always use high-quality parchment paper (like Wilton Non-Stick) and ensure it’s smooth and taut in the pan. Grease the parchment with butter or baking spray before pouring the batter.
For stubborn cases, dust the pan with flour after greasing—just enough to coat the bottom lightly. Avoid overgreasing, as excess oil can cause the cake to sink.
Nutrition facts
Frequently asked questions
How many servings does this 12x18 sheet cake provide?
This recipe yields 36 generous servings, perfect for large gatherings like weddings or office parties. Each slice is about 2x2 inches, making it easy to portion evenly. The three-layer approach ensures everyone gets a substantial piece without overwhelming portions.
Can I bake this cake in a single 12x18-inch pan instead of three layers?
Yes, but you'll need to adjust the baking time and recipe slightly. Reduce the batter to 2 cups flour and 1 cup sugar (scale all ingredients proportionally), then bake at 325°F for 30-35 minutes in one pan. The result will be a single, thick layer rather than multiple tiers, which works well for buffet-style serving.
What's the best way to store leftover sheet cake?
For short-term storage (2 days), cover tightly with plastic wrap at room temperature. For longer storage (up to 5 days), wrap the entire cake in plastic wrap and place it in an airtight container in the refrigerator. To serve, let it sit at room temperature for 30 minutes before slicing for cleaner cuts.
How do I prevent the cake from drying out before serving?
Brush the fully cooled, frosted cake with a simple syrup glaze (equal parts sugar and water, heated until dissolved) just before serving. This adds moisture and keeps the cake tender. For extra protection, store unfrosted layers in an airtight container with a slice of bread to absorb excess dryness.
What are some creative flavor variations for this sheet cake?
Try adding 1 cup of cocoa powder for chocolate flavor, or swap ½ cup milk with ½ cup orange juice for citrus notes. For spiced cakes, add 1 tsp cinnamon or ½ tsp cardamom to the dry ingredients. Fruit lovers can fold in 1 cup mashed berries or ½ cup lemon curd between layers for a burst of freshness.