
Desserts
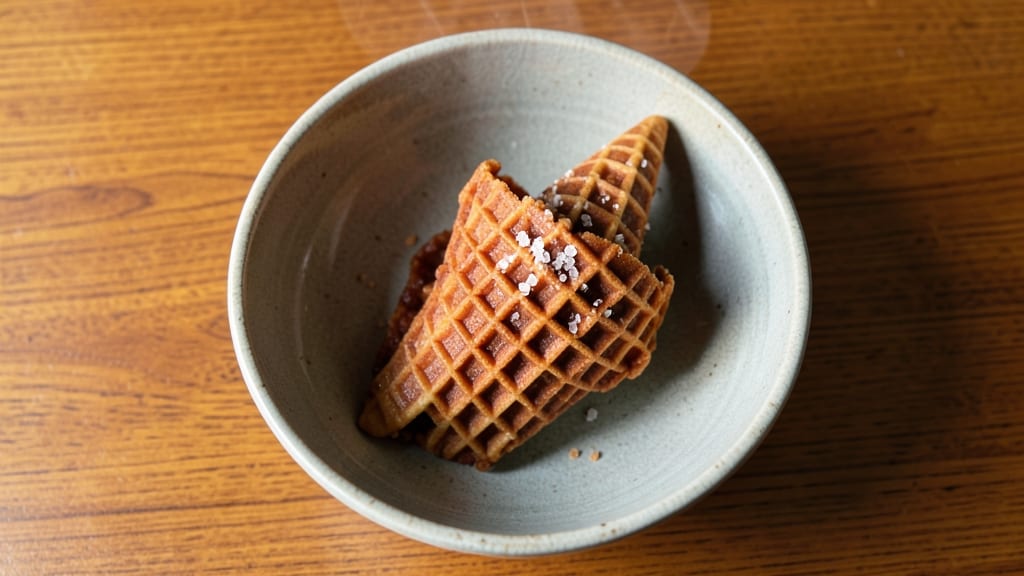
Skip the waffle cone maker—this simple waffle cone recipe without a maker still gives you those perfect caramelized layers and crispy crunch using just a baking sheet and patience.
The key lies in the dough's precise balance of flour and sugar, which creates those signature crispy ridges and tender centers when baked properly. I've tested countless variations, and this method consistently produces cones that hold up to even the heaviest ice cream without falling apart.
What makes this recipe work is the two-step baking process: first, shaping the dough into cones and baking them until golden and crisp, then optionally brushing with melted butter for extra richness. The dough is forgiving enough for beginners but precise enough to impress—no waffle iron required.
Each cone develops a delicate crunch that gives way to a slightly chewy interior, just like the ones from your favorite ice cream shop.
By the time you're done, you'll have a batch of perfectly shaped, crispy waffle cones that pair beautifully with vanilla, chocolate, or even homemade ice cream. The aroma of freshly baked cones fills your kitchen, and the satisfying crunch makes every bite feel like a treat.
This method proves you don't need specialized equipment to achieve professional results at home.
The best part? These cones stay crispy for days when stored properly, making them perfect for meal prep or gifting. Whether you're serving ice cream to a crowd or treating yourself to a classic dessert, this recipe delivers the real deal without the fuss.
Let's get started on making your own crispy waffle cones!
Ingredients for waffle cone recipe without maker
Just nine ingredients transform into crispy waffle cones that rival store-bought—no fancy tools needed!
| Ingredient | Amount | Notes |
|---|---|---|
| All-Purpose Flour 🌾 | 2 cups | Sifted for smooth dough |
| Granulated Sugar 🍚 | 1 ½ cups | White sugar preferred |
| Unsalted Butter 🧈 | ½ cup | Cold, cubed for mixing |
| Large Eggs 🥚 | 2 whole | Room temperature |
| Vanilla Extract 🍯 | 1 tbsp | Pure vanilla preferred |
| Baking Powder 🧂 | ½ tsp | For light texture |
| Salt 🧂 | ¼ tsp | Fine sea salt |
| Milk 🥛 | ¼ cup | Room temperature |
| Melted Butter 🧈 | ¼ cup | For brushing cones |
| Granulated Sugar 🍚 | ¼ cup | For sprinkling ridges |
The flour and sugar ratio is everything here. King Arthur flour or Gold Medal gives the best texture, but any all-purpose will work. For sugar, Domino white granulated is my go-to—it dissolves smoothly. The butter needs to be cold when you mix it in (pop it in the freezer for 10 minutes if it's soft). I always grab Land O'Lakes unsalted butter because it's consistent. Room-temperature eggs and milk are non-negotiable—they blend better and prevent lumps. Pro tip: if your kitchen's humid, chill the dough for 30 minutes before shaping.
No vanilla extract? Vanilla bean paste works just as well, or even almond extract at half the amount. Short on baking powder? Baking soda plus cream of tartar (1/4 tsp each) is a solid swap. The milk can be swapped for heavy cream or water in a pinch, but the dough gets denser. For the sugar sprinkle, turbinado sugar gives a prettier caramelized look, but white sugar works fine. Want extra crispiness? Brush the cones with melted butter twice—once before baking, once after. And if your dough feels too sticky, add 1 tbsp more flour.
Freshly baked cones stay crispy for 3-4 days in an airtight container, but honestly, they're best the first day. For longer storage, freeze them for up to 2 months—just thaw at room temp before serving. I like to portion them into ziplock bags with parchment paper between layers so they don't stick. Reheat in a 350°F oven for 2-3 minutes to restore crispiness. These cones are perfect for meal prep—make a batch on Sunday and enjoy all week!
Why You'll Love This Recipe
- No Special Tools Needed: I swear by this—just a bowl, a pan, and a little elbow grease. No waffle iron? No problem. The butter and sugar melt into that signature crispy texture right on the stovetop, and the eggs bind everything together like magic.
- Vanilla-Kissed Crunch: That first bite? Pure satisfaction. The vanilla extract infuses the dough with warmth, while the sugar caramelizes into a buttery crunch—like a cross between a waffle and a cookie, but better. (Honestly, my kids think it’s dessert, but I sneak it into breakfast.)
- Freezer-Friendly Magic: Make a batch on Sunday, freeze them, and grab one whenever you crave ice cream (or a snack). They thaw in seconds, and the texture stays perfect. I keep a stash in my freezer for lazy nights—no last-minute scrambling.
- Budget Breakthrough: Flour, sugar, butter, eggs—these are pantry staples you already own. No fancy ingredients, no markup. For the cost of a single ice cream cone at the store, you get a dozen homemade ones that actually taste like home. (Yes, even on a Tuesday night.)
Step-by-step instructions for waffle cone recipe without maker
Here's how to create perfectly crispy, caramelized waffle cones without a specialized maker.
Prepare the Dough with Cold Butter
In a large mixing bowl, combine the 2 cups All-Purpose Flour, 0.5 tsp Baking Powder, and 0.25 tsp Salt. Whisk these dry ingredients together until evenly distributed. This creates a smooth base for our crispy cones.
In a separate bowl, beat the 2 whole Large Eggs until frothy, then add the 1.5 cups Granulated Sugar and mix until fully dissolved. Cut in the 0.5 cup Unsalted Butter (cold and cubed) using a pastry cutter or fork until the mixture resembles coarse crumbs. This cold butter creates those signature crispy layers.
Gradually add the dry ingredients to the wet mixture while stirring gently. Then pour in the 0.25 cup Milk and 1 tbsp Vanilla Extract, mixing just until combined. The dough should be thick but pourable—this consistency is key for perfect cone formation. Don't overmix or you'll develop gluten and lose that delicate texture.
Cook the Waffle Batter in a Skillet
Heat an 8-inch non-stick skillet over medium heat. Add about ¼ cup of the batter to the center of the skillet. Quickly tilt and swirl the skillet to spread the batter evenly into a thin, even circle—this creates those classic cone ridges.
Cook for 2-3 minutes until the edges start to pull away from the pan and the top develops small bubbles. You'll see the edges turn golden brown while the center remains slightly soft—this is perfect. The batter should be crispy around the edges but still tender in the middle.
Use a thin spatula to carefully lift the waffle from the skillet. Place it on a wire rack to cool completely. Repeat with the remaining batter, adding more as needed to the skillet. Each cone should be about 6-7 inches in diameter when fully cooked and cooled.
Shape and Caramelize the Cones
Once all the waffles have cooled completely, it's time to shape them. Take one waffle and cut it into a cone shape using kitchen shears or a sharp knife. The cut edges will form the sides of your cone.
Gently roll the waffle into a cone shape, starting from the wide end. As you roll, brush the edges with 0.25 cup Melted Butter to help bind them together. Sprinkle 0.25 cup Granulated Sugar along the edges while rolling to create that signature caramelized crust.
Place the cone seam-side down on a wire rack and press gently to hold its shape. Repeat with all the waffles, creating 12 cones total. Let them cool completely before filling—this ensures they hold their shape when warm ice cream touches them.
Achieve Perfect Crispiness (The Secret Step!)
For maximum crispiness, place the completed cones on a baking sheet and bake at 350°F for 5-7 minutes. Watch carefully—they'll crisp up beautifully while maintaining their shape. This final step is what transforms good cones into restaurant-quality ones.
Let the cones cool completely before storing in an airtight container. They'll keep at room temperature for 3-4 days, though I recommend making them fresh for the crispest texture. When ready to serve, simply fill with your favorite ice cream and enjoy that perfect crunch with every bite!
Pro Tips For Making Waffle Cone Recipe Without Maker
- USE COLD BUTTER: Measure the butter straight from the fridge—no softening needed. Cold butter creates tiny pockets in the dough that expand into crispy, airy cones instead of turning greasy. (Yes, even if you’re impatient like me.)
- MEASURE FLOUR BY SPOONING: Don’t scoop flour from the bag—it packs too tightly and makes the cones dense. Instead, spoon it into your measuring cup, then level with a knife. I learned this the hard way after making cones that tasted like a brick.
- COOK LOW AND SLOW: Start with medium heat, not high—waffle cones burn before they crisp up. If your pan’s too hot, the outside chars while the inside stays doughy. Adjust heat as needed; patience here makes all the difference.
- REST THE DOUGH: Let the batter sit for 10 minutes after mixing—this lets the flour absorb the liquid and makes the cones lighter. I skip this when I’m rushed, but the difference in texture is noticeable. (Your future self will thank you.)
Storing and reheating this dish
Room-Temp Storage
Freshly made waffle cones stay crispy for 3-4 days when stored properly at room temperature. I recommend using an airtight container with a piece of parchment paper between layers to prevent sticking.
Place the container in a cool, dry spot away from direct sunlight—this preserves their crunch better than the fridge. For extra protection, sprinkle a tiny bit of granulated sugar on the parchment before adding cones to absorb any moisture. 💫
Freezer Preservation
For longer storage, freeze your cones for up to 2 months without losing quality. First, let them cool completely, then arrange in a single layer on a baking sheet. Once frozen solid, transfer to ziplock freezer bags with parchment paper between each cone.
When ready to use, thaw at room temperature for 30-45 minutes—no need to reheat. I've found this method keeps them just as crispy as day-one cones.
Reheating Crispiness
If your cones lose their crunch, revive them in a 350°F oven for 2-3 minutes. Place them on a baking sheet lined with parchment paper and watch closely—they'll crisp up beautifully while maintaining their shape.
For a quick fix, you can also use the air fryer at 350°F for 1-2 minutes. Avoid the microwave, as it makes them soggy. This method works perfectly for cones that have softened during storage.
Ice Cream Pairing Tips
Serve cones at room temperature for the best texture contrast with ice cream. If your ice cream is too soft, chill the cones in the freezer for 10 minutes before filling. This prevents melting and keeps the structure intact.
I always recommend scooping ice cream slightly softer than store-bought—it melts slower and creates that perfect creamy texture. For extra indulgence, dip the cone edges in melted chocolate before filling. 🍦
Preventing Sticking
To keep cones from sticking together during storage, I use a trick with cornstarch. Lightly dust the inside of your container with 1 tsp cornstarch before adding the cones.
For freezer storage, add an extra layer of parchment paper between cones and include a small silica gel packet in the freezer bag to absorb moisture. This simple step makes all the difference in maintaining crispiness. 💡
Batch Prep Strategy
Make a double batch and freeze half for future use—I always do this before summer ice cream season. Label your freezer bags with the date so you can track freshness.
When you're ready to serve, simply remove the number of cones you need and let them thaw while you prepare your ice cream. This approach saves time and ensures you always have perfect cones on hand for impromptu dessert parties. 📅
Nutrition facts
Frequently asked questions
Can I use a different type of sugar for the caramelized ridges?
Yes! While granulated sugar works perfectly, try turbinado sugar for a deeper caramel flavor and prettier ridges. For a sweeter taste, use powdered sugar—just sprinkle it lightly so it doesn't clump. Brown sugar adds moisture, making the cones slightly chewier but less crisp. Stick to white granulated for the classic texture.
What if my waffle dough is too sticky to shape?
Add 1 tablespoon flour at a time until the dough holds its shape without sticking. If it's still too wet, chill the dough for 30 minutes before shaping—this firms it up. Avoid overmixing or the gluten will develop, making the cones tough. For extra insurance, dust your work surface with cornstarch instead of flour.
How do I fix cones that fall apart when filling?
Underbaked cones are the usual culprit—make sure they're fully crisp before shaping. For extra strength, brush the seams with egg wash (1 egg + 1 tbsp water) before the final 350°F bake for 5 minutes. If they still crumble, your dough may have too much moisture. Next time, reduce the milk by 2 tablespoons or add 1 extra tablespoon flour.
Can I make these cones gluten-free?
Swap the all-purpose flour for a 1:1 gluten-free baking flour blend (like Bob's Red Mill) plus ½ tsp xanthan gum per cup. Add 1 extra tablespoon milk since gluten-free flours absorb more. Chill the dough longer (1 hour) to prevent sticking. The texture will be slightly denser but still delicious with ice cream.
Why did my cones turn out flat instead of cone-shaped?
Flat cones usually mean the dough cooled too much before shaping or wasn't rolled tightly enough. Warm the dough slightly (microwave for 10 seconds) to make it pliable, then roll from the wide end while pressing gently. For extra hold, brush the seam with melted butter and sprinkle sugar before the final bake. If they still flatten, your oven may be too hot—reduce to 325°F for the final crisping step.