Desserts
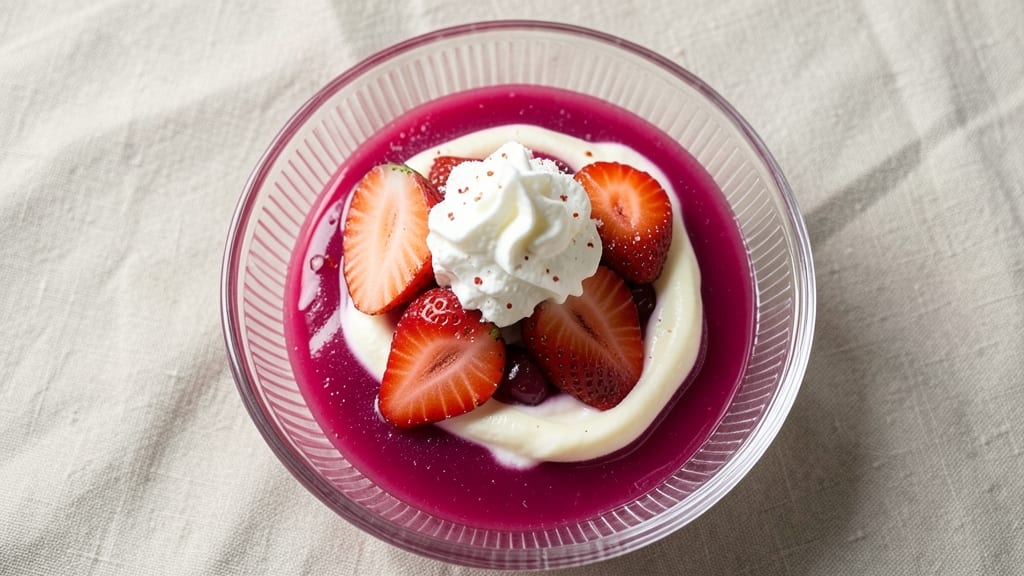
This strawberry jello with sour cream recipe transforms a classic dessert into a velvety, layered masterpiece that takes just 15 minutes of prep and zero skill—yet looks like it belongs on a bakery display.
The secret lies in balancing the tartness of strawberry jello with the cool, tangy richness of sour cream, creating a texture that’s both creamy and perfectly set. I developed this recipe after realizing how often simple desserts can feel underwhelming, and this combination delivers restaurant-worthy results with minimal effort.
The magic happens in the layers: first, a vibrant strawberry jello base sets firmly, then a generous dollop of sour cream adds a silky, almost mousse-like contrast. No fancy equipment is needed—just a loaf pan, a spoon, and patience for the jello to chill.
The sour cream doesn’t just sit on top; it blends seamlessly into the jello’s structure, creating a marbled effect that’s visually stunning and irresistibly smooth. This dessert is foolproof, making it perfect for beginners or anyone craving a no-fuss treat that still feels special.
What you’ll end up with is a dessert that’s cool, creamy, and bursting with strawberry flavor—each bite delivers a perfect balance of sweetness and tang. The sour cream adds a luxurious mouthfeel, while the jello keeps everything light and refreshing.
It’s ideal for summer gatherings, potlucks, or even a spontaneous dessert craving. Garnish with whipped cream or fresh berries for an extra touch of elegance, though the layers alone are already impressive.
This recipe scales effortlessly for parties or individual servings, and leftovers keep well in the fridge for up to 3 days, making it a practical yet indulgent choice.
The best part? No baking, no mixing, and no cleanup beyond a spoon and a pan. Let’s create this layered chill-out dessert that’s as easy as it is delicious.
Ingredients for strawberry jello with sour cream
Eight ingredients, zero fuss, and a dessert that looks like it took hours—trust me, it’s foolproof magic.
| Ingredient | Amount | Notes |
|---|---|---|
| Strawberry Jello Mix 🍓 | 3 oz | Unflavored or strawberry flavored preferred |
| Boiling Water 💧 | 1 ½ cups | Freshly boiled, not tap water |
| Sour Cream 🧀 | 1 cup | Full-fat for best texture |
| Fresh Strawberries 🍓 | ½ cup | Hulled and chopped for garnish |
| Heavy Whipping Cream 🥛 | ½ cup | Chilled for topping |
| Granulated Sugar 🍚 | ¼ cup | For sweetening if needed |
| Lemon Juice 🍋 | 1 tbsp | Freshly squeezed for brightness |
| Vanilla Extract 🌸 | ½ tsp | Pure, high-quality extract |
| Unsalted Butter 🧈 | 2 tbsp | Softened for garnish |
| Diamond Crystal Kosher Salt 🧂 | ¼ tsp | For balancing flavors |
| Loaf Pan 🍰 | 1 whole | 8x4-inch for perfect layers |
The jello mix is where it all begins—strawberry or unflavored works best, but avoid the sugar-free versions (they won’t set properly). Grab the Knorr or Jell-O brand from the baking aisle, not the boxed gelatin at the back. Fresh strawberries? Trader Joe’s or local markets have the juiciest, but frozen works in a pinch if you’re in a hurry. The sour cream is non-negotiable—full-fat gives that luxurious mouthfeel, and Kroger or La Choy brands are my go-tos. Pro tip: let everything sit at room temperature before mixing—cold jello won’t set right, and cold sour cream won’t blend smoothly.
No strawberry jello? Unflavored plus 1 tbsp strawberry puree does the trick—just blend fresh or frozen strawberries with a splash of water. Sour cream too thick? Whip it lightly before folding into the jello. Running short on time? Substitute Greek yogurt at half the amount, but expect a slightly tangier result. The lemon juice is key—freshly squeezed brightens the whole dessert, while bottled just won’t cut it. And if you’re feeling fancy, swap the granulated sugar for powdered for a smoother finish (though it’s not necessary). The butter and whipped cream? Store-bought is fine, but homemade always tastes better—just don’t overwhip it!
This dessert is all about patience—chill for at least 4 hours, preferably overnight, for those perfect layers. Store leftovers in the fridge for up to 3 days, covered tightly. To serve, run a hot knife through the pan for clean slices, and garnish with extra strawberries or a dusting of powdered sugar for that bakery touch. Freezing? Not recommended—the texture gets grainy. But if you’re making this ahead for a party, assemble it the night before and keep it chilled until serving. Trust me, the anticipation makes it even better.
Why You'll Love This Recipe
- Five-Ingredient Magic: I swear, this is the kind of dessert where you mix, chill, and forget about it. No baking, no fussing—just dissolve the Jello in boiling water, fold in sour cream, and let the strawberries do their thing. My kids think I’m a genius (they don’t know it’s basically foolproof).
- Tangy-Sweet Dream: That first bite? The Jello’s bright strawberry flavor cuts through the creamy sour cream like a cool sip of lemonade after a spicy meal. Honestly, the contrast is what makes it—smooth, fruity, and just a little tart. Add fresh strawberries on top, and you’ve got a dessert that tastes like summer in a glass.
- Party in a Bowl: This is my go-to for potlucks, office birthdays, or when I’m too tired to bake. Serve it in clear cups for a pretty presentation, or layer it in a trifle dish for a showstopper. Between us, it’s the kind of dish that disappears fast—no one expects something this good to be this easy.
- Leftovers? No Problem: Make a big batch and store it in the fridge for up to 5 days. The texture stays perfect, and the flavor only gets better as the strawberries mellow. I’ll be real: I’ve reheated slices in the microwave for a quick breakfast treat (yes, even on a Tuesday night). Budget-friendly? Absolutely. Versatile? You bet.
Step-by-step instructions for strawberry jello with sour cream
This dessert comes together faster than you can say "chill-out magic"—creamy layers that melt in your mouth.
Prepare the Strawberry Jello Base
In a medium bowl, whisk together the 3 oz strawberry jello mix and the 1.5 cups boiling water until the powder is completely dissolved and the mixture becomes glossy. You'll notice the color deepen to a vibrant pink—this is your signal that hydration is complete. Let this cool to room temperature for 5 minutes while you prepare the next layer. If you rush this cooling step, the jello won't set properly, resulting in a wobbly texture instead of firm layers.
Once cooled, stir in the 1 tbsp lemon juice and 0.5 tsp vanilla extract until fully incorporated. The lemon brightens the strawberry flavor while the vanilla adds depth. Taste a small spoonful—you should detect both tartness and sweetness, with no graininess remaining. This is your flavor foundation, so accuracy here matters most.
Assemble the Creamy Layers
In a separate bowl, gently fold together the 1 cup sour cream, 0.5 cup heavy whipping cream, 0.25 cup granulated sugar, and 0.25 tsp diamond crystal kosher salt using a rubber spatula. The mixture should be smooth and lump-free, with a thick, pudding-like consistency. For best results, chill the bowl in the refrigerator for 10 minutes before assembling—this prevents the cream from melting too quickly during layering. The sugar and salt work together to balance the tanginess of the sour cream while enhancing the sweetness.
Divide the cooled jello mixture evenly between two small bowls. In another two bowls, divide the prepared cream mixture. This careful division ensures each layer will be uniform in thickness and flavor distribution throughout the loaf pan.
Layer with Precision in the Loaf Pan
Pour half of the jello mixture into the whole loaf pan, spreading it evenly to the edges. Tap the pan gently on the counter to remove any air bubbles trapped in the jello. Immediately pour half of the cream mixture over the jello, again spreading it evenly. Repeat with the remaining jello and cream, finishing with a final layer of jello on top. This alternating pattern creates the signature marbled effect when sliced.
Here's the thing—don't overfill the pan. The layers should come within ¼ inch of the top edge to allow for proper setting. If you fill it completely, the jello will spill over when you refrigerate it, creating a messy presentation. Use a rubber spatula to smooth the top layer if needed, ensuring a clean, professional finish.
Chill and Set for Perfect Texture
Cover the loaf pan tightly with plastic wrap and refrigerate for at least 4 hours, or until the jello is completely set. You'll know it's ready when the edges pull away cleanly from the pan and a knife inserted in the center comes out clean. This chilling time is non-negotiable—rushing it results in a dessert that's more pudding than jello. For best results, chill overnight, as this allows the flavors to meld and the textures to fully develop.
While chilling, prepare your garnish by melting the 2 tbsp unsalted butter in a small saucepan over low heat. Once melted, stir in the 0.5 cup chopped fresh strawberries and let them warm through for 2 minutes. This creates a beautiful strawberry butter to drizzle over each slice when serving. The warm strawberries will contrast beautifully with the cool jello, adding an extra layer of texture and flavor.
Serve with Confidence
Once set, run a knife around the edges of the loaf pan to loosen the dessert. Invert a plate over the pan and quickly flip it to release the jello. Slice into 8 even portions using a sharp, hot knife (dip the knife in hot water and wipe dry between cuts)—this ensures clean slices every time. Serve each portion immediately topped with the strawberry butter drizzle and a few extra chopped strawberries for garnish.
The contrast between the cool, wobbly jello and the warm strawberry butter creates a sensory experience that's nothing short of magical. Each bite delivers the perfect balance of sweet, tart, and creamy—this is dessert perfection reimagined in minutes. Trust the process, and you'll have a showstopper that's as impressive as it is delicious.
Pro Tips For Making Strawberry Jello With Sour Cream
- STRAIN THE JUICE: After mashing strawberries, wrap them in a clean cheesecloth or fine strainer over a bowl—squeeze every last drop. I used to just dump the pulp in, but that leaves gritty texture in your jello. The extra juice makes the layers richer, and you’ll end up with a smoother finish.
- CHILL THE MOLD: Pop your jello mold in the freezer for 10 minutes before pouring the sour cream layer. This keeps the jello from melting when you add the cold mixture. I learned this the hard way—my first attempt turned into a runny mess when I skipped it.
- WHIP CREAM FAST: Use cold, heavy whipping cream straight from the fridge, and beat it on medium-high until it’s just stiff peaks. Overwhipping turns it buttery, and underwhipping makes it flop. Fold it into the sour cream mixture gently—don’t stir like you’re angry.
- SALT THE SOUR CREAM: Add a pinch of salt (about ¼ teaspoon) to your sour cream before folding in the whipped cream. It balances the sweetness and cuts through the tang. I was skeptical until I tried it—now it’s non-negotiable for me.
Best sauces and condiments for strawberry jello with sour cream
Strawberry Butter Drizzle
Elevate your dessert with a strawberry butter drizzle—simmer 2 tbsp unsalted butter with ½ cup chopped fresh strawberries over low heat for 2 minutes until fragrant. This warm, jammy topping melts beautifully over the chilled jello, adding a luxurious contrast of temperatures and textures.
Use a fine-mesh sieve to strain out any seeds for a silky finish. 🍓
Whipped Cream Swirl
For an extra touch of elegance, fold ½ cup whipped cream into the final jello layer before chilling. Use a skewer to gently swirl it through the top layer, creating a marbled effect when sliced.
I like to lightly whip the cream with 1 tsp powdered sugar and a pinch of vanilla extract for extra sweetness. This adds a light, airy contrast to the dense jello and sour cream. ✨
Lemon Curd Swipe
Brighten the dessert with a lemon curd swipe—spread a thin layer of store-bought or homemade lemon curd (about 2 tbsp) along the sides of the loaf pan before adding the first jello layer.
As it sets, the curd will create a zesty, citrusy border that cuts through the richness. I recommend Smucker’s lemon curd for convenience, but homemade is even better. 🍋
Caramelized Honey Glaze
Drizzle a light caramelized honey glaze over the top layer before chilling. Heat 2 tbsp honey in a small saucepan until it turns golden amber (about 3 minutes), then brush it over the jello’s surface.
This adds a subtle sweetness and a glossy finish that makes the dessert look like it came from a patisserie. Let it set for 10 minutes before refrigerating. 🍯
Toasted Almond Crunch
Add a crunchy contrast with toasted almonds—lightly toast ¼ cup sliced almonds in a dry pan over medium heat for 2-3 minutes until golden. Sprinkle them over the final jello layer before chilling.
The nuts add a nutty depth that pairs beautifully with the creamy texture. For extra flair, toss them with 1 tsp cinnamon before toasting. 🌰
Chocolate Ganache Drip
For a decadent twist, drizzle dark chocolate ganache down the sides of the loaf pan before adding the first jello layer. Melt ½ cup dark chocolate chips with ¼ cup heavy cream, then let it cool slightly before pouring.
The chocolate will create a rich, velvety border that contrasts with the bright strawberry flavor. Use a toothpick to create drip effects** along the edges. 🍫
Nutrition facts
Frequently asked questions
Can I use Greek yogurt instead of sour cream?
Yes, but expect a slightly tangier result. Use ½ cup Greek yogurt (full-fat works best) and fold it into the cream mixture. For a smoother texture, strain any excess liquid first. The flavor will be brighter, but the creamy consistency will be similar.
Why is my jello not setting properly?
This usually happens if you used cold water or didn't let the mixture cool to room temperature before chilling. Always use boiling water and let the jello sit for 5 minutes before assembling layers. Also, ensure your pan is clean and dry—any moisture or grease can prevent proper setting.
How do I make this dessert without a loaf pan?
Use individual ramekins or small glasses for single servings. Layer the jello and cream in each container, then chill for 3-4 hours. For a larger batch, try a round cake pan—just adjust the chilling time to 4+ hours for even setting. The key is maintaining the same layering ratio (equal parts jello and cream).
Can I make this dessert ahead of time?
Assemble the layers up to 24 hours in advance and refrigerate. The flavors meld beautifully overnight. For best texture, let it sit at room temperature for 10 minutes before serving to soften slightly. Store leftovers covered in the fridge for up to 3 days.
What's the best way to slice clean layers?
Use a hot knife—dip your knife in hot water, wipe dry, then slice through the chilled dessert. This prevents sticking and gives you perfectly clean layers. For extra precision, run the knife around the edges of the pan before flipping. A sharp, thin-bladed knife works best for delicate cuts.