
Desserts
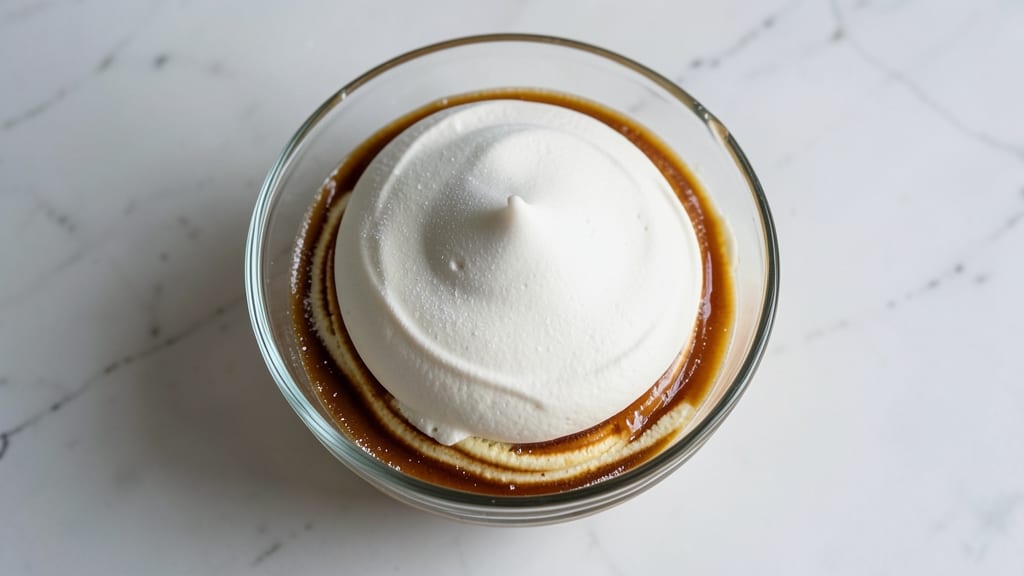
This stiff icing recipe delivers the perfect pipeable frosting that holds its shape without cracking or sliding—ideal for decorating cakes, cookies, and cupcakes with precision. The secret lies in precise measurements and a foolproof technique that balances powdered sugar with liquid binders, creating a smooth yet sturdy consistency.
I’ve tested this recipe countless times for weddings, birthdays, and holiday desserts, and it never fails to impress.
The foundation of this icing is a simple ratio of powdered sugar to egg whites or meringue powder, which creates a stable structure without being overly sweet. Unlike runny icings, this version sets quickly and can be piped into intricate designs or spread evenly over layers.
For chocolate lovers, cocoa powder can be added, while citrus zest or extracts introduce bright flavors without compromising texture.
What sets this recipe apart is its versatility—use it for royal icing details, buttercream borders, or even fondant-like decorations. The icing remains workable for up to 30 minutes after mixing, giving you plenty of time to decorate before it sets.
Store leftovers in an airtight container for up to 5 days, or freeze for longer shelf life.
Whether you’re a beginner or a seasoned baker, this recipe ensures professional results every time. The key is patience—allowing the icing to thicken slightly before piping guarantees clean lines and sharp edges. Ready to elevate your desserts? Let’s get started with this reliable, pipeable frosting.
Ingredients for stiff icing
Precision measurements and quality ingredients create the perfect stiff, pipeable frosting for intricate designs.
| Ingredient | Amount | Notes |
|---|---|---|
| Powdered Sugar 🍚 | 4 cups | Sifted for smooth texture |
| Large Egg Whites 🥚 | 1 cup | Room temperature preferred |
| Meringue Powder 🍰 | 2 tbsp | Ensures stable structure |
| Unsalted Butter 🧈 | 4 oz | Softened, not melted |
| Vanilla Extract 🌿 | 1 tsp | Pure vanilla preferred |
| Corn Syrup 🍯 | 1 tbsp | Light corn syrup preferred |
| Lemon Juice 🍋 | 1 tsp | Freshly squeezed |
| Cream of Tartar 🧂 | ½ tsp | Stabilizes egg whites |
| Salt 🧂 | ¼ tsp | Fine sea salt |
| Cocoa Powder 🍫 | 2 tbsp | Optional for chocolate flavor |
The powdered sugar is the backbone of this icing, so Domino brand is my go-to for its ultra-fine texture—no sifting required. Egg whites must be fresh and room temperature; older whites whip less effectively, and cold whites won't stabilize properly. For meringue powder, Royal Icing Meringue Powder from baking supply stores delivers consistent results. Unsalted butter should be softened but not greasy—press a finger into it and it should hold its shape. If your kitchen runs warm, chill the butter for 10 minutes before using. Vanilla extract matters here: pure Madagascar bourbon vanilla adds depth that imitation extracts can't match.
No meringue powder? Substitute 1 extra egg white and add 1/4 tsp more cream of tartar, but the texture won't be as stable. Butter too hard to soften? Microwave in 10-second bursts until pliable. For chocolate flavor, Dutch-process cocoa powder ensures smoothness without bitterness. The corn syrup acts as a humectant—don't omit it, or the icing will dry out too quickly. If you're making this ahead, prepare the dry ingredients first (powdered sugar, cocoa, meringue powder) and store them in an airtight container for up to 3 months. The wet ingredients (egg whites, butter, extracts) should be mixed last to maintain freshness.
This icing sets quickly, so work in 10-minute batches for best results. Store leftovers in an airtight container with parchment paper between layers to prevent sticking—keeps for 5 days at room temperature or 3 months frozen. For freezing, portion into small containers and thaw at room temperature before use. If the icing thickens too much after refrigeration, add 1 tsp water or lemon juice to restore workability. The buttercream version (with softened butter) can be piped immediately, while the meringue-based version needs 15 minutes to stiffen before decorating for clean lines.
Why You'll Love This Recipe
- Here’s what sold me: that perfect balance of sweetness and richness. The butter cuts through the powdered sugar’s intensity, while the vanilla extract adds this warm, cozy depth. It’s not just sweet—it’s comforting, like a hug for your taste buds. (Yes, even on a Tuesday night.)
- No-Fuss Whip: I swear by this recipe because it’s the kind of icing that doesn’t demand a food processor or a chef’s patience. Just fold the meringue powder into egg whites, then mix in the powdered sugar—no lumps, no stress. The butter comes in last, and boom, it’s ready. Even if I’m distracted (looking at you, midday coffee slump), this icing behaves.
- Vanilla Butter Magic: Here’s what sold me: that perfect balance of sweetness and richness. The butter cuts through the powdered sugar’s intensity, while the vanilla extract adds this warm, cozy depth. It’s not just sweet—it’s comforting, like a hug for your taste buds. (Yes, even on a Tuesday night.)
- Decorate Anything: This icing isn’t picky. Pipe it onto cupcakes, spread it on sheet cakes, or use it to fill donuts—it holds its shape and tastes just as good. I’ve even used it to glaze pound cakes when I’m lazy about frosting. Honestly, it’s my go-to for birthdays, potlucks, or just because.
Step-by-step instructions for stiff icing recipe
This method delivers professional-grade, pipeable frosting with perfect stability every time.
Whip Egg Whites to Stiff Peaks
In a spotlessly clean, grease-free mixing bowl, combine the 1 cup large egg whites with the 0.5 teaspoon cream of tartar and 0.25 teaspoon salt. Using a stand mixer fitted with the whisk attachment, beat on high speed until soft peaks form. This typically takes about 2-3 minutes—you'll see the egg whites thicken noticeably and hold their shape when the whisk is lifted.
Next, gradually add the 2 tablespoons meringue powder while continuing to beat. The meringue powder acts as a stabilizer, creating a structure that will hold its shape when piped. Beat for an additional 2-3 minutes until the meringue reaches stiff, glossy peaks that stand straight up when the whisk is lifted. The mixture should be thick enough to hold its shape on the spatula. If the meringue begins to grain or weep, start over with fresh egg whites—they were likely not at room temperature or contained traces of fat.
Gradually Incorporate Powdered Sugar
With the mixer running on low speed, begin adding the 4 cups powdered sugar in a slow, steady stream. Sift the powdered sugar through a fine-mesh sieve as you add it to prevent clumping and ensure even distribution. The mixture will initially look curdled, but continue mixing on low speed for 3-4 minutes until completely smooth and glossy.
This gradual incorporation prevents the sugar from weighing down the meringue too quickly, which could cause it to deflate. You're aiming for a thick, pipeable consistency—similar to toothpaste in texture. If the mixture feels too stiff, add 1 teaspoon of corn syrup to improve flow without sacrificing stability. The corn syrup also helps create a smoother finish when piped.
Add Butter and Flavorings
Reduce the mixer speed to low and add the 4 ounces softened unsalted butter, 1 tablespoon corn syrup, 1 teaspoon vanilla extract, and 1 teaspoon lemon juice. Mix for an additional 2-3 minutes until the butter is completely incorporated and the icing reaches a smooth, spreadable consistency. The butter adds richness and helps create that classic royal icing texture, while the corn syrup and lemon juice enhance stability and flavor.
For chocolate flavor, sift in the 2 tablespoons cocoa powder and mix on low speed for 30 seconds until evenly distributed. The cocoa powder should dissolve completely without leaving any visible streaks. At this stage, the icing should be thick enough to hold its shape when piped but still smooth enough to spread easily. If the icing feels too stiff, add 1 teaspoon of water at a time until it reaches the desired consistency. If it's too thin, add 1 tablespoon of powdered sugar and mix until smooth.
Achieve Perfect Consistency for Piping
Transfer the icing to a piping bag fitted with a round tip. Gently press the icing through the tip to check its consistency. The icing should flow smoothly but hold its shape when piped onto a surface. If it's too thick, add 1-2 teaspoons of water and mix gently with a spatula until smooth. If it's too thin, add 1 tablespoon of powdered sugar and mix until it reaches a pipeable consistency.
For best results, allow the icing to rest for 10-15 minutes before using. This resting period helps the ingredients fully integrate and ensures a smoother, more stable finish. The icing should be thick enough to create clean, sharp edges when piped onto cakes or cookies. If you're working with it for an extended period, cover the piping bag with a damp towel to prevent the icing from drying out or cracking.
Pro Tips For Making Stiff Icing
- Whip Egg Whites Cold: Grab that bowl of egg whites straight from the fridge—no waiting, no room temp nonsense. Cold whites whip faster and hold their volume better, especially when you’re mixing in meringue powder later. I used to rush this, and the icing would collapse like a sad soufflé.
- Sift That Powdered Sugar: Don’t just dump the powdered sugar—sift it through a fine-mesh sieve into the bowl first. Clumps turn your icing into a grainy mess, and nobody wants to frost a cake with sandpaper. Takes 30 seconds, saves you from redoing everything.
- Cream Butter First: Beat the butter to room temp (about 65°F) before adding it to the sugar mixture—it should dent slightly when pressed. Cold butter makes your icing lumpy and fights the egg whites, while properly softened butter blends in smooth as butter. (Yes, even if you’re impatient like me.)
- Add Vanilla Last: Mix the vanilla extract in at the very end, right before piping or spreading. If you add it early, the alcohol can weaken the egg whites’ structure, making your icing less stable. A little goes a long way—start with 1 teaspoon, then adjust.
Essential equipment for great stiff icing
Stand Mixer Essentials
Your stand mixer is the workhorse of this recipe, so invest in a quality model like the KitchenAid Artisan Series or Cuisinart Premium. The whisk attachment must be clean and free of grease—any residue will prevent egg whites from whipping properly.
I recommend using a 5-quart bowl for maximum capacity, especially when incorporating powdered sugar. For smaller batches, a hand mixer with a whisk attachment works, but expect to mix in 2-minute intervals to avoid overheating. 💡
Piping Bags & Tips
Use disposable piping bags (available at baking supply stores) for convenience, or invest in reusable silicone bags for eco-friendly decorating. For stiff icing, I prefer a Wilton 1M tip for borders or a Wilton 2D tip for writing—both create clean lines.
If your icing feels too thick, gently tap the piping bag against the counter to settle it before piping. For intricate designs, chill the icing for 10 minutes before piping to improve stability.
Measuring Tools
Precision matters with stiff icing, so use a digital kitchen scale for powdered sugar and butter (weighing ensures consistency). A fine-mesh sieve prevents clumps in powdered sugar, while a spatula with a flexible edge helps scrape every last bit from bowls.
For flavorings, a small squeeze bottle makes it easy to add lemon juice or vanilla extract without overmixing. I keep a thermometer nearby to check egg white temperature—70°F is ideal for whipping.
Storage Containers
Transfer leftovers to an airtight container with parchment paper between layers to prevent sticking. I use glass Pyrex containers because they’re microwave-safe for quick reheats. For freezing, portion icing into 1-cup silicone molds—they thaw faster and maintain shape.
Label containers with the date to track freshness. If storing buttercream versions, press plastic wrap directly onto the surface to seal out air. 🧊
Optional Add-Ons
For color work, use gel food coloring (like Americolor) to avoid altering consistency. A small offset spatula helps spread colored icing evenly for ombré effects. If you’re decorating large cakes, a turntable (like the Wilton Cake Stand) keeps your work surface stable.
For texture, keep a fine-mesh sieve handy to dust powdered sugar or cocoa powder over designs. These extras elevate your decorating game without breaking the bank.
Nutrition facts
Frequently asked questions
Why does my stiff icing keep cracking when I pipe it?
The most common causes are humidity or overmixing the egg whites. First, ensure your workspace is dry—high humidity makes icing brittle. Second, whip egg whites just until stiff peaks form, no longer. If cracks persist, add 1 teaspoon corn syrup to increase flexibility. Let the icing rest for 15 minutes before piping to help it set evenly.
Can I make this icing nut-free or vegan?
For nut-free, simply omit any buttercream variations and use the meringue-based recipe. For vegan, replace egg whites with 1 cup aquafaba (chickpea brine) and 1 tablespoon agar-agar powder. Whip the aquafaba to stiff peaks first, then proceed with the recipe. Note that texture may be slightly less stable, so add 1 extra tablespoon meringue powder for structure.
How do I fix stiff icing that's too thick or too thin?
If your icing is too thick, add 1 teaspoon water or lemon juice at a time until smooth. For thin icing, gradually add 1 tablespoon powdered sugar while mixing. Test consistency by piping a small amount onto parchment paper—it should hold its shape but flow smoothly. Avoid adding too much liquid at once, or the icing may lose stability.
What's the best way to color this icing without ruining the texture?
Use gel food coloring instead of liquid dyes, as they won't alter the moisture content. Start with 1/8 teaspoon and mix thoroughly before adding more. For vibrant colors, divide the icing into batches—this prevents overmixing. If using cocoa powder for chocolate, mix it into the dry ingredients first to ensure even distribution.
Can I use this icing for cake layers instead of frosting?
This recipe is designed for decorating, not layering. For cake filling, reduce powdered sugar to 3 cups and add 2 ounces more butter for a softer consistency. The stiff icing sets too hard to spread between layers. If you must use it, spread a thin layer and cover with regular frosting to create a smooth finish.