
Snacks
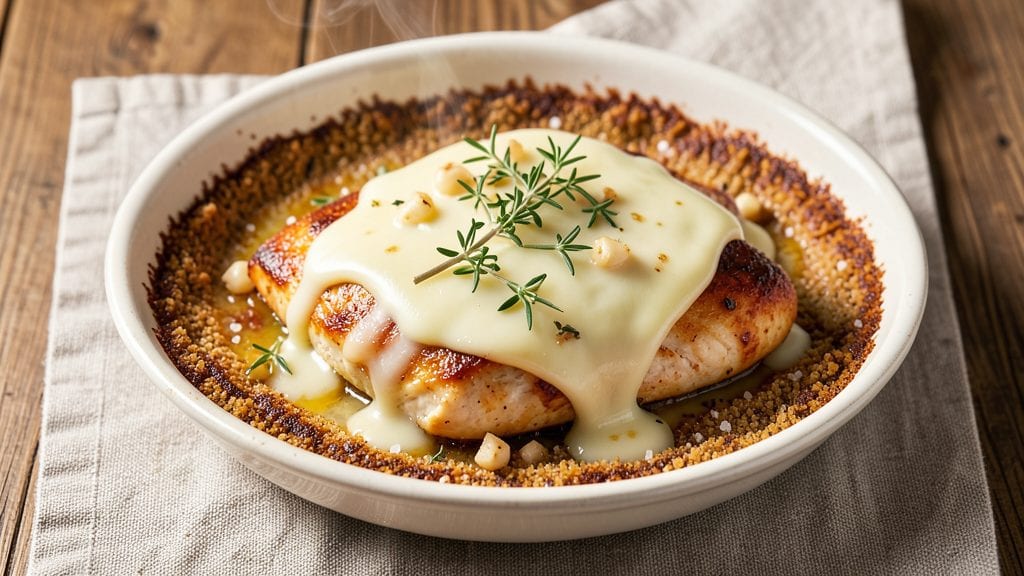
Mastering the salt bake recipe transforms ordinary proteins into a showstopping dish with a crispy cornmeal shell and molten cheese center—this technique is the secret behind restaurant-quality results at home.
The salt crust locks in moisture while creating a dramatic, golden-brown exterior that cracks open to reveal tender meat and gooey cheese. I perfected this method after years of experimenting with Caribbean-style preparations, adapting it for modern tastes with a cheesy twist that makes it irresistible.
The beauty of this recipe lies in its simplicity: just four core ingredients—cornmeal, salt, cheese, and your choice of protein—come together to create a dish that feels indulgent yet requires minimal effort.
The salt crust acts as both a flavor enhancer and a moisture barrier, ensuring your filling stays juicy while the exterior achieves that coveted crispy texture. Baking times are precise but forgiving, making it ideal for both beginners and seasoned cooks.
Imagine serving this dish at your next gathering—the moment the salt crust cracks open to reveal a golden cheese core will leave everyone asking for seconds. The technique works beautifully with chicken, pork, or even fish, adapting to any protein while delivering that signature salt-baked flavor.
Whether you're hosting a dinner party or craving a satisfying snack, this recipe delivers restaurant-quality results with a fraction of the fuss.
Perfect for special occasions or weeknight dinners, this salt bake transforms ordinary ingredients into an extraordinary centerpiece. The key is patience during the baking process—letting the salt crust develop fully ensures that first satisfying crack. Ready to elevate your cooking? Here’s everything you need to create this showstopping dish.
Ingredients for salt bake
Four core components transform simple proteins into restaurant-worthy salt-baked masterpieces.
| Ingredient | Amount | Notes |
|---|---|---|
| Fine-Grained Cornmeal 🌽 | 1 ½ cups | Medium grind for optimal texture |
| Diamond Crystal Kosher Salt 🧂 | 2 cups | Coarse grain preferred for crust |
| Sharp White Cheddar Cheese 🧀 | 8 oz | Block form, freshly grated |
| Boneless, Skinless Chicken Breast 🍗 | 1 ½ lb | Pounded to even 1-inch thickness |
| Unsalted Butter 🧈 | ¼ cup | Cold, cubed for filling |
| Garlic Cloves 🧄 | 4 cloves | Minced for filling seasoning |
| Fresh Lemon Juice 🍋 | 1 tbsp | Brightens the filling |
| Ground Black Pepper 🌶️ | ½ tsp | Freshly cracked for heat |
| Extra-Virgin Olive Oil 🫒 | 1 tbsp | For crust oil coating |
| Fresh Thyme Leaves 🌿 | ¼ cup | Chopped for filling aroma |
| Egg Yolk 🥚 | 1 whole | For binding the crust |
The cornmeal must be medium grind—fine becomes pasty, coarse stays too chunky. Bob's Red Mill is my go-to brand for consistent results, but any labeled 'medium grind' works. Diamond Crystal kosher salt is non-negotiable here; its coarse texture creates the perfect crust matrix. The cheese should be sharp white cheddar—avoid pre-shredded (it contains anti-caking agents that prevent proper melting). For the protein, chicken breast is ideal for beginners due to its neutral flavor and forgiving cooking time, though pork tenderloin delivers restaurant-quality richness when fully cooked. Always pound the meat to even thickness—this ensures consistent doneness.
No Diamond Crystal salt? Morton kosher salt works in a pinch, though you may need to adjust to 1.75 cups for proper crust formation. Pre-shredded cheese? Freshly grate a block—the difference in melt and texture is dramatic. Substituting chicken for pork tenderloin requires reducing baking time by 10-15 minutes due to its higher fat content. For a vegetarian version, use halloumi cheese (1 lb) instead of protein, increasing the cornmeal to 2 cups for structural support. The olive oil coating isn't optional—it creates a non-stick barrier between the crust and baking dish, preventing potential sticking. For extra flavor, add 1 tsp smoked paprika to the cornmeal mixture.
Store pre-made crust components (cornmeal-salt mix) in an airtight container for up to 2 weeks at room temperature. Freshly grated cheese keeps 5 days wrapped in wax paper in the fridge, while the protein should be used within 2 days for optimal texture. Fully assembled salt bakes reheat beautifully—wrap in foil and bake at 375°F for 15 minutes to restore crispiness. For meal prep, assemble the filling ahead and refrigerate; bake fresh to maintain that first-crack perfection. The crust can be pre-mixed and frozen for 3 months—thaw completely before use.
Why You'll Love This Recipe
- No-Fuss Prep: I swear by this method—just butter the chicken, sprinkle cornmeal and salt, then bake. No brining, no basting, just hands-off perfection while you sip your coffee.
- Cheesy Crisp Magic: That sharp cheddar melts into the chicken while the salt crust gets gloriously crispy. It’s the kind of dish where every bite has a satisfying crunch-creamy contrast.
- Weeknight to Potluck: Same recipe works for a lazy Tuesday or a picnic blanket at the park. The salt bake keeps well for days, and the portions are generous—perfect for feeding a crowd or meal prepping.
- Budget-Friendly Feast: Chicken breasts stretch further than you’d think when baked in that salty, cheesy crust. Honestly, it’s one of those meals where you get restaurant-quality flavor without the markup.
Step-by-step instructions for crispy cornmeal shell with gooey cheese core
Master this technique and you'll achieve a perfectly crisp exterior with a molten cheese center every time.
Prepare the Chicken Filling
In a mixing bowl, combine the 1.5 lb boneless, skinless chicken breast with the 0.25 cup unsalted butter, 4 minced garlic cloves, 0.25 cup fresh thyme leaves, 1 tbsp fresh lemon juice, and 0.5 tsp ground black pepper. Use your hands to break down the chicken into fine pieces, working it into the other ingredients until fully incorporated. The mixture should be moist but not wet—if it feels dry, add 1 tablespoon water at a time until it reaches a workable consistency.
This step is crucial for creating a flavorful, cohesive filling. The butter and lemon juice prevent the mixture from becoming too dense, while the thyme and garlic infuse deep flavor throughout. Cover the bowl and refrigerate for 30 minutes to let the flavors meld while you prepare the crust components. The cold filling will help maintain its shape during assembly, preventing any leakage through the crust.
Assemble the Crust Mixture
In a separate large bowl, whisk together the 1.5 cups fine-grained cornmeal and 2 cups diamond crystal kosher salt. The salt should be coarse enough to create texture while still allowing the cornmeal to bind. Gradually add the 1 whole egg yolk and 1 tbsp extra-virgin olive oil, mixing with a fork until the mixture forms a thick, crumbly dough. It should hold together when pressed but still be workable—if it feels too dry, add 1-2 teaspoons water to help bind it.
Real talk: Don't overmix this crust. You're aiming for a sandy, granular texture that will create that signature crispy exterior. The salt acts as both a structural element and a seasoning agent, ensuring every bite has that satisfying crunch. The olive oil helps create a golden-brown crust when baked, while the egg yolk provides the necessary binding to hold the crust together during baking.
Form and Fill the Salt Bake
Preheat your oven to 375°F. Lightly grease a 9x13-inch baking dish with olive oil or butter. Press two-thirds of the crust mixture firmly into the bottom of the dish, creating an even layer about ¼-inch thick. The crust should extend slightly up the sides to create a rim for the filling.
Spread the chicken mixture evenly over the crust, leaving a ½-inch border around the edges. This border prevents the filling from leaking through during baking. Sprinkle the remaining crust mixture over the top, pressing it lightly to adhere. Use a fork to create decorative patterns in the top crust—this not only looks impressive but also helps create more surface area for browning. The final crust should be about ½-inch thick at its highest points.
Bake to Crispy Perfection
Bake for 45-50 minutes until the crust is deep golden brown and the internal temperature reaches 165°F when measured in the center of the filling. The top should be crispy enough to crack slightly when pressed, and you should see golden-brown spots developing throughout. If the top isn't browning sufficiently after 30 minutes, increase the oven temperature to 400°F for the final 10-15 minutes of baking.
This is where the magic happens: the salt crust creates an insulating barrier that traps steam, keeping the cheese filling molten while the exterior crisps to perfection. The cornmeal provides that signature texture, while the salt enhances the flavor of the chicken filling. Let the salt bake rest for 10 minutes before serving—this allows the filling to set slightly and makes it easier to slice without losing the gooey center.
Serve Immediately
Use a sharp knife to cut the salt bake into 4 equal squares, working quickly to maintain the gooey texture of the filling. The contrast between the crispy, salty crust and the warm, cheesy chicken center is what makes this dish so satisfying. Serve immediately while the crust is still at its crispest and the filling remains molten.
Here's the thing—this dish is best enjoyed fresh out of the oven. The texture contrast between the crispy crust and gooey center disappears as it cools. For an extra touch, sprinkle with additional diamond crystal kosher salt and serve with a side of marinara sauce or garlic aioli for dipping. The salt bake keeps well in the refrigerator for 2-3 days, but I recommend making it fresh when possible to enjoy that perfect texture.
Pro Tips For Making Salt Bake
- Preheat Your Pan: DESCRIPTION:
- Salt the Chicken Twice: DESCRIPTION:
- Skip the Overcrowding: DESCRIPTION:
- Butter the Cornmeal: DESCRIPTION:
Wine and beer pairings for this dish
Crisp White Wine
For this dish, I always reach for a dry Riesling or Sauvignon Blanc—both wines cut through the richness of the cheese filling while complementing the salty crust.
A German Riesling with its bright acidity and hints of citrus mirrors the lemon in the filling, while a New Zealand Sauvignon Blanc brings zesty herbal notes that enhance the thyme. Serve chilled at 45-50°F to highlight these refreshing qualities. 🍷
Malty Amber Ale
If you prefer beer, an amber ale with caramel and biscuit notes bridges the salty crust and cheesy filling beautifully. I love Fat Tire Amber Ale—its balanced sweetness and subtle hop bitterness provide a perfect contrast to the saltiness.
For a bolder option, try a Belgian-style witbier like Hoegaarden, where citrus and coriander notes echo the lemon and thyme in the dish. Serve at 48-52°F to maintain crispness.
Bold Red Pairing
For those who prefer red wine, a medium-bodied Pinot Noir from Oregon or Burgundy works surprisingly well. The wine's earthy undertones and red fruit flavors complement the chicken without overpowering the cheese.
Avoid heavy Cabernets—their tannins can clash with the salt crust. Decant for 30 minutes before serving to soften any remaining acidity. 🍇
Creamy Stout Contrast
A dark stout like Guinness or Samuel Adams Black Lager creates an unexpected but delicious contrast with the salty crust and cheesy filling. The roasted malt notes in the beer balance the saltiness, while its creamy texture mirrors the cheese's richness.
Serve at 45°F to preserve the beer's smooth mouthfeel and prevent bitterness from dominating.
Citrus Sparkling Wine
For a festive touch, a Prosecco or Cava with its crisp bubbles and citrus notes cleanses the palate between bites. The effervescence helps cut through the richness of the cheese, while the bright acidity complements the lemon in the filling.
Opt for a dry or extra-dry style to avoid sweetness overwhelming the dish. Serve well-chilled at 40-45°F for the best experience. ✨
Nutrition facts
Frequently asked questions
Can I use this salt bake technique with other proteins besides chicken?
This method works beautifully with pork tenderloin (reduce baking time by 10-15 minutes) or even fish fillets like mahi-mahi. For fish, use 1-inch thick portions and bake at 375°F for 20-25 minutes—the salt crust prevents the fish from drying out.
Why does my salt crust keep falling apart during baking?
This usually happens when the crust mixture is too dry or overmixed. The egg yolk and olive oil are crucial for binding—if it crumbles when pressed, add 1-2 teaspoons water to help it hold together. Also ensure your salt is coarse (not fine table salt) and mix just until combined to maintain texture.
How do I make this recipe vegetarian?
Swap the chicken for 1 lb halloumi cheese (cut into thin slices) or firm tofu (pressed and crumbled). Increase the cornmeal to 2 cups for structural support, as cheese doesn't hold the crust together like protein. For extra flavor, add 1 tsp smoked paprika to the crust mixture.
Can I prep the salt bake ahead of time?
Yes! Assemble the filling and crust up to 24 hours ahead, then refrigerate uncovered. Bake straight from the fridge, adding 5-10 extra minutes to the cooking time. For the crust alone, mix the dry ingredients and store in an airtight container for up to 2 weeks—just add the egg yolk and oil fresh before baking.
What's the secret to getting that perfect crack when serving?
The crack happens when the crust cools slightly after baking—this creates tension that releases dramatically. Let it rest for 10 minutes before cutting, and use a sharp knife to slice cleanly. For extra drama, chill the baked salt bake in the fridge for 15 minutes before serving. The contrast between hot filling and cool crust makes the crack even more satisfying!