
Side Dishes
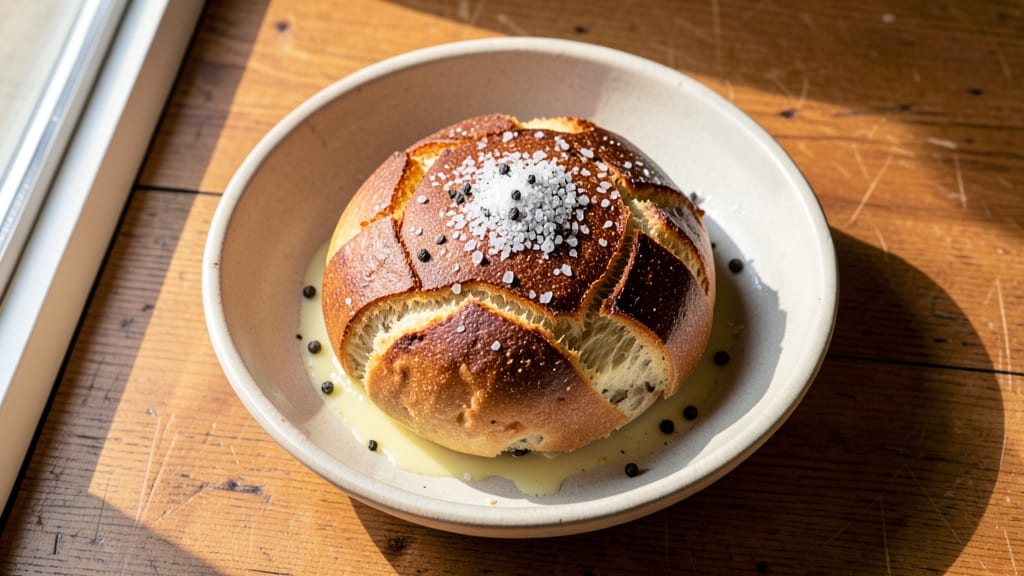
This Reka bread recipe brings Hungary’s most beloved pull-apart loaf to your kitchen with its signature fluffy crumb and golden crust. The secret lies in a precise blend of flour, yeast, and milk that creates that signature tender-yet-crisp texture.
I’ve perfected this version after years of testing, ensuring every bite delivers that classic Hungarian comfort.
The dough requires two rises—one overnight in the fridge for deep flavor and another at room temperature for proper expansion. This slow fermentation develops the bread’s signature softness while allowing the crust to develop that satisfying crack when pulled apart.
The result is a loaf that’s both rustic and refined, perfect for sandwiches or serving alongside soups.
What makes this recipe special is its versatility—use it for savory meals or sweeten it with cinnamon and raisins for a dessert loaf. The bread stays fresh for days when stored properly, making it ideal for meal prep.
With just 10 simple ingredients, you’ll achieve restaurant-quality results that taste like home.
Hungarian households have been baking Reka bread for generations, and now you can bring that tradition to your table. The key is patience—letting the dough work its magic yields a loaf so tender it practically melts in your mouth. Let’s get started on creating your own pull-apart masterpiece.
Ingredients for reka bread
Ten simple ingredients transform into Hungary's legendary pull-apart loaf.
| Ingredient | Amount | Notes |
|---|---|---|
| All-Purpose Flour 🌾 | 5 cups | King Arthur or similar high-gluten preferred |
| Active Dry Yeast 🍞 | ¼ oz | Fresh yeast for best results |
| Whole Milk 🥛 | 1 ½ cups | Warm to 110°F before using |
| Granulated Sugar 🍚 | ¼ cup | For yeast activation |
| Unsalted Butter 🧈 | ½ cup | Cold, cubed for dough |
| Diamond Crystal Kosher Salt 🧂 | 1 ½ tsp | Adjust to taste |
| Large Eggs 🥚 | 2 whole | Room temperature |
| Cornmeal 🌽 | ¼ cup | For dusting bread pan |
| Water 💧 | ½ cup | For dough consistency |
| Sesame Seeds 🌻 | 2 tbsp | Optional topping |
The flour is non-negotiable here—King Arthur or similar high-gluten flour gives that signature tender crumb. I grab mine from King Arthur Flour's website or the baking aisle at Whole Foods. The yeast needs to be fresh; Fleischmann's active dry yeast works well, but check the expiration date. Warm the milk to 110°F before mixing—too hot kills the yeast, too cold and it won't activate. For the butter, Land O'Lakes unsalted is my go-to, but any cold, cubed butter works. The sesame seeds? Trader Joe's sells them in bulk for a fraction of the price at regular stores.
No high-gluten flour? Add 1 tbsp vital wheat gluten per 5 cups flour to mimic the texture. Out of whole milk? 2% milk works, but whole gives that authentic richness. The sugar can be swapped for honey or maple syrup at half the amount—just know it'll be slightly sweeter. For the butter, European-style butter like Plugrá adds more flavor but isn't required. The eggs should be room temperature—cold eggs can make the dough gummy. If you're making this ahead, pre-ferment the dough overnight for even better flavor development.
The dough keeps beautifully—3-4 days at room temperature wrapped in a towel, or up to 1 week in the fridge. For longer storage, freeze the shaped loaf (unbaked) for up to 3 months. Thaw overnight in the fridge before baking. The baked loaf? Wrap tightly in foil and store at room temperature for 2-3 days. To revive stale bread, spritz with water and warm for 10 minutes. I always bake two loaves—one for eating, one for freezing.
Why You'll Love This Recipe
- No-Knead Magic: The dough comes together in five minutes—just mix, let it rise, and bake. Honestly, the yeast and warm milk do all the heavy lifting while you sip your coffee.
- Buttery Soft Crust: That whole milk and butter? It’s what gives this bread its ridiculously tender crumb and golden edge. Not too sweet, not too rich—just perfectly balanced.
- Weeknight & Holiday Hero: Toss it with jam for breakfast, tear it into sandwiches, or serve it warm with dinner. It’s my go-to for lazy mornings and when I need to impress guests last-minute.
- Budget-Friendly Staple: A loaf costs pennies to make and lasts ages—freeze slices for toast or crumbs for meatballs. Between us, this is the kind of bread that makes grocery day feel like a win.
Step-by-step instructions for reka bread recipe
Let's create this Hungarian masterpiece with its signature pull-apart texture and golden crust.
Activate the Yeast for Maximum Rise
In a small bowl, combine the 1.5 cups warm whole milk (about 110°F) with the 0.25 cup granulated sugar and 0.25 oz active dry yeast. Let this sit for 5-10 minutes until it becomes frothy and bubbly. This activation ensures your bread will rise properly and develop that signature fluffy texture.
I always test the milk temperature with my finger—it should feel warm but not hot to the touch. If it's too hot, you'll kill the yeast; if too cold, it won't activate. The bubbly foam confirms the yeast is alive and ready to transform our dough.
Mix the Dough to Develop Gluten
In the bowl of a stand mixer fitted with the dough hook attachment, combine the 5 cups all-purpose flour and 1.5 tsp diamond crystal kosher salt. Mix on low speed until evenly distributed. Add the yeast mixture, 2 whole large eggs, and 0.5 cup cold unsalted butter (cut into small cubes).
Mix on medium speed for 5-7 minutes until the dough begins to pull away from the sides of the bowl and forms a shaggy mass. The butter should be fully incorporated but still visible in small clumps. This kneading develops gluten, which gives reka bread its signature chewy yet tender texture.
Knead Until Smooth and Elastic
Continue kneading on medium-high speed for an additional 8-10 minutes until the dough becomes smooth, elastic, and slightly tacky. It should pass the windowpane test—when you stretch a small piece, it should be thin enough to see light through without tearing.
I know it seems like a long time, but this kneading is crucial. The dough should feel firm yet pliable, like the inside of your cheek. If it's too sticky, add 1 tablespoon flour at a time until it comes together. Once properly kneaded, the dough should be silky smooth and spring back slowly when pressed.
First Rise for Maximum Fluffiness
Lightly grease a large bowl with oil and place the dough inside. Cover with a damp kitchen towel or plastic wrap and let rise in a warm place for 1-1.5 hours, or until doubled in size. The dough should feel light and airy when pressed gently—it should leave a noticeable indentation that slowly fills back in.
I like to place the bowl near a slightly warm oven with the light on, or on top of my fridge's top shelf where it's naturally warm. The goal is to create an environment that's consistently around 75-80°F. If your kitchen is cold, this rise might take longer, but don't rush it—the longer the rise, the more flavorful your bread will be.
Shape and Second Rise for Pull-Apart Texture
Punch down the risen dough to release air, then divide it into 4 equal portions. On a lightly floured surface, roll each portion into a 12-inch round (about ½-inch thick). Place each round in a greased 9x13-inch baking pan, leaving about 1 inch between them. Cover and let rise for another 30-45 minutes until puffy.
Here's where the magic happens—the rounds should expand and nearly touch each other. The edges should be slightly rounded and the tops should look domed. If they don't rise much, your kitchen might be too cold. The second rise is crucial for that signature pull-apart texture that makes reka bread so special.
Bake to Golden Perfection
Preheat your oven to 375°F. Brush the tops of the dough rounds with a little water or milk, then sprinkle generously with 2 tablespoons sesame seeds. Bake for 25-30 minutes until the bread is deep golden brown and sounds hollow when tapped on the bottom.
I like to rotate the pan halfway through baking for even browning. The bread should pull apart easily with your hands, revealing a tender crumb underneath. For extra crispiness, broil for 1-2 minutes at the end, watching closely to avoid burning. Let cool for 10 minutes before serving—this resting time allows the bread to set and makes it easier to pull apart.
Pro Tips For Making Reka Bread
- Proof at Room Temp: Ditch the fridge—yeast loves 75°F (24°C) like a warm blanket. I used to proof my dough in the oven with the light on, but now I just leave it on the counter for 1–1.5 hours until it’s almost doubled. Cold milk slows things down, so if your kitchen’s chilly, warm the milk to 100°F (38°C) first—just don’t let it get above that or you’ll kill the yeast.
- Butter in Small Pieces: Cut that butter into ½-inch cubes—not big chunks—so it melts evenly without turning your dough greasy. I learned this the hard way when I tossed in a single slab and ended up with a dense, uneven loaf. Cold butter creates pockets for steam, but skip the food processor unless you want a brioche-like texture (which isn’t what reka bread is about).
- Skip the Over-Kneading: This dough only needs 5–7 minutes by hand (or 3–4 minutes in a stand mixer with a dough hook) until it’s smooth and slightly tacky. Overwork it, and you’ll end up with a tough, chewy loaf. The gluten develops fast—stop when the dough springs back slowly when poked. (Yes, even if it feels underworked.)
- Steam the Pan: Before baking, pour ¼ cup hot water in the pan and swirl it around—then dump it out. The steam mimics a commercial oven’s humidity, giving you that signature soft, domed crust. I used to skip this and got a dry top every time. Do it right before the dough goes in, and your bread will rise higher and stay moist longer.
Essential equipment for perfect results
Stand Mixer Essentials
Your stand mixer is the MVP for this recipe—I use a KitchenAid Artisan Series with the dough hook attachment for perfect gluten development. The dough hook ensures even mixing without overworking the dough, which can make it tough.
If you don’t have a stand mixer, a hand mixer works, but you’ll need to be more patient with kneading by hand for the full 8-10 minutes. 💡
Precision Scales
A digital kitchen scale is non-negotiable for accurate measurements, especially with yeast and salt. I swear by the OXO Good Grips—it measures down to 0.1 oz and has a backlit display for easy reading.
For the yeast, 0.25 oz might seem small, but too much can make your bread taste bitter. Weighing your flour (instead of scooping) ensures consistency every time.
Baking Pans
Use a 9x13-inch baking pan (preferably light-colored metal) for even heat distribution. I recommend Wilton Professional Non-Stick pans—they’re durable and release bread easily. Grease the pan thoroughly with butter or oil, then dust with cornmeal to prevent sticking.
For extra crispiness, I line the pan with parchment paper before greasing, which makes cleanup a breeze.
Yeast Thermometer
A candy or yeast thermometer is your best friend for checking milk temperature—110°F is critical for activating yeast without killing it. I keep a Thermoworks Thermapen One in my kitchen for all temperature-sensitive tasks.
If you don’t have one, test the milk with your finger: it should feel warm but not hot to the touch. Too hot, and your yeast will die; too cold, and it won’t activate.
Damp Kitchen Towel
Covering your dough with a damp kitchen towel (or plastic wrap) creates a humid environment that helps it rise evenly. I like using unbleached cotton towels because they’re breathable and easy to wash.
For extra warmth, place the bowl on top of your fridge’s top shelf or near a slightly warm oven (with the light on). This mimics a professional proofing box and ensures a perfect rise.
Sesame Seeds
For that authentic Hungarian touch, toasted sesame seeds are key. I buy them in bulk from Trader Joe’s—they’re cheaper and fresher than pre-packaged options. Toast them in a dry pan over medium heat for 2-3 minutes until fragrant, then sprinkle generously over the dough before baking.
If you’re short on time, use poppy seeds as a substitute, though the flavor won’t be identical. 🌻
Nutrition facts
Frequently asked questions
What makes Reka bread different from regular bread?
Reka bread stands out with its signature pull-apart texture and ultra-soft crumb, thanks to its unique dough preparation. The key differences are the two-rise process (overnight cold fermentation + room temp rise) and the use of whole milk and butter for richness. This creates a bread that's both tender and slightly crispy on the edges, unlike dense loaves or crusty baguettes.
Can I make Reka bread without a stand mixer?
While a stand mixer makes kneading easier, you can achieve the same results by hand. Knead the dough for 10-12 minutes on a lightly floured surface until smooth and elastic. The extra time ensures proper gluten development for that signature tender-yet-chewy texture. Just be patient—your arms will thank you for the workout!
Why does my Reka bread not pull apart easily?
If your bread lacks the pull-apart quality, it's likely due to under-kneading or insufficient rising time. Make sure to knead until the dough passes the windowpane test, and allow both rises to complete fully. The second rise is especially critical—it should take 30-45 minutes until the dough nearly touches. Also, ensure your oven isn't too hot, as excessive heat can dry out the bread before it's fully baked.
How can I sweeten Reka bread for dessert?
For a sweet version, add ½ cup raisins or chopped dates to the dough along with 1 tsp cinnamon. You can also brush the baked loaf with a simple glaze made from ½ cup powdered sugar + 1 tbsp milk. The bread's natural tenderness makes it perfect for sweet applications while maintaining its signature pull-apart texture. Just reduce the salt to 1 tsp to balance the sweetness.
Can I freeze Reka bread dough?
Yes! Shape the dough into rounds, place them in a freezer bag with parchment between each, and freeze for up to 3 months. Thaw overnight in the fridge before the final rise and baking. For best results, let the dough come to room temperature before shaping after thawing. The flavor actually improves with this cold fermentation process, giving you that authentic Hungarian taste.