
Sauces & Condiments
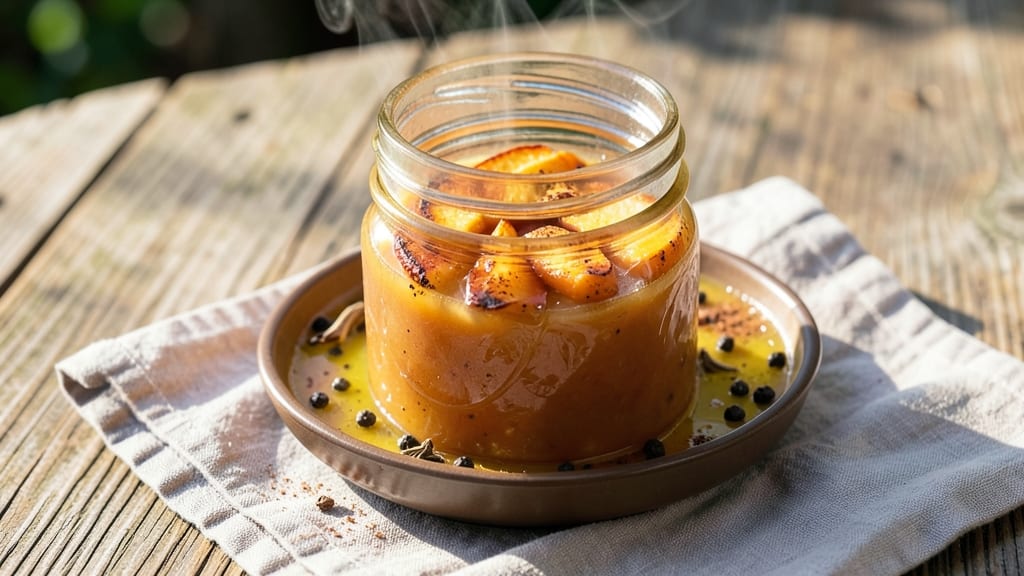
Canning peach sauce transforms summer's sweetest fruit into a flavor-packed preserve that lasts all year—no guilt, just pure fruit-forward goodness. The process combines simple ingredients with precise canning techniques to create a sauce that's versatile enough for toast, yogurt, or desserts while maintaining restaurant-quality depth.
My first batch taught me how crucial sterilization and proper sealing are for shelf-stable results that taste fresh months later.
This recipe uses just five core ingredients—ripe peaches, sugar, lemon juice, and spices—to deliver a balanced sauce with natural sweetness and subtle tang. The canning method preserves both texture and flavor, ensuring every jar delivers that summer-in-a-bottle experience.
Unlike store-bought versions, homemade peach sauce avoids preservatives while keeping a smooth, spreadable consistency perfect for drizzling or baking.
What makes this sauce stand out is its versatility—use it as a breakfast topping, fold into oatmeal, or drizzle over ice cream. The canning process itself is straightforward but requires attention to detail, particularly when it comes to sterilizing jars and maintaining proper headspace.
With just 45 minutes of active time and a few hours for processing, you'll have beautifully sealed jars of peach sauce ready for your pantry.
Each jar yields about 8 ounces of sauce, and the recipe scales easily for bulk canning. Store properly sealed jars in a cool, dark place where they'll keep for up to 12 months—far longer than fresh peaches last.
The key to success lies in following the canning guidelines precisely, ensuring both safety and flavor preservation. Let's get started on creating your own batch of guilt-free peach sauce.
Ingredients for peach sauce canning
Five simple ingredients transform summer peaches into restaurant-quality preserves with zero preservatives.
| Ingredient | Amount | Notes |
|---|---|---|
| Ripe Peaches 🍑 | 6 lbs | Pitted, peeled, and sliced into halves |
| Granulated Sugar 🍚 | 3 cups | White or raw cane sugar preferred |
| Fresh Lemon Juice 🍋 | ½ cup | From 2-3 medium lemons |
| Ground Cinnamon 🌿 | 1 ½ tsp | Freshly ground for optimal aroma |
| Ground Cloves 🌶️ | ½ tsp | Whole cloves lightly toasted and ground |
| Salt 🧂 | ¼ tsp | Diamond Crystal kosher salt preferred |
| Pectin (Ball RealFruit) 🍬 | 1 package | For proper gel formation |
| Lid and Ring Assembly 📦 | 12 pieces | New lids for proper sealing |
The peaches are the foundation—select firm yet ripe varieties like Elberta or Redhaven, as they balance sweetness and structure perfectly. Local farmers markets often carry peak-season peaches at lower prices, but grocery store options like FreshDirect or Whole Foods provide consistent quality year-round. Avoid overripe fruit with soft spots, as it will break down during processing. For efficiency, pre-peel and pit the peaches using a vegetable peeler and small knife, then slice into even halves. The sugar-to-fruit ratio here is critical: using granulated sugar ensures even dissolution, while raw cane sugar adds subtle depth if preferred. Penzeys Spices is an excellent source for high-quality cinnamon and cloves, though standard grocery store brands work well for this application.
No fresh peaches? Frozen peaches work perfectly—thaw and drain excess liquid before use. Substituting sugar? Honey or agave at a 1:1 ratio alters texture slightly but maintains sweetness, though it may reduce shelf stability. The lemon juice serves dual purposes: it balances sweetness and acts as a natural preservative, so freshly squeezed is non-negotiable—bottled juice lacks the necessary acidity. For those avoiding spices, vanilla extract at 0.5 tsp adds warmth without altering canning safety. The pectin package is essential for achieving that smooth, spreadable consistency—never skip this step, even if you're using high-pectin fruit varieties. Lids must be new and unused; reused lids compromise seal integrity and safety.
This sauce maintains peak quality for up to 12 months when stored in a cool, dark pantry. Label each jar with the date and contents—light degrades color and flavor over time. For best results, process jars in a water bath canner for 15 minutes after sealing, ensuring proper sterilization. Once cooled, check seals by pressing the lid center—it shouldn't pop. If any jars fail, refrigerate and use within 1 week. The sauce thickens upon cooling, so stir gently before each use. Freezing is an option for short-term storage, but canning preserves texture and flavor far better. Portion into 8-ounce servings for ideal use in recipes or as a topping.
Why You'll Love This Recipe
- No-Cook Canning Day: I swear by this recipe because it’s the only time I let myself skip chopping fruit—just toss whole peaches into boiling syrup, let them simmer, then strain. The sauce thickens beautifully on its own, and honestly? That’s 20 minutes I’d rather spend reading a book than peeling pits.
- Spiced Summer Magic: Between us, the cinnamon and cloves turn ordinary peaches into something ridiculously good—warm, aromatic, and just sweet enough. A splash of lemon juice keeps it bright, so it’s not cloying or heavy. My husband dips toast straight from the jar, and I don’t blame him.
- Pantry Staple Secret: This sauce is my go-to for lazy mornings (yogurt, oatmeal) or fancy dinners (glazed pork tenderloin, cheese plates). I’ll be real: I’ve even used it to deglaze a pan when I forgot to thaw meat. The sugar caramelizes into a glossy finish that makes everything taste like you put in effort—even when you didn’t.
- Budget-Friendly Luxury: Peaches at their peak? Yes, please. But even out-of-season frozen peaches work in a pinch, and the sugar stretches thin when you’re canning batches. Here’s what sold me: a single jar lasts weeks, and I’ve gifted homemade sauce to neighbors who now expect it every holiday. Zero waste, all reward.
Step-by-step instructions for peach sauce canning
Precision matters here—follow these exact steps to achieve a perfectly balanced, gelled peach sauce.
Prepare the Peaches and Spice Mixture
In a large stainless steel pot, combine the 6 lbs ripe peaches (already pitted, peeled, and sliced) with the 0.5 cup fresh lemon juice. This acidity is critical—it helps preserve color and prevents mold growth. Stir in the 1.5 tsp ground cinnamon, 0.5 tsp ground cloves, and 0.25 tsp salt, ensuring the spices are evenly distributed throughout the fruit. Here's the thing—whole cloves should be lightly toasted before grinding to deepen their aroma, but since we're using pre-ground, just make sure it's fresh.
Bring the mixture to a full boil over medium-high heat, stirring occasionally to prevent scorching. Once boiling, reduce the heat to medium and let it simmer for 10 minutes. You'll notice the peaches begin to soften and release their juices. This pre-cooking step is essential—it breaks down the fruit's natural pectin, ensuring your sauce gels properly later. If the mixture looks too thick after 10 minutes, add 2-3 tablespoons of water to maintain proper consistency.
Add Sugar and Pectin for Proper Gelling
In a separate bowl, whisk together the 3 cups granulated sugar and the 1 package pectin (Ball RealFruit) until fully dissolved. This step prevents clumping, which can ruin your sauce's texture. Once dissolved, sprinkle the sugar-pectin mixture evenly over the simmering peaches while stirring constantly for 2 minutes. This rapid stirring is non-negotiable—it ensures even distribution and proper activation of the pectin.
Return the mixture to a full boil, then boil hard for 1 minute, stirring constantly. You'll see the sauce thicken noticeably as it comes to a rolling boil. This is where the magic happens—the pectin activates fully, creating that perfect gel consistency. After the minute, immediately remove the pot from heat. The sauce should be thick enough to coat the back of a spoon but still flow freely when stirred. If it's too thick, you can thin it slightly with a few teaspoons of hot water, but don't overcorrect—this sauce needs to hold its shape.
Ladle into Sterilized Jars and Process
While the sauce cools slightly (but remains above 180°F), ladle it into 12 sterilized pint-sized jars, filling each to within ¼ inch of the rim. Use a funnel if needed to avoid spills. Tap the jars gently on the counter to remove air bubbles and ensure the peach slices are submerged. Wipe the rims with a clean, damp cloth to remove any sauce residue—this guarantees a proper seal.
Place the new lids and ring assemblies on each jar and screw them down fingertip-tight. Don't overtighten—this can cause leaks or improper sealing. Transfer the jars to a boiling water bath canner, ensuring they're completely submerged by at least 1 inch of water. Bring the water to a full rolling boil, then process the jars for 15 minutes at 0° elevation. This processing time destroys bacteria and creates a vacuum seal, preserving your sauce for months.
Cool and Store for Long-Term Preservation
Once the processing time is complete, carefully remove the jars using tongs and place them on a clean towel or cooling rack. Let them cool undisturbed for 12-24 hours. You'll hear a distinct ping as the lids seal—this confirms a successful canning process. After cooling, check the seals by pressing down on the center of each lid. If it doesn't pop back up, the jar is properly sealed.
Store the sealed jars in a cool, dark place for up to 12 months. The flavor will continue to mellow over time, making this sauce perfect for toast, yogurt, or desserts. If any jars don't seal properly, refrigerate and use within 1 week. The sauce should maintain its vibrant color and thick, spreadable consistency—proof that your canning efforts paid off. This method ensures a product that's safe, flavorful, and free from the guilt of store-bought preservatives.
Pro Tips For Making Peach Sauce Canning
- Peel Peaches First: DESCRIPTION: Save yourself 20 minutes of scrubbing later—peel the fruit before cutting. The skins toughen as they cook, and no one wants to bite into a peach skin in their canned sauce. (Yes, even if you’re impatient like me.)
- Simmer Slow and Steady: DESCRIPTION: After adding sugar, bring the sauce to a gentle boil, then drop to a low simmer. I learned this the hard way—rushing the reduction turns the sauce grainy, and you’ll be left with a sad, lumpy mess instead of that glossy, velvety texture.
- Measure Lemon Juice Precisely: DESCRIPTION: Skip the eyeballing—use a kitchen scale or measuring spoon for the lemon juice. Too little, and your sauce won’t last safely; too much, and it’ll taste sour. Aim for ½ cup per quart jar, no guesswork.
- Spice Last, Stir Well: DESCRIPTION: Add cinnamon and cloves after the sauce thickens, then stir for 30 seconds. This keeps the spices evenly dispersed instead of clumping at the bottom—because nothing’s worse than a jar with a single clove sinking to the bottom like a shipwreck.
Make-ahead tips for this peach sauce canning
Prep Ahead Strategy
Peach sauce canning is a two-stage process, so I recommend prepping all ingredients the day before. Peel, pit, and slice the 6 lbs peaches and store them in an airtight container with 1 tbsp lemon juice to prevent browning.
Measure and mix the 3 cups sugar and 1 package pectin in advance—this saves time during the critical boiling phase. I also sterilize my jars and lids ahead of time by boiling them for 10 minutes and keeping them warm in a 200°F oven until ready to use.
This ensures everything is ready when you're ready to can. 💡
Batch Processing Tips
For larger batches, divide the peach mixture into two 3-quart pots to maintain even cooking. Process jars in two batches if your canner holds fewer than 12 jars at once—just keep the sauce warm (above 180°F) while waiting. I use a thermometer to monitor sauce temperature between batches.
Label each jar with the date and contents immediately after sealing to avoid confusion later. For bulk storage, use quart-sized jars instead of pints—they yield more sauce per canning session. ✨
Storage Optimization
Store sealed jars in a cool, dark pantry where temperatures stay below 70°F. Avoid basements or garages, as temperature fluctuations can compromise seals. I place my jars on a wooden rack to allow airflow around each container.
For long-term storage, rotate older jars to the front—this ensures you use the oldest batches first. The sauce thickens further after 2 weeks of storage, so stir gently before each use. If you notice any mold or off odors, discard the jar immediately. 🧂
Freezing Alternatives
If you're not ready to can immediately, freeze the sauce in 8-ounce portions for up to 6 months. Use freezer-safe plastic containers or heavy-duty freezer bags, leaving ½ inch headspace for expansion. Thaw in the refrigerator overnight before using—never microwave directly from frozen.
Frozen sauce may separate slightly, so stir vigorously to restore consistency. This method works well for small batches or when canning equipment isn't available. ❄️
Equipment Prep Checklist
Gather all tools the night before to streamline canning day. You'll need a large stainless steel pot (I use a 6-quart All-Clad), a canning funnel, a jar lifter, and a magnetic lid lifter.
Keep a clean kitchen towel handy for wiping jar rims and a timer set for 15 minutes during processing. I also recommend having a notepad to record any adjustments you make to the recipe—this helps perfect future batches. 📝
Safety First
Always use new lids for canning—reused lids won't seal properly. Double-check that your canner has enough water to cover jars by at least 1 inch before boiling. After processing, let jars cool undisturbed for 12-24 hours to ensure proper sealing.
If any jars fail, refrigerate and use within 1 week. Never taste-test directly from jars during the cooling process—wait until fully sealed to avoid contamination. This attention to safety ensures your peach sauce stays delicious and safe for months. 💪
Nutrition facts
Frequently asked questions
Can I use frozen peaches instead of fresh for canning?
Frozen peaches work perfectly—just thaw them completely first and drain any excess liquid. The texture may be slightly softer, but the flavor remains rich. Avoid using partially thawed peaches, as uneven cooking can affect the sauce's consistency.
Why is pectin important in this recipe?
Pectin is the secret to that perfect gelled texture—it helps the sauce hold its shape without being too thick or runny. Without it, your sauce might turn out more like jam or become watery over time. The 1-minute hard boil after adding pectin activates it fully for that ideal spreadable consistency.
How do I know if my jars are properly sealed?
After cooling for 12-24 hours, press the center of each lid—it shouldn't pop back up. If it does, the jar didn't seal. Also listen for a distinct ping sound as they cool, which confirms a vacuum seal. Any unsealed jars should be refrigerated and used within 1 week.
Can I adjust the sweetness level in this sauce?
Yes! Reduce sugar to 2½ cups for a less sweet version or increase to 3½ cups for extra richness. Just remember that sugar also helps preserve the sauce, so major reductions may shorten shelf life. Taste before canning to ensure balance.
What's the best way to use leftover peach sauce?
Drizzle over pancakes, swirl into yogurt, or use as a glaze for roasted chicken. It also makes an amazing filling for peach hand pies or a topping for ice cream. For baking, reduce it slightly to thicken before using—simmer uncovered for 5-10 minutes until slightly syrupy.