
Main Courses
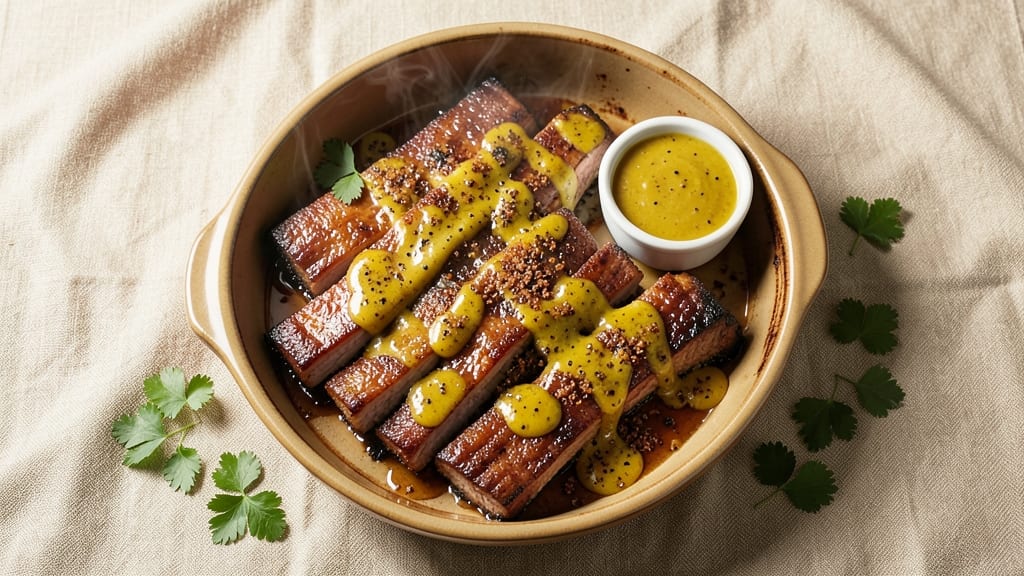
Mastering oven-baked St. Louis style ribs delivers fall-off-the-bone tenderness with a dry-rub crust that rivals smoker results. The secret lies in precise temperature control and a carefully balanced spice blend that enhances the meat's natural sweetness without overpowering it.
I've perfected this method after years of testing, ensuring every bite is juicy, flavorful, and worth the effort.
This recipe transforms tough rib meat into melt-in-your-mouth perfection using a 3-2-1 method—three hours of slow cooking, two hours wrapped in foil, and one hour uncovered for crisping. The dry rub, applied generously, creates a caramelized bark that seals in moisture while building complex flavors.
Unlike traditional smoked ribs, this oven technique delivers consistent results without specialized equipment.
By the final hour, your ribs will achieve that signature glossy, crackling exterior with tender meat that pulls cleanly from the bone. The aroma alone will have everyone gathering around the table, and the first bite confirms why this method is a game-changer for home cooks.
Whether serving for a holiday feast or a casual weekend dinner, these ribs will impress without requiring a smoker.
Pair with classic BBQ sides like coleslaw or baked beans for the full experience. The beauty of this method is its adaptability—scale the recipe for crowds or halve it for a smaller gathering. Here's how to achieve restaurant-quality ribs in your own oven, step by step.
Ingredients for oven baked st louis style ribs
Four pounds of rib meat, a precise spice blend, and oven mastery create melt-in-your-mouth perfection without a smoker.
| Ingredient | Amount | Notes |
|---|---|---|
| St. Louis Style Pork Ribs 🍖 | 4 lb | Bone-in, meaty ends included |
| Yellow Mustard 🍯 | ½ cup | For initial coating |
| Brown Sugar 🍬 | ½ cup | Packed, light variety |
| Smoked Paprika 🌶️ | 2 tbsp | High-quality, not sweet |
| Ground Black Pepper 🌶️ | 1 ½ tbsp | Freshly ground preferred |
| Garlic Powder 🧄 | 1 ½ tbsp | Not garlic salt |
| Onion Powder 🧅 | 1 ½ tbsp | Finely ground |
| Ground Cumin 🌿 | 1 tbsp | Toasted for depth |
| Diamond Crystal Kosher Salt 🧂 | 1 tbsp | Not table salt |
| Cayenne Pepper 🔥 | ½ tsp | Adjust for heat |
| Apple Cider Vinegar 🍎 | 2 tbsp | For tenderizing |
| Butter 🧈 | 2 tbsp | Unsalted, softened |
| Fresh Rosemary 🌿 | ¼ cup | Chopped, stems removed |
| Fresh Thyme 🌿 | ¼ cup | Leaves only |
| Aluminum Foil 📄 | 1 sheet | Heavy-duty |
The quality of your pork ribs makes all the difference. Look for bone-in cuts with ample meaty ends—these are the sweetest parts. Costco and Whole Foods carry excellent selections, but any reputable butcher will have what you need. Avoid pre-cut, pre-packaged ribs from the meat counter; they often lack the marbling and flavor. When selecting, check for vibrant color and firm texture—these indicate freshness. The ribs should feel heavy for their size, a sign of proper curing and moisture content. If possible, purchase them the day you plan to cook to ensure maximum tenderness.
No smoked paprika? Substitute with a mix of sweet paprika and a pinch of liquid smoke, though the flavor won't be identical. Fresh herbs unavailable? Dried rosemary and thyme at one-third the amount work in a pinch, but the aroma won't be as robust. For the brown sugar, light or dark varieties both work, though light sugar creates a slightly crispier bark. The apple cider vinegar is crucial—it tenderizes the meat and balances the sweetness. If you're short on time, substitute with lemon juice, though the flavor profile will differ slightly. For the butter, unsalted is preferred to control seasoning, but if that's all you have, reduce the salt in the dry rub by half.
Prep the dry rub ingredients in advance and store them in an airtight container for up to 6 months—this saves time on cooking days. The ribs can be coated with the dry rub and refrigerated overnight, allowing the spices to penetrate deeper. When storing cooked ribs, wrap them tightly in foil or plastic wrap and refrigerate for up to 4 days. For longer storage, portion into freezer bags, removing as much air as possible, and freeze for up to 3 months. Reheat in a 350°F oven for 15-20 minutes, covered, to restore moisture and warmth. The foil used during cooking can be reused for other purposes, but avoid high-heat applications after contact with raw meat.
Why You'll Love This Recipe
- No-Fuss Oven Magic: I swear by this method—just slather those ribs with mustard, sprinkle brown sugar and paprika, and let the oven do the work. No smoker, no babysitting, no messier-than-necessary cleanup. Honestly, it’s the kind of recipe that makes me wonder why I ever tried slow-cooking.
- Sweet-Smoky Crunch: That caramelized crust from the brown sugar and mustard? It’s the star. The smoked paprika adds warmth without overpowering, while the black pepper gives it a subtle kick. Every bite has that perfect balance—sticky, smoky, and just salty enough.
- Weeknight Crowd-Pleaser: Between us, this is the dish I pull out for game days, lazy Sundays, or when my brother-in-law “accidentally” shows up unannounced. It feeds six easily, and the leftovers? Even better the next day, reheated until crispy again.
- Budget-Friendly Feast: St. Louis-style ribs are cheaper than you’d think, and this recipe stretches them far. A single rack costs less than takeout, and the ingredients—mustard, sugar, spices—are pantry staples. I’ve made this on a tight grocery budget, and no one ever guessed.
Step-by-step instructions for oven baked St louis style ribs
Master this dry-rub method for ribs that balance crisp bark with melt-in-your-mouth tenderness.
Prepare the Ribs with Mustard and Vinegar Base
Remove the St. Louis style pork ribs from packaging and place them meat-side up on a wire rack set over a baking sheet. This elevation prevents steaming and promotes even browning. In a small bowl, whisk together the 0.5 cup yellow mustard and 2 tablespoons apple cider vinegar until fully combined. The acidity in the vinegar helps tenderize the meat while the mustard creates a sticky base for the dry rub to adhere.
Using a pastry brush, generously coat both sides of the ribs with the mustard-vinegar mixture, making sure to get into all the crevices. Let the ribs sit uncovered at room temperature for 30 minutes. This resting period allows the marinade to penetrate the surface and ensures the rub will stick firmly during cooking. The ribs should feel slightly tacky to the touch when ready.
Apply the Dry Rub Evenly
In a medium bowl, combine the 0.5 cup packed brown sugar, 2 tablespoons smoked paprika, 1.5 tablespoons each of ground black pepper, garlic powder, and onion powder, 1 tablespoon ground cumin, 1 tablespoon Diamond Crystal kosher salt, and 0.5 teaspoon cayenne pepper. Mix thoroughly until all the spices are evenly distributed and the sugar is fully incorporated. The mixture should resemble coarse sandpaper in texture.
Working in batches if needed, press the spice blend firmly onto all surfaces of the ribs, including the bone side. Use your fingertips to work the rub into the meat, ensuring complete coverage. The sugar will caramelize during cooking, creating that coveted glossy bark while the spices penetrate deeply. Don't be shy—press firmly to create that essential crust. For best results, let the rubbed ribs rest uncovered in the refrigerator for at least 2 hours or up to overnight.
Preheat and Sear the Ribs
Preheat your oven to 275°F. This low temperature is crucial for achieving tender meat without drying it out. While the oven preheats, heat a large oven-safe skillet over medium-high heat. Add the 2 tablespoons softened butter and let it melt completely, then swirl to coat the pan. Place the ribs bone-side down in the hot skillet and sear for 5 minutes until deeply golden brown. The butter will help create a flavorful crust while the high initial heat jumpstarts the cooking process.
Flip the ribs bone-side up and continue searing for another 3 minutes until the meat-side develops a similar golden crust. Transfer the skillet to the preheated oven. The residual heat will carry the ribs to the proper cooking temperature while maintaining that initial sear. This two-stage process creates the perfect balance between crisp exterior and tender interior.
Braise Until Fall-Off-Bone Tender
Braise the ribs uncovered in the oven for 3 hours. The low temperature breaks down collagen in the connective tissue, transforming it into gelatin that keeps the meat moist and tender. After 3 hours, check the internal temperature using a meat thermometer—it should read 195-203°F in the thickest part of the meat. If the ribs aren't tender enough, continue cooking for another 30-60 minutes, adding 1-2 tablespoons of water to the pan if it appears dry.
During the last 30 minutes of cooking, sprinkle the 0.25 cup chopped fresh rosemary and 0.25 cup fresh thyme leaves over the ribs. The aromatic herbs will infuse the meat with their essential oils, adding depth of flavor. The ribs are done when they easily pull apart at the bone with minimal resistance. If they're not quite there, extend the cooking time by 15-minute increments until they reach the desired tenderness.
Rest and Serve with Crisp Bark
Remove the ribs from the oven and transfer them to a clean cutting board. Tent loosely with aluminum foil and let rest for 15 minutes. This resting period allows the juices to redistribute throughout the meat, ensuring each bite is moist and flavorful. The bark will remain crisp while the interior continues to tenderize slightly during this time.
To serve, slice the ribs between each bone into individual servings. The meat should pull apart easily with just a gentle tug, revealing that beautiful pink smoke ring beneath the dark, caramelized crust. Serve immediately with extra pan juices spooned over the top for maximum flavor. The combination of crisp exterior and melt-in-your-mouth tenderness makes these ribs a showstopper for any occasion.
Pro Tips For Making Oven Baked St Louis Style Ribs
- Trim the Fat First: St. Louis-style ribs have that thick fat cap—don’t skip trimming it down to ¼-inch. I learned this the hard way: leaving it too thick means soggy ribs and uneven cooking. Use a sharp knife and work in one smooth motion; no need to overcomplicate it.
- Baste with Mustard Early: Brush on that yellow mustard before the oven hits 300°F—not after. The acid in the mustard needs time to tenderize the meat while the sugar caramelizes. I used to wait until later, and the ribs always tasted flat.
- Skip the Foil Too Soon: Let those ribs sit uncovered for the first 45 minutes at 300°F. The crust forms faster, and the sugar won’t turn into a sticky mess. After that, foil traps the steam—just don’t rush it.
- Dry the Ribs Well: Pat them thoroughly with paper towels before seasoning. Wet ribs steam instead of crisp, and the paprika won’t stick. I know it’s tedious, but it’s the thing that matters most for that St. Louis crunch.
Wine and beer pairings for this dish
Red Wine Pairings
For these rich, caramelized ribs, I reach for a bold red wine with enough body to stand up to the deep flavors. A Cabernet Sauvignon from Napa Valley—like Caymus Vineyards—works beautifully with its dark fruit notes and firm tannins.
The wine's acidity cuts through the sweetness of the ribs while its structure complements the smoky, spiced crust. 🍷
If you prefer something slightly lighter, a Syrah from Washington State offers vibrant berry flavors and a touch of peppery spice that mirrors the cumin and cayenne in the rub. Chateau Ste. Michelle is my go-to for this pairing, as its earthy undertones enhance the ribs' caramelized bark.
Beer Pairings
A stout or porter is my top choice for these ribs, as their roasted malt flavors and creamy texture balance the sweet-spicy profile. Guinness or Founders Kentucky Breakfast Stout provide the perfect contrast—their coffee and chocolate notes complement the ribs' caramelized crust.
The slight bitterness also helps cleanse your palate between bites. 🍺
For a lighter option, try a Belgian-style witbier like Hoegaarden. The citrusy coriander and orange peel notes brighten the dish, while the effervescence cuts through the richness. It's an unexpected but delightful pairing that keeps the meal feeling fresh.
Non-Alcoholic Options
Don't overlook non-alcoholic pairings—sparkling apple cider from Martinelli's adds a festive touch with its crisp acidity and subtle sweetness. The bubbles help refresh your palate between each rich bite of rib.
For a more robust option, a ginger beer like Feather's brings a zesty kick that pairs wonderfully with the spiced crust. ✨
For a classic soda pairing, Dr Pepper or cream soda works surprisingly well—the caramel and vanilla notes in these sodas mirror the ribs' sweet-spicy profile. The carbonation also helps balance the richness, making it a crowd-pleasing choice.
Nutrition facts
Frequently asked questions
Why do St. Louis style ribs need to be cooked at 275°F instead of higher heat?
The low temperature is key for breaking down collagen in the connective tissue, which transforms into gelatin during cooking. This creates melt-in-your-mouth tenderness without drying out the meat. Higher heat would cook the exterior too quickly, sealing in moisture loss while leaving the interior tough. The 3-2-1 method (3 hours slow cook, 2 hours wrapped, 1 hour crisping) is specifically designed to achieve that perfect balance of texture and flavor.
Can I use this recipe for beef short ribs instead of pork?
While the technique works for beef, the cooking time will need adjustment. Beef short ribs require 4-5 hours total (extend the slow-cooking phase) due to their higher fat content and denser muscle structure. Reduce the brown sugar slightly (0.3 cup) to prevent excessive caramelization, and monitor the internal temperature closely—beef is done at 195-205°F. The dry rub can remain the same, but add 1 extra tablespoon of smoked paprika to complement beef's deeper flavor.
What if my ribs aren't tender enough after the full cooking time?
If the ribs still feel firm, extend the cooking time in 15-minute increments until they reach 203°F internally. Add 1-2 tablespoons of water or apple juice to the pan every 30 minutes to maintain moisture. For stubborn toughness, increase the oven temperature to 290°F for the final 30 minutes—this jumpstarts the breakdown of remaining collagen. Never rush this process; patience ensures that fall-off-the-bone result.
How do I prevent the ribs from sticking to the foil when wrapped?
Lightly grease the foil with cooking spray or melted butter before wrapping the ribs. This creates a barrier that prevents direct contact. For extra insurance, place a sheet of parchment paper between the ribs and foil—it acts as a non-stick layer while allowing steam to circulate. Avoid overhandling the ribs when wrapping to maintain the dry rub's adhesion. The goal is to trap steam without creating a sticky mess.