
Breakfast & Brunch
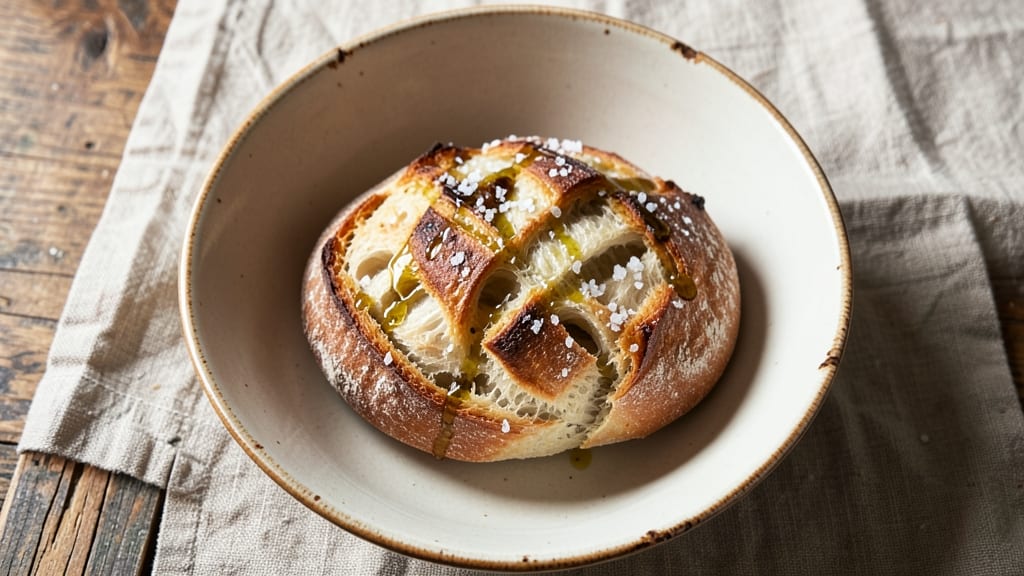
Baking a perfect one loaf French bread recipe at home means achieving that restaurant-worthy golden crunch with a soft, airy interior—something I’ve perfected after years of trial and error.
The secret lies in precise technique: from kneading the dough just enough to develop gluten without overworking it, to proofing it in a controlled environment for maximum rise. This isn’t just bread; it’s a textural masterpiece that transforms any meal.
What sets this recipe apart is its foolproof method for a single loaf, designed to yield consistent results every time. You’ll need only five simple ingredients—flour, water, yeast, salt, and a touch of sugar—but the process demands patience and attention to detail, particularly during the two-hour proofing stage.
The reward? A loaf with a crackling crust that shatters when torn and a crumb so tender it practically melts in your mouth.
By the time you pull it from the oven, you’ll have a loaf that looks and tastes like it came from a Parisian bakery, not your kitchen. The crust will be deep golden and crisp, while the interior remains soft and slightly chewy—a balance that takes practice to master.
This recipe is ideal for beginners willing to invest time, or experienced bakers looking to refine their technique for a single, show-stopping loaf.
Use it fresh for sandwiches, toast it for breakfast, or serve it warm with butter and jam. The possibilities are endless, but the process is what makes it special—each step builds toward that perfect loaf. Let’s get started on creating your own artisan masterpiece.
Ingredients for one loaf french bread
Five essential ingredients transform into a single loaf of restaurant-quality French bread.
| Ingredient | Amount | Notes |
|---|---|---|
| Bread Flour 🌾 | 3 ½ cups | High-protein for optimal gluten development |
| Active Dry Yeast 🍞 | ¼ tsp | Ensure it's fresh and bloomed properly |
| Granulated Sugar 🍚 | ¼ tsp | Feeds yeast for proper activation |
| Diamond Crystal Kosher Salt 🧂 | 1 ½ tsp | Adjusts flavor and controls fermentation |
| Lukewarm Water 💧 | 1 ¼ cups | 105-110°F for ideal yeast activation |
| Extra-Virgin Olive Oil 🫒 | 1 tbsp | Enhances crust texture and flavor |
| Cornmeal 🌽 | ¼ cup | For dusting proofing basket or parchment |
| Ice Water ❄️ | ½ cup | Used for final shaping and dough relaxation |
The bread flour is non-negotiable here—its high protein content develops the gluten structure needed for that signature French bread texture. King Arthur or Bob's Red Mill are my go-tos for consistent results. The yeast must be active dry and fresh; test it by blooming in warm water with sugar—it should foam within 5-10 minutes. If it doesn't, replace it. Penzeys sells high-quality yeast in small quantities, perfect for occasional bakers. The Diamond Crystal kosher salt is crucial; its larger crystals dissolve slower, allowing for more controlled flavor distribution throughout the dough. Always measure by weight if possible for precision, but volume works in a pinch.
Substitutions are limited with this recipe due to its precision, but you can experiment with bread machine flour if bread flour isn't available—just add 1 tsp vital wheat gluten to mimic the protein content. For yeast, instant yeast can be used at the same quantity, but don't skip the blooming step. If your water isn't exactly lukewarm, adjust gradually—too hot kills yeast, too cold slows activation. The extra-virgin olive oil adds richness; if unavailable, melted unsalted butter works equally well. For the cornmeal, semolina makes an excellent alternative for a slightly nuttier flavor and better crust adherence. The ice water is critical for final shaping—never skip this step, as it relaxes the gluten and prevents tearing during proofing.
Store the dry ingredients—flour, yeast, sugar, and salt—in airtight containers in a cool, dark place for up to 6 months. The yeast should be kept in the refrigerator to maintain freshness. Once mixed, the dough can be refrigerated for up to 24 hours before baking, allowing for a slower rise and deeper flavor development. For longer storage, freeze shaped dough on a tray before transferring to a bag—bake directly from frozen with an additional 10-15 minutes. The baked loaf keeps well at room temperature for 2-3 days, but for maximum freshness, wrap it in a clean kitchen towel and store in a paper bag. Reheat slices in a dry skillet for that fresh-baked crunch.
Why You'll Love This Recipe
- Five-Ingredient Magic: I swear by this combo—yeast, flour, sugar, salt, and water. That’s it. No fancy mix-ins, no last-minute store runs. Just mix, let it rise, and bake. Honestly, I’ve made it on days when I forgot to meal prep.
- Crust That Cracks: The secret’s in the kosher salt and steam—you get that iconic French bread shatter with one bite. That crispy shell? It’s what turns this from good bread to the bread. (Yes, even on a Tuesday night.)
- Meal Prep MVP: Toss it in the freezer, and it’s fresh toast in 10 minutes. My lunchbox staple? Always. I bake two loaves, slice one, freeze half, and thank me later when you’re not scrambling for sandwich bread.
- Budget-Friendly Staple: A single loaf costs pennies to make—less than store-bought, no preservatives. I stretch it for garlic bread, croutons, or just buttered slices. My wallet and taste buds win every time.
Step-by-step instructions for artisan French bread
Mastering this dough requires patience and precision—each step builds toward that signature golden crust and airy crumb.
Activate the Yeast for Optimal Fermentation
In a large mixing bowl, combine the 1.25 cups lukewarm water, 0.25 tsp granulated sugar, and 0.25 tsp active dry yeast. Stir gently with a wooden spoon and let the mixture sit for 5-10 minutes until it develops a frothy, bubbly surface. This confirms the yeast is alive and ready to work—if it doesn’t bubble, your bread will fail. The water temperature is critical: it should feel like bathwater (around 105-110°F). Too hot kills the yeast; too cold slows fermentation.
Once active, add the 3.5 cups bread flour and 1.5 tsp diamond crystal kosher salt to the bowl. Using a dough whisk or your hands, mix until a shaggy mass forms. The flour’s high protein content will develop gluten, but don’t overwork it yet—just enough to combine. The dough will feel sticky and uneven at this stage, and that’s exactly what we want before the kneading begins.
Develop Gluten Through Methodical Kneading
Turn the dough onto a lightly floured surface and knead for 8-10 minutes by hand, or use a stand mixer with a dough hook attachment for 5-6 minutes on medium speed. You’re aiming for a smooth, elastic dough that springs back slowly when poked—a windowpane test will confirm readiness. The gluten strands should be visible and cohesive, not sticky or gummy. If the dough resists, add 1 tablespoon extra-virgin olive oil to lubricate without weakening structure.
Shape the dough into a round ball, place it back in the bowl, and lightly coat the surface with the remaining 1 tablespoon extra-virgin olive oil. Cover the bowl with a damp kitchen towel and let it rise in a warm place (around 75°F) for 1-2 hours, or until it has nearly doubled in size. The dough should feel light and airy, with visible bubbles along the surface. Patience here ensures a proper oven spring later.
Shape and Proof for Structural Integrity
Punch down the risen dough to release air, then divide it into 4 equal portions (about 8 ounces each). Roll each portion into a 12-inch log, tapering the ends slightly to mimic a classic French baguette shape. Arrange the logs on a baking sheet lined with parchment paper, spacing them 2 inches apart to allow for expansion. Cover loosely with the damp towel and let them proof for 30-45 minutes until they’ve puffed noticeably and feel firm to the touch.
While the dough proofs, preheat your oven to 450°F with a baking stone or inverted baking sheet on the middle rack. Sprinkle 0.25 cup cornmeal onto the parchment to prevent sticking—this creates a crisp, golden crust as the bread bakes. The cornmeal also absorbs excess moisture, ensuring a dry surface for proper browning. Slash each log diagonally with a razor blade for ½-inch deep cuts—this directs steam and prevents over-expansion.
Bake for Maximum Crust Development
Transfer the shaped dough to the preheated oven and bake for 20-25 minutes until the crust is deep golden brown with a hollow sound when tapped. Rotate the baking sheet halfway through for even browning. The internal temperature should reach 190-200°F at the center. Avoid opening the oven door during baking—temperature fluctuations cause the bread to collapse.
Immediately after baking, brush the crust with 0.5 cup ice water (mixed with 1 teaspoon extra-virgin olive oil if desired) to enhance color and texture. Let the bread cool on a wire rack for at least 30 minutes before slicing—this allows the gluten to relax and prevents a gummy crumb. The crust should be crisp and shatterable, while the interior remains soft and chewy, with an open, airy texture.
Pro Tips For Making One Loaf French Bread
- Check Yeast Temperature: I learned this the hard way—yeast hates extremes. Test your lukewarm water (75–80°F) by sticking your finger in: if it feels like a warm bath, it’s perfect. Too hot and your yeast will die before it even wakes up.
- Weigh Your Flour: No more eyeballing. Bread flour varies in density, and a cup isn’t always a cup. Use a kitchen scale for 350g—this guarantees the right structure without guessing. (Yes, even if you’re impatient like me.)
- Skip the Over-Kneading: After burning three batches, I finally figured out: knead just until the dough springs back when poked (about 8–10 minutes). Overwork it, and you’ll end up with a tough, chewy loaf instead of that classic French texture.
- Steam the Oven: This isn’t the prettiest method, but it’s the tastiest. Place a metal bowl on the oven rack while preheating, then pour in 1 cup boiling water right before baking. The steam guarantees that crackly crust you crave—no weird hacks needed.
Best sauces and condiments for this one loaf french bread
Classic Garlic Butter
Nothing elevates French bread like a simple garlic butter spread. Melt ¼ cup unsalted butter with 3 minced garlic cloves and 1 tsp fresh parsley in a small saucepan over low heat for 3-4 minutes.
Let it cool slightly before spreading on warm slices. For extra richness, add ½ tsp lemon zest—this brightens the buttery flavor and cuts through the bread’s density. 🧄
Herb-Infused Olive Oil
Drizzle freshly baked bread with 2 tablespoons extra-virgin olive oil infused with 1 tbsp each of rosemary, thyme, and oregano. Heat the oil with the herbs in a small pot for 5 minutes, then strain before using.
This adds a fragrant, earthy note that pairs beautifully with the bread’s crusty exterior. Store leftover infused oil in an airtight container for up to 1 week.
Whole Grain Mustard Dip
Mix ¼ cup Dijon mustard with 2 tbsp honey and 1 tbsp apple cider vinegar for a tangy-sweet dip that balances the bread’s richness. Thin with 1-2 tbsp water if needed for a smoother consistency.
This dip works wonders with grilled chicken sandwiches or as a spread for breakfast toast. Keep it refrigerated in a small jar for up to 2 weeks.
Spicy Harissa Spread
Combine 2 tbsp harissa paste with 1 tbsp tahini and 1 tsp lemon juice for a North African-inspired spread that adds heat and depth. Adjust the harissa amount based on your spice tolerance—1 tbsp for mild, 3 tbsp for fiery.
This spread pairs exceptionally well with hummus or roasted vegetables. Store in the fridge for up to 10 days.
Sweet Almond Butter
For a dessert-friendly option, blend ¼ cup almond butter with 1 tbsp maple syrup and a pinch of sea salt. Spread on warm bread slices and top with sliced banana or apple for a quick breakfast or snack.
The nutty sweetness contrasts perfectly with the bread’s savory crust. Keep refrigerated in an airtight container for up to 1 week.
Cheese and Herb Compote
Melt ¼ cup cream cheese with 2 tbsp sour cream, 1 tbsp chopped chives, and ½ tsp smoked paprika in a small bowl. Spread on toasted bread and top with everything bagel seasoning for a savory, herby twist.
This compote also works as a filling for French toast. Store in the fridge for up to 5 days.
Nutrition facts
Frequently asked questions
Why does my French bread dough stick to everything?
The dough is intentionally sticky during mixing to maximize gluten development. Use bread flour (not all-purpose) and add just 1 tablespoon olive oil if needed during kneading. Always wet your hands slightly when handling it, and avoid over-flouring—this creates a tougher crust. The stickiness is normal until the final shaping stage!
Can I make this recipe without a stand mixer?
Hand-kneading works perfectly—just dedicate 8-10 minutes to developing the gluten. Work the dough on a lightly floured surface, using your knuckles to push and fold. The key is patience: aim for a smooth, elastic dough that springs back when poked. A windowpane test confirms readiness when you can stretch a thin sheet without tearing.
What's the best way to store leftover French bread?
Wrap the cooled loaf in a clean kitchen towel and place it in a paper bag at room temperature for 2-3 days. For longer storage, slice and freeze portions in an airtight container for up to 3 months. To revive, toast slices directly from frozen in a dry skillet over medium heat for 1-2 minutes per side. Never refrigerate—this makes the crust stale faster.
How do I fix a dense or gummy French bread?
Dense bread usually means underproofed dough or insufficient kneading. Next time, extend the proofing time by 30-60 minutes in a warm spot (use a proofing box or warm oven with light on). For gummy texture, ensure your oven reaches 450°F and bake until internal temp hits 190-200°F. If the crust isn't crisp enough, try brushing with ice water immediately after baking. The secret is patience—rushing any step compromises texture!
Can I use this dough for other shapes besides baguettes?
This versatile dough works for boules, batards, or even dinner rolls! For boules, shape into rounds and bake on a floured surface. For rolls, divide into 12 equal portions (~2 oz each), roll into balls, and proof on a baking sheet. The same proofing and baking times apply. The high gluten content makes it ideal for rustic shapes—just adjust the final proofing time by 10-15 minutes for smaller pieces.