
Side Dishes
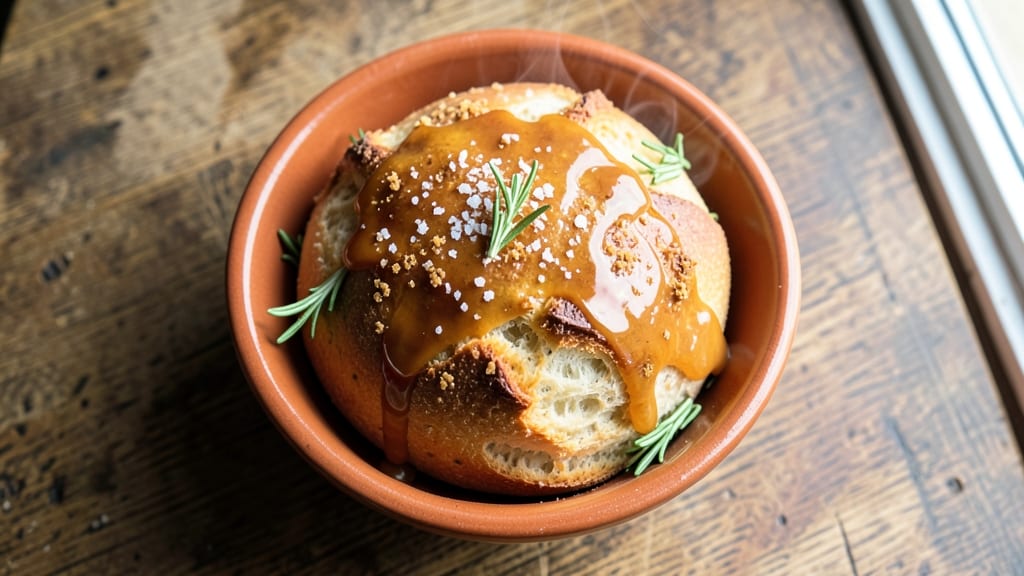
Capturing Olive Garden bread recipe at home means recreating that signature buttery, pull-apart magic with crispy garlic-herb crusts. The secret lies in balancing yeast-based dough with a rich garlic butter sauce that browns perfectly—just like the restaurant version.
I’ve perfected this recipe after years of testing, ensuring every bite delivers that familiar, comforting flavor.
This recipe starts with a simple dough that rises beautifully, creating airy pockets perfect for soaking up the garlic butter.
The sauce is where the magic happens: a blend of melted butter, minced garlic, and fresh herbs that gets brushed on just before baking. Baking at high heat ensures a golden, crispy crust while keeping the inside soft and pillowy.
What you’ll end up with is bread that’s warm, aromatic, and impossible to resist—ideal as an appetizer or side dish. The pull-apart texture is foolproof, and the garlic-herb flavor is bold but balanced. Whether serving a crowd or enjoying a cozy meal, this bread delivers restaurant-quality results at home.
Pair it with marinara for dipping or serve alongside pasta for the full Olive Garden experience. The dough can be made ahead, and the sauce comes together in minutes—perfect for when you need a crowd-pleasing side in a hurry.
Ingredients for olive garden bread
Six ingredients for dough, seven for sauce—simple yet restaurant-quality Olive Garden bread at home.
| Ingredient | Amount | Notes |
|---|---|---|
| Active Dry Yeast 🍞 | 2 ¼ tsp | Ensure yeast is fresh for proper rise |
| Warm Water 💧 | 1 ¼ cups | 110°F for optimal yeast activation |
| All-Purpose Flour 🌾 | 5 cups | Bread flour for enhanced texture (optional) |
| Granulated Sugar 🍚 | ½ cup | Feeds yeast for better fermentation |
| Salt 🧂 | 1 ½ tsp | Diamond Crystal preferred for purity |
| Unsalted Butter 🧈 | ½ cup | Cold, cubed for optimal dough texture |
| Garlic Cloves 🧄 | 6 cloves | Fresh, minced for authentic flavor |
| Fresh Parsley 🌿 | ¼ cup | Finely chopped, stems removed |
| Fresh Rosemary 🌿 | 1 tbsp | Finely chopped, fresh preferred |
| Extra-Virgin Olive Oil 🫒 | ¼ cup | High-quality for rich flavor |
| Large Eggs 🥚 | 1 whole | Room temperature for even mixing |
| Butter (for sauce) 🧈 | ¾ cup | Melted, unsalted preferred |
| Garlic Powder 🧄 | 1 tsp | For enhanced garlic flavor |
| Ground Black Pepper 🌶️ | ½ tsp | Freshly ground for best flavor |
The yeast is the foundation—Bob’s Red Mill active dry yeast or Saf-Instant works best for consistent rises. Always check expiration dates; stale yeast won’t activate properly. For the flour, King Arthur bread flour yields a superior texture, but all-purpose flour works in a pinch. The butter should be cold when added to the dough—this creates the signature flaky layers. If your kitchen is warm, chill the dough for 30 minutes before shaping. The garlic and herbs are non-negotiable for authenticity; freshly minced garlic and organic herbs from the grocery store’s produce section deliver the boldest flavor.
No fresh parsley? Dried parsley at one-third the amount works, though texture suffers slightly. Running short on rosemary? Thyme or oregano can substitute, but adjust to taste. For the garlic butter sauce, European-style butter like Plugrá has higher fat content, perfect for crispy crusts. If you’re gluten-free, King Arthur gluten-free flour blend can replace all-purpose flour, though texture will differ. The dough can be made a day ahead—just refrigerate it until ready to shape, allowing it to come to room temperature before baking.
The dough doubles in size during the first rise, so use a large mixing bowl to prevent overflow. Once shaped, let it rest for 10 minutes before baking to relax the gluten. The garlic butter sauce should be brushed on just before baking—this ensures a golden, crispy crust. Store leftovers in an airtight container at room temperature for 2 days or freeze for 3 months. Reheat in a 350°F oven for 5-10 minutes to restore freshness. For serving, tear into pieces and arrange on a platter for that signature pull-apart presentation.
Why You'll Love This Recipe
- No-Knead Magic: I swear by this—just toss in the yeast, flour, and warm water, let it rise overnight, and boom. No standing at the counter, no sore arms, just pure hands-off baking. The sugar in the dough gives it that golden crust without extra effort.
- Garlic-Kissed Crust: That crispy, buttery edge with a hint of garlic? It’s what makes this bread dangerously good. The yeast does all the work while you sleep, waking you up to a loaf that tastes like it came from a bakery.
- Weeknight Wonder: Pull it out for dinner with pasta, tear it into bowls for soup, or freeze half for lazy mornings. It’s my go-to when I’m too tired to think but still want something that feels like a celebration.
- Budget-Friendly Staple: Five ingredients, one bowl, zero waste. This dough stretches for sandwiches, toast, or even garlic bread—no fancy add-ons needed. Honestly, it’s the kind of recipe that makes grocery day feel like a win.
Step-by-step instructions for Olive Garden bread recipe
Here's the method that delivers that signature pull-apart texture and aromatic garlic-herb crust.
Activate the Yeast for Optimal Rise
In a large mixing bowl, combine the 1.25 cups warm water (tested at 110°F using a thermometer) with the 0.5 cup granulated sugar and 2.25 tsp active dry yeast. Let this mixture sit for 5-10 minutes until it becomes frothy and bubbles vigorously at the surface. This indicates the yeast is active and ready to work.
I always test the water temperature first—too hot kills yeast, too cold prevents activation. The sugar feeds the yeast, creating the perfect environment for fermentation. If no bubbles form after 10 minutes, your yeast may be inactive, and you'll need to start over with fresh yeast.
Develop the Dough with Wet and Dry Ingredients
Add the 5 cups all-purpose flour and 1.5 tsp salt to the yeast mixture. Using a wooden spoon or dough whisk, stir until a shaggy dough forms. Then incorporate the 0.5 cup unsalted butter (cut into small cubes) and the 0.25 cup extra-virgin olive oil. The butter should begin to soften and emulsify into the dough.
Next, add the 1 whole large egg and mix until fully combined. The dough will be sticky but manageable. Here's the thing—don't be tempted to add extra flour. The moisture content is crucial for that signature pull-apart texture. Transfer the dough to a lightly oiled surface and knead for 8-10 minutes by hand, or use a stand mixer with a dough hook for 5-6 minutes until smooth and elastic.
Incorporate Garlic and Herbs for Authentic Flavor
While the dough kneads, finely mince the 6 cloves garlic using a knife or garlic press. Chop the 0.25 cup fresh parsley and 1 tbsp fresh rosemary into small pieces, removing any tough stems. Once the dough is smooth, make a well in the center and add the minced garlic, parsley, and rosemary.
Gently work these aromatics into the dough by hand, pressing them into the surface. The herbs will infuse the bread with their bright, fresh flavors while the garlic develops its signature aroma during proofing. This is where the magic happens—these ingredients create that unmistakable Olive Garden bread profile.
First Proof and Shape for Pull-Apart Texture
Place the dough in a lightly oiled bowl, cover with a damp towel, and let it rise in a warm place (75-80°F) for 1-1.5 hours, or until doubled in size. I like to use my oven with the light on for consistent warmth. Punch down the dough to release air, then divide it into 6 equal portions (about 6 ounces each).
Roll each portion into a 12-inch rope, then shape into a 10-inch circle by gently stretching the dough outward. Place each circle on a parchment-lined baking sheet, leaving 2 inches between them. Cover again and let rise for another 30-45 minutes until puffy. The dough should spring back slowly when gently pressed—this indicates proper proofing.
Bake and Brush with Garlic Butter
Preheat your oven to 375°F. Bake the bread circles for 18-22 minutes until they're golden brown at the edges and sound hollow when tapped on the bottom. While baking, prepare the garlic butter sauce by melting the 0.75 cup butter (for sauce) in a small saucepan over low heat. Remove from heat and stir in 1 tsp garlic powder and 0.5 tsp ground black pepper until smooth.
Immediately after removing the bread from the oven, brush each circle generously with the garlic butter mixture. The residual heat will create a golden, crispy crust while infusing the bread with rich, garlicky flavor. Serve warm while the butter is still melted and the interior is soft and pillowy. Each piece should pull apart easily, revealing that tender, buttery interior we all love.
Pro Tips For Making Olive Garden Bread
- Test the Yeast First: Skip straight to mixing and you might end up with flat, sad bread. Sprinkle that active dry yeast in warm water with a pinch of sugar, then wait 5–10 minutes for it to bubble like a tiny science experiment. If nothing happens, your yeast is dead—toss it and start over. I learned this the hard way after baking a brick-shaped loaf.
- Measure Flour Right: Scooping flour straight from the bag packs in air, and your bread will turn out dense. Use a kitchen scale or the "spoon-and-level" method: Spoon flour into your measuring cup, then level it off with a knife. Olive Garden’s bread stays light because they nail this step—don’t skip it, even if it feels tedious.
- Knead Until Silky: You don’t need to turn this into a workout, but stop when the dough springs back slowly when poked. If it’s sticky and fights you, it’s not ready. Wet your hands to keep it from sticking, and knead for about 8–10 minutes by hand (or 5–6 minutes with a stand mixer). Over-kneading dries it out—just enough to make it smooth and elastic.
- Let It Rise Twice: One rise is non-negotiable, but the second rise is where the magic happens for that airy Olive Garden texture. After the first rise, punch down the dough and let it rest for 10 minutes before shaping. Then, give it another 1–2 hours to rise again—patience here makes the difference between tough bread and something worth sharing. (Yes, even if you’re impatient like me.)
Perfect pairings for this dish
Appetizer Showstopper
This bread is a game-changer as an appetizer—think of it as your homemade version of Olive Garden's legendary breadsticks. Serve warm with marinara sauce for dipping, just like at the restaurant.
I like to arrange pieces on a wooden serving board with a bowl of sauce in the center for that restaurant-style presentation. 🍽️
For a crowd-pleasing platter, tear the bread into irregular pieces and arrange them in a loose pile. Drizzle any leftover garlic butter sauce over the top and sprinkle with flaky sea salt for extra flavor.
This works perfectly for game day, dinner parties, or even as a weeknight snack with a glass of Italian wine.
Pasta Pairing Perfection
Pair this bread with spaghetti and meatballs or fettuccine alfredo for the full Olive Garden experience. The garlic-herb crust cuts through the richness of creamy sauces beautifully.
I often serve it family-style—place the bread in the center of the table so everyone can tear off pieces as they please. 🍝
For a lighter meal, serve it alongside grilled chicken or roasted vegetables. The bread's buttery flavor balances hearty proteins and veggies, making it a versatile side.
If you're serving a salad, place the bread on the table so guests can tear off pieces to dip into balsamic vinaigrette.
Wine and Beer Pairings
A crisp Italian white wine like Pinot Grigio or Vermentino complements the garlic and herbs beautifully. The acidity in these wines cleanses your palate between bites. For beer lovers, a light Italian lager such as Peroni or Moretti works perfectly. The effervescence helps balance the richness of the bread. 🍷
If you prefer red wine, go for a light Chianti—its bright acidity and subtle tannins won’t overpower the garlic flavors. Avoid heavy, oaky wines or bold reds, as they can clash with the delicate herb notes. For a non-alcoholic option, sparkling water with lemon adds a refreshing contrast.
Breakfast Upgrade
This bread makes an amazing breakfast side—think of it as a garlic-herb focaccia with endless possibilities. Serve it with scrambled eggs or bacon for a hearty morning meal. The warm, buttery crust pairs perfectly with runny yolks and crispy bacon. 🍳
For a brunch spread, arrange the bread alongside avocado toast, fresh berries, and yogurt. The garlic-herb flavor adds a savory contrast to sweet and creamy breakfast items. You can also use it to soak up leftover gravy from roasted meats or breakfast sausages.
Meal Prep and Storage
Make the dough a day ahead and refrigerate it until ready to shape—this saves time on busy days. Once baked, store leftovers in an airtight container at room temperature for 2 days. Reheat in a 350°F oven for 5-10 minutes to restore that crispy crust. 💡
For longer storage, freeze the bread in single-serving portions. Wrap each piece in parchment paper and place in a freezer bag for up to 3 months. Thaw at room temperature for 1 hour before reheating. The texture remains soft and pillowy, just like fresh-baked bread.
Nutrition facts
Frequently asked questions
Can I make this bread without yeast?
Yes! For a quick version, replace the yeast with 1.5 tsp baking powder and 1 tsp baking soda. Use 4 cups flour instead of 5, and reduce the water to 1 cup. The texture will be denser but still delicious—great for busy weeknights.
Why does my dough keep sticking?
Sticky dough is normal, but here’s how to fix it: Use a lightly oiled surface and wet your hands when handling. If it’s too sticky, add 1 tbsp flour at a time until manageable—but don’t overdo it. The dough should be soft, not dry. For extra help, chill it for 30 minutes before shaping.
How do I get that perfect crispy crust?
The secret is brushing with garlic butter right after baking while the bread is still hot. Use 375°F heat and bake until golden. For extra crispiness, broil for 1-2 minutes at the end. The residual heat from the butter creates that restaurant-style crunch.
Can I make this bread gluten-free?
Yes, but expect a slightly denser texture. Replace the flour with a 1:1 gluten-free blend (like King Arthur’s) and add 1 extra tbsp xanthan gum to improve elasticity. Let the dough rest 10 minutes after shaping to relax the gluten substitutes.
What’s the best way to reheat leftover bread?
Wrap slices in foil and warm in a 350°F oven for 5-7 minutes to restore crispiness. For a quick fix, toast in a skillet over medium heat for 1-2 minutes per side. Avoid microwaving—it makes the bread soggy.