
Side Dishes
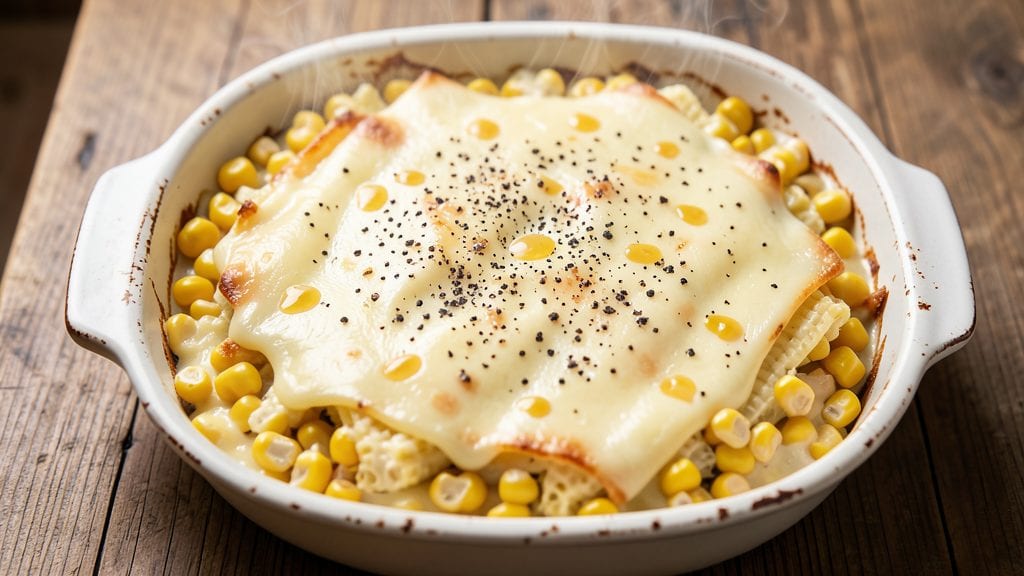
This Old Betty Crocker scalloped corn recipe brings back the comforting flavors of classic home cooking—creamy, cheesy, and topped with a golden buttery crust.
The memory of my grandmother’s version still lingers in the warm, savory aroma that fills the kitchen as it bakes, layer after layer of tender corn and rich dairy. What makes this dish special is how simple ingredients transform into something nostalgic and deeply satisfying.
The secret lies in the balance of milk, butter, and sharp cheddar cheese, creating that signature creamy texture while the breadcrumb topping adds a satisfying crunch. Unlike modern versions, this recipe stays true to its roots—no shortcuts, just old-fashioned comfort.
The result is a side dish that feels like a hug, perfect for holidays or weeknight dinners when you crave something familiar yet refined.
What you’ll end up with is a creamy, golden-topped casserole that’s tender in the center and crisp on top, with each bite offering that perfect blend of buttery corn and melted cheese.
The aroma alone will have everyone at the table asking for seconds. Ready in just 45 minutes, it’s the kind of dish that turns simple ingredients into a centerpiece-worthy side.
For those looking to modernize it, try adding fresh herbs like thyme or a sprinkle of smoked paprika to the breadcrumbs, or swap out half the cheese for a lower-fat option without sacrificing flavor.
The beauty of this recipe is its flexibility—classic enough to feel like tradition, yet adaptable for today’s tastes.
Ingredients for old betty crocker scalloped corn
Simple ingredients that transform into nostalgic, creamy scalloped corn with a golden buttery crust.
| Ingredient | Amount | Notes |
|---|---|---|
| Fresh or Frozen Sweet Corn 🌽 | 4 cups | Cut kernels off cob or thawed |
| Sharp Cheddar Cheese 🧀 | 2 cups | Shredded, aged for best flavor |
| Whole Milk 🥛 | 1 ½ cups | Full-fat for creamiest texture |
| Unsalted Butter 🧈 | ½ cup | Cold, cubed for even melting |
| All-Purpose Flour 🌾 | ¼ cup | For thickening the corn mixture |
| Freshly Ground Black Pepper 🌶️ | ½ tsp | Freshly cracked for best flavor |
| Salt 🧂 | 1 tsp | Kosher or sea salt preferred |
| Fine Dry Breadcrumbs 🍞 | ½ cup | Panko for extra crunch (optional) |
| Garlic Powder 🧄 | ½ tsp | For subtle depth of flavor |
| Fresh Thyme Leaves 🌿 | ¼ tsp | Dried thyme works in a pinch |
| Smoked Paprika 🌶️ | ¼ tsp | Optional for modern touch |
The sharp cheddar cheese is non-negotiable here—aged varieties like Cabot or Whole Foods' organic sharp cheddar deliver that signature tang. For the corn, frozen works perfectly if you're short on time, just thaw it first. The breadcrumbs should be fine and dry; Trader Joe's has a great pre-made mix if you don't want to pulse them yourself. If you're feeling adventurous, try toasted breadcrumbs for extra depth. The butter matters too—European-style like Plugrá melts more smoothly, but any good-quality unsalted butter will do.
No sharp cheddar? Gruyère or white cheddar add a nice twist, though the flavor will differ slightly. Short on milk? Half-and-half works in a pinch, but the texture won't be quite as creamy. The flour is key for thickening—don't skip it, but if you're gluten-free, cornstarch at half the amount will work. For the breadcrumbs, crushed cornflakes make a great gluten-free alternative. The smoked paprika is optional but adds that modern touch mentioned in the intro—if you're keeping it strictly classic, leave it out entirely.
This casserole reheats beautifully—best served warm straight from the oven. Keeps in the fridge for up to 4 days covered tightly, though the texture softens slightly. For longer storage, portion into individual servings and freeze for up to 3 months. When reheating, cover with foil to prevent drying out. The aroma alone will have everyone gathering at the table—just like Grandma used to make.
Why You'll Love This Recipe
- One-Pot Magic: I swear by this recipe because it’s the kind of dish where you dump everything into one pan—corn, cheese, and that creamy milk-butter roux—and walk away. No chopping, no fussing, just hands-off baking while you fold laundry or scroll through your phone.
- Cheese Pulls Hard: That sharp cheddar melts into gooey, stretchy strands while the butter-flour roux adds a velvety richness. It’s the kind of comfort you get from a diner casserole, but I’m making it at home with ingredients I already have.
- Leftovers for Days: Between us, this recipe makes way more than I can eat in one sitting. The good news? It reheats like a dream—crispy top, creamy center—so I’m basically feeding myself for a week without trying.
- Budget-Friendly Staples: Honestly, this is the kind of recipe that makes me feel like I’m cooking fancy without breaking the bank. Corn’s cheap, cheese’s cheap, and the rest? Pantry basics. It’s my go-to when I need a hearty side that won’t empty my wallet.
Step-by-step instructions for old Betty Crocker scalloped corn
This classic recipe delivers that perfect creamy texture with a crispy golden crust—just like Grandma used to make.
Prepare the Creamy Corn Mixture
In a large bowl, combine the 4 cups of fresh or frozen sweet corn with the 1.5 cups of whole milk, 0.5 cup of unsalted butter (cut into small cubes), and 0.25 cup of all-purpose flour. The butter should begin to melt slightly as you stir, creating a velvety base. This mixture is the foundation of your creamy filling, so make sure it's completely smooth—no lumps should remain.
Season generously with 1 teaspoon of salt and 0.5 teaspoon of freshly ground black pepper. Add the 0.5 teaspoon of garlic powder and 0.25 teaspoon of smoked paprika for depth of flavor. Stir in the 0.25 teaspoon of fresh thyme leaves (or dried thyme if substituting) and mix well. The spices should be evenly distributed throughout the mixture, ensuring every bite carries that nostalgic flavor profile.
Assemble the Scalloped Corn in a Baking Dish
Preheat your oven to 375°F. Grease a 9x13-inch baking dish with a little butter or oil to prevent sticking. Pour the corn mixture evenly into the dish, spreading it out to create an even layer. This step is crucial for even cooking and a consistent texture throughout.
Sprinkle the 2 cups of shredded sharp cheddar cheese evenly over the top of the corn mixture. The cheese should melt into the corn, creating that signature creamy texture. For extra crunch, top with the 0.5 cup of fine dry breadcrumbs—this is where the magic happens, as the breadcrumbs will toast beautifully while the cheese melts beneath.
Bake Until Golden and Bubbly
Place the baking dish in the preheated oven and bake for 45-50 minutes. The dish is ready when the top is golden brown and the edges are bubbling. If the top isn't browning enough, tent it loosely with aluminum foil for the last 10 minutes to prevent over-browning while still allowing the cheese to melt.
During the last 10 minutes of baking, keep an eye on the dish. The corn should be tender, and the cheese should be fully melted and creamy. If the top starts to brown too quickly, reduce the oven temperature to 350°F to prevent burning. The internal temperature of the corn should reach 160°F for a perfectly creamy texture.
Rest and Serve Warm
Remove the dish from the oven and let it rest for 10-15 minutes before serving. This resting time allows the corn to set slightly, making it easier to slice and serve. The breadcrumb topping should be crispy, while the cheese beneath remains creamy and smooth.
Serve warm, straight from the baking dish, for that classic comfort-food experience. Each bite should deliver a perfect balance of creamy corn, sharp cheddar, and a hint of smoky paprika. Pair it with a simple green salad or crusty bread to complete the meal. This dish is best enjoyed fresh out of the oven, so don't wait too long before serving!
Pro Tips For Making Old Betty Crocker Scalloped Corn
- Drain, Don’t Rinse: That leftover water in your corn kernels is the enemy of creamy texture. After draining frozen corn, give it a quick shake in the colander—just enough to break up clumps, but don’t run it under water. I learned this the hard way when my first batch turned out watery and sad.
- Melt Butter Slowly: The roux is where flavor happens, so don’t rush it. Melt the butter over medium-low heat, then whisk in the flour gradually—about 1 tablespoon at a time—until it’s a pale, sandy color. After burning two batches, I finally realized high heat turns it beige, not golden.
- Salt the Cheese: Sharp cheddar already packs salt, but if you’re using pre-shredded (which clumps less), skip the extra salt in the milk. If you’re grating your own, taste the cheese first—it’ll save you from a bland, milky mess. I used to ignore this, and my dish always tasted like it needed more oomph.
- Cover Twice: First, cover the dish loosely with foil before baking to trap steam and help the corn cook evenly. Then, after 20 minutes, crimp the foil tightly to lock in moisture for the final 10 minutes. I was skeptical until I tried it—now it’s non-negotiable.
Regional styles of these flavors
Classic Midwest Style
The original Betty Crocker scalloped corn recipe hails from the heartland—think Iowa and Illinois—where farmers' markets overflowed with fresh corn in summer. This version relies on whole milk and sharp cheddar for that signature creamy, tangy flavor that became a Midwest staple.
The dish was often served at church potlucks and family reunions, where it became a symbol of homegrown comfort. I remember my aunt making this every Fourth of July, always with Pillsbury refrigerated biscuits crushed on top instead of breadcrumbs for extra flakiness. 🌽
Southern Creamy Twist
Down south, this dish gets a richer, slightly spicier profile. Swap half the sharp cheddar for white cheddar and add ½ teaspoon smoked paprika to the breadcrumb topping—this was a common adaptation in Alabama and Georgia.
Some families even stir in a pinch of cayenne into the corn mixture for subtle heat. My grandmother in Mississippi used to finish hers with a sprinkle of tonic water (yes, really!) before baking to give it a crispy, almost cracker-like crust. The result?
A dish that’s creamy, crunchy, and just a little bit unexpected. 🔥
New England Buttery Crust
Up north, the focus shifts to an ultra-crispy topping and extra butter. In New Hampshire and Vermont, families would use butter-flavored breadcrumbs (like Annie’s or Trader Joe’s) and add an extra ¼ cup butter to the corn mixture.
The baking dish would go under the broiler for the last 2 minutes to achieve that golden, almost caramelized crust. I’ve seen versions where they even add a splash of heavy cream to the corn mixture for an extra-luxurious texture.
The result is a dish that feels indulgent yet still nostalgic. ❄️
Modern Fusion Adaptations
Today’s cooks are putting their own spin on this classic. In California, you’ll find versions with avocado oil instead of butter and nutritional yeast for a cheesy, dairy-free twist. Meanwhile, urban chefs in Chicago are adding crispy prosciutto or caramelized onions on top for a gourmet touch.
I love adding a handful of fresh chives or crumbled feta for brightness—it’s a great way to keep the dish classic while making it feel fresh. The key is balancing tradition with innovation. 💫
Holiday Potluck Variations
At Thanksgiving gatherings, this dish often gets a festive upgrade. In Texas, families might add diced green chiles and Monterey Jack cheese for a Southwestern flair. Meanwhile, in New York, it’s common to see a sprinkle of poppy seeds on top for a subtle crunch.
My favorite holiday twist? Adding a layer of sautéed mushrooms beneath the corn for extra depth. The dish becomes a showstopper while still feeling like a homey classic. 🍽️
Nutrition facts
Frequently asked questions
Why does my scalloped corn turn out watery?
The most common cause is undercooking or overmixing the corn mixture. Always bake until the internal temperature reaches 160°F and ensure your flour is properly thickening the milk. For extra insurance, let the dish rest 10 minutes before serving—this helps the corn absorb any excess liquid.
Can I use canned corn instead of fresh or frozen?
Yes, but drain it thoroughly and pat dry with a paper towel first. Canned corn contains more moisture, which can make your dish watery. For best results, use 15 oz (2 cups) drained canned corn and reduce the milk to 1 cup to maintain the right texture.
How do I make this dish gluten-free?
Replace the all-purpose flour with 2 tablespoons cornstarch and use gluten-free breadcrumbs or crushed cornflakes. For the topping, try crushed pork rinds or gluten-free panko instead of regular breadcrumbs. The texture will be slightly different but still delicious!
What's the best way to reheat leftovers?
Cover the dish with foil and warm in a 350°F oven for 15-20 minutes until heated through. For microwave reheating, cover with a damp paper towel and heat in 30-second intervals to prevent drying out. The breadcrumb topping may soften slightly, but the creamy texture remains intact.
Can I make this ahead of time for a potluck?
Assemble the dish up to 24 hours ahead and refrigerate uncovered. When ready to bake, add 10-15 minutes to your baking time (about 55-60 minutes total) since it starts cold. The flavors develop beautifully overnight, making it perfect for holiday gatherings.