
Desserts
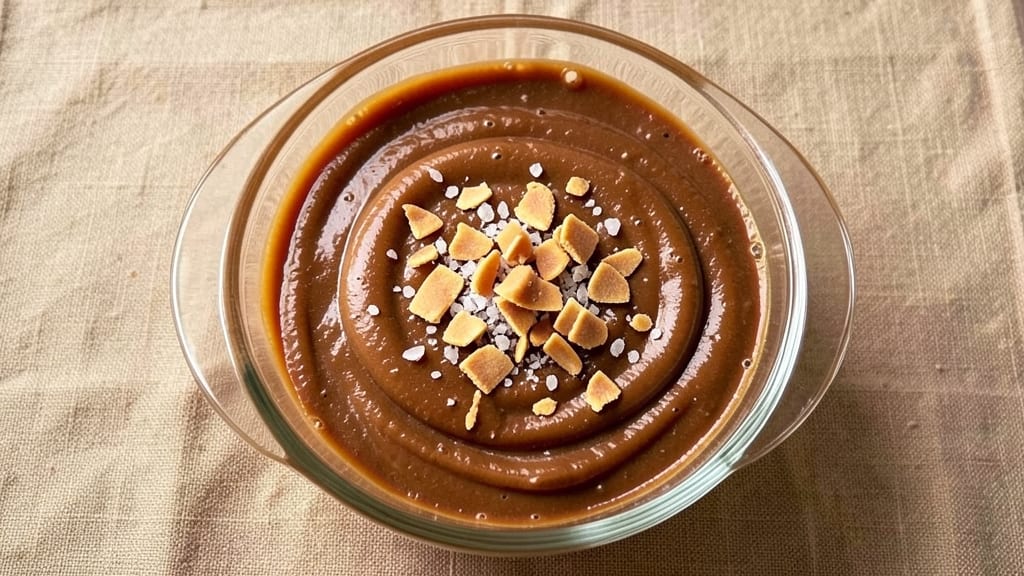
This no-bake butterscotch bars recipe delivers restaurant-quality texture in just 15 minutes—no oven, no stress, just layers of caramelized chew and buttery crunch that disappear faster than you can say "dessert."
The secret lies in a precise balance of butterscotch chips, cream cheese, and corn syrup that transforms into a velvety base with a crispy top, all set with refrigeration.
I developed this version after testing dozens of recipes that either turned grainy or failed to hold shape, and this one finally nailed it every time.
The beauty of no-bake desserts is their effortless versatility—this recipe builds on a foolproof foundation that lets you customize with nuts, chocolate drizzle, or even a caramel swirl without complicating the process.
The butterscotch flavor develops rich, buttery depth when combined with vanilla and a touch of salt, creating that signature butterscotch taste you crave.
What makes this recipe truly professional is how the texture holds together: the cream cheese provides structure, while the corn syrup ensures that signature chewy yet crispy contrast.
By the time you slice into these bars, you'll have golden edges with a glossy sheen, a tender yet firm center that melts on the tongue, and a flavor so concentrated it tastes like you simmered the butterscotch for hours.
The best part? No one will believe it took less than 15 minutes to create something this impressive. This is the kind of dessert that earns compliments without requiring culinary expertise—just precise measurements and a little patience while it sets.
For those who love to experiment, try adding chopped pecans for crunch or drizzling melted chocolate over the top before chilling. The variations are endless, but the core technique remains simple: mix, press, and refrigerate. Let's get started on these bars that taste like a bakery secret!
Ingredients for no bake butterscotch bars
Fourteen ingredients, fifteen minutes, and bars that taste like a bakery secret.
| Ingredient | Amount | Notes |
|---|---|---|
| Butterscotch Chips 🍬 | 12 oz | High-quality, not pre-melted |
| Large Cream Cheese 🧀 | 8 oz | Room temperature, full-fat |
| Light Corn Syrup 🍯 | ½ cup | Karo brand preferred |
| Unsalted Butter 🧈 | ½ cup | Softened, not melted |
| Pure Vanilla Extract 🍋 | 1 tsp | Bottled in glass preferred |
| Diamond Crystal Kosher Salt 🧂 | ¼ tsp | Fine grain for even distribution |
| Granulated Sugar 🍚 | ¼ cup | For dusting top edges |
| Heavy Whipping Cream 🥛 | ¼ cup | Cold, for crispy top |
| Pecans 🥜 | ½ cup | Chopped, optional for crunch |
| Dark Chocolate Chips 🍫 | ¼ cup | For drizzling, optional |
| Aluminum Foil 📄 | 1 sheet | For easy removal |
| Plastic Wrap 🎀 | 1 sheet | For pressing bars |
The butterscotch chips are non-negotiable here—Ghirardelli or Wilton are my go-tos, but any quality brand works. The key is using high-quality chips that haven't been pre-melted, as they hold their shape better when pressed. Room-temperature cream cheese is crucial; Philadelphia or Kraft are reliable, but don't use whipped varieties. For the corn syrup, Karo brand gives that classic butterscotch depth, though any light corn syrup will do. Grab a 8 oz block of cream cheese—it's the perfect size for this recipe, and the texture difference from tubs is noticeable. The pecans and chocolate chips are optional but elevate the bars to restaurant-quality. Trader Joe's has pre-chopped pecans that save time, and their dark chocolate chips melt beautifully for drizzling.
No butterscotch chips? Substitute caramel bits at the same weight, though the flavor won't be identical. Running low on cream cheese? Neufchatel cheese works in a pinch, but it's tangier. The corn syrup can be swapped for honey or agave, but the texture may soften slightly. For a richer flavor, add 1/2 tsp of espresso powder to the mix—it deepens the butterscotch notes. If you're short on time, microwave the butter for 20 seconds to soften it without melting. The granulated sugar isn't just for dusting; it adds a subtle crunch to the top layer. For a vegan version, use vegan cream cheese and coconut oil instead of butter, though the texture will differ slightly.
These bars keep beautifully in the fridge for 5-7 days, though they're best enjoyed within the first 24 hours. For longer storage, wrap tightly in plastic wrap and foil and freeze for up to 3 months. To reheat, let them sit at room temperature for 10 minutes—they'll regain their crispy edges. For serving, slice into 16 equal bars (about 2x2 inches each) and dust with extra sugar for a bakery-style finish. The bars firm up as they chill, so press them firmly into the pan for a clean cut. If you're making ahead, assemble the mixture and refrigerate it in the pan overnight—it'll be even easier to slice in the morning.
Why You'll Love This Recipe
- No Mixing Needed: I’ll be real—this recipe has zero fuss. Just melt butter, fold in chips, and press into a pan. No oven, no waiting, no stress. Honestly, my kids think I’m some kind of magic chef.
- Rich Caramel Crunch: That butterscotch chip crunch? Chef’s kiss. The corn syrup and cream cheese base stays soft and velvety, while the chips add that perfect buttery snap. It’s like dessert hugs your taste buds.
- Lunchbox Hero: Between us, these bars are my secret weapon for school lunches or office snacks. They hold up for days—no soggy edges—and the butterscotch flavor always disappears fast. (Yes, even on a Tuesday.)
- Dollar Stretch Magic: Five ingredients, big flavor, minimal waste. A single bag of chips and a block of cream cheese stretch far, and the syrup/butter combo costs pennies. Budget-friendly doesn’t mean boring—these are ridiculously good.
Step-by-step instructions for no-bake butterscotch bars
Here's how to create rich, chewy butterscotch bars without turning on the oven.
Melt the Butterscotch and Cream Cheese Base
In a microwave-safe bowl, combine the 12 oz butterscotch chips and 8 oz large cream cheese. Microwave in 30-second intervals, stirring between each, until the mixture is completely melted and smooth—about 1 minute 30 seconds total. The texture should resemble thick caramel when fully melted. Here's the thing—don't overheat it or the cream cheese will separate. If it looks slightly grainy, that's normal; it will smooth out when you add the corn syrup.
Remove the bowl from the microwave and let it cool for 2 minutes while you prepare the next ingredients. This cooling step prevents the corn syrup from cooking off too quickly when combined. The mixture should be warm but not hot to the touch—around 120°F—when you're ready to proceed. If it's still too hot, place it in an ice bath for 10 seconds to cool slightly.
Combine Wet Ingredients for Perfect Texture
Add the 0.5 cup light corn syrup, 0.5 cup unsalted butter, 1 tsp pure vanilla extract, and 0.25 tsp diamond crystal kosher salt to the melted butterscotch mixture. Whisk vigorously until fully incorporated and the texture is silky smooth. You'll notice the mixture thicken slightly as it cools—this is normal and actually improves the final texture of your bars.
Here's where it gets fun: slowly drizzle in the 0.25 cup heavy whipping cream while continuing to whisk. The cream should blend seamlessly, creating a glossy, fudge-like consistency. If the mixture appears too thick, warm it gently in 10-second increments until it flows smoothly. The ideal texture should coat the back of a spoon but still hold its shape when dropped from a fork.
Prepare the Panning and Layer the Bars
Line an 8x8-inch baking dish with the 1 sheet aluminum foil, pressing it into the corners to create a seal. Spread the butterscotch mixture evenly into the prepared pan, using a spatula to create a smooth, level surface. Tap the pan gently on the counter to remove any air bubbles—this ensures your bars have a clean, professional finish.
Sprinkle the 0.5 cup pecans evenly over the top layer, pressing them lightly into the butterscotch to create a textured surface. Then, dust the edges with the 0.25 cup granulated sugar for a decorative touch and subtle crunch. Cover the pan tightly with the 1 sheet plastic wrap and refrigerate for 4 hours or until completely firm. This chilling time is non-negotiable—it allows the bars to set properly and develop their signature chewy texture.
Cut and Finish with Chocolate Drizzle
Once the bars are fully set, remove them from the refrigerator and carefully lift them out of the pan using the aluminum foil. Cut into 16 equal squares using a sharp knife dipped in hot water and wiped dry between cuts—this prevents the bars from tearing. The edges should hold cleanly when cut, indicating proper setting.
For the finishing touch, melt the 0.25 cup dark chocolate chips in 10-second microwave intervals, stirring between each, until smooth. Drizzle the melted chocolate over the top of each bar in a zigzag pattern. Let the chocolate set at room temperature for 10 minutes before serving. The contrast between the rich butterscotch and the dark chocolate creates a perfect balance of flavors in every bite.
Pro Tips For Making No Bake Butterscotch Bars
- MELT CREAM CHEESE LOW: I learned this the hard way—heating cream cheese too fast turns it grainy. Use a double boiler or microwave in 20-second bursts, stirring every time. You want it smooth and just warm enough to blend, not hot enough to scramble.
- CHOP CHIPPED CHOCOLATE SMALL: Butterscotch chips lose their shape when melted unevenly. Chop half of them into quarters before mixing—this gives texture contrast and prevents a gummy finish. (Yes, even if the recipe says to use them whole.)
- COOL THE MIX FULLY: Skipping this step means bars that won’t set properly. Spread the mixture into the pan, then refrigerate for at least 2 hours—no peeking! The longer it chills, the cleaner the cut and the firmer the texture.
- LINE PAN WITH PARCHMENT: Does it look like overkill? No. Does it save you from scrubbing melted butterscotch off aluminum? Absolutely. Press parchment into the corners first—it stays put, and your bars slide out like magic. (Your future self will thank you.)
Best sauces and condiments for these flavors
Butterscotch Sauce Drizzle
Elevate your bars with a homemade butterscotch sauce drizzled over the top before chilling. Simmer ½ cup heavy cream, ½ cup granulated sugar, and 2 tbsp butter until dissolved, then whisk in 1 tbsp corn syrup and ½ tsp vanilla extract.
Pour this glossy sauce over the set bars for extra richness. 🍯
Salted Caramel Swirl
For a decadent twist, create a salted caramel swirl by melting ½ cup caramel bits with 1 tbsp heavy cream and ¼ tsp flaky sea salt. Spread half the butterscotch mixture in your pan, drizzle the caramel over it, then top with the remaining butterscotch.
Chill as directed for a marbled effect that tastes like a bakery showpiece.
Chocolate Ganache Drip
Melt ½ cup dark chocolate chips with ¼ cup heavy cream over a double boiler until silky smooth. Drizzle this chocolate ganache over the cooled bars in a zigzag pattern. The contrast between the butterscotch and chocolate creates a sophisticated flavor profile that's always a crowd-pleaser. 🍫
Spiced Whipped Cream Topping
Whip ½ cup heavy cream with 1 tsp powdered sugar and ½ tsp cinnamon until soft peaks form. Spread this lightly over the top of each bar before serving. The warm spice complements the butterscotch beautifully while adding a light, airy texture. Perfect for a festive presentation!
Caramelized Pecan Streusel
Toast ½ cup pecans in a dry pan over medium heat for 3-4 minutes until fragrant. Toss with 2 tbsp brown sugar and 1 tsp cinnamon, then sprinkle over the butterscotch mixture before chilling. The nutty crunch adds a delightful contrast to the chewy bars. 🥜
Vanilla Bean Infusion
For an ultra-luxurious touch, split 1 vanilla bean, scrape the seeds, and infuse them in ½ cup warm heavy cream for 10 minutes. Whisk this into your butterscotch mixture before pressing into the pan. The deep vanilla flavor takes these bars to the next level of sophistication. ✨
Nutrition facts
Frequently asked questions
Why do my no-bake butterscotch bars turn out too soft?
Under-chilling is the most common cause. These bars need 4 hours in the fridge to set properly—they won't firm up fully in less time. If your kitchen is warm, try chilling them longer or using an ice bath for the pan. Also, ensure your cream cheese is fully melted but not overheated, as excess heat weakens the structure.
Can I make these bars without corn syrup?
Yes! Swap the 0.5 cup corn syrup for 0.5 cup honey or agave, but expect slightly softer bars with less chew. For a closer texture, use 0.25 cup honey + 0.25 cup maple syrup. The corn syrup creates that signature firm-yet-chewy contrast, so if you're avoiding it, reduce the butter slightly to compensate for moisture.
How do I prevent the bars from sticking to the pan?
Line your 8x8-inch pan with aluminum foil and press it into the corners to create a seal. After spreading the mixture, chill the pan for 10 minutes before covering—this helps the top set slightly. When cutting, dip your knife in hot water and wipe dry between slices for clean edges. Never skip the foil, even if your pan claims to be non-stick.
What's the secret to getting crispy edges?
Dust the edges with 0.25 cup granulated sugar before chilling, then chill uncovered for the final 30 minutes. The sugar draws moisture to the surface, creating a caramelized crust. For extra crispiness, brush the edges with melted butter before dusting with sugar. Pro tip: Let the bars sit at room temperature for 5 minutes before slicing—they'll develop a firmer edge.
Can I make these bars ahead of time?
Assemble the mixture and refrigerate it in the pan for up to 24 hours before cutting. For longer storage, wrap tightly in plastic and foil, then freeze for 3 months. Thaw in the fridge overnight—microwaving causes condensation that makes them soggy. The flavor actually improves after 24 hours as the ingredients meld together.