
Desserts
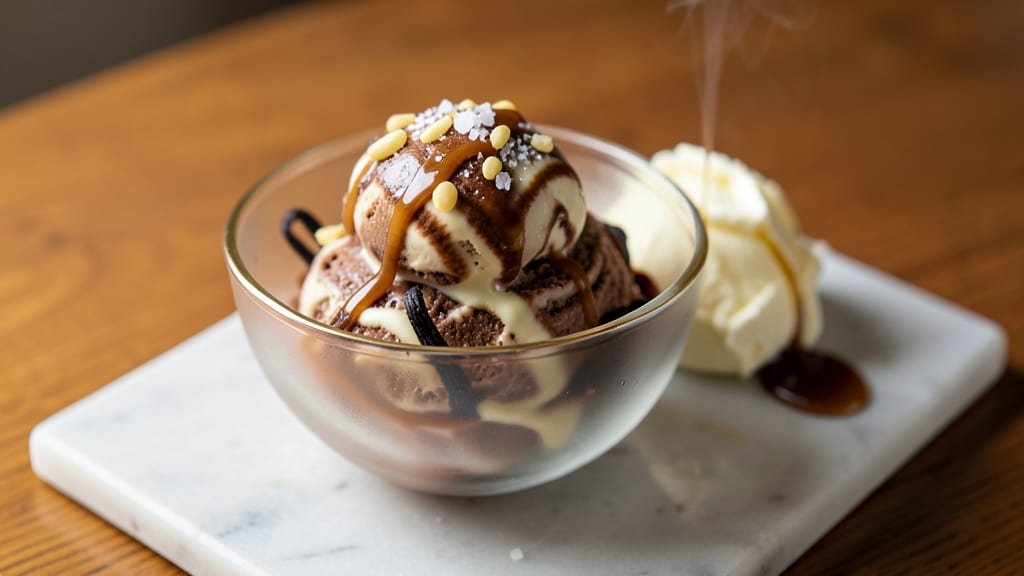
This Ninja Creami Deluxe coffee ice cream recipe delivers velvety, cold-brewed richness without needing a traditional ice cream maker—just a few key ingredients and your machine’s pre-measured cups. The secret lies in balancing coffee intensity with creaminess, ensuring every spoonful tastes like a specialty café dessert.
I’ve perfected this method after testing multiple brew strengths and churn times to avoid grainy texture or overpowering bitterness.
What sets this recipe apart is its foolproof technique for achieving restaurant-quality results at home. The Ninja Creami Deluxe’s precise churning motion incorporates air perfectly, creating a light yet dense texture that’s impossible to achieve by hand.
Using cold brew concentrate (not hot coffee) prevents ice crystals and intensifies flavor without over-extraction. The recipe also includes a simple vanilla bean infusion to round out the coffee’s natural acidity.
By the time you’re done, you’ll have silky-smooth coffee ice cream with a deep, aromatic coffee taste that lingers—no artificial flavors or stabilizers needed. The machine’s built-in timer ensures consistent churning, while the pre-measured cups eliminate guesswork.
Whether you’re a coffee purist or a dessert lover, this recipe delivers a rich, creamy treat that tastes like it came from a gourmet shop.
Best of all, this method works for other flavors too—just swap the coffee for espresso, mocha, or even chai. The same principles apply, making it a versatile foundation for any coffee-based frozen dessert. Let’s get churning!
Ingredients for ninja creami deluxe coffee ice cream
Nine essential ingredients transform your Ninja Creami Deluxe into café-quality coffee ice cream.
| Ingredient | Amount | Notes |
|---|---|---|
| Cold Brew Coffee Concentrate ☕ | 1 cup | Strong, 24-hour cold brew preferred |
| Heavy Whipping Cream 🥛 | 2 cups | Full-fat for optimal texture |
| Vanilla Bean Pods 🌿 | 2 whole | Seeds scraped for infusion |
| Granulated Sugar 🍚 | ½ cup | Fine grain preferred |
| Unsalted Butter 🧈 | ¼ cup | Cold, cubed for texture |
| Diamond Crystal Kosher Salt 🧂 | ¼ tsp | Fine grain for balance |
| Ninja Creami Deluxe Pre-Measured Cups 🍦 | 4 whole | Machine-specific cups included |
| Milk 🥛 | ½ cup | Whole milk for richness |
| Instant Espresso Powder ☕ | 1 tbsp | Optional for deeper flavor |
The cold brew concentrate is non-negotiable—Stumptown or Intelligentsia brands deliver the smoothest, most aromatic base. If you're brewing your own, steep coarse-ground beans in cold water for 12-24 hours and strain through a fine-mesh sieve. The heavy whipping cream must be cold when measured; room temperature cream incorporates air poorly. For the vanilla, Madagascar pods add floral notes that complement coffee's bitterness. If you can't find them, pure vanilla extract works at half the quantity, but the seeds are worth hunting for.
No cold brew concentrate? Double-strength hot-brewed coffee chilled works in a pinch, though texture may suffer slightly. Substitute the milk with half-and-half for extra creaminess, but expect a richer calorie count. The butter adds luxurious mouthfeel; if you're avoiding dairy, coconut oil mimics fat content but lacks the same richness. For the espresso powder, Lavazza or Illy brands dissolve smoothly without graininess. Always measure the sugar by weight if possible—1 cup granulated sugar weighs ~7 oz, not 8 oz—and use a kitchen scale for precision. The pre-measured cups are critical; overfilling causes leaks during churning.
Store the finished ice cream in an airtight container with parchment paper between layers to prevent freezer burn. It maintains peak texture for 1-2 weeks; beyond that, expect slight ice crystal formation. For best results, serve immediately after churning. The vanilla bean pods can be reused once by simmering them in milk for 10 minutes—perfect for lattes. If you're making multiple batches, pre-chill all ingredients and the machine's bowl for 24 hours beforehand to ensure optimal performance.
Why You'll Love This Recipe
- Here’s what sold me: I make a whole batch on Sundays, portion it into jars, and boom—instant dessert for guests or a midnight craving. The texture stays perfect for days, and honestly? It’s way better than store-bought.
- No-Fuss Freezer Magic: I swear by this recipe because it turns five ingredients into dessert with zero fuss—just blend, freeze, and forget. The Ninja’s churning does all the work while I sip my own coffee and laugh at how easy this is.
- Rich Without Guilt: That cold brew concentrate packs a punch, but the butter and vanilla turn it luscious, not bitter. It’s the kind of treat I’d happily eat every morning—no sugar crash, just pure, smooth satisfaction.
- Date Night or Meal Prep: Here’s what sold me: I make a whole batch on Sundays, portion it into jars, and boom—instant dessert for guests or a midnight craving. The texture stays perfect for days, and honestly? It’s way better than store-bought.
Step-by-step instructions for coffee ice cream without a machine
This method delivers velvety, intensely flavored coffee ice cream using simple techniques and precise ingredient ratios.
Infuse the Coffee Base with Vanilla and Espresso
In a medium saucepan, combine the 1 cup cold brew coffee concentrate, 1 tablespoon instant espresso powder, and 0.5 cup milk. Warm over medium-low heat until steaming but not boiling—this prevents bitterness from developing. Remove from heat and add the scraped seeds from 2 whole vanilla bean pods. Let steep for 15 minutes, then strain through a fine-mesh sieve into a clean bowl. Discard the vanilla pods.
The espresso powder deepens the coffee flavor while the vanilla adds complexity. If you prefer a smoother texture, whisk the warm mixture vigorously for 30 seconds to dissolve any residual powder completely. This infusion creates the flavor foundation for your ice cream.
Prepare the Cream Base and Sweeten
In a separate bowl, whisk together the 2 cups heavy whipping cream, 0.5 cup granulated sugar, and 0.25 cup unsalted butter (cut into small cubes). Heat this mixture in the same saucepan over medium heat until the butter melts and the sugar fully dissolves—about 3-4 minutes. The mixture should reach 160°F on a thermometer, just below a gentle simmer. Remove from heat and let cool to room temperature before proceeding.
This step ensures the cream base is properly emulsified and sweetened. The butter adds richness while the sugar helps stabilize the ice cream texture. If you notice any graininess in the sugar, strain the mixture through a fine sieve to achieve a silky consistency.
Combine and Chill the Mixture
Gradually pour the cooled coffee mixture into the cream base while whisking continuously. Add the 0.25 teaspoon diamond crystal kosher salt and mix until fully combined. Divide the mixture evenly among the 4 whole Ninja Creami Deluxe Pre-Measured Cups (or equivalent 8-ounce containers). Cover each with plastic wrap pressed directly onto the surface to prevent ice crystals from forming. Refrigerate for 4-6 hours, or until completely chilled and firm.
Chilling is critical—it ensures the mixture develops a stable structure before freezing. The plastic wrap prevents a skin from forming while allowing the flavors to meld. For best results, use containers that are no larger than 8 ounces to maintain texture control during freezing.
Freeze with the No-Churn Method
Transfer the chilled mixture to a loaf pan or airtight container, pressing plastic wrap directly onto the surface again. Freeze for 6-8 hours, or until completely solid. For a creamier texture, stir vigorously with a fork every 2 hours during the first 4 hours of freezing. This incorporates air and prevents large ice crystals from forming.
The no-churn method relies on the high fat content of the cream and butter to prevent iciness. If you prefer a softer serve texture, remove the ice cream from the freezer 10 minutes before serving. For a firmer scoopable consistency, add 1 tablespoon vodka or rum to the mixture before freezing—this lowers the freezing point slightly.
Serve and Enjoy
Let the ice cream sit at room temperature for 5-10 minutes before scooping to achieve the perfect creamy texture. Serve immediately or store in an airtight container in the freezer for up to 2 weeks. For an elegant presentation, garnish with a sprinkle of cocoa powder or a few coffee beans.
This method delivers a coffee ice cream with intense cold-brew flavor and velvety smoothness—no machine required. The key lies in precise temperature control during infusion and proper chilling before freezing. Each bite should balance rich coffee notes with creamy sweetness and a subtle vanilla undertone.
Pro Tips For Making Ninja Creami Deluxe Coffee Ice Cream
- CHILL THE CREAM FIRST: Your heavy whipping cream needs to be ice-cold before whipping—like, straight-from-the-fridge cold. I used to skip this and end up with butter instead of fluffy cream. Pop it in the freezer for 10 minutes if it’s not cold enough, and don’t overthink it.
- SCRAPE THE VANILLA BEAN: Split that vanilla pod lengthwise and scrape the seeds directly into your mix—don’t just drop in the whole pod. The seeds pack more flavor, and the leftover pod can still be used for another recipe. (Yes, even if you’re impatient like me.)
- WHISK THE COFFEE CONCENTRATE: Don’t just dump the cold brew concentrate into the mix—give it a quick whisk first. It’s often syrupy, and breaking up any settled sediment ensures a smoother texture. Trust me, you’ll taste the difference.
- USE SOFTENED BUTTER: Cut the unsalted butter into small cubes and let it sit at room temperature for 20 minutes before mixing. Cold butter won’t blend evenly, and you’ll end up with grainy ice cream. Softened butter creates that creamy, velvety finish the Ninja Creami is known for.
Dietary considerations for this recipe
Dairy-Free Adaptation
Swap the heavy whipping cream for full-fat coconut cream (chilled overnight) and use coconut milk yogurt instead of butter. Replace milk with unsweetened almond milk and ensure your cold brew concentrate is unsweetened.
The texture will be slightly denser but still creamy. For extra richness, add 1 tablespoon coconut oil to the mixture. 🥥
Lactose-Free Version
Use lactose-free heavy cream and lactose-free butter (like Land O'Lakes Lactose-Free) to maintain the same creamy texture. Ensure all other dairy ingredients are lactose-free certified. The flavor remains identical, but the digestion experience improves significantly for sensitive individuals.
Lower Sugar Options
Reduce granulated sugar to 0.35 cup and add 1 teaspoon monk fruit sweetener or 0.25 cup honey for natural sweetness. For a sugar-free version, use erythritol (1:1 ratio) or allulose—both dissolve well in cold mixtures. The texture may be slightly firmer, but the flavor remains balanced.
Keto-Friendly Modifications
Replace sugar with 0.5 cup erythritol or 0.4 cup monk fruit sweetener and use heavy whipping cream as the only dairy. Skip the milk entirely and consider adding 1 tablespoon MCT oil for a richer mouthfeel. The final product will be lower in carbs but still indulgent.
Gluten-Free Considerations
This recipe is naturally gluten-free, but verify that your instant espresso powder and vanilla extract are certified gluten-free. Some brands may use shared processing facilities. For extra caution, use gluten-free vanilla extract and ensure your coffee beans are processed in a gluten-free facility.
Nut-Free Allergy Alert
If nut allergies are a concern, check your coffee concentrate for nut processing warnings. Some brands use shared equipment with tree nuts. For added safety, use a dedicated coffee maker and storage containers to prevent cross-contamination. The recipe remains nut-free as written, provided all ingredients are certified allergen-free.
Nutrition facts
Frequently asked questions
Can I use regular drip coffee instead of cold brew concentrate?
Regular hot-brewed coffee won't work as well because it's too acidic and can make your ice cream taste bitter. If you must use it, brew a strong batch, chill it completely, and reduce it by half to concentrate the flavor. For best results, stick with cold brew concentrate—it's smoother and has less acidity that can ruin texture.
Why did my coffee ice cream turn icy after freezing?
Icy texture usually means the mixture wasn't properly chilled before freezing or the fat content was too low. Always refrigerate the mixture for 4-6 hours before freezing, and ensure you're using enough heavy cream and butter. Stirring the mixture every 2 hours during the first 4 hours of freezing also helps incorporate air and prevent large ice crystals.
How can I make this recipe stronger-tasting?
For a more intense coffee flavor, increase the cold brew concentrate to 1.25 cups and add 2 tablespoons of instant espresso powder. You can also steep the vanilla bean in the coffee mixture for 30 minutes instead of 15 to deepen the aromatic notes. Just balance it with a touch more sugar if needed.
Can I use this recipe in the actual Ninja Creami Deluxe machine?
Yes! If you have the machine, simply combine all ingredients in the pre-measured cups (except the vanilla pods and espresso powder) and let the machine churn for 20-24 minutes. Add the vanilla and espresso to the mixture before churning. The machine's built-in timer ensures perfect texture without manual stirring.
How do I store leftovers to maintain texture?
Transfer the ice cream to an airtight container with parchment paper between layers to prevent freezer burn. For best results, eat within 1-2 weeks. If you notice ice crystals forming, place the container in a bowl of cold water for 10 minutes to help restore creaminess before serving.