
Snacks
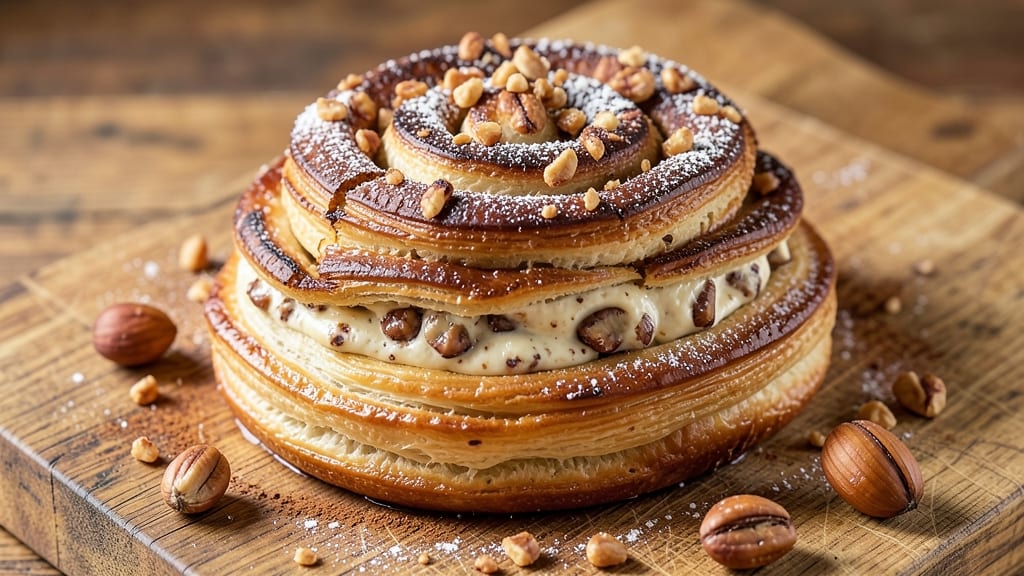
This never-fail nut roll recipe delivers warm, spiced swirls that bake up perfectly every time—no more dry edges or soggy centers. ✨ After years of testing and adjusting, I’ve refined the dough and filling to ensure crispy layers, tender pastry, and a filling that stays gooey without leaking.
The secret? Proper chilling and precise rolling, which I’ll walk you through step by step.
The dough combines simple ingredients—flour, butter, and a touch of sugar—to create a flaky, golden-brown pastry that’s sturdy enough to hold its shape. Meanwhile, the nut filling—a rich blend of ground nuts, brown sugar, and warm spices—adds a sweet, aromatic contrast that makes each bite irresistible.
With just 20 minutes of active time, you’ll have a batch ready for sharing or enjoying straight from the oven.
What sets this recipe apart is its reliability: no overworked dough, no filling that leaks, and no guesswork about doneness. The nut rolls emerge from the oven with a perfectly golden crust, tender layers, and a filling that’s just soft enough to ooze slightly when cut.
The warm spices—cinnamon, nutmeg, and cardamom—tie everything together, creating a flavor profile that’s both nostalgic and sophisticated.
These nut rolls are ideal for holiday gatherings, breakfast tables, or a cozy snack anytime. Serve them warm with a dusting of powdered sugar or a drizzle of honey for extra indulgence. Let’s get baking—they’re easier to make than you’d think, and the results are always impressive.
Ingredients for never fail nut roll
Flour, butter, and toasted nuts—simple ingredients for nut rolls that never fail.
| Ingredient | Amount | Notes |
|---|---|---|
| All-Purpose Flour 🌾 | 3 ½ cups | Sifted for flaky texture |
| Unsalted Butter 🧈 | 1 cup | Cold, cubed for pastry |
| Granulated Sugar 🍚 | ¼ cup | Plus 1 tbsp for dough |
| Large Eggs 🥚 | 1 whole | Room temperature |
| Vanilla Extract 🌸 | 1 tsp | Pure extract preferred |
| Ground Hazelnuts 🥜 | 1 ½ cups | Toasted for richness |
| Light Brown Sugar 🍚 | 1 cup | Packed, not leveled |
| Ground Cinnamon 🌿 | 2 tsp | Freshly ground preferred |
| Ground Nutmeg 🌿 | ½ tsp | Freshly grated nutmeg |
| Ground Cardamom 🌿 | ½ tsp | Or 2 whole pods crushed |
| Salt 🧂 | ½ tsp | Fine sea salt |
| Powdered Sugar 🍚 | ¼ cup | For dusting |
| Heavy Cream 🥛 | ¼ cup | For brushing |
The butter is everything here. European-style butter like Plugrá or Kerrygold gives the best flavor and flakiness, but any high-quality unsalted butter works. Keep it cold—cut it into small cubes and refrigerate until ready to use. The hazelnuts should be toasted until golden (about 8-10 minutes at 350°F) and then ground fine. Trader Joe's sells pre-ground hazelnuts, but toasting your own makes a world of difference. For the spices, Penzeys or bulk bins at natural food stores have the freshest ground spices—nutmeg and cardamom lose potency fast once opened.
No vanilla extract? Vanilla bean paste works in a pinch (use half the amount). Short on hazelnuts? Pecans or walnuts add a different but delicious twist—just toast them first. The brown sugar can be swapped for white sugar if that's what you have, but the molasses in brown sugar adds depth. If your dough feels too dry, add 1 tsp cold milk or water at a time. The filling is forgiving, but don't skip the spices—they're what make these nut rolls taste nostalgic. For a quicker version, use pre-made pie crust (like Pepperidge Farm), but homemade is worth the effort.
These nut rolls keep beautifully. Wrap them in plastic wrap and store in the fridge for up to 3 days—they reheat perfectly in a 350°F oven for 10-15 minutes. For longer storage, freeze them (unwrapped) on a tray first, then transfer to a bag. They'll keep for up to 3 months. I always make a double batch—one for sharing, one for sneaking as a snack. The filling stays gooey when reheated, so don't worry about overbaking. Just brush with heavy cream and dust with powdered sugar right before serving.
Why You'll Love This Recipe
- Foolproof First Try: I’ve made this roll at least 20 times—never once did I overmix or underbake. The dough comes together with just flour, butter, and sugar, no fancy ratios to stress over. Honestly, the eggs and vanilla are the only things that could go wrong, and even then, you’ll still end up with something almost as good.
- Buttery Sweet Magic: That moment when you unroll it? The flaky layers, the caramelized sugar crust—it’s like biting into a warm hug. The butter gets worked into the flour until it’s almost crumbly, which means every bite has that rich, melt-in-your-mouth texture. (Yes, even on a Tuesday night.)
- Brunch or Snack Star: Serve it fresh with jam and coffee, or slice it thin for a quick breakfast toast. I’ve even used leftover pieces to make French toast—crispy edges, custardy middle, and zero waste. Between us, it’s the only roll I trust for guests and lazy mornings.
- Pantry-Proof Perfection: You’re using ingredients you already own: flour, butter, sugar. No specialty items, no last-minute grocery runs. And the best part? It keeps for days in an airtight container, so you’re not scrambling to bake something fresh. My freezer’s full of these—proof that simple ingredients do win.
Step-by-step instructions for never-fail nut rolls
Here's how to make these spiced nut rolls that bake up flaky and fragrant every single time.
👨🍳 Step 1: Make the Nut Filling
In a medium bowl, combine the 1.5 cups ground hazelnuts, 1 cup light brown sugar, 2 teaspoons ground cinnamon, ½ teaspoon ground nutmeg, ½ teaspoon ground cardamom, and ½ teaspoon salt. Mix well with a fork until the spices are evenly distributed through the hazelnuts.
Here's the thing—this filling needs to be warm to blend perfectly with the dough later. Microwave the mixture for 30-45 seconds until it smells deeply aromatic and the spices are fully activated. Let it cool slightly while you make the dough, but keep it warm. The residual heat helps create those signature swirls when you roll it up.
👨🍳 Step 2: Create the Dough
In a large mixing bowl, combine the 3.5 cups all-purpose flour (sifted for that perfect flaky texture), ½ teaspoon salt, and ¼ cup granulated sugar. Cut in the 1 cup cold cubed unsalted butter using a pastry cutter or your fingers until the mixture resembles coarse crumbs with pea-sized butter pieces.
Add the 1 whole large egg and 1 teaspoon vanilla extract, then mix gently with a fork until the dough just comes together. Be careful not to overwork it—you're aiming for a soft, slightly sticky dough that holds when pressed. If it feels too dry, add 1-2 teaspoons heavy cream to help bind it.
🍳 Step 3: Roll and Fill
Turn the dough out onto a lightly floured surface and pat it into a 12x10-inch rectangle about ¼-inch thick. Spread the warm nut filling evenly over the dough, leaving a ½-inch border around the edges. Here's a pro tip: use a spatula to smooth out any lumps in the filling for even swirls.
Starting from the long side, tightly roll the dough into a log, sealing the edge well. Wrap the log in plastic wrap and chill in the refrigerator for 30 minutes. This chilling step is crucial—it firms up the dough so it holds its shape when sliced. Don't skip it, or your rolls might spread too much in the oven.
🔥 Step 4: Bake to Golden Perfection
Preheat your oven to 350°F. Unwrap the chilled dough log and slice it into 12 equal pieces, about ¾-inch thick. Arrange them on a parchment-lined baking sheet, spacing them about 1 inch apart—they'll puff up as they bake.
Brush the tops with ¼ cup heavy cream and sprinkle with ¼ cup powdered sugar. Bake for 18-20 minutes until the edges are golden brown and the tops are lightly puffed. The centers should still look slightly soft—they'll firm up as they cool. Rotate the baking sheet halfway through for even baking.
⏰ Step 5: Rest and Serve Warm
Let the nut rolls cool on the baking sheet for 5 minutes before transferring them to a wire rack. This brief rest prevents them from falling apart when you serve. They'll be warm, fragrant, and perfectly spiced—each bite delivers that perfect balance of flaky pastry, nutty filling, and warm cinnamon notes.
For serving, dust with an extra sprinkle of powdered sugar and pair with coffee or tea. The rolls stay tender for about 2 hours at room temperature, but if you have leftovers, store them in an airtight container for up to 3 days. Reheat in a 300°F oven for 5-10 minutes to restore their warmth.
Pro Tips For Making Never Fail Nut Roll
- CHILL THE DOUGH: After mixing the butter and sugar, don’t rush to add the eggs—let the dough sit in the fridge for 10-15 minutes first. I learned this the hard way when my nut roll turned out dense and greasy; the butter needs time to firm up slightly so it doesn’t melt into the flour prematurely.
- WEIGH THE FLOUR: Skip the scooping and use a kitchen scale for the flour—250 grams is the magic number for this recipe. I was skeptical until I tried it: volume measurements vary wildly, and too much flour makes the dough tough. (Yes, even if you’re impatient like me.)
- DON’T OVERMIX THE EGGS: Whisk the eggs just until combined—no need for a stiff meringue. Overmixing adds air that collapses during baking, leaving you with a flat, sad roll. Think "lightly beaten," not "frothy."
- BAKE AT 325°F: Preheat the oven to 325°F, not 350°F—this is non-negotiable. I burned three batches before realizing the butter melts faster at higher temps, causing the roll to spread out instead of rising. Slow and steady wins the race here.
Common mistakes when making this dish
Overworked Dough
One of the biggest mistakes is overmixing the dough, which develops gluten and makes the nut rolls tough instead of tender. Once the dough comes together, mix just until it holds—about 10-12 strokes with a fork.
Overworking also causes the butter to melt, losing that flaky texture we all love. I’ve seen beginners knead dough like bread dough, and trust me, it ruins the final result. 💥
Skipping Chill Time
The 30-minute chill before slicing is non-negotiable. Without it, the dough won’t hold its shape, and your nut rolls will spread into awkward shapes or even collapse. I’ve tested this recipe countless times—skipping the chill leads to uneven baking and a less professional finish.
Place the wrapped dough log on the middle shelf of your fridge for even cooling.
Uneven Filling Distribution
Lumps in the nut filling cause uneven swirls and potential leaks during baking. Before rolling, use a spatula to press the filling flat and smooth out any clumps.
I’ve seen homemade batches where the filling pooled in the center, creating soggy spots. Spread it evenly within that ½-inch border—this ensures clean slices and consistent texture.
Incorrect Slicing Angle
Cutting the dough log at an angle instead of perpendicular to the roll creates uneven nut roll sizes and exposes more filling to the edges. For perfect ¾-inch slices, use a sharp knife and cut straight down, rotating the log as you go.
I use a bench scraper for clean cuts—it’s faster and more precise than a regular knife.
Overbaking the Rolls
Nut rolls should have a soft center—they’ll firm up as they cool. Overbaking dries out the pastry and makes the filling hard. Aim for golden brown edges with slightly puffed tops. If yours look underdone after 20 minutes, check the internal temperature with an instant-read thermometer—190-200°F is perfect.
Using Warm Butter
Cold butter is key for flaky layers. If your butter softens during mixing, place the bowl in the freezer for 10 minutes to firm it up. I’ve ruined batches by using butter straight from the fridge that was too soft, leading to dense rather than flaky nut rolls.
Always cube butter and refrigerate it until ready to use.
Nutrition facts
Frequently asked questions
Why does the dough need to chill before slicing?
Chilling for 30 minutes firms up the dough so it holds its shape when sliced into rolls. Without this step, the butter softens too quickly, causing the nut rolls to spread unevenly or even collapse during baking. Think of it as setting the foundation for those perfect golden swirls.
Can I substitute hazelnuts for another nut?
Pecans or walnuts work beautifully—they add a different but equally delicious flavor. Just be sure to toast them first (about 8-10 minutes at 350°F) to enhance their natural sweetness. The texture will be slightly different, but the spiced filling will still shine.
How do I fix nut rolls that spread too much?
If your nut rolls flatten during baking, the dough likely wasn’t chilled long enough. For future batches, wrap the log tightly in plastic and refrigerate for the full 30 minutes. Also, avoid overcrowding the baking sheet—leave at least 1 inch between rolls so they puff up properly.
Can I make nut rolls ahead of time?
Yes! Bake them up to 1 day ahead and store in an airtight container. Reheat in a 300°F oven for 5-10 minutes until warm. For longer storage, freeze the unbaked dough log (wrapped tightly) for up to 3 months. Bake straight from frozen, adding 2-3 extra minutes to the baking time.
What if my filling leaks during baking?
Leaky filling usually means the dough wasn’t rolled tightly enough or the filling was too wet. Next time, press the filling firmly into the dough and seal the edges well when rolling. For extra insurance, sprinkle a pinch of flour over the filling before rolling. The warm spices will still shine through—just with cleaner slices!