
Breakfast & Brunch
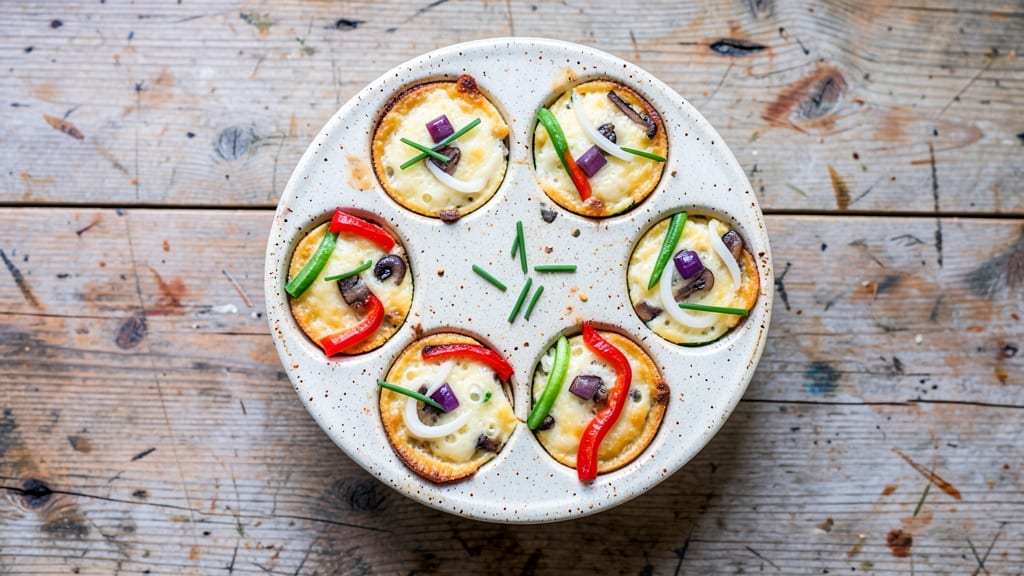
This mini veg quiche recipe delivers the perfect balance of crispy crust and creamy, fluffy centers—all baked together in one simple step. After years of testing, I’ve perfected a method that ensures golden edges and tender fillings without the fuss of layering.
The secret lies in pre-baking the crust just enough to hold its shape while letting the filling set perfectly underneath.
The beauty of mini quiches is their versatility—serve them as a breakfast spread, appetizer, or even a light lunch. Each bite offers a mix of savory vegetables, rich egg custard, and buttery crust that’s impossible to resist.
This recipe uses a simple pie crust (store-bought or homemade) and a mix of spinach, bell peppers, and cheese for a flavorful, nutrient-packed filling. No special equipment is needed beyond a muffin tin or mini quiche molds.
What makes this recipe stand out is the foolproof technique that guarantees crispy crusts and creamy centers every time. The filling bakes just long enough to set without drying out, while the crust stays perfectly golden.
Whether you’re feeding a crowd or prepping for meal prep, these mini quiches are a game-changer for effortless, restaurant-quality results.
Customize with your favorite vegetables—mushrooms, onions, or even sun-dried tomatoes work beautifully. Serve warm with a side salad or a dollop of sour cream for the ultimate brunch experience. Let’s get baking!
Ingredients for mini veg quiche
Twelve simple ingredients transform into restaurant-quality mini quiches with crispy crusts and creamy centers.
| Ingredient | Amount | Notes |
|---|---|---|
| All-Purpose Flour 🌾 | 1 ½ cups | Unbleached for best texture |
| Unsalted Butter 🧈 | ¾ cup | Cold, cubed for pastry |
| Ice Water 💧 | ½ cup | Chilled for dough handling |
| Large Eggs 🥚 | 4 whole | Room temperature for custard |
| Heavy Cream 🥛 | ½ cup | Full-fat for richness |
| Whole Milk 🥛 | ½ cup | Warmed for smooth custard |
| Shredded Sharp Cheddar Cheese 🧀 | 1 ½ cups | Freshly grated preferred |
| Fresh Spinach 🌿 | 2 cups | Chopped, stems removed |
| Red Bell Pepper 🍅 | ½ cup | Diced, small pieces |
| Yellow Onion 🧅 | ½ cup | Finely diced |
| Garlic Cloves 🧄 | 2 cloves | Minced for aromatic base |
| Diamond Crystal Kosher Salt 🧂 | 1 ½ tsp | Fine grain preferred |
| Freshly Ground Black Pepper 🌶️ | ½ tsp | Cracked peppercorns |
| Extra-Virgin Olive Oil 🫒 | 1 tbsp | Light drizzle for crust |
The all-purpose flour and unsalted butter form the foundation for a tender yet crisp crust. For optimal results, use King Arthur flour—its high protein content yields a superior texture. Chill your butter cubes for at least 30 minutes before mixing to prevent overworking the dough. Store-bought pie crust works in a pinch, but homemade delivers that signature flaky texture. When selecting cheese, sharp cheddar melts beautifully without dominating the delicate vegetable flavors. Opt for organic spinach when possible—it retains its vibrant color and sweetness better than conventional varieties.
No heavy cream? Whole milk plus 1 tbsp melted butter replicates the richness. Substitute bell peppers with zucchini or mushrooms for different flavor profiles. For the onion, caramelizing it first adds depth, but quick dicing works for convenience. Garlic powder at half the amount suffices if fresh isn't available. The olive oil isn't just for brushing—it enhances the crust's golden finish. Pre-cook your vegetables to remove excess moisture, ensuring the custard remains luscious rather than watery. Diamond Crystal kosher salt dissolves more evenly than table salt, so measure carefully.
Store pre-baked crusts in an airtight container for up to 2 days before adding filling. Assembled quiches keep 3 days refrigerated or 3 months frozen. For meal prep, bake a full batch and reheat individual portions at 350°F for 10 minutes. The sharp cheddar develops deeper flavor when stored longer, so plan ahead for maximum impact. Freeze unassembled crusts and fillings separately for ultimate flexibility—just bake from frozen, adding 5 minutes to the total time.
Why You'll Love This Recipe
- No-Fuss Dough: I swear by that cold butter + ice water trick—it keeps the crust flaky without overworking. Roll it out once, press it into mini muffin tins, and boom. No rolling pin wars or crying over a shaky crust.
- Creamy Without Guilt: That heavy cream and eggs combo? Rich but still light enough to eat at 7 a.m. (Yes, I’ve done it.) The butter in the crust melts into the filling, making every bite buttery, golden, and just set enough to hold its shape.
- Potluck Hero: These disappear at gatherings—no one turns down a handheld quiche. Toss in whatever veggies you have (spinach, bell peppers, even leftover roasted zucchini) and call it a day. Bonus: They reheat like a dream for lazy afternoons.
- Budget Breakfast: Five ingredients, zero waste. The crust uses pantry staples, and the filling stretches to feed four (or one very hungry person for two days). Leftovers? Microwave in 30 seconds—no sad, rubbery reheats here.
Step-by-step instructions for mini veg quiche
Master the perfect balance of golden crust and velvety filling with these precise techniques.
Prepare the Crispy Crust Dough
In a large mixing bowl, combine the 1.5 cups all-purpose flour and 1.5 teaspoons diamond crystal kosher salt. Cut in the 0.75 cup unsalted butter, using a pastry cutter or your fingers, until the mixture resembles coarse crumbs with pea-sized butter pieces remaining. This texture is crucial for achieving flaky layers in the crust.
Gradually add the 0.5 cup ice water, one tablespoon at a time, mixing gently with a fork just until the dough begins to come together. Avoid overmixing—this develops gluten and makes the crust tough. Once the dough forms a shaggy mass, turn it out onto a lightly floured surface and knead it briefly (about 10-12 strokes) until smooth and elastic.
Wrap the dough tightly in plastic wrap and refrigerate for at least 30 minutes or up to 24 hours. This chilling period firms up the fat, preventing excessive spreading during baking. The dough should be cold but pliable when you're ready to roll it out.
Assemble the Vegetable Filling
In a nonstick skillet, heat the 1 tablespoon extra-virgin olive oil over medium heat. Add the 0.5 cup finely diced yellow onion and 0.5 cup diced red bell pepper, cooking for 4-5 minutes until softened and beginning to caramelize. This step develops their natural sweetness and removes excess moisture from the vegetables.
Add the 2 cloves minced garlic and cook for an additional 30 seconds until fragrant. Transfer the sautéed vegetables to a bowl and stir in the 2 cups chopped fresh spinach, allowing it to wilt completely. Season the vegetable mixture with 0.5 teaspoon freshly ground black pepper and set aside.
In a separate bowl, whisk together the 4 whole large eggs, 0.5 cup heavy cream, and 0.5 cup whole milk until well combined. Gradually fold in the 1.5 cups shredded sharp cheddar cheese until evenly distributed. The cheese should melt smoothly into the custard mixture, creating a rich, creamy base for the quiche.
Roll and Bake the Crust
On a lightly floured surface, roll out the chilled dough to a 1/8-inch thickness, about 12 inches in diameter. Transfer the dough to a 9-inch round baking dish (or two 6-inch dishes for mini quiches) and press it gently into the bottom and up the sides, creating a 1-inch border. Trim any excess dough.
Preheat your oven to 375°F. Line the crust with a sheet of parchment paper and fill it evenly with the vegetable mixture, spreading it to within 1/2 inch of the edges. This prevents the filling from overflowing during baking. Bake for 25 minutes until the crust begins to turn golden brown around the edges.
Remove the quiche from the oven and carefully pour the egg mixture over the vegetable filling, tilting the dish to distribute it evenly. Return to the oven and bake for an additional 20-25 minutes, until the center is set and the top is golden brown. The quiche should spring back gently when touched in the center—this indicates it's fully cooked.
Finish and Serve
Allow the quiche to cool for 10-15 minutes before slicing. This resting period lets the filling set slightly, making it easier to serve without collapsing. Use a sharp knife to cut into 12 equal wedges (for the 9-inch dish) or 6 wedges (for the 6-inch dishes), ensuring clean, even slices.
The crust should be crisp and golden, with a delicate, flaky texture that contrasts beautifully with the creamy, cheesy filling. Each bite should deliver a perfect balance of savory vegetables, rich custard, and sharp cheddar. Serve warm or at room temperature for the best texture and flavor.
Pro Tips For Making Mini Veg Quiche
- CHILL THE BUTTER FIRST: Cut that unsalted butter into tiny cubes and pop them in the fridge for 15 minutes before mixing with flour. I used to skip this and ended up with a dough that fought me every step—now it comes together like butter (literally).
- WHISK EGGS LIKE YOUR LIFE DEPENDS ON IT: Beat those large eggs and heavy cream until the mixture is thick enough to leave a faint trail when you lift the whisk. Under-whisked = watery quiche filling. Over-whisked? No, just keep going until it’s smooth and slightly ribbony.
- DON’T OVERFILL THE MINI MOULDS: Fill your mini quiche cups only halfway with veggie mix—packing them too tight makes the custard overflow and turn gummy. Trust me, the custard needs room to puff, not drown.
- USE COLD CREAM, NOT ROOM-TEMP: Keep the heavy cream cold when mixing with eggs—it stabilizes the custard and prevents a runny center. I learned this after my first batch turned into a sad, soupy mess. (Yes, I ate it anyway.)
Dietary considerations for this dish
Gluten-Free Adaptation
For a gluten-free version, replace the all-purpose flour with a 1:1 gluten-free baking flour blend like King Arthur Measure for Measure. You’ll need about 1.5 cups of the blend, but add an extra 1 tablespoon of xanthan gum to mimic gluten’s binding properties.
Chill the dough longer—1 hour instead of 30 minutes—to prevent spreading. Use a lightly oiled mini muffin tin for baking to ensure easy removal. 🌾
Dairy-Free Options
Swap the heavy cream and milk for full-fat coconut milk (or a dairy-free cream alternative like Oatly). Use nutritional yeast (about 2 tablespoons) to replicate the cheesy flavor when replacing the cheddar.
For the crust, replace butter with vegan butter (like Miyoko’s) and ensure your flour blend is certified dairy-free. The texture will be slightly denser but still delicious. 🥛
Lower-Carb Keto Version
Transform this into a keto-friendly quiche by using a low-carb crust mix (like Almond Flour + Egg Wash) or a store-bought keto pie crust. Replace the spinach and bell peppers with sautéed mushrooms and zucchini (about 1 cup each, chopped finely).
Use cream cheese (about 4 oz) blended into the egg mixture for extra richness. Skip the heavy cream and milk—just use 4 eggs + ¼ cup water for the custard. 🥑
Nut-Free & Seed-Free
If nut or seed allergies are a concern, stick with the original crust but ensure all ingredients are certified nut-free. For extra binding in the crust, add 1 extra tablespoon of ice water to the dough.
Double-check your cheese and vegetable mix for cross-contamination risks—brands like Organic Valley and Trader Joe’s offer reliable nut-free options. Always verify labels when using pre-packaged ingredients. 🧀
Vegan Protein Boost
Add plant-based protein with 1 cup cooked lentils or crumbled tofu (about ½ cup) to the vegetable filling. For the custard, use silken tofu blended with coconut milk (about 1 cup silken tofu + ¼ cup coconut milk) instead of eggs.
Bind with 1 tablespoon ground flaxseed + 3 tablespoons water for a vegan "egg" substitute. The texture will be lighter but still satisfying. 🌱
Allergen-Friendly Tips
For egg-free quiches, use a flax or chia "egg" (1 tbsp ground flax + 3 tbsp water per egg) and ensure your crust is egg-free. If soy allergies are a concern, opt for tofu-free versions and use coconut aminos instead of soy sauce in any seasonings.
Always label your ingredients clearly if serving guests with multiple allergies. A little extra prep ensures everyone can enjoy these mini quiches safely. ✨
Nutrition facts
Frequently asked questions
Can I use store-bought pie crust instead of making it from scratch?
Store-bought pie crust works perfectly and saves time. Just press it into a 9-inch round pan or mini muffin tin, prick the bottom with a fork, and blind-bake for 10 minutes at 375°F before adding your filling. This prevents sogginess while keeping the crust crispy.
How do I prevent the crust from getting soggy?
Pre-baking the crust is key! Blind-bake it for 10-15 minutes at 375°F before adding the filling. For mini quiches, bake the crusts in your muffin tin for 8-10 minutes until lightly golden. This creates a barrier that keeps the filling creamy instead of watery.
What’s the best way to make these mini quiches ahead of time?
Assemble the quiches (without baking) and refrigerate for up to 24 hours before baking. For freezing, bake them fully, cool completely, then freeze in an airtight container for 3 months. Reheat individual portions at 350°F for 10 minutes to restore crispiness.
Can I use frozen vegetables instead of fresh?
Yes, but thaw and drain them first to remove excess moisture. For best results, sauté frozen veggies until tender and squeeze out any liquid with a paper towel. This keeps your custard rich and prevents a watery texture.
Why did my quiche filling come out rubbery?
Overbaking causes rubbery fillings. The center should be just set (no jiggle) when done. Bake at 350°F for 20-25 minutes total (after pre-baking the crust). If using a muffin tin, reduce time to 15-18 minutes—mini quiches bake faster than large ones.