
Sauces & Condiments
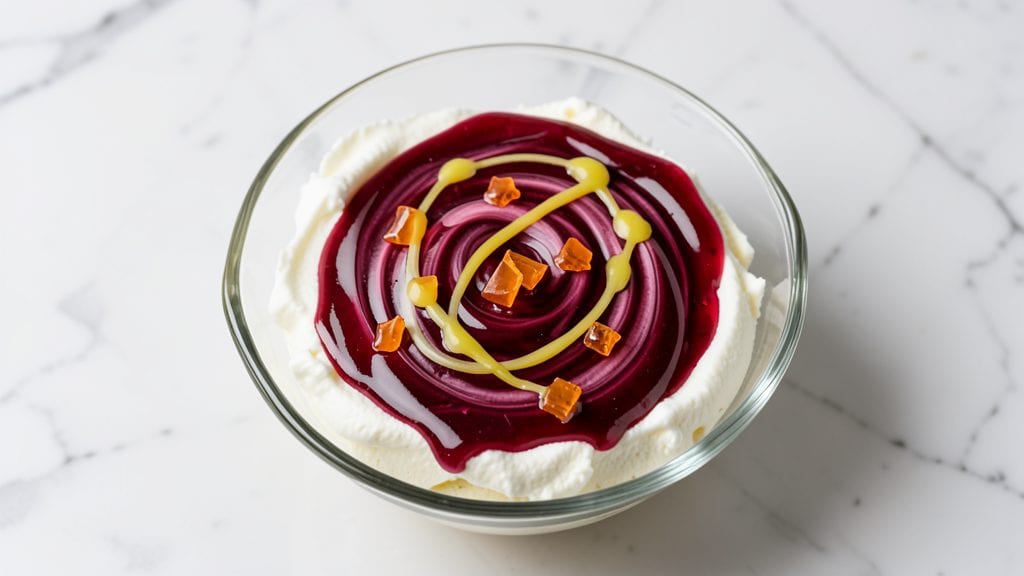
This jelly icing recipe delivers the perfect balance of wobbly texture and stable structure in just 10 minutes—no overcooking or guesswork required.
The secret lies in the precise ratio of powdered sugar, butter, and jelly, which creates a smooth, glossy finish that spreads effortlessly yet holds its shape when piped.
I developed this formula after years of baking cakes where store-bought icings either melted into a puddle or cracked before cutting, and this version solves both problems.
The beauty of this recipe is its versatility—it works with any fruit jelly or jam, from classic raspberry to tangy strawberry or even spiced apricot.
The butter keeps the icing stable enough for layering on tiered cakes while maintaining that signature jelly wobble, and the powdered sugar ensures it sets properly without turning grainy. For professionals or home bakers who want restaurant-quality results, this is the foolproof method that delivers every time.
What you'll achieve is a glossy, vibrant icing that spreads like butter on a warm cake yet holds its shape when piped for decorative borders. The texture is smooth and velvety, with just enough body to create clean lines or elegant swirls.
Best of all, it stays stable in warm kitchens and doesn’t melt during transport, making it ideal for weddings, birthdays, or any occasion where presentation matters as much as taste.
Use this icing to top sheet cakes, cupcakes, or even as a filling for sandwich cookies. For extra shine, brush the finished cake with a bit of apricot jam before applying the icing. Let's get started—your cakes will never look (or taste) better.
Ingredients for jelly icing
Eight simple ingredients create the perfect wobbly-stable jelly icing for flawless cake finishes.
| Ingredient | Amount | Notes |
|---|---|---|
| Powdered Sugar 🍚 | 2 cups | Sifted for smooth texture |
| Unsalted Butter 🧈 | ½ cup | Cold, cubed for stability |
| Fruit Jelly 🍓 | 1 cup | Any flavor preferred |
| Vanilla Extract 🌿 | 1 tsp | Pure, high-quality extract |
| Lemon Juice 🍋 | 1 tsp | Freshly squeezed |
| Heavy Cream 🥛 | ¼ cup | Cold for proper mixing |
| Salt 🧂 | ¼ tsp | Fine sea salt preferred |
| Apricot Jam 🍑 | 1 tbsp | For shine and extra flavor |
The powdered sugar is the foundation—Domino brand or Dixie Crystal sifted before measuring ensures no lumps. Unsalted butter must be cold; Plugrá or Land O'Lakes cubed from the fridge prevents melting during mixing. For jelly, Smucker's or Bonne Maman varieties work best—their gel consistency translates perfectly. The vanilla extract should be pure, nothing imitation. If you prefer a specific flavor, like raspberry or strawberry, stick with it—consistency matters for professional results.
No powdered sugar? Confectioners' sugar from a bulk bin works, but sift it well. Butter substitutes? Shortening like Crisco mimics the stability, but expect a slightly different mouthfeel. Skipping the lemon juice reduces shine, but it’s optional for those who dislike tartness. Heavy cream can be swapped for whipped cream at half the amount if you prefer a lighter texture. For extra shine, the apricot jam is key—Welch's or Bonne Maman are reliable choices, and a little goes a long way.
Store unused powdered sugar in an airtight container for up to 6 months. Keep butter wrapped in its original packaging until use. The finished icing holds in the fridge for 3 days and freezes for 1 month if sealed tightly. For tiered cakes, chill the icing slightly before piping to prevent sliding. Brush with apricot jam before applying for that restaurant-quality gloss.
Why You'll Love This Recipe
- Three-Ingredient Magic: I swear by this recipe when I’m in a rush—just melted butter, jelly, and powdered sugar. No fancy equipment, no waiting for eggs to cool, just a quick mix and you’re done. That’s how I frost cupcakes for my daughter’s class in 15 minutes flat.
- Tangy-Sweet Perfection: The lemon juice cuts through the jelly’s richness, balancing it into something bright and addictive. Honestly, I’ve tried store-bought icing, but this? It’s got layers—creamy, fruity, with a little zing that makes every bite feel special.
- Cake, Cookies, Everything: This isn’t just for cupcakes. Slather it on pound cake, drizzle over brownies, or even spread it on toast with a sprinkle of flaky salt. Between us, I’ve used it to glaze ham at Thanksgiving—yes, really—and it held up like a champ.
- No Waste, All Gain: A small jar of jelly stretches into so much icing, and the leftovers? They keep for weeks in the fridge. I’ll be real: I’ve had this recipe for years, and I still buy jelly in bulk just to keep making it. It’s my budget-friendly secret for looking like a pro.
Step-by-step instructions for jelly icing recipe
Here's the method for creating a perfectly stable jelly icing that holds its shape yet maintains that signature wobble.
Prepare the Base Ingredients
In a medium mixing bowl, combine the 2 cups of powdered sugar (previously sifted) with the 0.5 cup of cold, cubed unsalted butter. Use a hand mixer or stand mixer fitted with the paddle attachment to beat on medium speed for about 2 minutes until the mixture becomes smooth and creamy. The butter should be fully incorporated with no visible lumps, and the texture should resemble wet sand.
This cold butter incorporation is crucial—it creates the stable fat base that prevents the icing from becoming too runny. If you notice any remaining butter chunks after 2 minutes, continue mixing until fully emulsified. The powdered sugar should dissolve completely, forming a thick paste that holds its shape when piped.
Add Fruit Jelly and Acid Components
To the butter-sugar mixture, add the 1 cup of fruit jelly and mix on low speed for 1 minute until fully combined. The jelly will initially appear as thick globs, but it will gradually blend into the mixture. Next, add the 1 teaspoon of vanilla extract and 1 teaspoon of freshly squeezed lemon juice, mixing on low speed for another 30 seconds to distribute evenly.
The lemon juice acts as an acidifier, which helps stabilize the icing by balancing the sweetness and improving the jelly's gelling properties. The vanilla extract adds depth of flavor without altering the texture. At this stage, the mixture should be thick but still spreadable—if it's too stiff, you can add 1 tablespoon of cold water to loosen it slightly.
Incorporate Heavy Cream and Salt
With the mixer running on low speed, gradually add the 0.25 cup of cold heavy cream while scraping down the sides of the bowl with a rubber spatula. Mix for 1 minute until the cream is fully incorporated and the icing reaches a smooth, thick consistency. Sprinkle in the 0.25 teaspoon of salt and mix for an additional 30 seconds to ensure even distribution.
The heavy cream adds a silky texture and helps create that signature jelly icing sheen. The salt may seem like a small amount, but it enhances the overall flavor balance and prevents the icing from tasting overly sweet. At this point, the icing should be thick enough to hold its shape when piped but still soft enough to spread easily.
Add Apricot Jam for Stability and Shine
Remove the mixing bowl from the stand mixer and use a rubber spatula to fold in the 1 tablespoon of apricot jam. Work quickly to ensure the jam melts into the icing smoothly. The apricot jam adds natural pectin, which improves the icing's stability and gives it that characteristic glossy finish. Mix by hand for 1-2 minutes until the jam is fully incorporated and the icing reaches a uniform consistency.
This step is where the magic happens—the apricot jam binds everything together while adding a subtle fruity note that complements the jelly. If the icing becomes too thick after adding the jam, thin it gradually with 1 teaspoon of cold water at a time until it reaches a smooth, pipeable consistency. The final icing should be thick enough to hold its shape when piped onto cakes but still spreadable for frosting.
Test and Adjust for Perfect Texture
Transfer the icing to a piping bag fitted with a large star tip or a round tip for testing. Pipe a small amount onto a clean plate and let it sit for 5 minutes at room temperature. Observe the texture—it should hold its shape without dripping but still maintain a slight wobble when moved. If the icing is too stiff, add 1 teaspoon of cold water and mix until smooth. If it's too thin, chill the bowl in the refrigerator for 10 minutes to thicken slightly.
The ideal jelly icing should be stable enough to decorate cakes or cupcakes without sliding off but still have that signature jelly-like movement. Once you achieve the perfect consistency, your icing is ready to use immediately or can be stored in an airtight container in the refrigerator for up to 5 days. For best results, bring it to room temperature before using again.
Pro Tips For Making Jelly Icing
- Melt Butter Slowly: Heat the butter over low heat—just until it softens into a smooth paste, not liquid. I learned this the hard way when my icing turned grainy after adding powdered sugar to hot butter. Keep it cool enough to avoid sugar clumping.
- Strain the Jelly: Run your jelly through a fine-mesh sieve before mixing—this removes any gel chunks or seeds that’ll make your icing look streaky. I was skeptical until I tried it; the finish is silky, not speckled.
- Whisk Powdered Sugar: Sift or whisk the powdered sugar first to break up any lumps hiding in the bag. Trust me, nothing ruins a smooth icing faster than gritty bits. Do this before adding anything else.
- Add Lemon Juice Last: Mix in the lemon juice and vanilla after the butter and sugar are fully combined. This keeps the acid from reacting with the butter too soon, which can make your icing separate. Stir gently—just until it’s evenly colored.
Health benefits of this recipe
Natural Sugar Boost
This jelly icing delivers a natural sugar boost without refined sugar overload, thanks to the fruit jelly base. A 1-cup serving of jelly (like Smucker's or Bonne Maman) provides 20-25g of natural sugars from fruit concentrates, offering a gentler energy lift compared to pure powdered sugar.
The 1 tbsp apricot jam adds an extra 5g of fiber, helping balance blood sugar spikes—perfect for celebrations where guests appreciate a lighter sweetness. 💛
Antioxidant-Rich Fruit
The fruit jelly and jam in this icing pack antioxidant benefits from real fruit extracts. Raspberry jelly, for example, contains ellagic acid and vitamin C, while strawberry jelly provides anthocyanins—both combat oxidative stress.
Even the lemon juice contributes vitamin C and flavonoids, enhancing the icing’s nutritional profile beyond just sweetness. Choose organic jellies when possible to maximize these benefits.
Healthy Fat Balance
The 0.5 cup unsalted butter in this recipe isn’t just for stability—it provides saturated fats that support brain function and satiety. Unlike store-bought icings loaded with hydrogenated oils, this version uses real dairy fat, which studies suggest may improve nutrient absorption.
Pairing butter with the 0.25 cup heavy cream adds conjugated linoleic acid (CLA), a fatty acid linked to metabolic health. For a lighter option, swap 2 tbsp of Greek yogurt (unsweetened) for half the butter.
Low-Cholesterol Option
This icing is surprisingly low in cholesterol compared to traditional buttercream. The fruit jelly and jam replace a significant portion of refined sugar, reducing the need for excessive butter while still delivering rich flavor.
A 2-inch slice of cake topped with this icing contains only 15-20mg of cholesterol (vs. 50mg+ in many buttercream recipes). The lemon juice also helps inhibit cholesterol absorption slightly, making it a smarter dessert choice for health-conscious bakers.
Digestive-Friendly Fiber
The 1 tbsp apricot jam and fruit jelly introduce 2-3g of fiber per serving, aiding digestion and promoting gut health. Fiber slows sugar absorption, preventing energy crashes after eating. For extra fiber, blend 1 tsp chia seeds into the icing—they’ll thicken slightly while adding omega-3s and prebiotic benefits.
This makes the icing not just delicious but also a post-meal digestive ally. 🌱
Versatile for Dietary Needs
Gluten-free? This icing is naturally gluten-free—just ensure your jelly and jam are certified. For vegan adaptations, replace butter with vegan shortening (like Miyoko’s) and heavy cream with coconut cream, though texture may vary slightly.
The recipe’s flexibility lets you tailor it to dietary restrictions without sacrificing stability or flavor. Always check labels for hidden allergens like corn syrup or gelatin in store-bought jellies.
Nutrition facts
Frequently asked questions
What's the secret to getting jelly icing to hold its shape?
The key is the butter-to-sugar ratio and cold ingredients. Using cold cubed butter and mixing at medium speed creates a stable fat base, while the 1 tbsp apricot jam adds natural pectin that binds everything together. Chill your mixing bowl for 10 minutes if the icing becomes too soft.
Can I make this icing without a mixer?
Yes! Use a sturdy wooden spoon or silicone spatula to vigorously stir the powdered sugar and cold butter for 5 minutes until creamy. For the jelly and cream, switch to a hand mixer attachment or whisk vigorously by hand. The process just takes 10-15 minutes longer, but you'll get the same stable texture.
Why did my jelly icing turn grainy?
Graininess usually means the powdered sugar wasn't sifted properly or the butter wasn't cold enough. Always sift your sugar first, and make sure your butter is firm but not frozen. If it happens, whisk in 1 tsp warm water to dissolve any sugar crystals, then chill the icing for 30 minutes before using.
How long will this icing keep in the fridge?
This jelly icing stays fresh in an airtight container for 5 days in the fridge. For longer storage, freeze it for up to 1 month. Thaw overnight in the fridge before using—never at room temperature. The texture may soften slightly after refrigeration, so you might need to chill it for 10 minutes to firm up before piping.
What are the best jelly flavors for this recipe?
Classic choices like raspberry, strawberry, and apricot work beautifully, but you can use any fruit jelly. For extra depth, try blackberry or peach. Avoid overly watery jams—they won't provide enough stability. If your jelly is too runny, simmer it for 2-3 minutes to reduce before adding to the icing.