
Snacks
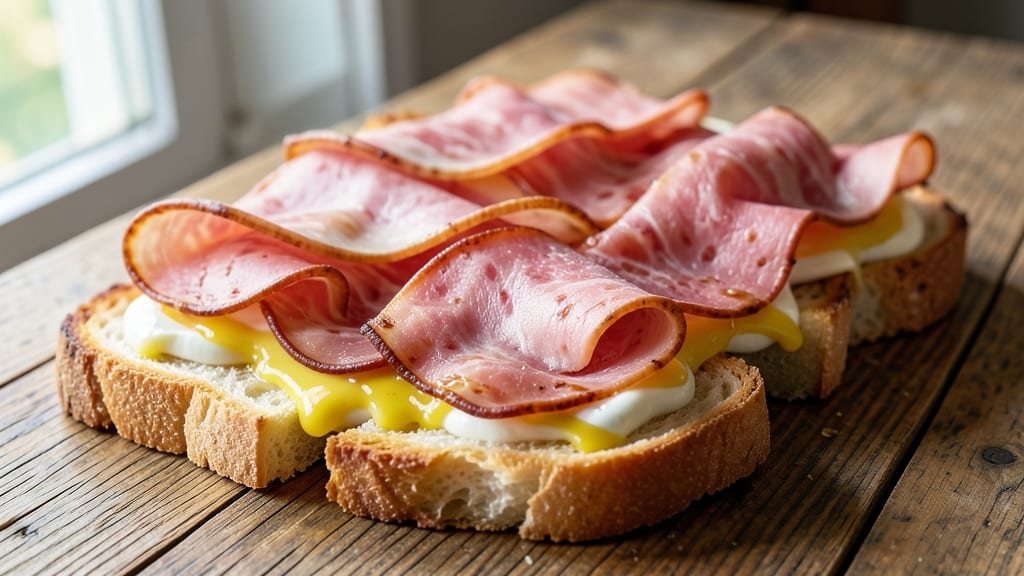
Transforming a simple ham and cheese roll into a crispy, golden masterpiece takes just 10 minutes—no fancy skills required. The secret lies in the right bread choice and a quick cooking method that delivers that perfect crunch while keeping the cheese perfectly melty inside.
I’ve perfected this technique over countless lunches, and it never fails to impress.
This recipe works with any sandwich bread, but baguettes or slider buns create the best texture—crispy on the outside, soft on the inside. The key is toasting or pan-frying the roll until it’s golden brown, while the cheese inside melts into a gooey, stretchy perfection.
It’s the kind of snack that feels indulgent without requiring effort.
What you’ll end up with is a handheld meal that’s crispy enough to satisfy a crunch craving and melty enough to make every bite irresistible. The cheese pulls slightly when you take a bite, creating that satisfying contrast of textures.
This is the kind of recipe that works for breakfast, lunch, or a quick snack—just add your favorite condiments like mustard or mayo for extra flavor.
Pair it with a cold drink or a simple side salad to round out the meal. Whether you’re feeding a crowd or just treating yourself, this foolproof method ensures every roll turns out perfect. Let’s get started!
Ingredients for ham and cheese roll
Eight simple ingredients to turn ordinary bread into crispy, melty perfection in minutes.
| Ingredient | Amount | Notes |
|---|---|---|
| Baguette Slices 🍞 | 8 whole | Freshly baked, crusty variety |
| Deli Ham Slices 🥓 | 8 whole | Black forest or honey ham preferred |
| American Cheese Slices 🧀 | 8 whole | Thinly sliced, melty texture |
| Unsalted Butter 🧈 | 2 tbsp | Softened for crispy coating |
| Mayonnaise 🥛 | 2 tbsp | For optional spread (optional) |
| Yellow Mustard 🍯 | 1 tbsp | For optional spread (optional) |
| Olive Oil 🫒 | 1 tbsp | For pan-frying (optional) |
| Salt 🧂 | ¼ tsp | Kosher or sea salt |
| Black Pepper 🌶️ | ⅛ tsp | Freshly ground preferred |
The bread is everything here. Baguette slices from a bakery or the fresh bread section at Whole Foods give you that perfect crunch—nothing beats the texture of a crusty baguette. If you can't find baguette, slider buns or sourdough work too, but they won't be as crispy. Look for bread with a good crust; the fresher, the better. For ham, Black Forest or honey ham adds a touch of sweetness that pairs perfectly with the melty cheese. If you're using pre-sliced deli ham, check for any additives—plain ham is the way to go.
No butter? Olive oil works just fine—just use a little more since it's not as rich. Want extra flavor? Mix in a little garlic powder or smoked paprika with the butter. American cheese is non-negotiable for that perfect melt, but if you're feeling fancy, Swiss or provolone will give you a slightly different texture. The mustard and mayo are totally optional, but they add that classic sandwich kick. Pro tip: if your cheese isn't melting enough, microwave the roll for 10 seconds before serving—it'll make all the difference.
These rolls reheat beautifully—just pop them in the oven at 350°F for 2-3 minutes to get that crispy texture back. Store leftovers in an airtight container for up to 3 days in the fridge. I like to make a big batch on Sunday and keep them on hand for quick lunches all week. Freezing works too—just reheat in the oven or toaster oven to avoid sogginess. The best part? You can customize these with any fillings you love—turkey, bacon, or even veggies!
Why You'll Love This Recipe
- Five-Ingredient Magic: I swear by this combo—just baguette, ham, cheese, butter, and mayo. No fancy prep, no measuring cups, just layer and toast. My kids call it "lazy person food," but honestly? It’s my secret weapon for days I’d rather spend not cooking.
- Toasty Crunch Factor: That buttery baguette gets golden and crispy while the cheese melts into gooey perfection. Between us, the moment the first bite hits your tongue? You’ll understand why I keep a loaf on hand at all times.
- Packable Picnic Star: Wrap a few in foil, toss in a cooler, and you’ve got a lunch that’s foolproof for tailgates, beach days, or even a last-minute office potluck. No reheating needed—just grab and go. (Yes, even on a Tuesday night.)
- Budget-Friendly Leftovers: A single baguette stretches for days when you repurpose the extras as sliders or sandwiches. I’ve turned yesterday’s rolls into tomorrow’s lunchbox fillers without breaking the bank. Cheap? Yes. Delicious? Absolutely.
Step-by-step instructions for ham and cheese roll recipe
Here's how to make these crispy, melty ham and cheese rolls in record time—no fancy skills required.
Prepare the Baguette Slices for Crispy Perfection
Start by laying out all 8 whole baguette slices on a clean work surface. I like to brush each slice lightly with the 1 tablespoon olive oil using a pastry brush—this creates that golden, crispy crust we're after. The oil helps lock in moisture too, so the bread stays soft inside while getting perfectly crispy on the outside.
While the oil is still wet, sprinkle each slice evenly with the 0.25 teaspoon salt and 0.125 teaspoon black pepper. Don't be shy with the seasoning—the crusty bread soaks it up beautifully. Let the slices sit for about 2 minutes while you prepare the fillings. This brief resting time helps the oil penetrate slightly, ensuring even crispiness when we toast them later.
Assemble the Melty Ham and Cheese Layers
Take 4 of the baguette slices and spread each one with about 1 teaspoon of the 2 tablespoons mayonnaise. I use a small offset spatula for this—it gives you just the right amount without overloading. Then layer one deli ham slice and one american cheese slice on each spread baguette slice. The cheese should cover the ham completely, peeking slightly over the edges for that classic sandwich look.
For the remaining 4 baguette slices, spread with about 1 teaspoon of the 1 tablespoon yellow mustard instead. Top these with another ham and cheese layer. The mustard adds a tangy contrast that cuts through the richness of the cheese. Press down gently on each assembly to help them hold together when we toast them—this prevents any filling from spilling out later.
Toast to Crispy Golden Perfection
Heat a large skillet over medium heat and melt the 2 tablespoons unsalted butter until it foams but doesn't brown. This should take about 2 minutes. The butter should be hot enough to sizzle when you add the sandwiches, but not so hot that it burns them instantly. You'll know it's ready when the butter bubbles gently around the edges of the pan.
Carefully place the assembled sandwiches in the skillet, pressing down lightly with a spatula. Cook for 2 to 3 minutes per side until the baguette slices turn a beautiful golden brown color and the cheese begins to bubble and melt. Don't rush this step—you want that perfect balance of crispy bread and gooey cheese. The cheese should be just starting to stretch and pull when you lift a sandwich to check.
Finish with Extra Crispiness (Optional but Worth It!)
For that restaurant-quality finish, transfer the toasted sandwiches to a wire rack set over a baking sheet. This allows any excess butter to drip away while keeping the bottoms crispy. If you're feeling extra indulgent, broil them for 1 to 2 minutes—watch closely!—until the cheese bubbles even more and the tops get additional crispy spots. Just be careful not to burn them.
Serve immediately while the cheese is still melty and the bread is crispy. These sandwiches are best enjoyed right away when the texture is perfect. For an extra touch, sprinkle with a pinch more black pepper or a dash of smoked paprika if you have it on hand. The contrast of the crispy, toasted bread with the creamy, melted cheese is what makes these rolls so irresistible!
Pro Tips For Making Ham And Cheese Roll
- Toast Slices First: Pop your baguette slices under the broiler for 30 seconds before assembling—just until the edges start to crisp. I learned this the hard way after making soggy rolls because the butter melts too fast when stacked cold. Trust me, that first golden edge makes all the difference when you bite in.
- Use Cold Butter: Keep your unsalted butter chilled until the very last second—even if it means scraping it straight from the fridge. Warm butter spreads too fast and turns your rolls into a greasy mess. Slather it on right before adding the ham and cheese, then roll immediately.
- Skip Pre-Slicing Ham: Buy deli ham in its original roll and slice it yourself with a sharp knife—thinner than the pre-packaged stuff. Thick slices tear when you roll, and thin slices cook faster without drying out. (Yes, it takes 30 seconds, but your rolls will hold together better.)
- Press Cheese Tight: Don’t just layer the American cheese—press it firmly into the baguette so it sticks to the butter. I used to let it sit loosely, and half of it would slide out when I rolled. A quick press with a spatula or your fingers guarantees it stays put.
Regional styles of this dish
Southern-Style Crispy Rolls
In the South, ham and cheese rolls are often called "hot browns" when made with turkey and gravy, but the principle stays the same. I love using Texas toast—thick-cut white bread toasted until golden brown—because it handles the butter beautifully.
The secret here is buttering both sides before assembling, then pan-frying until the edges are crispy. Serve with a side of collard greens or a simple tomato salad for that classic Southern spread. 🌶️
New England Pub-Style
Up north, these rolls take on a heartier vibe. Use sourdough bread from a local bakery and add a layer of sharp cheddar instead of American cheese for a tangier bite.
I like to finish them with a sprinkle of crumbled bacon bits and a drizzle of honey mustard for that New England pubhouse feel. Pair with a cold New England IPA or a crisp Moscow Mule to balance the richness. 🍺
Midwest Grill Favorite
The Midwest loves their slider buns for these rolls, often served as part of a larger platter. I've seen diners here use Swiss cheese instead of American for a slightly nuttier flavor.
The key is grilling them on a cast-iron skillet until the cheese pulls and the buns get that perfect grill mark. Serve with pickle spears and chips for a classic Midwest combo. The contrast of the tangy pickles with the melty cheese is unbeatable. 🥔
California Fusion Twist
Out west, they've put their own spin on this classic. Try using ciabatta rolls brushed with garlic-infused olive oil and topped with avocado slices alongside the ham and cheese. Add a sprinkle of crumbled feta and a drizzle of chipotle mayo for that California fusion flair.
Pair with a Pinot Noir or a refreshing sparkling rosé to complement the flavors. 🍇
Breakfast Club Version
For a morning twist, add scrambled eggs and crispy hash browns to your ham and cheese roll. Toast the roll in the same skillet used for the eggs to save on cleanup.
This version is a crowd-pleaser at brunch spots, and the runny yolk from the eggs adds an extra layer of richness. Serve with a side of sausage patties and fresh fruit for a balanced breakfast. 🍳
Nutrition facts
Frequently asked questions
Can I use any type of bread for these rolls?
Baguette slices or slider buns work best for that signature crispy texture, but sourdough, ciabatta, or even Texas toast will work too. Just avoid soft bread like white sandwich loaves—they won't get as crispy. For extra crunch, lightly toast the bread before assembling.
What if my cheese doesn't melt enough?
If the cheese stays firm, try one of these fixes: Microwave the assembled roll for 10 seconds before serving, or add a pinch of cream cheese to the mix for extra creaminess. For pan-frying, make sure your butter is hot enough to sizzle—this helps melt the cheese faster.
Can I make these ahead of time?
Yes! Assemble the rolls but don't cook them yet. Store in an airtight container in the fridge for up to 2 days. When ready to eat, pan-fry or toast them fresh—they'll still be crispy and melty. For freezing, assemble and cook first, then freeze for up to 1 month—just reheat in the oven or toaster oven.
What's the best way to keep the rolls crispy?
Transfer cooked rolls to a wire rack for 2-3 minutes to let excess butter drain away. This keeps the bottoms crispy while the tops stay warm. Avoid stacking them—they'll steam and turn soggy. For extra crunch, broil for 30 seconds before serving.
How can I make these vegetarian?
Swap the ham for grilled portobello mushrooms, smoked tofu, or turkey bacon. For cheese, try Swiss, provolone, or vegan cheddar—they all melt beautifully. Add a spread of hummus or pesto instead of mayo/mustard for extra flavor.