Side Dishes
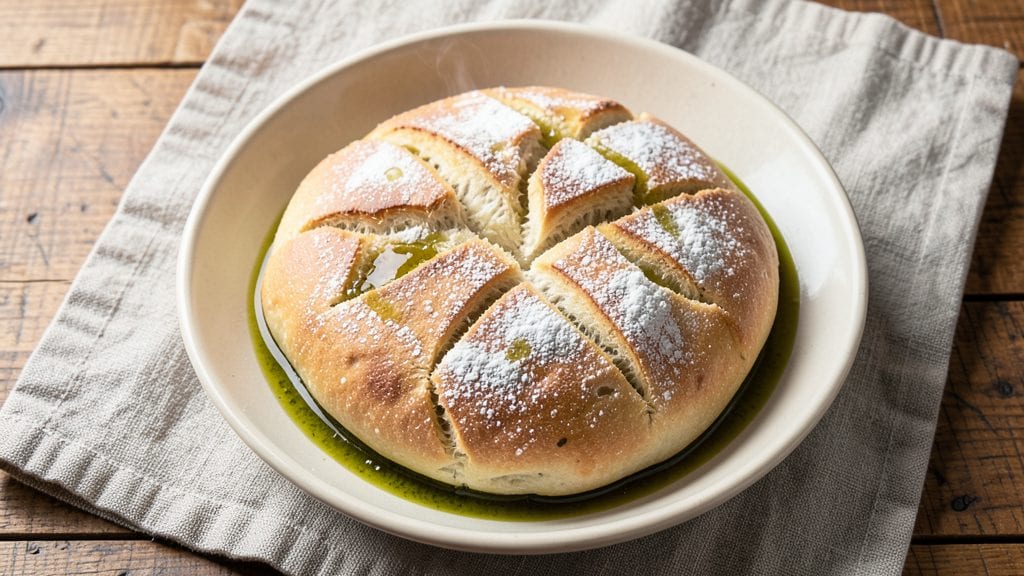
Grisanti's bread recipe delivers the crusty, chewy perfection that makes every meal feel special—just like my grandmother used to bake. The secret lies in that first brush of olive oil before baking, which transforms ordinary dough into golden, aromatic loaves with an irresistible crunch.
I've perfected this recipe over years of trial and error, and it never fails to impress, whether served warm with meals or toasted for breakfast.
What sets this bread apart is the balance of texture and flavor—thin, crispy crust that shatters when you tap it, paired with a soft, airy interior that's just chewy enough to hold onto every bite.
The dough comes together with simple ingredients, but the technique is where the magic happens, especially during the proofing and baking stages. With just 30 minutes of active time and a few hours of hands-off rising, you'll have a loaf that tastes like it came from a rustic Italian bakery.
The aroma alone—warm bread fresh from the oven, infused with olive oil and a hint of salt—will have everyone gathering around your kitchen. This recipe is foolproof once you get the hang of it, and the best part?
You can customize it with herbs, garlic, or even a sprinkle of flaky sea salt to suit your taste. Let's get started on creating bread that's worth every minute of waiting.
Perfect for serving alongside soups, salads, or charcuterie boards, or simply enjoying with butter and jam. The possibilities are endless, and the results are always satisfying. Here's everything you need to bring this classic bread to your table with confidence.
Ingredients for grisanti's bread
Nine simple ingredients transform into golden, chewy loaves with that perfect olive oil crunch.
| Ingredient | Amount | Notes |
|---|---|---|
| All-Purpose Flour 🌾 | 5 cups | Spooned and leveled, not packed |
| Active Dry Yeast 🍞 | 2 ¼ tsp | Or 1 packet, fresh is best |
| Granulated Sugar 🍚 | 1 tbsp | Feeds yeast for activation |
| Extra-Virgin Olive Oil 🫒 | ¾ cup | High quality, fruity flavor |
| Warm Water 💧 | 1 ¼ cups | 110°F, not hot |
| Salt 🧂 | 2 tsp | Fine sea salt preferred |
| Kosher Salt 🧂 | 1 tsp | For dough and final sprinkle |
| Cornmeal 🌽 | ¼ cup | For dusting baking sheet |
| Ice Water ❄️ | 1 tbsp | For final dough adjustment |
The olive oil is non-negotiable—Trader Joe's or Whole Foods brands have the best fruity notes. Skip the cheap stuff; it won't give that authentic Italian flavor. For yeast, Saf-Instant is my go-to because it doesn't need proofing in water first. If your kitchen runs warm, use active dry yeast and proof it in warm water for 5-10 minutes until bubbly. Flour matters too: King Arthur or Gold Medal work best for that perfect texture. I always measure by spooning flour into the cup and leveling it off—never scooping directly from the bag, or you'll end up with dense bread.
No extra-virgin olive oil? Light olive oil works in a pinch, but it won't have the same depth of flavor. Running low on yeast? Nutritional yeast at double the amount adds a slightly nutty note. The sugar can be swapped for honey or maple syrup, but it might make the crust darker. For a garlic twist, add 1 tsp garlic powder to the dough. If your dough feels too sticky, add 1 tbsp more flour or chill it for 20 minutes. And if you're feeling fancy, toss in 1 tsp dried rosemary for an herb-infused loaf.
This dough is a beast—it needs time. Let it rise for 1.5 to 2 hours until doubled, or up to 4 hours in the fridge. Shape the loaves right before baking; they'll spring back beautifully. Bake at 425°F for 25-30 minutes until deep golden. Store wrapped at room temp for 2 days or freeze for 3 months. The best part? It reheats perfectly—just wrap in foil and warm in a 350°F oven for 5 minutes. Leftovers? Toast them—nothing beats fresh-baked bread.
Why You'll Love This Recipe
- Five-Ingredient Magic: I swear, this bread only needs flour, yeast, sugar, olive oil, and water—nothing fancy. That’s it. No strange substitutions or hunting for specialty ingredients; just pantry staples that somehow transform into something golden and irresistible.
- Crust So Good: Between us, the olive oil crust is where this bread steals the show. That crispy, shimmering top with just a hint of richness? It’s the kind of detail that makes you pause mid-slice, even if you’re in a hurry.
- Weeknight Hero: Honestly, this is my go-to when I’m too tired to fuss. Toss the dough together, let it rise while I fold laundry, and boom—warm bread in under an hour. No waiting for hours or complicated shaping; just reliable, foolproof results every time.
- Budget-Friendly Staple: A single batch feeds my family for days—sandwiches, toast, or even crusty sides for soups. The ingredients cost pennies, but the satisfaction? Priceless. Plus, it freezes beautifully, so I always have backup when life gets chaotic.
Step-by-step instructions for Grisanti's bread recipe
Here's how to create that signature olive oil richness and perfect crust every time.
Activate the Yeast and Mix the Dough
In a large bowl, combine the 1.25 cups warm water (about 110°F), 1 tbsp granulated sugar, and 2.25 tsp active dry yeast. Let this sit for 5-10 minutes until it becomes frothy and bubbly—this tells you the yeast is alive and ready to work. If it doesn't bubble, your yeast might be dead, and you'll need to start over.
Next, add the 5 cups all-purpose flour, 2 tsp salt, and 0.75 cup extra-virgin olive oil to the bowl. Using a wooden spoon or dough whisk, stir until a shaggy dough forms. The olive oil is key here—it keeps the dough tender and gives that signature Italian flavor. If the dough feels too sticky, add 1 tbsp ice water at a time until it comes together but remains slightly tacky.
Knead the Dough for Maximum Flavor
Turn the dough onto a lightly floured surface and knead for 8-10 minutes by hand, or use a stand mixer with a dough hook on medium speed for 5-6 minutes. You're looking for a smooth, elastic dough that springs back when poked. The kneading develops gluten, which gives the bread its chewy texture and structure.
Here's the trick: every 2 minutes during kneading, add 1 tsp kosher salt to the dough. This gradual incorporation ensures even distribution. Once the dough is smooth and elastic, shape it into a round loaf and place it back in the bowl. Cover with a damp towel and let it rise in a warm place for 1-2 hours, or until it has roughly doubled in size. You'll know it's ready when you poke it gently and the indentation stays.
Shape and Proof the Dough for Crusty Perfection
Punch down the risen dough to release air, then divide it into 4 equal portions. Shape each portion into a round boule by pulling the edges toward the center and tucking them under. Place the boules on a baking sheet dusted with 0.25 cup cornmeal, spacing them about 2 inches apart. Cover with the damp towel again and let them proof for another 30-45 minutes until they've puffed up noticeably.
This second rise is crucial—it ensures a light, airy interior. If your kitchen isn't warm enough, place the baking sheet near a slightly turned-on oven light or in a warm oven (off) with a bowl of hot water. The boules should rise until they're about 50% larger than when you shaped them. If they rise too quickly, they might collapse in the oven.
Bake for a Crispy Crust and Chewy Interior
Preheat your oven to 425°F with a baking stone or inverted baking sheet on the middle rack. Once preheated, carefully transfer the boules to the hot stone or sheet. Bake for 20-25 minutes until they're deep golden brown and sound hollow when tapped on the bottom. The crust should be crispy, and the interior should be soft and chewy.
Here's where the magic happens: after 15 minutes, brush the tops of the boules with a little more extra-virgin olive oil for extra richness. If the crust isn't browning quickly enough, tent the baking sheet with foil to prevent over-browning while the interior finishes cooking. Let the bread cool on a wire rack for at least 30 minutes before slicing—this ensures the crumb stays intact and the flavors develop fully.
Serve Warm for the Ultimate Experience
Once cooled, slice the bread and serve it warm. The crust should be crispy enough to stand up on its own, while the interior remains soft and chewy with that signature olive oil richness. Grisanti's bread is perfect for dipping in olive oil and balsamic vinegar, or pairing with soups, salads, or your favorite Italian dishes.
If you're making this ahead, store the bread in an airtight container at room temperature for up to 3 days, or freeze it for up to 3 months. To reheat, wrap the bread in foil and warm it in a 350°F oven for 10-15 minutes until it's toasty again. The key to perfect bread is patience—don't rush any of these steps, and you'll get a loaf that rivals any bakery.
Pro Tips For Making Grisanti'S Bread
- Measure Water by Weight: The recipe likely calls for "warm water," but eyeballing it leads to inconsistent dough. Use a kitchen scale—100g of water per 500g of flour gives you a reliable baseline. I learned this the hard way when my dough turned out either too sticky or too dry, even with the same "warm" water.
- Bloom Yeast in Olive Oil: Skip dissolving yeast in water first—mix it directly with the olive oil and a pinch of sugar. The fat helps the yeast activate faster and creates a richer flavor. I was skeptical until I tried it; the bread develops a deeper, nuttier taste without extra effort.
- Knead Until Windowpane: Stop kneading when you can stretch a small piece of dough into a thin, translucent sheet without tearing. Over-kneading makes the bread tough, and under-kneading leaves it dense. This isn’t the prettiest method, but it’s the tastiest—trust the stretch test.
- Proof Until Doubled, Then Doubled Again: The dough is ready when it’s not just doubled in size but has visibly puffed back down slightly after a gentle poke. Rushing this step means a dense loaf; waiting too long risks overproofing. I skip the poke test sometimes, and my bread suffers for it—don’t be like me.
Wine and beer pairings for these flavors
Italian White Wine
For Grisanti's bread, I always reach for a crisp, dry Italian white wine like Vermentino from Sardinia or Pinot Grigio from Alto Adige. These wines have bright acidity that cuts through the bread's rich olive oil flavor, cleansing your palate with every bite.
The citrus and mineral notes complement the bread's crusty exterior and soft interior beautifully. 🍷
Light Lager Pairing
A crisp Italian lager like Peroni or Moretti works surprisingly well with this bread. The light, effervescent quality balances the bread's chewy texture, while the subtle malt sweetness enhances the olive oil richness.
For a craft option, try a Belgian witbier—the coriander and citrus notes add an unexpected but harmonious twist.
Red Wine Contrast
If you prefer red, a Chianti Classico or Sangiovese offers enough acidity to stand up to the bread's bold flavors. The earthy cherry notes in the wine mirror the rustic qualities of the crust, while the tannins provide a satisfying contrast to the soft interior.
Serve slightly chilled for a refreshing balance.
Seasonal Beer Options
During summer, I love pairing Grisanti's bread with a session IPA like Fat Tire Amber Ale—the hoppy bitterness balances the bread's richness. For winter, a dark wheat beer with notes of caramel and clove adds warmth and depth, creating a cozy contrast to the bread's crispy crust.
Non-Alcoholic Pairings
For a non-alcoholic option, sparkling blood orange soda like San Pellegrino Aranciata Rossa adds a refreshing citrus note that complements the olive oil. Alternatively, a chilled hibiscus iced tea with a touch of honey provides a floral contrast that enhances the bread's rustic charm.
Olive Oil Dipping Ritual
No pairing is complete without the classic olive oil and balsamic vinegar ritual. Use a high-quality extra-virgin olive oil like Colavita or Bertolli, and a aged balsamic glaze for dipping.
The tangy sweetness of the balsamic cuts through the bread's richness, creating a balanced flavor experience that's pure Italian tradition. 🫒
Nutrition facts
Frequently asked questions
Why does this bread need extra-virgin olive oil?
The extra-virgin olive oil is the soul of this recipe—it creates that signature Italian flavor and keeps the crust crispy while maintaining a soft, chewy interior. The high-quality oil adds richness that regular oil can't match, and brushing it on before baking gives that golden, aromatic finish. Don't skip it!
Can I make this bread without a stand mixer?
This dough is perfect for hand-kneading. Just work it on a lightly floured surface for 8-10 minutes until smooth and elastic. The key is patience—knead until it springs back when poked. A dough whisk helps mix the ingredients before kneading, and you can use a wooden spoon for that too.
What if my dough doesn't rise?
Check your yeast first—it should be fresh and bubbly after 5-10 minutes in warm water. If your kitchen is cold, place the dough near a warm oven with the light on (not heat). For extra help, cover the bowl with a plastic wrap tent to trap heat. If it still doesn't rise, your yeast may be dead—start over with fresh yeast.
How do I get a crispier crust?
For maximum crispiness, bake on a preheated baking stone or steel at 425°F with steam. After 15 minutes, brush the tops with more olive oil, then finish uncovered. A dutch oven works too—place the boules inside with the lid on for the first 20 minutes to trap steam, then remove the lid for browning.
Can I freeze the dough before baking?
Yes! Shape the boules, place them on a tray, and freeze solid. Then transfer to a freezer bag for up to 3 months. Thaw overnight in the fridge, then bake as directed. The texture stays just as good, and it's perfect for busy days. Just add 5-10 extra minutes to the baking time if thawed.