
Main Courses
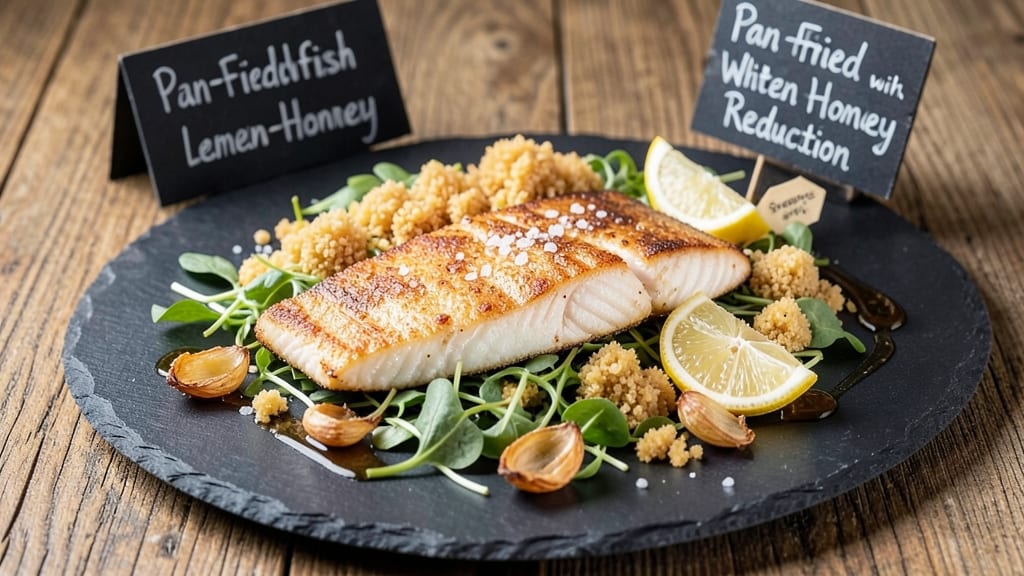
This fried whitefish recipe delivers the perfect balance of crispy golden batter and juicy centers that melt in your mouth—exactly how it should be. The secret lies in beating the batter just right and frying at the ideal temperature to lock in moisture while creating that satisfying crunch.
After years of testing different techniques, this method consistently delivers restaurant-quality results at home.
What sets this recipe apart is the beaten batter technique, which creates a lighter, airier coating compared to traditional breading. You'll need just a few simple ingredients—whitefish fillets, flour, eggs, and a touch of cornstarch—to achieve that perfect texture.
The process is straightforward but requires attention to detail, particularly when frying, to ensure even cooking and avoid overcrowding the pan.
By the time you serve this dish, you'll have crispy edges that shatter with every bite and tender whitefish underneath that flakes effortlessly. The golden-brown batter contrasts beautifully with the delicate fish, making it a standout main course for any meal.
Pair it with lemon wedges, tartar sauce, or a fresh salad to complete the presentation.
This recipe works equally well for traditional pan-frying or air-frying, giving you flexibility based on your preferred cooking method. Whether you're serving it for a weeknight dinner or a special occasion, the combination of crispy exterior and juicy interior makes it a dish that will impress every time.
Ingredients for fried whitefish
Four key ingredients transform delicate whitefish into restaurant-style crispy perfection.
| Ingredient | Amount | Notes |
|---|---|---|
| Whitefish Fillets 🐟 | 1 ½ lb | Skin-on, cutlets pounded even thickness |
| All-Purpose Flour 🌾 | 1 cup | Sifted for smooth batter consistency |
| Large Eggs 🥚 | 2 whole | Room temperature for even coating |
| Cornstarch 🌾 | ½ cup | For ultra-crispy texture |
| Vegetable Oil 🫒 | 3 cups | High smoke point preferred |
| Salt 🧂 | 1 tsp | Diamond Crystal kosher preferred |
| Ground Black Pepper 🌶️ | ½ tsp | Freshly cracked preferred |
| Lemon Wedges 🍋 | 4 whole | For serving, optional garnish |
| Tartar Sauce 🥫 | ½ cup | Store-bought or homemade |
| Ice Water 💧 | ½ cup | For batter consistency |
| Paprika 🌶️ | ½ tsp | Smoked for color and depth |
| White Wine Vinegar 🍷 | 1 tbsp | For marinade, optional |
The whitefish selection is critical—look for fillets with firm, translucent flesh and minimal bruising. Local seafood markets often carry the freshest cuts, but reputable grocery stores like Whole Foods or Trader Joe's carry high-quality frozen options. If using frozen, thaw overnight in the refrigerator to maintain texture. For the batter, cornstarch is non-negotiable—it creates that signature shatter while flour provides structure. The beaten egg technique (whisked until just combined) prevents lumps that could disrupt the crispy exterior. Preheat your oil to 350°F—any lower risks soggy batter, higher risks burning.
No cornstarch? Arrowroot powder at the same quantity works in a pinch, though texture will be slightly less crisp. Substituting regular flour for the all-purpose reduces airiness—stick with the recipe if possible. For the oil, vegetable or canola are ideal, but peanut oil works beautifully if you prefer its flavor. The white wine vinegar marinade (5 minutes max) isn't mandatory but enhances tenderness—lemon juice works equally well. If you're air-frying, use avocado oil spray and reduce oil quantity by half, though results won't be as crisp. The tartar sauce can be store-bought (Hellmann's or Duke's are reliable) or homemade with mayo, capers, and dill.
Fresh whitefish should be used within 2 days of purchase for optimal texture. Store fillets in an airtight container on ice if prepping ahead. The batter mixture keeps for 4 hours in the fridge—stir before using. For air-frying, preheat 5 minutes at 400°F and cook in batches to avoid overcrowding. Leftover fried whitefish reheats best in a 350°F oven for 5-7 minutes—microwaving destroys crispiness. Portion tartar sauce into small containers for up to 1 week refrigerated. The lemon wedges can be stored in a sealed container with a paper towel for 3 days to maintain freshness.
Why You'll Love This Recipe
- No-Fuss Breading: This recipe is three steps max—dredge, dip, fry. No fancy techniques, no measuring cups of confusion. The cornstarch gives that perfect crunch without overpowering the fish, and honestly? Even if I rush, it still turns out golden and crispy.
- Crispy-Creamy Magic: That first bite—crunchy crust giving way to tender, flaky fish—is what makes this worth it. The egg coating seals in moisture while the flour and cornstarch combo creates a texture that’s dangerously addictive. (Yes, I’ve eaten leftovers straight from the pan.)
- Weeknight or Party Star: Serve it with lemon wedges and a cold beer for a laid-back dinner, or double the batch for a crowd—it’s that reliable. My roommates don’t even ask what’s for dinner anymore; they just know fried whitefish means easy, no-fail food that disappears fast.
- Budget-Friendly Protein: Whitefish is affordable, and this recipe stretches it far. A single fillet feeds two, and the pantry staples (flour, eggs, oil) mean no extra shopping trips. I’ll be real: it’s my go-to when I’m trying to stretch groceries without sacrificing flavor.
Step-by-step instructions for crispy beaten batter whitefish
Master this technique and you'll achieve a perfect balance of crispy exterior and tender interior every time.
Prepare the Whitefish Cutlets
Begin by patting the 1.5 lb whitefish fillets completely dry with paper towels. This step is critical for achieving maximum crispiness in the batter. Place each fillet between two sheets of plastic wrap and pound gently with a meat mallet until you achieve an even ½-inch thickness throughout. The goal is uniformity—this ensures even cooking and prevents any portion from being undercooked.
Transfer the pounded fillets to a shallow dish and season both sides generously with the 1 tsp salt and 0.5 tsp ground black pepper. For an optional marinade, combine the 1 tbsp white wine vinegar with 1 tsp of the salt and pour evenly over the fillets. Let them marinate for 10-15 minutes at room temperature while you prepare the batter. This brief marinade adds subtle brightness that complements the crispy exterior.
Create the Ultra-Crispy Batter
In a medium bowl, whisk together the 1 cup all-purpose flour and 0.5 cup cornstarch until completely combined. This blend creates the perfect texture—flour for structure and cornstarch for that signature crispiness. Make a well in the center and add the 2 whole large eggs. Using a fork or whisk, gradually incorporate the eggs into the dry ingredients until you have a smooth, thick paste.
In a separate small bowl, combine the 0.5 cup ice water with the 0.5 tsp paprika. The ice water is essential—it creates a lighter, more delicate batter that won't weigh down the delicate whitefish. Slowly pour the water mixture into the flour-egg mixture while whisking continuously. The batter should be thick enough to coat the back of a spoon but still flow smoothly when poured. If it's too thick, add 1-2 tablespoons more ice water until you reach the perfect consistency.
Heat the Oil and Fry the Whitefish
Fill a deep skillet or Dutch oven with the 3 cups vegetable oil and heat over medium-high heat until the oil reaches 350°F. Use a deep-fry thermometer to monitor the temperature—this precision is key to achieving even cooking without burning. The oil should shimmer gently but not smoke excessively. If you don't have a thermometer, test with a small piece of batter: it should sizzle and rise immediately to the surface.
Working in batches to avoid overcrowding, carefully dip each seasoned whitefish fillet into the prepared batter, allowing any excess to drip off. Gently lower the coated fillets into the hot oil using a slotted spoon or tongs. Fry for 3-4 minutes per side until the batter is deep golden brown and crispy. The whitefish should register 145°F internally when checked with a meat thermometer. Remove the fried fillets to a paper towel-lined plate to drain excess oil and maintain crispness.
Rest and Serve
Let the fried whitefish rest for 2-3 minutes before serving. This brief resting period allows the internal juices to redistribute, ensuring each bite remains moist and flavorful. The exterior should remain crispy if you've maintained the proper oil temperature throughout frying. For presentation, arrange the fillets on a platter and garnish with the 4 whole lemon wedges. The acidity of the lemon cuts through the richness of the fried fish beautifully.
Serve immediately with the 0.5 cup tartar sauce on the side. The sauce's creamy texture and tangy flavor complement the crispy exterior and delicate whitefish perfectly. For an extra touch, sprinkle with additional smoked paprika just before serving to enhance both color and flavor. The combination of crispy batter, juicy centers, and bright accompaniments creates a restaurant-quality dish that's surprisingly simple to prepare at home.
Pro Tips For Making Fried Whitefish
- Dry the Fillets Thoroughly: Wet fish is the enemy of crispy crusts. Pat those fillets down with paper towels—really press hard—until they’re bone-dry. I learned this the hard way after frying fish that came out soggy inside. A dry surface seals better and browns faster.
- Use a 50/50 Flour Mix: Skip the all-flour coating—mix half all-purpose flour with half cornstarch for a lighter, shatter-priced crust. The cornstarch absorbs moisture better, so your batter won’t turn to glue. (Yes, even if you’re impatient like me.)
- Fry in Batches, Not Crowds: One fillet at a time, or two if they’re small. Overloading the pan drops the oil temp, and that’s how you end up with greasy, greasy fish. A thermometer helps—keep it at 350°F (175°C) for that perfect golden finish.
- Rest the Fish Before Frying: Take the fillets out of the fridge 20 minutes before cooking. Cold fish hits hot oil and steams instead of searing—resulting in a sad, uneven crust. Room temp = better texture, every single time. (Your future self will thank you.)
Common mistakes when making your fried whitefish
Overcrowding the Pan
Frying more than one fillet at a time drops the oil temperature dramatically, causing soggy batter instead of crispy results. I’ve learned this the hard way—even with 3 cups of oil, the pan can only handle 2 fillets safely.
If you’re cooking for a crowd, work in batches and maintain oil temperature between 345-350°F using a thermometer. A ThermoWorks Deep Fry thermometer is my go-to for precision. 🌡️
Skipping the Resting Step
Rushing to serve fried whitefish right out of the oil is a common mistake that leads to dry, crumbly centers. The 2-3 minute rest lets juices redistribute—skipping it means losing that melt-in-your-mouth texture.
I always set a timer and resist the urge to dig in immediately. Pro tip: Place fillets on a wire rack over a baking sheet to keep them crispy while resting.
Uneven Oil Temperature
Frying at inconsistent temperatures is the #1 reason for uneven cooking—some pieces crispy, others greasy. I’ve found that medium-high heat is key, but you must monitor closely. If the oil isn’t hot enough (below 340°F), the batter will absorb oil instead of crisping.
Test with a small piece of batter—it should sizzle vigorously and float immediately. If it sinks or bubbles slowly, your oil needs more time to heat.
Using Cold Fish
Cold fillets from the fridge take longer to cook through, leading to overcooked edges while the centers remain underdone. Always let your whitefish sit at room temperature for 15-20 minutes before frying.
This ensures even cooking and that perfect 145°F internal temperature throughout. I keep my fillets in a shallow dish while prepping the batter to maintain consistency.
Overmixing the Batter
Vigorously whisking the batter incorporates too much air, which can cause it to break apart in the oil. Instead, mix just until smooth—think "pancake batter" consistency. The cornstarch-flour blend is delicate, so handle it gently.
I use a fork to combine ingredients rather than an electric mixer to avoid overworking. The batter should coat the back of a spoon but still flow when poured. 🥄
Wrong Oil Choice
Not all oils are created equal for frying—using something with a low smoke point (like olive oil) will burn before your fish is cooked. Stick to vegetable, canola, or peanut oil with a smoke point of 400°F+.
I avoid butter or margarine entirely—they burn too quickly and add unnecessary fat. For air-frying, use avocado oil spray, but expect less crispiness than traditional frying.
Nutrition facts
Frequently asked questions
Why does the batter need to be beaten, not stirred?
The beating technique incorporates just enough air to create a light, crispy coating without making the batter too fluffy. Stirring too vigorously would create too many air bubbles, causing the batter to break apart in the hot oil. Think of it like pancake batter—smooth but not aerated like cake batter. The gentle whisking ensures a consistent, even coat that crisps beautifully.
Can I use frozen whitefish for this recipe?
Yes, but thaw it properly first! Place frozen fillets in a sealed bag and submerge in cold water for 20-30 minutes or refrigerate overnight. Never thaw at room temperature—this causes uneven cooking. Pat completely dry before seasoning, as any ice crystals will prevent the batter from adhering properly. The texture will be just as tender when cooked correctly.
How do I keep the fried whitefish crispy when serving?
Serve immediately on a wire rack placed over a baking sheet to allow air circulation. If you must hold it, keep warm in a 200°F oven for no more than 10 minutes. The rack prevents sogginess from steam buildup. For best results, fry in batches and serve straight from the pan while the batter is at its peak crispness.
What's the best way to test if the oil is ready?
Use the batter test: Drop a small spoonful of batter into the oil. If it sizzles vigorously and floats immediately, your oil is at 350°F. If it sinks slowly or bubbles gently, the oil needs 2-3 more minutes to heat. A deep-fry thermometer is ideal, but this method works perfectly without one. Never rely on visual cues alone—temperature is everything for crispy results.
Can I make this gluten-free?
Replace the all-purpose flour with a 1:1 gluten-free flour blend (like Bob's Red Mill) and use ½ cup cornstarch as written. For extra crispiness, add 1 tablespoon potato starch to the batter. The texture will be slightly different but still delicious. Always check your gluten-free flour's instructions for best results.